Samsung SM-R600 User Manual
Hide thumbs
Also See for SM-R600:
- User manual (109 pages) ,
- Quick start manual (3 pages) ,
- Quick start manual (21 pages)
Table of Contents
Advertisement
Advertisement
Table of Contents

Related Manuals for Samsung SM-R600


Summary of Contents for Samsung SM-R600
- Page 1 SM-R600 User Manual English. 09/2017. Rev.1.0 www.samsung.com...
-
Page 2: Table Of Contents
19 Turning the Gear on and off notifications 20 Connecting the Gear to a mobile 42 Entering text device Introduction Installing the Samsung Gear app Using the voice input Connecting the Gear to a mobile Using emoticons device via Bluetooth Using handwriting input mode or... - Page 3 Introduction Setting a wake-up command Receiving calls Using S Voice Making calls Setting the language 52 Contacts 81 Weather 54 Samsung Pay 81 Alarm 55 Samsung Health 82 World clock Introduction 83 Gallery Cal burned Importing and exporting images Steps...
- Page 4 102 Watch faces 102 Notifications 103 Apps 104 Transfer content to Gear 104 Send SOS requests 105 Find My Gear 105 Gear connection 106 Quick messages 106 Samsung Health 106 Samsung Galaxy Apps 107 About Gear 108 About Samsung Gear app...
-
Page 5: Getting Started
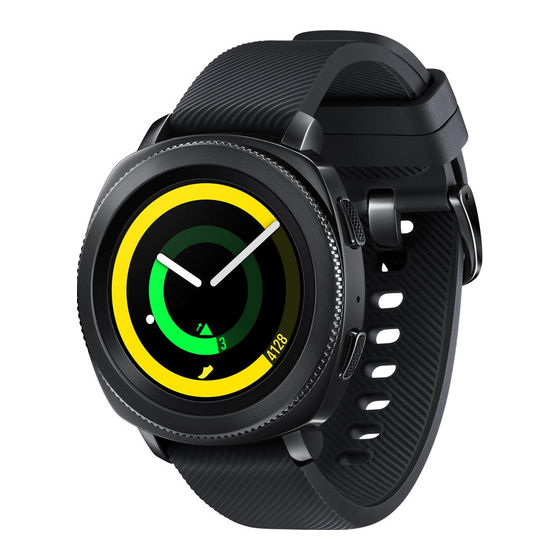
Getting Started About the Gear Sport The Gear Sport is a smartwatch that can analyse your exercise pattern, manage your health and allows you to use a variety of convenient apps for making phone calls, playing music, and managing your health. By rotating the bezel, you can access convenient features quickly and easily. -
Page 6: Read Me First
• D efault apps that come with the Gear are subject to updates and may no longer be supported without prior notice. If you have questions about an app provided with the Gear, contact a Samsung Service Centre. For user-installed apps, contact service providers. -
Page 7: Maintaining Water And Dust Resistance
Getting Started Instructional icons Warning: situations that could cause injury to yourself or others Caution: situations that could cause damage to your device or other equipment Notice: notes, usage tips, or additional information Maintaining water and dust resistance Your device supports water- and dust-resistance. Follow these tips carefully to maintain the water- and dust-resistance of your device. - Page 8 • O nly the materials observed the standards of the U.S Consumer Product Safety Commission (CPSC), the regulations of the European countries, and other international standards are used to make a Gear. • F or more information about how Samsung manages chemicals, refer to the Samsung website (http://www.samsung.com/us/aboutsamsung/sustainability/...
-
Page 9: Device Layout
• A ppearances and specifications are subject to change without prior notice. • Y ou can purchase additional accessories from your local Samsung retailer. Make sure they are compatible with the Gear before purchase. • E xcept the Gear, some accessories, such as docking devices, may not have the same water- and dust-resistance certification. -
Page 10: Gear
Getting Started Gear NFC antenna GPS antenna Touchscreen Back key Bezel Microphone Light sensor Home key (Power key) Atmospheric pressure sensor Pressure vent Heart rate sensor Band • E nsure that the band is kept clean. Contact with contaminants, such as dust and dye, can cause stains on the band that may not be fully removed. -
Page 11: Wireless Charging Dock
Getting Started Keys Function • P ress and hold to turn the Gear on or off. • P ress to turn on the screen. • P ress and hold for more than 7 seconds to restart the Gear. Home/Power •... -
Page 12: Battery
Charge the battery before using it for the first time or when it has been unused for extended periods. Use only Samsung-approved chargers, batteries, and cables. Unapproved chargers or cables can cause the battery to explode or damage the Gear. - Page 13 When a wireless charging dock error occurs, the LED indicator flashes red. Disconnect the Gear from the wireless charging dock, wait until the LED indicator stops flashing and reconnect the two. If the error occurs again, contact a Samsung Service Centre for service support.
-
Page 14: Battery Charging Tips And Precautions
• D eactivate the watch always on feature. • D eactivate the voice wake-up feature in the S Voice app. • C ustomise the notification settings in Samsung Gear on the mobile device. • T urn off the GPS feature. -
Page 15: Power Saving Mode
If the battery gets hotter than usual, the charger may stop charging. • I f the Gear is not charging properly, take the Gear to a Samsung Service Centre. • A void using a bent or damaged USB cable. If the USB cable is damaged, stop using it. -
Page 16: Wearing The Gear
Getting Started Wearing the Gear Putting on the Gear Open the buckle and place the band around your wrist. Fit the band to your wrist, insert the pin into an adjustment hole, and then secure the buckle to close it. Do not bend the band excessively. -
Page 17: Replacing The Band
Getting Started Replacing the band Detach the band from the Gear to replace it with a new one. Slide the band’s spring bar inwards. Pull the band away from the Gear’s body. - Page 18 Getting Started Insert one end of the spring bar into the Gear’s lug. Slide the spring bar inwards and connect the band.
-
Page 19: Turning The Gear On And Off
Press and hold the Home key (Power key) for a few seconds to turn on the Gear. When you turn on the Gear for the first time or reset it, on-screen instructions will appear to download and install the Samsung Gear app on your mobile device. Refer to Connecting the Gear to a mobile device for details. -
Page 20: Connecting The Gear To A Mobile Device
Connecting the Gear to a mobile device Installing the Samsung Gear app To connect your Gear to a mobile device, install the Samsung Gear app on the mobile device. Depending on your mobile device, you can download the Samsung Gear app from the following places: •... - Page 21 Getting Started Select your Gear type on the screen. If you cannot find your Gear type, tap MINE’S NOT HERE. Tap TURN ON when the Bluetooth activation request window appears. Follow the on-screen instructions to complete the connection. When the devices are connected, an on-screen tutorial will appear on the Gear’s screen. Follow the on-screen instructions to learn the Gear’s basic controls.
-
Page 22: Remote Connection
This feature is automatically activated when you connect to your mobile device via Bluetooth for the first time. If this feature is not turned on, launch Samsung Gear on your mobile device, tap SETTINGS → Gear connection, and then tap the Remote connection switch. -
Page 23: Using The Gear Without A Mobile Device
Check the notice and read the terms and conditions, and then agree to them. Login with your Samsung account. If you need to restore data, restore another Gear’s data stored in your Samsung account. Set a time zone. Set a PIN for restoring or backing up data. -
Page 24: Basics
Basics Controlling the screen Screen composition The Watch screen is the starting point for accessing all of the Gear’s many screens. You can view other screens by pressing the button, rotating the bezel, or swiping your finger on the screen. Watch Notifications Widgets... -
Page 25: Turning The Screen On And Off
Basics Turning the screen on and off To turn on the screen, rotate the bezel. Or, press the Home key or the Back key. If the screen does not turn on after you rotate the bezel, tap (Settings) on the Gear’s Apps screen and tap Device →... -
Page 26: Returning To The Previous Screen
Basics Opening apps On the Apps screen, tap an app icon to open the app. (Recent apps) on the Apps screen. To open an app from the list of recently used apps, tap You can launch apps directly after adding the App shortcuts widget and add the frequently used apps. -
Page 27: Using The Bezel
• D o not use the bezel near magnetic fields as they may interfere with the bezel’s internal magnets and cause it to malfunction. If the bezel does not rotate, take it to a Samsung Service Centre without disassembling the Gear. - Page 28 Basics Selecting an item Rotate the bezel to move from item to item. When you rotate the bezel, the highlight indicator will move in same direction and an item will be highlighted. Adjusting the input value Rotate the bezel to adjust the volume or brightness. When adjusting the brightness, rotate the bezel clockwise to make the screen brighter.
-
Page 29: Touchscreen
Basics Receiving or rejecting incoming calls Rotate the bezel clockwise to receive an incoming call or to dismiss an alarm. Rotate the bezel anticlockwise to reject an incoming call or to activate the snooze feature for an alarm. Touchscreen • D o not allow the touchscreen to come into contact with other electrical devices. Electrostatic discharges can cause the touchscreen to malfunction. - Page 30 Basics Tapping To open an app, to select a menu item, or to press an on-screen button, tap it with your finger. Tapping and holding Tap and hold the screen for two or more seconds to access the Edit mode or to view available options.
- Page 31 Basics Dragging To move an item, tap and hold it and drag it to the target position. Double-tapping Double-tap on an image to zoom in. Double-tap again to return.
-
Page 32: Quick Control Panel
Basics Swiping Swipe to the left or right to view other panels. Quick control panel This panel allows you to view the Gear’s current status and configure basic settings. Swipe downwards from the top edge of the screen. Indicator icons Quick control icons Gear's connection status... - Page 33 Basics Checking the indicator icons Indicator icons appear at the top of the quick control panel and let you know the Gear’s current status. The icons listed in the table below are most common. The indicator icons shown may vary depending on the region. Icon Meaning Bluetooth connected...
- Page 34 Basics Editing the quick control icons You can edit the quick control icons on the quick control panel and up to eight quick control icons can be added. You can add a new icon only after removing one if eight icons have already been added.
- Page 35 Basics Activating water lock mode You can activate water lock mode when you exercise in water. On the quick control panel, tap The touchscreen, the wake-up gesture feature, and the watch always on feature will be deactivated. Press and hold the Home key until the circle disappears to turn off water lock mode. Activating the do not disturb mode When a notification, except an alarm, is received, you can set your Gear not to vibrate and not to turn on the screen.
- Page 36 Basics Opening the Settings screen Open the Setting screen to configure the Gear’s various features and apps. On the quick control panel, tap The Settings screen will appear. Activating the NFC feature Activate the NFC feature to make payments. On the quick control panel, tap . The NFC feature will be activated and you make payments easily with the NFC antenna.
-
Page 37: Watch
Basics Opening the battery management menu Open the battery management menu to manage the battery consumption easily. On the quick control panel, tap . The battery management menu will be appear. Activating the location information feature Activate the location information to use GPS data and location data with certain apps. On the quick control panel, tap . -
Page 38: Changing The Watch Face
However, the CUSTOMISE feature is unavailable. You can also change the Gear’s watch face from your mobile device. Launch Samsung Gear on your mobile device and tap SETTINGS → Watch faces. To download more watch faces from Galaxy Apps, launch Samsung Gear and tap INFO →... -
Page 39: Using The Watch Always On Feature
Basics Select the photo to apply as your watch face and tap OK → OK. To add extra photos, rotate the bezel clockwise, or swipe the screen to the left and select Add photo. Up to ten photos can be added as the watch face. The photos you add will rotate in chronological order. -
Page 40: Notifications
Basics Notifications Notification panel Check a notification such as a new message or a missed call on the notification panel. On the Watch screen, rotate the bezel anticlockwise to open the notification panel. When there are unchecked notifications, a yellow dot will be visible on the Watch screen. Notification indicator Viewing incoming notifications When you receive a notification, information about the notification, such as its type, will... -
Page 41: Selecting Apps For Receiving Notifications
Selecting apps for receiving notifications Select an app from your mobile device to receive notifications. Launch Samsung Gear on your mobile device and tap SETTINGS → Notifications, and tap the switch. Tap Manage notifications and tap the switch next to apps to receive notifications from... -
Page 42: Entering Text
Basics Entering text Introduction A text input screen will appear when you are able to enter text. • T he screen layout may be different depending on the app you launch. • W hen the Gear is connected to a mobile device via Bluetooth, the language settings applied on the mobile device are applied to the Gear. -
Page 43: Using Emoticons
Basics • T his feature is not supported in some languages. • T ips for better voice recognition – Speak clearly. – Speak in quiet places. – Do not use offensive or slang words. – Avoid speaking in dialectal accents. The Gear may not recognise your spoken message depending on your surroundings or how you speak. -
Page 44: Using Handwriting Input Mode Or The Keyboard
Basics Using handwriting input mode or the keyboard and open handwriting mode and write on the screen. This feature may not be available depending on the region. Changing the input mode Rotate the bezel to change the input mode on the text input screen. You can switch between handwriting mode, character mode, number mode, punctuation mode, emoticon mode, and voice input mode. -
Page 45: Gps
Basics Using the keyboard Rotate the bezel to enter text using the keyboard. • T ext entry is not supported in some languages. To enter text, you must change the input language to one of the supported languages. • T he keyboard layout may differ depending on the region. Delete a preceding character. -
Page 46: Sos Messages
Adding emergency contacts Launch Samsung Gear on your mobile device and tap SETTINGS → Send SOS requests → Send SOS messages to → ADD. Tap Create contact and enter the contact information or tap Select from Contacts to add an existing contact as an emergency contact. -
Page 47: Finding My Gear
To finish sharing your location with your emergency contacts, scroll down the screen, and tap (Stop sharing) → Finding my Gear If you misplace your Gear, use the Samsung Gear app on your mobile device to find it. Register your Samsung account on the connected mobile device first to use this feature. -
Page 48: Messages
Applications Messages View messages and reply to using the Gear. Viewing messages You may incur additional charges for receiving messages while you are roaming. (Messages) on the Apps screen. Or, swipe to the right on the Watch screen or rotate the bezel anticlockwise when you receive a new message notification. - Page 49 Applications Sending messages You may incur additional charges for sending messages while you are roaming. (Messages) on the Apps screen. Create a new message. Contacts Messages list Or, you can choose a message recipient by tapping on the contacts list. Add a recipient and tap NEXT.
-
Page 50: Phone
Applications Phone Introduction On your Gear, you can make or answer a call, or receive notifications for incoming calls, but you can only have phone conversations via your connected mobile device. Receiving calls Answering a call When a call comes in, drag outside the large circle. - Page 51 Applications Rejecting a call Reject an incoming call and send a rejection message to the caller. When a call comes in, drag outside the large circle. Alternatively, rotate the bezel anticlockwise. To send a message when rejecting an incoming call, swipe upwards from the bottom edge of the screen.
-
Page 52: Making Calls
Applications Making calls (Phone) on the Apps screen. Keypad Contacts Log list Use one of the followings methods: • T ap , enter a number using the keypad, and then tap . • T ap , search or select a contact, and then tap •... - Page 53 Applications Adding contacts (Contacts) on the Apps screen. on the top of the contacts list and enter the contact information. Tap SAVE. Selecting the frequently used contacts on the widget After adding the Contacts widget, add the frequently used contacts to contact them easily via a text message or phone call.
-
Page 54: Samsung Pay
Applications Samsung Pay Register frequently used cards to Samsung Pay, a mobile payment service, to make payments quickly and securely. Samsung Pay supports near field communication (NFC) to allow payment through standard credit card readers. You can view more information, such as cards that support this feature at www.samsung.com/samsungpay. -
Page 55: Samsung Health
Samsung Health Introduction Samsung Health records your 24-hour activities and encourages you to cultivate a healthy habit. When connecting your Gear to your mobile devices, you can save and manage the health-related data and also receive the useful information about your health every day. - Page 56 Applications Wearing the Gear correctly • W hen you activate the auto heart rate tracking feature, or when the Gear recognises your exercise, the Gear will automatically track your heart rate. When measuring your heart rate, wear the Gear snugly on your arm above your wrist as shown in the figure below. •...
- Page 57 Applications • T he accuracy of the heart rate sensor may be diminished depending on measurement conditions and surroundings. • U se the HR feature only for measuring your heart rate. • D o not look directly at the heart rate sensor’s lights. Doing so may impair your vision.
-
Page 58: Cal Burned
Check your daily calories burned or how many calories you burned for this week, or the weekly average calories burned. (Samsung Health) on the Apps screen and open the cal burned screen. Or, rotate the bezel clockwise on the Watch screen and select the Calories widget to launch it. -
Page 59: Steps
The Gear counts the number of steps you have taken and measures the distance travelled. Measuring your step count and distance you walk (Samsung Health) on the Apps screen and rotate the bezel clockwise to open the steps tracker screen. Or, rotate the bezel clockwise on the Watch screen and select the Steps widget to launch it. -
Page 60: Floors
Record and track how many floors you climb. Measuring the floors you climb (Samsung Health) on the Apps screen and rotate the bezel clockwise to open the floors tracker screen. Or, rotate the bezel clockwise on the Watch screen and select the Floors widget to launch it. -
Page 61: Setting The Alarm
Applications To view weekly records with a graph, swipe upwards or downwards on the screen. To view records by day, tap View each date. • O ne floor is calculated as approximately 3 metres. The floors measured may not match the actual floors you climb. -
Page 62: Exercise
Applications Exercise Record your exercise information and calories burned using Samsung Health’s exercise feature. • B efore using this feature, pregnant women, the elderly, and young children, users suffering from conditions, such as chronic heart disease or high blood pressure, are recommended to seek the advice of a licensed medical professional. - Page 63 Applications to start exercising. • S et whether to use your location information when you use your Gear for the first time after purchasing or resetting it. Enabling the location information is set as the default. • Y our heart rate is measured in seconds when you start exercising. To measure your heart rate more accurately with the Gear, wear the Gear firmly around your lower arm just above your wrist.
- Page 64 Applications You can view exercise information, such as calories burned and current speed, when you swipe the screen to the left or right. When you are swimming, you can check additional exercise information, such as your previous stroke and pace. •...
-
Page 65: Heart Rate
Applications Automatic exercise recognition Once you have engaged in a middle or high-intensity activity for more than ten minutes while wearing the Gear, it automatically recognises that you are exercising and records exercise information such as the exercise type, duration and calories burned. When you stop exercising for more than one minute, the Gear automatically recognises that you have stopped exercising and this feature is deactivated. -
Page 66: Measuring Your Heart Rate
• I f the heart rate sensor is not working, check the Gear’s position on your wrist and make sure nothing is obstructing the sensor. If the heart rate sensor continues to have the same problem, visit a Samsung Service Centre. Measuring your heart rate (Samsung Health) on the Apps screen. - Page 67 Applications To view weekly records with a graph, swipe upwards or downwards on the screen. To view records by day, tap View each date. Tracking your heart rate The Gear can automatically measure and record your heart rate at regular intervals in your daily life when you are not using exercise trackers.
-
Page 68: Water
Water Record and track how many glasses of water you drink. Recording water consumption (Samsung Health) on the Apps screen. Rotate the bezel clockwise to open the water tracker screen. when you drink a glass of water. If you accidentally added an incorrect value, you can fix it by tapping To view weekly records with a graph, swipe upwards or downwards on the screen. -
Page 69: Caffeine
Caffeine Record and track how many cups of coffee you drink. Recording your coffee consumption (Samsung Health) on the Apps screen. Rotate the bezel clockwise to open the caffeine tracker screen. when you drink a cup of coffee. If you accidentally added an incorrect value, you can fix it by tapping To view weekly records with a graph, swipe upwards or downwards on the screen. -
Page 70: Together
Applications Together Compare your weekly step count records with other Samsung Health users. You can set a goal, compete with your friends, and view the challenge status. Activate the together feature in the Samsung Health app on your mobile device to check information on your Gear. -
Page 71: 24-Hour Log
View your daily activity based on your profile at a glance. You can also view your calories burned. (Samsung Health) on the Apps screen. Rotate the bezel clockwise to open the 24-hour log screen. Rotate the bezel to view the time-based records. -
Page 72: Settings
Avoid using the Gear near other devices that transmit radio waves. • T he content used in the Samsung Health app may vary depending on the software version of the app. The services provided with the app are subject to change or the... -
Page 73: Alti-Barometer
Applications • A vailable Samsung Health functions and services may vary depending on the local laws and regulations in your region. • S ome functions of Samsung Health may not be provided depending on your region. • S amsung Health functions are intended for fitness and informational purposes only and is not intended for use in the diagnosis of disease or other conditions, or in the cure, mitigation, treatment, or prevention of disease. - Page 74 Applications Measuring your current altitude Measure your current altitude and view a graph of changes over the last 6 hours. (Alti-Barometer) on the Apps screen. • I f you have recently purchased or reset the Gear, tap GO to activate the Gear’s GPS feature.
- Page 75 Applications Measuring your current atmospheric pressure Measure your current atmospheric pressure and view a graph of changes over the last 6 hours. You can anticipate any changes to the weather using the pressure prediction gauge. (Alti-Barometer) on the Apps screen. Swipe to the left to open the barometer screen.
-
Page 76: Music Player
Importing music Import music saved in your mobile device to your Gear. Launch Samsung Gear on your mobile device. Tap SETTINGS → Transfer content to Gear. Tap Select tracks. Select files and tap DONE. -
Page 77: Playing Music With The Gear
Applications Playing music with the Gear You can listen to music via a connected Bluetooth headset. (Music Player). to play the music saved in your Gear. The icon will be changed to Playing music from your mobile device Play music saved on your mobile device and control it with your Gear. (Music Player). -
Page 78: Reminder
Applications Reminder Add reminders for events such as buying tickets, going to the laundromat, or taking medicine, without using your calendar app. You can set alarms to receive reminders at specified times. Creating a reminder (Reminder) → Create reminder. Or, rotate the bezel On the Apps screen, tap clockwise on the Watch screen and tap Create reminder on the Reminder widget. -
Page 79: Calendar
Applications Calendar View events scheduled on your mobile device and Gear. All events scheduled on your Gear will be synced with the connected mobile device automatically to check them, and receive alarms from the mobile device. (Calendar) on the Apps screen. Tap anywhere on the monthly calendar. -
Page 80: Using S Voice
Applications Using S Voice (S Voice) on the Apps screen. Say the preset wake-up command. Alternatively, tap When S Voice is launched, the Gear begins voice recognition. This app may not be available depending on the region. View examples of voice commands. -
Page 81: Setting The Language
Applications Setting the language (S Voice) → , rotate the bezel, tap Language, and then select a On the Apps screen, tap language. The selected language is applied to S Voice only, not to the language displayed on the Gear. Weather View weather information on the Gear for locations set on the mobile device when the devices are connected. -
Page 82: World Clock
Applications Select the days for the alarm to repeat and tap SAVE. The saved alarm is added to the alarms list. On the alarms list, tap to activate the alarm or tap to deactivate the alarm. Stopping alarms Drag outside the large circle to stop an alarm. Alternatively, rotate the bezel clockwise. If you want to use the snooze function, drag outside the large circle. -
Page 83: Gallery
Applications Gallery Importing and exporting images Importing images from your mobile device Launch Samsung Gear on your mobile device. Tap SETTINGS → Transfer content to Gear. Tap Select photos. Select files and tap DONE. To sync images on your mobile device with your Gear, tap the Auto sync switch under PHOTO, tap Albums to sync, select albums to import to your Gear, and then tap DONE. -
Page 84: Viewing Images
Applications Viewing images View and manage the images saved on your Gear. (Gallery) on the Apps screen. Rotate the bezel to scroll through the image list and select an image. Zooming in or out While viewing an image, double-tap the image to zoom in or out. When an image is magnified, you can view the rest of the image by scrolling around the screen. -
Page 85: News Briefing
Applications News Briefing View the latest articles in various categories. You can catch up on news categories that interest you. (News Briefing) on the Apps screen. When you use the News Briefing app for the first time, read the legal notice and tap AGREE. -
Page 86: Email
Applications Email View emails received on the mobile device and reply to them. Reading emails (Email) on the Apps screen. Select an email to open the email screen. To view an email on the mobile device, tap , rotate the bezel, and tap Show on phone. To reply to an email, tap (Reply) and enter your email. -
Page 87: Setting The Alarm Functions
Applications Follow the on-screen instructions to complete the connection and learn the basic features and controls when an on-screen tutorial appears on your Gear. If your computer and Gear do not connect, cancel the Bluetooth request on both devices and try again. Alternatively, remove the Gear from your computer that previously appeared on the Bluetooth list, and try again. -
Page 88: Galaxy Apps
Tap → Show on phone to launch Galaxy Apps on your mobile device. Then, browse and select an app or watch face to download. Register your Samsung account on the connected mobile device first to use this app. -
Page 89: Settings
Applications Settings Introduction Customise settings for functions and apps. You can make your Gear more personalised by configuring various setting options. (Settings) on the Apps screen. Watch faces and styles Customise the watch face and the Apps screen. On the Settings screen, tap Watch faces and styles. •... -
Page 90: Vibration
Applications Vibration Change the settings for vibrations. On the Settings screen, tap Vibration. • V ibration intensity: Adjust the force of the vibration notification. • L ong vibration: Set the Gear to vibrate longer for incoming calls and notifications. •... -
Page 91: Display
SIG, may be incompatible with your device. • D o not use the Bluetooth feature for illegal purposes (for example, pirating copies of files or illegally tapping communications for commercial purposes). Samsung is not responsible for the repercussion of illegal use of the Bluetooth feature. - Page 92 Applications On the Settings screen, tap Connections → Bluetooth. • B luetooth: Turn the Bluetooth feature on or off. • B T headset: Search for Bluetooth headsets and connect them to the Gear. Wi-Fi Activate the Wi-Fi feature to connect to a Wi-Fi network. This feature is available when the Gear is not connected to the mobile device via Bluetooth.
- Page 93 Applications The Gear allows you to make payments and buy tickets for transportation or events after downloading the required apps. On the Settings screen, tap Connections → NFC. The Gear contains a built-in NFC antenna. Handle the Gear carefully to avoid damaging the NFC antenna.
-
Page 94: Flight Mode
Applications To set the default payment app, open the Settings screen and tap Connections → NFC → Tap and pay, and then select an app. The payment services list may not include all available payment apps. NFC antenna Alerts Set the Gear to vibrate when it is disconnected from your mobile device. On the Settings screen, tap Connections →... -
Page 95: App Settings
Applications Location Set the Gear to allow apps to use your current location information. On the Settings screen, tap Connections → Location. Tap Location to activate it and select a method to collect your location data. App settings App order Select how to arrange the apps on the Apps screen. -
Page 96: Security
• S amsung account: Enter your Samsung account and log in. • B ackup and restore: Backup the data saved in your Gear on the Samsung Cloud or restore data saved on the Samsung Cloud on your Gear. -
Page 97: General Management
On the Settings screen, tap General management → Input. • D efault keyboard: Check the default keyboard for entering the characters. • K eyboard settings: Configure the Samsung keyboard’s settings. Text-to-speech Change the settings for text-to-speech features, such as languages, speed, and more. -
Page 98: Battery Management
Applications Language Select a language to use on your Gear. On the Settings screen, tap General management → Language. The Language option is displayed only when you use the Gear without connecting to a mobile device. Reset Gear Delete all data on your Gear. On the Settings screen, tap General management →... -
Page 99: About Gear
• O pen source licences: View the guide for checking the Gear’s open source licence. • R eport diagnostic and usage info: Set the Gear to automatically send the device’s diagnostic and usage information to Samsung. • D ebugging: Activate or deactivate debugging mode when developing apps for the Gear. -
Page 100: Samsung Gear App
Samsung Gear app Introduction To connect your Gear to a mobile device, you must install the Samsung Gear app on your mobile device. You can check the Gear’s status and download recommended watch faces and apps. You can also customise your Gear’s various settings, such as your notification settings. -
Page 101: Info
• U ser manual: View the user manual to learn how to use your Gear. • C ontact us: Samsung Members offers support services to customers, such as device problem diagnosis, and lets users submit questions and error reports. You can also share information with others in the Galaxy users’... -
Page 102: Settings
You can change the type of watch to be displayed on the Watch screen. Launch Samsung Gear on your mobile device, tap SETTINGS → Watch faces, and select a desired watch type. The watch face you selected will be applied on the Watch screen. -
Page 103: Apps
• T he mobile device must be unlocked first to view details when the screen is locked. Apps Customise the Gear’s Apps screen. You can select and rearrange apps. Launch Samsung Gear on your mobile device and tap SETTINGS → Apps. Uninstalling apps Tap → Uninstall and tap next to the apps you want to remove from the Gear. -
Page 104: Transfer Content To Gear
• P laylists to sync: Select a playlist to sync with the Gear. Playlists to sync is available only when the Samsung Music app is installed on your mobile device and it is activated when you turn on the Auto sync feature. -
Page 105: Find My Gear
Register your Samsung account on the connected mobile device first to use this feature. • R eactivation lock: Set the Gear to require your Samsung account information after the device has been reset. This prevents others from reactivating your device if it is lost or stolen. -
Page 106: Quick Messages
Purchase and download apps or watch faces that are specialised for the Gear from the Galaxy Apps app. Launch Samsung Gear on your mobile device and tap SETTINGS → Samsung Galaxy Apps. Browse by category and select an app and watch face to download. -
Page 107: About Gear
RAM you are using, tick apps from the apps list, and tap CLEAN NOW. • U pdate Gear software: Update the Gear to the latest software. • B ack up and restore: Back up the Gear’s data on the Samsung Gear app or restore backup data. Refer to Backing up and restoring data for more information. -
Page 108: About Samsung Gear App
Keep the Gear’s settings data and other app settings and restore them later. To back up data, launch Samsung Gear on your mobile device and tap SETTINGS → About Gear → Back up and restore → Back up settings → BACK UP NOW. The data will be saved in Samsung Cloud. - Page 109 • R estart your Gear to clear any temporary software bugs. • E nsure that your Gear software is updated to the latest version. • I f the touchscreen is scratched or damaged, visit a Samsung Service Centre.
- Page 110 Appendix Your Gear freezes or has fatal errors Try the following solutions. If the problem is still not resolved, contact a Samsung Service Centre. Restarting the device If your Gear freezes or hangs, you may need to close apps or turn off the device and turn it on again.
- Page 111 • E nsure there are no obstacles, such as walls or electrical equipment, between the devices. • E nsure that the latest version of the Samsung Gear app is installed on the mobile device. • E nsure that your Gear and the other Bluetooth device are within the Bluetooth connection range (10 m).
- Page 112 Always make backup copies of all important data stored in the Gear through the Samsung Gear app. Otherwise, you cannot restore data if it is corrupted or lost. Samsung is not responsible for the loss of data stored in the Gear.
- Page 113 • S amsung does not accept liability for any damage or loss (whether in contract or tort, including negligence) which may arise from failure to precisely follow these warnings and instructions, other than death or personal injury caused by Samsung’s negligence.
- Page 114 Samsung Electronics. Trademarks • S AMSUNG and the SAMSUNG logo are registered trademarks of Samsung Electronics. ® • B luetooth is a registered trademark of Bluetooth SIG, Inc. worldwide.