Table of Contents
Advertisement
Table of Contents
Precautions .............................................................................. 2
Data handling ......................................................................... 3
About Nutube ......................................................................... 3
About the Owner's Manual ................................................ 3
Main Functions of Each Part ................................4
Front panel ............................................................................... 4
Rear Panel ................................................................................. 5
Making Connections .............................................5
Placing the instrument on a dedicated stand ............. 5
1. Connecting the AC adapter .......................................... 5
2. Connecting audio devices ............................................. 6
3. Connecting the pedals .................................................... 6
4. Connecting to a MIDI device or computer .............. 7
Turning the Power On/Off ....................................7
1. Turning the power on ..................................................... 7
2. Turning the power off ..................................................... 7
Selecting and Playing Sounds ..............................8
1. Selecting a sound .............................................................. 8
2. Selecting the scene .......................................................... 8
3. Using controllers ............................................................... 8
4. Applying effects ..............................................................10
Saving a Scene .................................................... 11
Saving a scene to the SCENE 1-4 buttons ..................11
Listening to the demo songs ............................. 11
Playing back the demo songs .........................................11
Owner's Manual
Detailed Functions ............................................. 12
System Settings .................................................. 20
Appendices ......................................................... 24
Specifications ...................................................... 25
ENGLISH
1. Master control ..................................................................12
2. Part select ..........................................................................12
3. ORGAN part .......................................................................13
4. E. PIANO part ....................................................................14
5. PIANO part .........................................................................14
6. KEY/LAYER part ................................................................14
7. Touch controls .................................................................15
8. Scene select ......................................................................17
9. EFFECTS controls .............................................................18
1. Master tune .......................................................................20
2. MIDI channel .....................................................................20
3. Lower part MIDI channel .............................................. 20
4. Local control .....................................................................21
5. Velocity curve ...................................................................21
6. Organ key trigger ............................................................21
7. Auto power off .................................................................21
8. VOX logo LED on/off ...................................................... 21
9. Wah pedal control .......................................................... 22
10. Calibrating the pedal .................................................. 22
11. Touch sensor calibration ........................................... 22
default settings .............................................................22
13. Saving the scene data ................................................. 23
14. Loading the scene data .............................................. 23
Troubleshooting ..................................................................24
Error messages .....................................................................24
Advertisement
Table of Contents

Summary of Contents for Vox CONTINENTAL-73
-
Page 1: Table Of Contents
6. Organ key trigger ............21 2. Turning the power off ............. 7 7. Auto power off ..............21 8. VOX logo LED on/off ............21 Selecting and Playing Sounds ......8 9. Wah pedal control ............22 1. Selecting a sound .............. 8 10. -
Page 2: Precautions
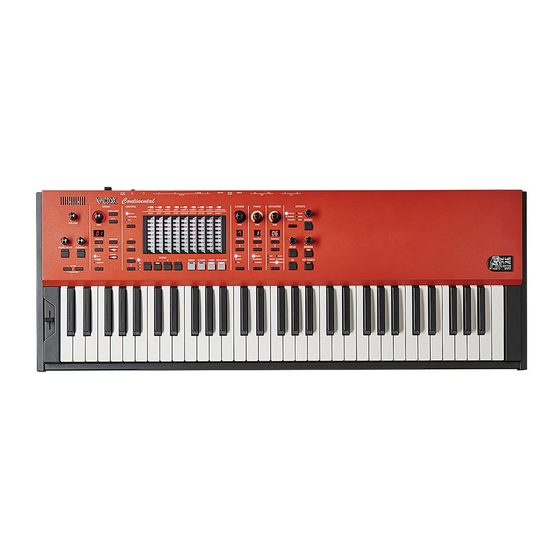
Thank you for purchasing the VOX Continental. The VOX Continental features a standard assortment of vintage sounds including a VOX organ, tonewheel organ, electric piano and more, as well as a rich grand piano sound that uses large, non-looped sample files in full stereo across the keyboard. -
Page 3: Data Handling
• VOX Continental Owner’s Manual (printed) data on USB storage devices. Please be aware that VOX will (this document) accept no responsibility for any damages which may result •... -
Page 4: Main Functions Of Each Part
Selects the scene. There are 16 scenes, which are used to store ORGAN part your favorite variations or effects and instantly recall them Selects the variation for the CX-3, VOX, or COMPACT organ during live performance or other situations. (See page 17) sound. (See page 13) The EXIT button is also used when making system settings. -
Page 5: Rear Panel
“14. Loading the scene data” (see page 23) USB B port Connect the USB A port of a Windows PC or Mac to the VOX Continental to exchange MIDI data. VOX logo “8. VOX logo LED on/off” (see page 21) -
Page 6: Connecting Audio Devices
3. Connecting the pedals The VOX Continental does not have built-in speakers. You will You can control the sound of the VOX Continental using the need to connect audio equipment such as powered monitor foot pedals connected to each foot controller jack. -
Page 7: Connecting To A Midi Device Or Computer
Turn the VOLUME knob on the VOX Continental all the way to the left. Hold down the power button on the rear panel of the VOX Continental. When is shown in the VARIATION displays of the PIANO and KEY/LAYER parts, release the power button. -
Page 8: Selecting And Playing Sounds
Press the BANK , buttons to select a bank (from A to The VOX Continental features four sound parts, ORGAN, E. D). (The LEDs on banks A–D will light) PIANO, PIANO and KEY/LAYER. You can select a variation for each part to play. - Page 9 Press the VARIATION , buttons to select the variation to adjust. Keyboard Select KEY/LAYER using the CONTROL button. The keyboard of the VOX Continental is velocity sensitive, but Adjust the settings by touching the touch sensors with aftertouch is not supported. This keyboard features waterfall your fingers.
-
Page 10: Applying Effects
CONTROL, ROTOR SPEED and DAMPER pedals , button to select the effect type. The type will be You can control the sound of the VOX Continental using shown in the KEY/LAYER display. (c) Press the EXIT commercially-available foot pedals. -
Page 11: Saving A Scene
Playing back the demo songs You can save the sound settings on the VOX Continental as The VOX Continental comes with 16 demo songs that are scenes. There are a total of 16 scenes (4 scenes × 4 banks). -
Page 12: Detailed Functions
For layered and split sounds, the dynamics effect will be Selects the sound part for performance. There are four sound applied to both variations. parts on the VOX Continental: organ, electric piano, acoustic Note: The effect controlled may differ, depending on the piano and keyboard/layer. -
Page 13: Organ Part
(the button goes dark) and LOWER (the button is lit). variation. Split on (when splitting the keyboard into UPPER Note: Only vibrato can be used with the VOX organ type. and LOWER) ROTARY button When split is on (see “6. SPLIT button” below), the higher... -
Page 14: Piano Part
Detailed Functions 4. E. PIANO part 4. E. PIANO part 6. KEY/LAYER part E. PIANO type button, LEDs KEY/LAYER type button, LEDs This selects the electric piano type. Select the sound type for the keyboard/ layer. TINE: Vintage electric piano with tines KEY: Clavinet, other keyboard REED: Vintage electric piano with reeds instruments... -
Page 15: Touch Controls
CONTROL button. You can control more than one sensor at the same time. 2) VOX The VOX drawbars differ for UPPER and LOWER. Switch between the two with the UPPER/LOWER button. (See “UPPER/LOWER button”, page 13) ... - Page 16 Detailed Functions 7. Touch controls 3) Compact KEY/LAYER Turn the tone stops on or off. This controls the volume of the KEY/LAYER variation sound. For the tone stops, a type of instrument sound like the one Each sensor controls the following parameters. shown on the panel will play at the specified octave.
-
Page 17: Scene Select
8. Scene select (6) PITCH LFO Adjusts how much the LFO makes the pitch vibrate. Up to 16 sounds that are set on the VOX Continental can be (7) LFO FREQ saved, and you can recall those settings instantly. These are This sets the LFO frequency. -
Page 18: Effects Controls
Detailed Functions 9. EFFECTS controls DRIVE: Creates a heavier, distorted sound. 9. EFFECTS controls WAH: Creates more shiny and muffled tones, by changing the frequency band to emphasize. You can control the effect using a pedal connected to the CONTROL jack. This configures the three series of effects and EQ. - Page 19 Detailed Functions 9. EFFECTS controls REVERB The REVERB effect adds reverberation to a sound, which simulates the feeling of being in a room, with sound reflecting off of the ceiling and walls. REVERB button This switches the reverb on/off. (The button will light when on.) Selecting the reverb type ...
-
Page 20: System Settings
Specifies the MIDI channels (1–16) when using an external Note: The steps to follow may differ from the above. Refer to MIDI keyboard as the VOX Continental’s organ LOWER (the each item for details. lower part of the keyboard). (Default setting: 2) 1. -
Page 21: Local Control
Set the velocity curve using the ORGAN part VARIATION 8. VOX logo LED on/off , buttons. This turns the VOX logo LED on the rear panel on or off. (Default setting: On) Hold down the EXIT button and press the part select ORGAN button. -
Page 22: Wah Pedal Control
When all touch sensors have been calibrated, you will be to the DAMPER, ROTOR SPEED and CONTROL jacks. able to play. Turn off the power on the VOX Continental, and connect all pedals that you wish to calibrate. Refer topage 6 for how to connect the pedals. -
Page 23: Saving The Scene Data
You can create, save and manage your data by project, so that you can recall the scenes you need at any time. Plug a USB storage device into the USB A port of the VOX 14. Loading the scene data Continental. -
Page 24: Appendices
This is not a malfunction. Adjust the levels by lowering the LEVEL knob and If an unexpected error occurs when you are using the VOX REVERB knob on each sound part. Continental , the error message will be shown in the □... -
Page 25: Specifications
PCM memory capacity Approx. 10.5 GB (when converted to 48 kHz 16-bit linear PCM) ORGAN part 3 types (CX-3, VOX, COMPACT), drawbars, percussion on/off, split function, vibrato/chorus on/off, rotary speaker on/off E. PIANO part 3 types (TINE, REED, FM) PIANO part 3 types (GRAND, UPRIGHT, E. - Page 26 Specifications Error messages Accessories Damper pedal KORG DS-1H Pedal switch KORG PS-1, PS-3 Keyboard stand ST-Continental * All product and company names are the registered trademarks of their respective companies.
- Page 27 © 2017 VOX AMPLIFICATION LTD.