Table of Contents
Advertisement
Advertisement
Table of Contents

Summary of Contents for Plinius 8100
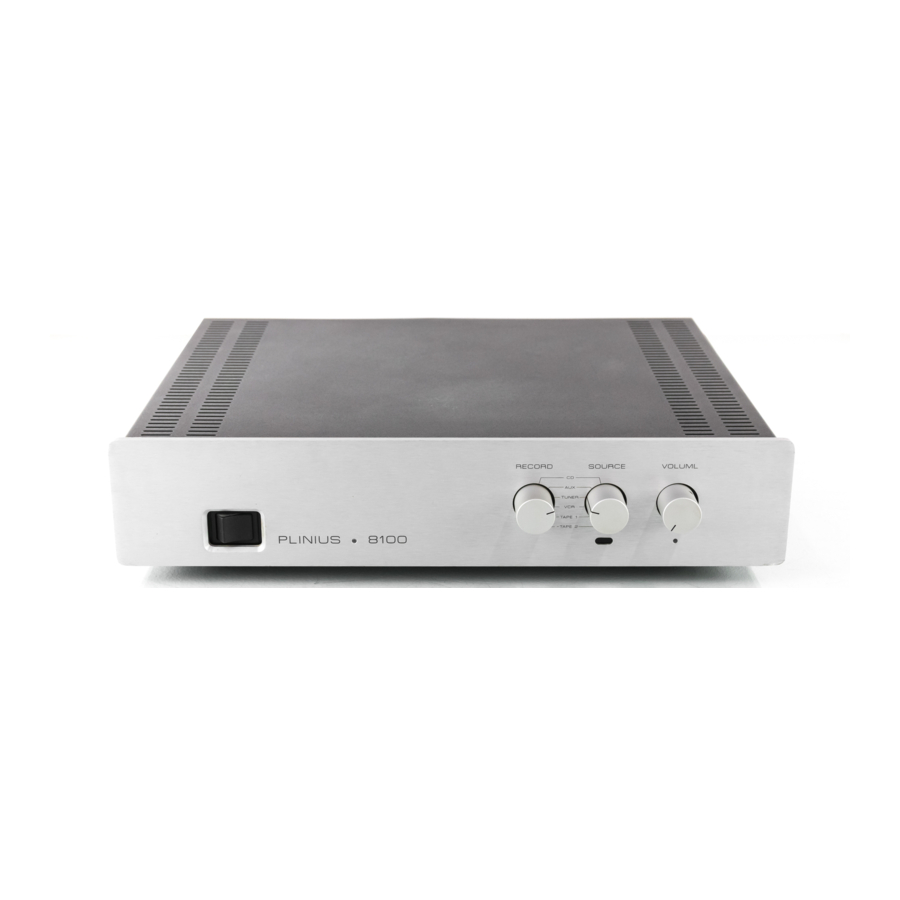
- Page 1 C l a s s A B I n t e g r a t e d A m p l i f i e r...
- Page 3 We have designed and manufactured this amplifier to reproduce faithfully and accurately, your favourite music. With a little care and a full understanding of the operating recommendations in this manual, your Plinius 8100 Integrated Amplifier will provide years of high-quality, trouble-free performance. Serial Number: Date of Manufacture: ...
- Page 4 Amplifier Features – Front Panel ...Page 6 Amplifier Features – Rear Panel ...Page 8 Installation and Operation ...Page 10 Input/Output Connection ...Page 11 8100 Features ...Page 13 Loudspeaker Selection ...Page 15 Specifications ...Page 16 Index ...Page 17 Contact Details ...Page 18...
- Page 5 Please take special note of the following precautions before operating your new amplifier: • The Plinius 8100 Integrated Amplifier can deliver in excess of 100 watts into 8 ohms. This amplifier is also capable of a very large peak current delivery.
-
Page 6: Mains Switch
POWER LED An LED in between ‘PLINIUS 8100’ indicates that the power is on. When first switched on, the power LED will pulse for ten seconds - this is an initialisation sequence, after which the power LED remains lit during the time the amplifier is powered on. -
Page 7: Record Selector
The volume control is an ALPS motorised unit that will accurately convey the source signals to the power amplification stage of the Plinius 8100. The knob can be adjusted manually or with the remote control supplied. When using the remote control to alter the volume level, stab the button to make small adjustments, or hold the button down to continuously adjust the volume. -
Page 8: Input Terminals
ANEL INPUT TERMINALS The input terminals for your Plinius 8100 Integrated Amplifier are easily accessible along the top of the rear panel. These standard RCA terminals are for use with unbalanced signals from CD, auxiliary, tuner, video, and two tape decks. Consult your PLINIUS OUTPUT TERMINALS Connections for the loudspeakers are provided on the right hand side of the rear panel. -
Page 9: Tape Outputs
PRE OUT OUTPUT The Pre-Out connection is provided to enable the Plinius 8100 to be connected to an external power amplifier. The signal from this output is line level, and as such is not amplified by the power stage of the Plinius 8100. -
Page 10: Placement And Ventilation
(slots in the lid and base) are not covered or restricted in any way. The Plinius 8100 design incorporates a very high level of mechanical de-coupling of the input and output. It can however still be influenced by acoustical feedback in the operating environment. The use of acoustic cones, or a suitably spiked amplifier stand or table, may further enhance the performance of this amplifier. -
Page 11: Recording Music
USING PRE OUT A line level output is provided on the back of the Plinius 8100. If you wish to use the Plinius 8100 as a pre-amp only, or to send signal to another amplifier, fit the interconnect cable to the pre out outputs. Note that the pre out connections provide signal from whatever the source selector knob is currently set to. -
Page 12: Connecting The Mains Supply
You can now enjoy your new Plinius 8100 Integrated Amplifier. WARM-UP PERIOD You will find that the Plinius 8100 will become noticeably ‘warmer’ in sound after being on for a period of time. We usually recommend waiting at least 24 hours before expecting the best quality of sound reproduction from your amplifier. -
Page 13: Remote Control
REMOTE CONTROL Provided with your Plinius 8100 is a three function remote control. The two buttons at the top of the remote adjust the volume level, and the button below switches the amplifier in and out of mute. Two AAA batteries power the remote, and these are replaced by removing the two posi-drive screws holding the bottom plate in place. -
Page 14: Mains/Line Fuse
MAINS/LINE FUSE A Mains/Line fuse is fitted within the IEC socket on the rear of the amplifier. A small drawer at the bottom of this socket may be removed (after the IEC plug is removed) by levering it out with a flat blade screwdriver. - Page 15 Your Plinius 8100 Integrated Amplifier is designed for use with high fidelity loudspeakers. It should not be used to operate with any other type of appliance or equipment. Choice of loudspeakers is one of personal taste, providing the chosen loudspeakers are suitable for use with your amplifier.
- Page 16 100-WATTS RMS PER CHANNEL INTO 8 OHMS. 140-WATTS RMS PER CHANNEL INTO 4 OHMS. BOTH CHANNELS DRIVEN FROM 20Hz TO 20kHz AT LESS THAN 0.1% TOTAL HARMONIC DISTORTION. D D D D H H H H : : : : 1dB or greater at 8Ω with music. YNAMIC YNAMIC EADROOM...
- Page 17 Bi-wiring...Page 12 Date of Manufacture ...Page 3 Front Panel Layout...Page 6 Fuse Protection ...Page 13 IEC Power Connector... Pages 10,13 Input Terminals ... Pages 8,11 Loudspeaker Impedance ...Page 15 Loudspeaker Power ...Page 15 Mains/Line Fuse...Page 14 Mains Supply Connection...Page 12 Mains Switch ...Page 6 Mute Switch...Page 9 Operating Temperature ...
- Page 18 All operational, technical and descriptive material published here is subject to change at any time without notice. For further product information or queries, please contact us at the address below. PLINIUS products are designed and manufactured by: PLINIUS PLINIUS PLINIUS Audible Technologies Ltd.


Need help?
Do you have a question about the 8100 and is the answer not in the manual?
Questions and answers