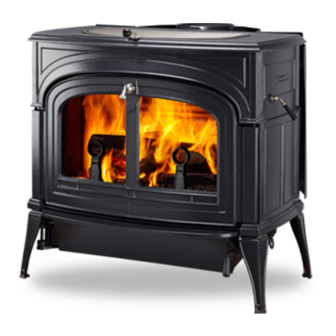
Vermont Castings 2550 Service Manual
1995 encore
Hide thumbs
Also See for 2550:
- Installating and operation manual (40 pages) ,
- Homeowner's installation and operating manual (40 pages) ,
- Service procedure (3 pages)

Related Manuals for Vermont Castings 2550


Summary of Contents for Vermont Castings 2550
- Page 1 For the VERMONT CASTINGS 1995 Encore Model 2550 TABLE OF CONTENTS History of Changes Exploded View and Parts List Service Procedures Assembly and Disassembly Gasketing Appendix...
- Page 2 CFM Corporation reserves the right to make changes in design, materials, specifications, prices and discontinue colors and products at any time, without notice. Encore Woodburning Stove 0956 Encore parts Model 2550 8/02 Item Description Part Number Item Description Part Number 7.
- Page 3 2. Not interchangeable, due to a heat-reflective coating on the room 54. Pawl Assembly Short Adjustment 30002362 side of the panels. 55. Ashdoor 1308607 3. Included in #0004345 ceramic handle assembly. Shell Enamel Parts - Encore Model 2550 Part Name Classic Biscuit Bordeaux Chestnut Ebony...
- Page 4 ENCORE 2550 HARDWARE 120-1745 ¼ -20 x 1” Zinc Hex Head Leveller Bolt 120-0334 7/16-20 x 1” Socket Set Screw ( 1-in each of the four legs ) ( 1-door insert for handle ) 120-1337 ¼ -20 x ⅜” Hex Head Cap Screw 120-0643 10-24 x 7/16”...
- Page 5 HISTORY OF CHANGES 1995 DEFIANT ENCORE Model 2550 This section covers the Defiant Encore Model 2550, built beginning in March, 1995. In March 1995, Vermont Castings changed the Defiant Encore stove to simplify assembly and minimize enamel chipping. • The visible parts of the front doors are now one casting instead of two. This ensures a good enamel colour match and minimizes chipping during assembly.
- Page 6 1995 DEFIANT ENCORE Model 2550 This section covers repairs and adjustments to the model 2550 Defiant Encore stoves built since March, 1995. Service procedures for this model are identical to those for the previous model 2190 Defiant Encore, except in three areas: damper adjustment; the removal, re-gasketing, and replacement of the upper fireback / damper assembly, and adjustments to the front door.
- Page 7 14. Re-install the lower fireback, and secure it with two wedges. 15. Replace the throat hood. 16. Re-install the andirons. Replacing the Primary Air Cable 1. Remove the throat hood. 2. Remove the right wedge, between the right wear plate and the lower fireback. 3.
- Page 8 Adjusting the Damper To adjust the damper to compensate for compression of the gasket, start by removing the griddle. Then: 1. Loosen the lock nut in the centre of the damper. 2. Use and Allen wrench to turn the pressure screw about one-half turn clockwise. 3.
- Page 9 DISASSEMBLY and ASSEMBLY 1995 DEFIANT ENCORE Model 2550 Disassembly 1. Lift off the griddle and the front doors. Remove the ash pan and dump the ashes. The pan will be a convenient place to store hardware during disassembly. 2. Lift out the grate and loosen the bolts holding the andirons in place. Lift out the andirons.
- Page 10 11. Remove the one side, then the other. They each have one bolt joining them to the stove front, and one bolt joining them to the bottom. When the hardware is out, break the cement seals and lift the parts off. 12.
- Page 11 Instructions and illustrations are given at the end of this section of the manual. Cementing Prepare parts which will need to be cemented before starting to assemble the stove, but do not apply cement until just before installing the parts. Cementing instructions are given below.
- Page 12 Assembly You will need at least 6 tubes of stove cement to re-assemble a Defiant Encore. Cut the tips of the tubes so you can apply an unbroken bead of cement to the cement channels and mating surfaces. 1. Place the stove bottom upside-down. Put a generous bead of cement around the top edge of the ashdrop (Fig.
- Page 13 5. Turn the stove bottom over onto its legs. Thread the running end of the thermostat cable down through the small hole and up through the large hole in the air rod. Pull the running end of the cable over to the valve and thread it through the small hole in the centre of the valve.
- Page 14 11. Mount the front to the stove bottom and to the stove ends. The threaded stems on the back edges of the stove front pass through clevises on the front edges of the stove ends, and are secured with hex nuts and washers. The front attaches to the stove bottom with a ¼-20 hex bolt and washer.
- Page 15 19. Install the thermostat. Be sure that the friction spring is on the stem, between the outer end and ‘ears’ pressed onto the stem, and that the wire stem coming off the bi- metal coil passes over the stem and toward the front of the stove. Loosely attach the thermostat handle to the stem, on the outside of the stove.
- Page 16 26. Assemble and install the ashdoor. Screw the socket, button head bolt into the stepped side of the latch pawl (Fig. 13). Thread the hex nut onto the end of the bolt and tighten it finger tight against the flat side of the pawl.
- Page 17 33. Install the griddle. Gently tap the perimeter of the griddle to seat it against the gasket. 34. If you have replaced any major iron panels, tell the customer to re-cure the stove with a series of four small fires, each hotter and longer than the last, to acclimate the iron to the stresses of heat.
- Page 18 8. After installing new gaskets, it may be necessary to make adjustments on the damper or load door. Refer to your Owner’s Guide. Fig. 14 Top Fig. 15 Upper Fireback 5/16” x 44” Griddle Gasket 5/16” x 42” for damper opening Fig.
- Page 19 Fig. 20 Left Inner Side (outside view) Fig. 21 Right Inner side (outside view) 3/8” x 54” Fiberglass 3/8” x 58” Fiberglass Fig. 22 Left Door (inside view) Fig. 23 Left Door (outside view) 3/16” x 36” Fiberglass to Seal Glass Gasket which wraps around from the back.
- Page 20 Gasketing the Damper/Upper Fireback 1. Remove the throat hood from the fireback by swinging it upward and then sliding it to either side (Fig. 25). Fig. 25 Removing the Throat Hood Fig. 26 Removing the Wedges 2. Remove the left and right wedges that hold the lower fireback in place, and remove the lower fireback (Fig.
- Page 21 APPENDIX #1 YEARLY MAINTENANCE SUGGESTIONS The 2550 Defiant Encore is a sophisticated combustion machine, and regular “fine tuning” will give you the full benefits of its operating potential. GENERAL CHECKLIST • Inspect the chimney for blockage such as squirrels, nests, branches, etc.
- Page 22 Inspect the element. Although small hairline cracks will not affect performance, the element should essentially be intact. If elements are broken or missing, the catalyst should be replaced. If the catalyst is in good shape and all the fly ash has been removed, re-install the combustor in the stove by sliding it into the opening, making sure that it is resting on the refractory shelf.
- Page 23 CHECK THE DAMPER The Encore’s damper is designed to snap into a locked position. When closing the damper, push the handle past the point at which you feel resistance until it snaps into the locked position. • Place several pieces of note paper along the top and bottom of the damper and lock the damper.