Table of Contents
Advertisement
Quick Links
User Manual
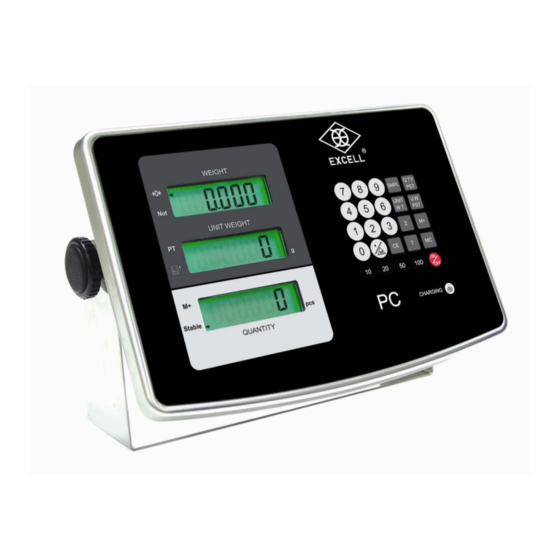
Waterproof Counting Indicator
PCH3
© EXCELL PRECISION CO., LTD. 2016. All rights reserved worldwide.
The information contained herein is the property of EXCELL PRECISION CO., LTD. and is
supplied without liability for errors or omissions. No part may be reproduced or used except as
authorized by contract or other written permission. The copyright and the foregoing restriction
on reproduction and use extend to all media in which the information may be embodied.
Advertisement
Table of Contents

Related Manuals for Excell PCH3


Summary of Contents for Excell PCH3
- Page 1 © EXCELL PRECISION CO., LTD. 2016. All rights reserved worldwide. The information contained herein is the property of EXCELL PRECISION CO., LTD. and is supplied without liability for errors or omissions. No part may be reproduced or used except as authorized by contract or other written permission.
-
Page 3: Table Of Contents
EXCELL PRECISION CO., LTD. Table of Content Indicator Housing ......................... 3 Instruction for Use ........................4 Preparations before Using ......................4 Chapter 1 Introduction........................6 1-1 Features ..........................6 1-2 Power Supply ........................6 1-3 Display ..........................6 1-4 Keypad ..........................7 1-5 Error Messages ........................ - Page 4 EXCELL PRECISION CO., LTD. 3-1-9 Pre-tare mode setting ..............21 3-1-10 “Beeper” Output Setting for Quantity Limit ........ 21 3-1-11 Accumulation Acceptable Condition Setting 1 ......22 3-1-12 Accumulation Acceptable Condition Setting 2 ......22 3-1-13 Combination Key Setting ............23 3-2 External Weight and G Value Calibration ..........
-
Page 5: Indicator Housing
EXCELL PRECISION CO., LTD. Indicator Housing Before opening the stainless steel indicator housing, make sure it is dry. If necessary wipe the housing dry paying particular attention to the joint between the front panel and rear housing. The re-assembly instructions should be accurately followed to ensure the IP rating is maintained in service. -
Page 6: Instruction For Use
EXCELL PRECISION CO., LTD. Thank you for purchasing EXCELL counting scale. In order to operate smoothly, to last the durability and to reduce chance of breakdown for this product, Please read this manual carefully. Instruction for Use The load placed on the weigh pan must NOT exceed the maximum weighing capacity of the scale. - Page 7 EXCELL PRECISION CO., LTD. Due to the storage battery adopt the advanced free-maintaining technique, customers need not to replenish electrolyte. The scale should be recharged every 3 months to prevent failure of the internal rechargeable battery. 1. The battery should be charged for 8~10 hours.
-
Page 8: Chapter 1 Introduction
EXCELL PRECISION CO., LTD. Chapter 1 Introduction 1-1 Features Sealed to IP67, Waterproof and dust proof Up to 1/15,000 display resolution and the internal resolution is 1/300,000 (Input voltage should be over 7 mV) Practical functions: Accumulations (weight and quantity), full range tare, pre-tare, auto-average unit weight, kilogram (kg) and pound (lb) weighing modes, auto backlight ... -
Page 9: Keypad
EXCELL PRECISION CO., LTD. Symbol Icons “” or Net or Tare : “Tare” indication or Zero : “Zero” indication 3. + or M+ : “Accumulation” indication 4. Stable : “Stable” indication : If the weight of the sample is less than the weight of the minimum sample, this symbol will display. -
Page 10: Error Messages
EXCELL PRECISION CO., LTD. Press this key, the display returns to 0. Press this key to deduct the weight of container. Or shift the digit pointer to left. Press this key to preset the unit weight of sample. Or use this key to enter the setting mode. -
Page 11: Chapter 2 Operation
EXCELL PRECISION CO., LTD. Chapter 2 Operation 2-1 Power On Press ON/OFF key to turn on the scale WEIGHT UNIT WEIGHT QUANTITY After stable, the scale will count back to zero. WEIGHT UNIT WEIGHT QUANTITY 600 ⇒ Maximum countable data: 600 000 Sampling Speed After return to zero and being stable, scale will enter into counting mode. -
Page 12: Known Unit Weight Of A Weighed Object
EXCELL PRECISION CO., LTD. 4. After stable, the scale finishes sampling and enters into counting mode stable Weight on platter Unit weight of object Enter sampling quantity 2-4-2 Known Unit Weight of a Weighed Object 1. Enter known unit weight of object intended to weigh ... -
Page 13: Tare Function Operation
EXCELL PRECISION CO., LTD. 2-5 Tare Function Operation 1. Place the packaging container on platter Weight of packaging container 2. Press 3. The scale will enter into counting mode after stable stable Clear off the tare value Mode 1: After removing the object together with packaging container, weight column will display the negative value of packaging container. -
Page 14: Accumulation
EXCELL PRECISION CO., LTD. 2. Enter the known weight of packaging container stable Weight of packaging container entered 3. Press stable Weight of the object without container Unit weight of the object Quantity without packaging container ... -
Page 15: Weight Accumulation
EXCELL PRECISION CO., LTD. 4. After about 3 seconds, scale returns to counting mode + stable Weight of the object on platter Unit weight of the object Quantity of the object on platter Recall quantity accumulation While weight column displays 0, press key to recall the accumulated data ... -
Page 16: Quantity Preset
EXCELL PRECISION CO., LTD. 2-8 Quantity Preset It’s available to pre-set the upper limit of quantity in counting mode. If the counts are over the limit, the beeper makes warning sounds, and the weight column displays flashing “ ” Upper limit of preset quantity 1. -
Page 17: Unit Weight Preset
EXCELL PRECISION CO., LTD. Clear off the pre-set upper limit To clear the pre-set upper limit of quantity or weight, please follow the above-mentioned operation steps. When entering the pre-set value, please enter “0” instead. When switching to “weight preset” mode or “quantity preset” mode, previous preset value will be deleted automatically. -
Page 18: Chapter 3 External Calibration Setting
EXCELL PRECISION CO., LTD. Chapter 3 External Calibration Setting After starting the machine and it returns to zero, press key and the screen displays ”- - - - - -“. Then press key to enter external calibration function setting mode. The weight column displays ... -
Page 19: Backlight Mode Setting
EXCELL PRECISION CO., LTD. 3-1-1 Backlight Mode Setting Press Previous setting Enter parameter 00~02 Press key to save the setting Default Setting: (No backlight) Backlight is always on. While weighing (weight is higher than 10d) or pressing any key, backlight be turned on automatically. -
Page 20: Stable Range Setting For Quantity Sampling
EXCELL PRECISION CO., LTD. 3-1-3 Stable Range Setting for Quantity Sampling Press Previous setting Enter parameter 00~15 Press key to save the setting Default Setting: While quantity sampling, the scale will indicate a stable reading and error is within 8d internal value. -
Page 21: A/D Sampling Speed Setting
EXCELL PRECISION CO., LTD. 3-1-5 A/D Sampling Speed Setting Press Previous setting Enter parameter 00~01 Press key to save the setting Default Setting: Low speed is about 7.5 Hz. (Weighing reflection is slow but relatively stable) Fast speed is about 15 Hz. (Weighing reflection is fast but relatively unstable) -
Page 22: Zero Tracking Range Setting
EXCELL PRECISION CO., LTD. 3-1-7 Zero Tracking Range Setting Press Previous setting Enter parameter 00~03 Press key to save the setting When CFN 01 = 00 ~ 01, the default setting is When CFN 01 = 00 ~ 04, the default setting is ... -
Page 23: Pre-Tare Mode Setting
EXCELL PRECISION CO., LTD. 3-1-9 Pre-tare mode setting Press Previous setting Enter parameter 00~01 Press key to save the setting Default setting: Traditionally, pre-tare can not proceed when weight on platter. When no weight on platter, press key to enter pre-tare value and then press key again. -
Page 24: Accumulation Acceptable Condition Setting 1
EXCELL PRECISION CO., LTD. 3-1-11 Accumulation Acceptable Condition Setting 1 Press Previous setting Enter parameter 00~01 Press key to save the setting Default setting: The scale accepts accumulation only when being stable. The scale accepts accumulation no matter its being stable or not. -
Page 25: Combination Key Setting
EXCELL PRECISION CO., LTD. 3-1-13 Combination Key Setting Combination key represents key or key. kg/lb U.W. PST This key contains 2 functions: Unit switching 50 sets for unit weight preset Press Previous setting Enter parameter 00~01 Press key to... -
Page 26: External Weight And G Value Calibration
EXCELL PRECISION CO., LTD. 3-2 External Weight and G Value Calibration Press Enter parameter 00~03 After entering parameter 00, press key to return to previous level Return to previous level External weight calibration Calibrate G value used in local or in verification ... -
Page 27: External Weight Calibration
EXCELL PRECISION CO., LTD. 3-2-1 External Weight Calibration Zero value can be calibrated separately from the weight calibration value. X X X If no temperature IC, “notMP” displays in UNIT WEIGIH Press X X X X X X X X X... -
Page 28: Calibrate G Value Used In Local Or In Verification
EXCELL PRECISION CO., LTD. 3-2-2 Calibrate G Value Used in Local or in Verification It is capable for users to set or modify G value for 9 times. If it is the 10 revised G value, please enter “06 CGr” to calibrate local G value, and the calibration time will be re-set as “1”. - Page 29 EXCELL PRECISION CO., LTD. Press key to display Historical revised data Display current revised times and the revised local G value Press Press Press key to enter revising mode Press key to quit and back to previous level...
-
Page 30: Rs-232 And Serial Printer Setting
EXCELL PRECISION CO., LTD. 3-3 RS-232 and Serial Printer Setting Press Enter parameter 00~08 After entering parameter 00, press key to return to previous level Return to previous level Baud rate setting Communication protocol setting Output data format setting ... -
Page 31: Communication Protocol Setting
EXCELL PRECISION CO., LTD. 3-3-2 Communication Protocol Setting Press Previous setting Enter parameter 00~02 Press key to save the setting Default Setting: (N, 8, 1) N, 8, 1 E, 7, 1 O, 7, 1 If there is free form device, it is 9600 bits/sec transmit. - Page 32 EXCELL PRECISION CO., LTD. Fixed format is described as following: Fixed format 1 “Press Fixed format 2 “Press key to print” key to print” xxxxxxx xxxxx 2.480 ITEM: xxxxxxx xxxxx 2.000 0.080 2.480 0.400 2.000 1.6003 0.080 1250 pcs 0.400 1.60...
-
Page 33: Output Count Setting Per-Second
EXCELL PRECISION CO., LTD. 3-3-4 Output Count Setting Per-second Press Previous setting Enter parameter 00~04 Press key to save the setting Default Setting: (1 count/sec) 1 count/sec 2 counts/sec 4 counts/sec 8 counts/sec More than 8 counts/sec ... - Page 34 EXCELL PRECISION CO., LTD. ZEBERA PRINTER output format 1. Press key to print “ “ <LF> <LF> <LF> <LF> <LF> <LF> <LF> <LF> <LF> <LF> G = Gross T = Tare PT = Pretare N = Net UW = Unit Weight PCS = Quantity , Fill in blanks for zero “0” on the left.
-
Page 35: Continuous Transmission Output Condition Setting
EXCELL PRECISION CO., LTD. For example: TN = TW = 2,395 kg TA = 23937 “ “ <LF> <LF> <LF> <LF> <LF> <LF> <LF> <LF> = 0x0A (line feed) SP = 0x20 (Blank) 3-3-6 Continuous Transmission Output Condition Setting Press... -
Page 36: Zero Band Setting For Auto. Transmission
EXCELL PRECISION CO., LTD. 3-3-7 Zero Band Setting for Auto. Transmission Press Previous setting Enter parameter 00~99 Press key to save the setting (External value “5d”) Default Setting: External value “0d” External value “1d” External value “99d”... -
Page 37: Appendix 1 Rs-232 Full Duplex Format
EXCELL PRECISION CO., LTD. Appendix 1 RS-232 Full Duplex Format Table 1 Command Format Command Format A Host Command Slave Command MZ Return to zero CP Clear off pre-tare value MT Tare CT Clear off tare value Current net weight accumulation & count plus 1 DT Clear off accumulated data and counts SC Set continuous transmission mode SA Set automatic transmission mode. - Page 38 EXCELL PRECISION CO., LTD. Description: 1. 2 previous code is command code (must be capital letter),A is 0-9 or A-Z. Other symbol is unacceptable (because it can’t be showed on LCD). 2. Decimal point of PT or UW can be moved.
-
Page 39: Appendix 2 Fixed Format Rs-232 Transmission Line Description
EXCELL PRECISION CO., LTD. Appendix 2 Fixed Format RS-232 Transmission Line Description RS-232 PRINTER SCALE SCALE DB 9 DB 9 DB 9 DB 9 3TX 2RX 5GND 5GND 5GND 5GND... -
Page 40: Appendix 3 Ascii Code Table
EXCELL PRECISION CO., LTD. Appendix 3 ASCII Code Table Symbol ASCII Code Symbol ASCII Code Symbol ASCII Code 03004035 ZSME200000058... -
Page 41: Appendix 4 7-Segment Display Characters
EXCELL PRECISION CO., LTD. Appendix 4 7-Segment Display Characters Number Display Letter Display Letter Display ℃ 03004035 ZSME200000058...