Table of Contents
Advertisement
Advertisement
Table of Contents

Summary of Contents for HoMedics BPS-420
- Page 1 Manual Inflate Blood Pressure Monitor Instruction Manual BPS-420-0GB...
-
Page 2: Table Of Contents
TABLE OF CONTENTS INTRODUCTORY INFORMATION: Important Safeguards ..............4 About Blood Pressure..............5 What is Blood Pressure? Why Measure Your Blood Pressure? Blood Pressure Standard .............6 How This Blood Pressure Monitor Works ........7 USAGE INFORMATION: Name/Function of Each Part ............8 Display Explanations ..............9 Installing Batteries...............11 Date &... -
Page 3: Important Safeguards
READ ALL INSTRUCTIONS BEFORE USE. ABOUT BLOOD PRESSURE: SAVE THESE INSTRUCTIONS FOR FUTURE REFERENCE. What is Blood Pressure? IMPORTANT SAFEGUARDS: Blood pressure is the pressure exerted on the artery walls while blood flows through the arteries. The pressure measured when the heart contracts and sends WHEN USING YOUR BLOOD PRESSURE MONITOR, BASIC blood out of the heart is systolic (highest) blood pressure. -
Page 4: Blood Pressure Standard
BLOOD PRESSURE STANDARD - JNC7: HOW THIS BLOOD PRESSURE MONITOR WORKS This is a blood pressure standard that identifies areas of low- and high-risk blood This manual inflate digital blood pressure monitor provides systolic pressure, pressure. This standard, however, is a general guideline as blood pressure varies diastolic pressure and pulse readings quickly and easily. -
Page 5: Name/Function Of Each Part
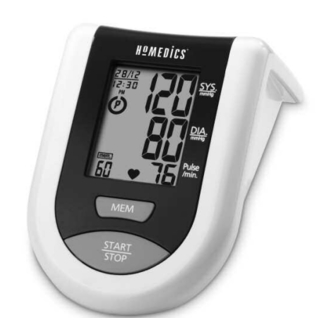
Name/Function of Each Part Display Explanations Cuff Tube Date/Time Indicator Inflation Bulb Date/Time Set Buttons (Located on back of unit) Systolic Pressure Arm Cuff Display Diastolic Pressure Battery Cover (Located on bottom of unit) Memory Recall Button Pulse Rate START/STOP Button... -
Page 6: Installing Batteries
Display Symbols Installing Batteries 1. Press down on latch and lift the battery cover towards you to open the battery compartment. Inflation Symbol: Appears when cuff requires inflation. 2. Install or replace 2 “AA” sized batteries in the battery compartment according to the indications inside the compartment. -
Page 7: Date & Time Set Procedure
If the Arrow falls outside of the Solid Color Line, you need a cuff with another circumference. Contact HoMedics Consumer Relations on tel: +44 (0) 1732 378557 2. The display will show a blinking number showing the date. Change the date or email: cservice@homedics.co.uk. - Page 8 1. If the cuff is not assembled, pass the end of the cuff furthest away from the 5. Position cuff edge 1.5-2.5 cm (0.6-1.0 inches) tubing through the metal D-ring in order to form a loop. The smooth side above elbow. without the felt material should be on the inside of the cuff loop.
-
Page 9: Measurement Procedure
NOTE: 1. With the cuff wrapped around your arm, press the START/STOP button. Main Artery If it is not possible to fit the cuff to your Do not inflate the cuff unless it is wrapped around your arm. All digits will light left arm, it can also be placed on your up to check the display functions. -
Page 10: Risk Category Indicator
Risk Category Indicator Recalling Values From Memory This unit conforms to the JNC7 blood pressure standard, classifying blood pressure ranges into 4 stages. This unit is equipped with an innovative blood 1. Press the “MEM” button to access the memory. pressure classification indicator, which visually indicates the assumed risk level (normal, prehypertension, stage 1 hypertension, or stage 2 hypertension) of each reading. -
Page 11: Important Notes Regarding Your Blood Pressure Measurement
• Users should wait a minimum of 5 minutes before taking additional device. If you have any problems with this device, please contact HoMedics measurements. More time may be necessary depending upon your physiology. -
Page 12: Troubleshooting
NOTE: If the unit still does not work, contact HoMedics Customer Service. NOTE: These specifications are subject to change without notice. Under no circumstance should you disassemble or attempt to repair the unit by yourself. - Page 13 This guarantee does not affect your statutory rights. For more information regarding our product lines, please visit: www.homedics.co.uk © 2007 HoMedics, Inc. and its affiliated companies, all rights reserved. HoMedics® is a registered trademark of HoMedics, Inc. and its affiliated companies. All rights reserved. TheraP is a trademark of HoMedics, Inc.


