
Related Manuals for NDC Pro Advantage

Summary of Contents for NDC Pro Advantage
- Page 1 Pro Advantage® Urine Analyzer Operator’s Manual © Pro Advantage by NDC. All rights reserved PS-733 Rev 00-3/10 1/23...
- Page 2 The manufacturer reserves the right to change the content of this manual at any time without notice. If the manner in which this machine is used differs from the procedures specified in this manual, then the instrument and the results may be impaired. © Pro Advantage by NDC. All rights reserved PS-733 Rev 00-3/10 2/23...
-
Page 3: Table Of Contents
Table 2: English – Standard (S.I.) Units (S1 & S2) ..........18 How to change the printed/displayed units ............ 18 9. Appendicies......................19 Appendix 1: Specifications ................... 19 © Pro Advantage by NDC. All rights reserved PS-733 Rev 00-3/10 3/23... - Page 4 ................21 Optical System Explanation ................21 Internal Checks Explanation ................. 21 Human Eye vs. Instrumental Optics .............. 21 Appendix 4: Warranty ..................22 10. Index ........................23 © Pro Advantage by NDC. All rights reserved PS-733 Rev 00-3/10 4/23...
-
Page 5: Analyzer Overview
What can your Urine Analyzer do? Your Pro Advantage Urine Analyzer is a portable, bench top analyzer for reading the manufacturer urine reagent strips. Training for this instrument is not required or necessary. Multiple urine strip types can be used with this analyzer. -
Page 6: Instrument And Labeling Symbols
Instrument and Labeling Symbols This section indicates the symbols that appear on the exterior packaging of the Pro Advantage Urine Analyzer, the analyzer itself, the power adapter and the urine reagent strips. Indicates a power on/off button In vitro diagnostic device Temperature Requirements for Operation (15º... -
Page 7: Analyzer Installation
How To Instructions Set Up Analyzer Installation Place the Pro Advantage Urine Analyzer on a level, flat surface The best temperature for using this where temperature and humidity conditions are consistent analyzer is -20ºC to 70ºC (-4ºF to 158ºF) Plugging Analyzer In Plug the proper end of the power supply into the back of the analyzer . -
Page 8: Understanding The Analyzer
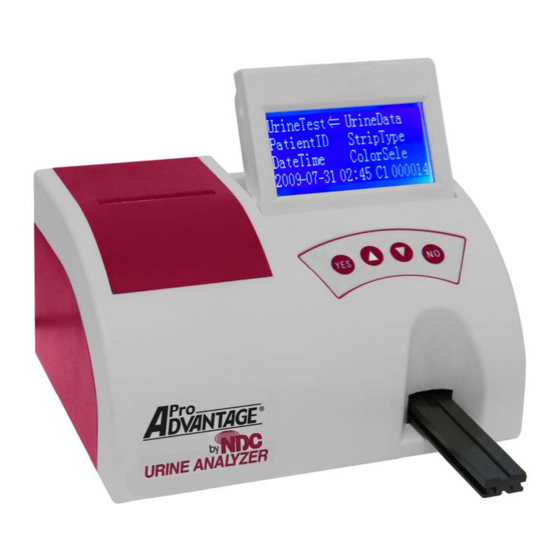
Strip Type This menu option allows for the user to change the strip type that will be used on Figure 1: Front View of Pro Advantage Urine Analyzer the analyzer Color Selection This menu option allows for the user to select the color of the patient’s urine color... -
Page 9: Testing
The results will be displayed on the LCD screen until another test is run, or until the user chooses to return to the main menu. Figure 6: Results Screen Figure. 7: Print Out © Pro Advantage by NDC. All rights reserved PS-733 Rev 00-3/10 9/23... -
Page 10: How To Run Continuous Tests
How to run continuous tests: The Pro Advantage Urine Analyzer has an optional continuous testing mode which allows the user to run consecutive tests without returning to the main menu. After the Pro Advantage Urine Analyzer has finished displaying the results on the LCD screen, the analyzer will then accept another test strip. The analyzer will again start its count down from 60 seconds. -
Page 11: How To Enter Date And Time
Figure 16: Strip Type Menu How to change strip type: The Pro Advantage Urine Analyzer allows for the user to use multiple strip types on the analyzer. To change the strip type on the analyzer: 1. Highlight the Strip Type function using the selection keys (see Fig. 15). -
Page 12: Analyzer Set-Up
4. Analyzer Set-Up How to change your urine analyzer settings: Your Pro Advantage Urine Analyzer allows you to change the settings to fit your laboratory or workplace requirements To change your setting turn on your analyzer and you will see the Welcome Screen appear (see Fig. 17). From this screen you will be able to change the settings by 1. -
Page 13: Language Settings
How to feed printer paper through the printer head: The Pro Advantage Urine Analyzer requires a thermal paper roll to be used to properly print the results of each patient sample. At times it may be difficult to feed the paper through the printer head manually, so the analyzer has an option to feed the paper through mechanically. -
Page 14: Troubleshooting
Error Messages Error messages will be displayed on the LCD screen to alert the user that the Pro Advantage Urine Analyzer has found a problem with the analyzer. To correct the error, see the List of Error Codes below. -
Page 15: Quality Control For Urinalysis Strip Testing
6. Quality Control for Urinalysis Strip Testing The Pro Advantage Urine Analyzer is a CLIA waived analyzer when used with the manufacturer’s branded urine reagent strips. For CLIA waived settings, we advocate for the use of positive and negative controls with each new bottle opened. -
Page 16: Pro Advantage Urine Analyzer Maintenance
1. Can be used at full strength, follow steps 1 – 8 in Disinfecting Strip Bed: Household Bleach Ensure that the Pro Advantage Urine Analyzer is kept clean and free of dust by turning the analyzer off by pressing the on/of button at the rear of the machine. Wipe the exterior plastic casing of the analyzer, including the LCD screen with a damp (not wet) cloth and a mild detergent (household bleach 5% or 70% - 80% isopropyl alcohol. -
Page 17: Table Of Results
Table 1: English – Conventional Units (C1 & C2) How to change the printed/displayed units The Pro Advantage Urine Analyzer has the ability to change the units in which the results are displayed and printed. 1. Start at the Main Menu screen and hold the “DOWN” selection key and press the “NO” key 2. -
Page 18: How To Change The Printed/Displayed Units
Table 2: English – Standard (S.I.) Units (S1 & S2) How to change the printed/displayed units The Pro Advantage Urine Analyzer has the ability to change the units in which the results are displayed and printed. 1. Start at the Main Menu screen and hold the “DOWN” selection key and press the “NO” key 2. -
Page 19: Appendicies
Width – 88 mm (3.5 inches) Height – 44 mm (1.3 inches) Adjustable LCD Screen: up to 45 degree incline Weight Pro Advantage Urine Analyzer (without power supply) – 2.36 kg (5.21 lb) Operating Temperature 18°C to 30°C (64°F to 86°F) Operating Humidity... -
Page 20: Appendix 2: Default Settings
Connectivity Allowing Results to be Sent to Computer Printer Automatic Enabled Contrast Setting Baud Rate 0 (zero) 115200 Parity Stop Bits None 1 (one) Strip Type 10 Parameter © Pro Advantage by NDC. All rights reserved PS-733 Rev 00-3/10 20/23... -
Page 21: Appendix 3: Analyzer Summary & Policy
Internal Checks Explanation When the user first turns on the Pro Advantage Urine Analyzer, the analyzer performs a series of electronic checks. Each time a test is read with the analyzer, the instrument ensures each test is positioned correctly on the strip bed. The analyzer then pulls the strip bed and strip into the analyzer, taking a reference reading from the reference block on the strip. -
Page 22: Appendix 4: Warranty
In no event shall the manufacturer be liable for indirect, special or consequential damages, even if the manufacturer has been advised of the possibility of such damages. For warranty service, purchaser must contact the Customer Service Department or your local authorized distributor. © Pro Advantage by NDC. All rights reserved PS-733 Rev 00-3/10 22/23... -
Page 23: Index
Page 11 Loading Printer Paper: Page 5 Warranty Page 20 Maintenance Page 14 Memory: Page 3 Operating Temperature: Page 17 Operating Humidity: Page 17 Optical System: Page 19 © Pro Advantage by NDC. All rights reserved PS-733 Rev 00-3/10 23/23...