
Related Manuals for Philips FW C255


Summary of Contents for Philips FW C255
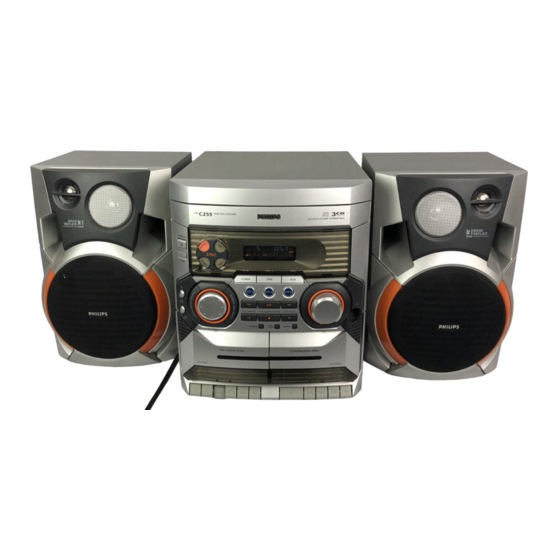
- Page 1 C255 C255 Mini Hi-Fi System 3139 115 21251 pg 001-028_255_21-Eng 12/24/01, 10:55 AM...
- Page 2 ATENCIÓN sea el requerido para su aparato Minisistema de Audio FW-C255/21 110–127 / 220–240V~; 50–60 Hz 70 W Philips Mexicana, S.A. de C.V. Norte 45, # 669, Col. Industrial Vallejo Tel. 5728-4200 Philips Electronics HK, Ltd. ______________________________ 12/24/01, 10:55 AM...
- Page 3 £ ≤ MINI HIFI SYSTEM DIGITAL SOUND DISPLAY STANDBY-ON SLEEP OPEN/ CLOSE DISC CHANGE PLAY / REC pg 001-028_255_21-Eng § CD 1/2/3 TUNER TAPE 1/2 AUX/CDR REPEAT SHUFFLE SLEEP í ë É Ç Å á á ∞ MUTE MUTE NEWS/TA C H A N G E R CD / CD-R / CD-RW COMPATIBLE MASTER...
- Page 4 3139 115 21251 pg 001-028_255_21-Eng 12/24/01, 10:55 AM...
- Page 5 Index English ------------------------------------------------ 6 Français -------------------------------------------- 29 Español --------------------------------------------- 53 -------------------------------------------------------- 77 3139 115 21251 pg 001-028_255_21-Eng 12/24/01, 10:55 AM...
-
Page 6: Table Of Contents
Contents General Information Supplied accessories ... 7 Environmental information ... 7 Safety information ... 7 Preparations Rear connections ... 8–9 Power Antennas connection Speakers connection Optional connection ... 9 Connecting other equipment to your system Inserting batteries into the remote control ... -
Page 7: General Information
IMPORTANT! PLEASE NOTE THAT THE VOLTAGE SELECTOR LOCATED AT THE REAR OF THIS SYSTEM IS PRESET AT 220V FROM THE FACTORY. FOR COUNTRIES THAT OPERATE AT 110V-127V, PLEASE ADJUST TO 110V-127V BEFORE YOU SWITCH ON THE SYSTEM. Supplied accessories – 2 speaker boxes –... -
Page 8: Preparations
Preparations AM loop antenna ANTENNA speaker (right) AC power cord Rear connections The type plate is located at the rear of the system. Power Before connecting the AC power cord to the wall outlet, ensure that the following are done; –... -
Page 9: Speakers Connection
FM Antenna For better FM stereo reception, connect an outdoor FM antenna to the FM ANTENNA terminal. Speakers Connection Connect the speaker wires to the SPEAKERS terminals, right speaker to "R" and left speaker to "L", coloured (marked) wire to "+" and black (unmarked) wire to "-". -
Page 10: Controls On The System And Remote Control
Controls (illustrations on page 3) Controls on the system and remote control STANDBY ON B – to switch the system on or to standby mode. SLEEP – to activate/deactivate or set the sleep timer. DIGITAL SOUND DISPLAY – the active DSC will be lighted. TUNER (BAND) –... - Page 11 Mode Selection PLAY•PAUSE É Å for CD ... to start or interrupt playback. for Plug & Play…(on the system only) to initiate and start plug & play mode. SEARCH•TUNING à á for CD ... to search backward/forward. for Tuner ... to tune to a lower or higher radio frequency.
-
Page 12: Basic Functions
Basic Functions DIGITAL SOUND DISPLAY STANDBY-ON SLEEP BAND TUNER SEARCH •TUNING OPEN/ CLOSE PREV/ PRESET STOP•CLEAR / DEMO STOP DISC CHANGE PROGRAM IMPORTANT! Before you operate the system, complete the preparation procedures. Plug and Play Plug and Play allows you to store all available radio stations automatically. -
Page 13: Demonstration Mode
Demonstration mode The system has a demonstration mode that shows the various features offered by the system. To activate the demonstration In standby mode, press and holdÇon the system until "WELCOME" is displayed. The demonstration will begin. To deactivate the demonstration Press and holdÇon the system until "DEMO OFF"... -
Page 14: Sound Control
Basic Functions Sound control Digital Sound Control (DSC) The DSC feature enables you to enjoy special sound effects that have preset equaliser settings, providing the best music reproduction. Press DSC. The selected DSC is shown. Adjust the jog control (or press DSC on the remote control repeatedly) to select : JAZZ, ROCK, TECHNO or OPTIMAL. -
Page 15: Cd Operation
MINI HIFI SYSTEM DIGITAL SOUND DISPLAY STANDBY-ON SLEEP BAND TUNER SEARCH •TUNING OPEN/ CLOSE PREV/ PRESET STOP•CLEAR / DEMO STOP DISC CHANGE PROGRAM IMPORTANT! – This system is designed for regular discs. Therefore, do not use any accessories such as disc stabiliser rings or disc treatment sheets, etc., as offered on the market, because they may jam the changer mechanism. -
Page 16: Playing Discs
CD Operation Playing discs a disc is loaded in the disc tray the current selected disc tray is empty the current selected disc tray is loaded or playing To play all discs on the disc tray PressÉ Å . All the available discs will play once, then stop. During playback, the selected disc tray, track number and elapsed playing time of the current track are displayed. -
Page 17: Programming The Disc Tracks
Notes: – During programme play or shuffling mode, it is not possible to repeat playback the current disc (Repeat Disc mode). – Pressing the OPEN/CLOSE button will cancel all repeat and shuffling modes. Programming the disc tracks Programming tracks is possible when playback is stopped. -
Page 18: Radio Reception
Radio Reception DIGITAL SOUND DISPLAY STANDBY-ON SLEEP BAND TUNER SEARCH •TUNING OPEN/ CLOSE PREV/ PRESET STOP•CLEAR DISC CHANGE PROGRAM Tuning to radio stations Press TUNER to select TUNER mode. "TUNER" is displayed. A few seconds later, the current radio frequency will appear on the display. -
Page 19: Manual Preset Programming
Manual Preset Programming Tune to your desired radio station (refer to “Tuning to radio stations”). Press PROGRAM. starts flashing. PROG The next available preset number is displayed for selection. To store the radio station to another preset number Press í or ë to select the desired preset number. -
Page 20: Tape Operation/Recording
Tape Operation / Recording DIGITAL SOUND DISPLAY STANDBY-ON SLEEP BAND TUNER SEARCH •TUNING OPEN/ CLOSE PREV/ PRESET STOP•CLEAR / DEMO STOP DISC CHANGE PROGRAM PLAY / REC IMPORTANT! – Before playing a tape, check and tighten slack tape with a pencil. Slack tape may get jammed or may burst in the mechanism. -
Page 21: Playing Tapes
Playing tapes To playback a selected tape deck PressÉ on tape deck 1 or 2. The tape will stop at the end of playback. Continuous playback of two tapes Load the tapes in tape deck 1 and 2. PressÉ on tape deck 2. Press Å... -
Page 22: Preparation For Recording
Tape Operation / Recording Preparation for recording Load a recordable tape into tape deck 1 with full spool to the left. Prepare the source to be recorded. CD 1/2/3 – load the disc(s). TUNER – tune to the desired radio station. TAPE –... -
Page 23: Karaoke
LEVEL Microphone mixing Connect a microphone (not supplied) to the system allowing you to sing along with the music source. Connect a microphone to the MIC jack. Before connecting the microphone, set the microphone MIC LEVEL to the minimum level to prevent howling sound. -
Page 24: Clock/Timer
Clock/Timer DIGITAL SOUND DISPLAY STANDBY-ON SLEEP BAND TUNER SEARCH •TUNING OPEN/ CLOSE PREV/ PRESET STOP•CLEAR DISC CHANGE PROGRAM View clock The clock (if it is set) will be shown in standby mode. To view the clock in any source mode (CD or TUNER for example) Press CLOCK/TIMER. -
Page 25: Deactivating The Timer
Press CD 1/2/3, TUNER or PROGRAM to select the desired source. “CD1 [or 2, 3] XX:XX" indicates the CD mode is selected. “TU XX:XX” indicates the Tuner mode is selected. “PROG XX:XX" indicates the CD programme mode is selected. Before setting timer, make sure the music source has been prepared. -
Page 26: Specifications
Specifications AMPLIFIER Output power ... 1500 W PMPO ... 2 x 40 W RMS Signal-to-noise ratio ... Frequency response ... 50 – 15000 Hz Input sensitivity AUX/CDR In ... 500 mV / 1V Microphone ... 3.5 mV Output Speakers ... 6 Headphones ... -
Page 27: Maintenance
Cleaning the disc lens After prolonged use, dirt or dust may accumulate at the disc lens. To ensure good playback quality, clean the disc lens with Philips CD Lens Cleaner or any commercially available cleaner. Follow the instructions supplied with cleaner. - Page 28 Troubleshooting RADIO RECEPTION Radio reception is poor. TAPE OPERATION/RECORDING Recording or playback cannot be made. GENERAL The system does not react when buttons are pressed. Sound cannot be heard or is of poor quality. The left and right sound outputs are reversed.