Table of Contents
Advertisement
Quick Links
Advertisement
Table of Contents

Related Manuals for Zte ZTE-C F451


Summary of Contents for Zte ZTE-C F451
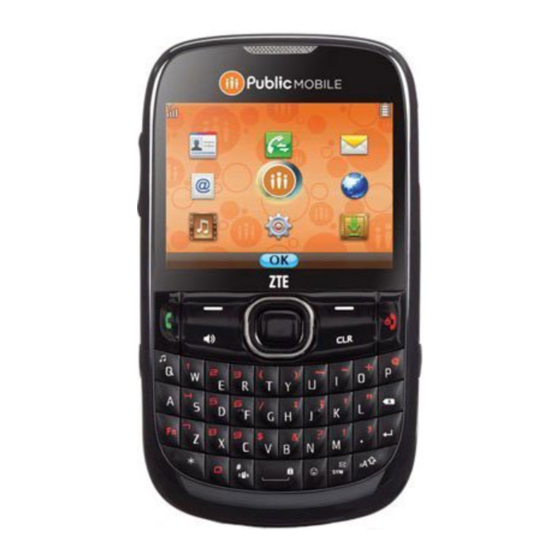
- Page 1 ZTE-C F451 User Guide...
- Page 2 ZTE Corporation. ZTE Corporation reserves the right to make modifications on print errors or update specifications in this guide without prior notice. Version No. : V1.0 Edition Time : 09-2011 Manual No.
-
Page 3: Table Of Contents
Contents Welcome ............................7 Your F451 ............................ 7 Phone Overview ........................... 7 Specifications ..........................9 Getting Started ..........................9 Installing the Battery ........................9 Installing the microSD Card ....................... 10 Charging the Battery ........................10 Powering On/Off Your Phone ....................11 Home screen .......................... - Page 4 Adding a New Group ......................19 Sending a Message to Group Members ................. 19 My Name Card ........................... 20 Editing My Name Card ......................20 Sending My Name Card via Message ..................20 Sending My Name Card via Bluetooth .................. 20 Messaging ............................
- Page 5 Master Volume ........................... 33 Keyguard Settings ........................33 Sounds Settings .......................... 33 Call Sounds ..........................33 Alert Sounds ........................... 33 Keypad Volume ........................33 Digit Dial Readout ......................... 34 Service Alerts ......................... 34 Power On/Off ......................... 34 Display Settings ......................... 34 Personal Banner ........................
- Page 6 IC Notice ............................ 45 Copyright Notice ........................45...
-
Page 7: Welcome
Welcome Your F451 Thank you for choosing F451 digital mobile phone. It works in CDMA network, you can make calls and send messages or emails while traveling or roaming. To guarantee this mobile phone is always in its best condition, please read this manual carefully and keep it for future reference. - Page 8 14. Right Soft Key: Press to enter the message box or access the function listed above the key. 15. Directional Key: Allows you to scroll through phone menu options and provides a shortcut to phone functions from home screen. 16. Accessory/Charger Port: Connects the phone to the wall charger, or other compatible accessories.
-
Page 9: Specifications
Specifications Model F451 Dimensions (L x W x H) 110 × 61 × 12.5 mm Weight approximately 100 g including battery Continuous Standby Time about 220 hours Continuous Talk Time about 240 minutes Note: The phone‟s talk and standby times are based on ideal working environments. Network conditions or, for example, use of the extended backlight or browser, can use more battery power and reduce talk/standby time. -
Page 10: Installing The Microsd Card
Align the battery cover over the battery compartment and slide it upward until it clicks into place. Installing the microSD Card Your phone supports microSD card up to 16 GB. You can store music, pictures, and other files on the microSD card. Note: microSD logo is a trademark of the SD Card Association. -
Page 11: Powering On/Off Your Phone
3.Plug the wall adapter into a power outlet. Warning: Please use only an approved charging accessory to charge your device. Improper handling of the charging port, as well as the use of an incompatible charger, may cause damage to your device and void the warranty. When not using the battery for a long time, remove it from the phone and store in a cool dry place. -
Page 12: Main Display Icons
4. Message: Press the Right Soft Key to select this option. 5. Battery strength: Four bars indicate a fully charged battery. Note: The start screen may vary if you change the default display settings. Main Display Icons : CDMA 1X Signal Strength : Airplane Mode : Battery Level No Service... -
Page 13: Basic Operation
Basic Operation Menu Navigation Your phone can be customized via the menu. Each function can be accessed by scrolling with the Directional Key or by pressing the number that corresponds with the menu item. To access the menu, press the Center Select Key [Menu]. To scroll through the menu, press the Directional Key up, down, left or right, or press the number key that corresponds to the desired menu item. -
Page 14: Entering Text
Note: Press the CLR Key to go to the previous options and change the settings. Press the Left Soft Key [Preview] or [Play] to view or play the option before setting it. Entering Text Your phone has a QWERTY keypad – a compact version of standard computer keyboard. Here‟s how it works. -
Page 15: Calling
Calling Making a Call Using the Keypad 1. Enter the destination phone number. 2. Press the Send Key. Note: To make an emergency call, enter the emergency number and press the Send Key. If possible, remain stationary and keep the line connected. Using the Contacts 1. -
Page 16: Removing A Speed Dial
Select a speed dial entry, or enter the speed dial digits in the Go to field, then press the Center Select Key [Set]. Select a contact in the contact list and press the Center Select Key. If the contact has multiple phone numbers, you need to choose a number. - Page 17 Missed: View the calls you did not answered. Received: View the calls you answered. Dialed: View the calls made from your phone. All: View the missed, received and dialed calls. View Timers: View the information of Last call, All calls, Received calls, Dialed calls, Roaming calls, Transmit data, Received data, Total data, Last reset, Lifetime calls and Lifetime data counter.
-
Page 18: Contacts
Contacts Adding a New Contact Press the Center Select Key [Menu] > Contacts > New Contact. Enter the contact information you need and press the Center Select Key [Save]. Editing a Contact Press the Left Soft Key [Contacts] in the home screen or press the Center Select Key [Menu] >... -
Page 19: Copying Contacts To The Microsd Card
Press the Left Soft Key [Contacts] in the home screen. Press the Right Soft Key [Options], select Manage Contacts > Lock/Unlock and press the Center Select Key. Press the Center Select Key [Mark] to mark the contacts you want to lock or unlock, or press the Right Soft Key [Mark All] to mark all contacts and then press the Left Soft Key [Done]. -
Page 20: My Name Card
Write the message and press the Center Select Key [Send]. My Name Card My Name Card is your personal contact, which you can send as a V-card via a message or Bluetooth. Editing My Name Card 1. Press the Center Select Key [Menu] > Contacts > My Name Card. 2. -
Page 21: Messaging
Messaging Your phone is able to send text, picture and voice messages. To access Messaging, press the Center Select Key [Menu] > Messaging. Shortcut: To quickly access the message box, press the Right Soft Key [Message] in the home screen. Using the Message Key You can press the Message Key on the keypad to create a new message. -
Page 22: Voicemail
Voicemail All unanswered calls to your phone can be transferred to voicemail, even if your phone is powered off. It‟s recommended to set up your voicemail and personal greeting as soon as you activate your phone. For more information, contact your service provider. 1. -
Page 23: Browser
Browser The web browser is preinstalled in your phone, which allows you to access the Internet with ease. This browser compresses the data of the web pages you visit and speeds up the browsing experience while saving your data airtime. Press the Center Select Key [Menu] >... -
Page 24: Media Center
Media Center Browser Refer to the Browser chapter please. My Music You can use My Music to play and manage music files stored on your phone and micro SD card. Press the Center Select Key [Menu] > Media Center > My Music to access My Music. IMPORTANT: To play music files on the microSD card, please store your music files in synched\music on the microSD card. -
Page 25: Managing My Music
3. Press the Right Soft Key [Options] and select Add Songs then press the Center Select Key. 4. Mark the songs you want to add and press the Left Soft Key [Done]. Managing My Music 1. Press the Music Key in the home screen. Select Manage My Music and press the Center Select Key. -
Page 26: My Pictures
My Pictures In My Pictures, you can view and manage all taken or downloaded pictures, and the pictures stored on your phone and micro SD card. IMPORTANT: To view the pictures on the microSD card, please store them in synched\pics on the microSD card. - Page 27 5. Press the Left Soft Key [Save] to save the picture in My Pictures or press the Right Soft Key [Erase] to delete it. You can also press the Center Select Key [Send] to send it via a multimedia message. Warning: Keep a safe distance when using the flash.
-
Page 28: Bluetooth
® Bluetooth Your phone is capable of connecting to a variety of Bluetooth wireless accessories. It allows you to transfer data between Bluetooth devices, talk with a Bluetooth wireless earphone, etc. The approximate range for Bluetooth wireless technology is up to 30 feet (10 meters). This device is compliant with Bluetooth specifications, supporting the following profiles: Headset, Handsfree, Stereo, Phonebook Access and Object Push. - Page 29 Supported Profiles: View the profiles that your phone can support. Highlight a profile and press the Center Select Key to view the description.
-
Page 30: Tools
Tools Calculator Your phone has a basic calculator for addition, subtraction, multiplication and division. Press the Center Select Key [Menu] > Settings & Tools > Tools > Calculator and use the keypad to operate. Press the Directional Key to select a mathematical function (add, subtract, multiply or divide). ... -
Page 31: Alarm Clock
Alarm Clock Adding a New Alarm 1. Press the Center Select Key [Menu] > Settings & Tools > Tools > Alarm Clock. 2. Select an alarm entry and press the Center Select Key. 3. From the Turn On/Off field press the Center Select Key [Set] to turn the alarm On or Off. Scroll down to adjust the remaining settings, including Set Time, Repeat and Ringtone. - Page 32 Note: If the microSD card is locked, the phone will prompt you to unlock it.
-
Page 33: Settings
Settings Master Volume Set the master volume of the phone. Press the Center Select Key [Menu] > Settings & Tools > Master Volume. Adjust the volume by pressing the Directional Key left or right. Press the Center Select Key [Set] to save. To check the volume, press the Left Soft Key [Play]. -
Page 34: Digit Dial Readout
1. Press the Center Select Key [Menu] > Settings & Tools > Sounds Settings > Keypad Volume. 2. Press the Directional Key left or right to adjust the volume and press the Center Select Key [Set]. Digit Dial Readout Choose whether the numbers are read out when you dial. 1. -
Page 35: Display Themes
3. Select a picture and press the Left Soft Key [Preview] to view it. Press the Center Select Key to set it as wallpaper. Display Themes Choose different themes for the phone's menus. 1. Press the Center Select Key [Menu] > Settings & Tools > Display Settings > Display Themes. -
Page 36: Language
Reset Shortcut 1, 2, 3 or 4: Reset the selected shortcut. Reset My Shortcuts: Reset all shortcuts to default. Using My Shortcuts 1. Press the Directional Key right in the home screen to open the My Shortcuts menu. 2. -
Page 37: Global Data Settings
3. Select Edit Phone Code and press the Center Select Key. 4. Enter the new code and press the Center Select Key. 5. Re-enter the new code for confirmation and press the Center Select Key. Phone Lock Setting Phone locking keeps your phone from unauthorized use. The use of your phone is restricted once the phone is locked, but you can still make emergency calls. -
Page 38: Auto Retry
1. Press the Center Select Key [Menu] > Settings & Tools > Call Settings > Answer Options. 2. Select from the following options and press the Center Select Key [Mark]. Any Key: Calls are answered when any key is pressed except the End/Power Key, Left and Right Soft Keys and Volume Keys. -
Page 39: Phone Memory
1. Press the Center Select Key [Menu] > Settings & Tools > Memory > Save Options. 2. Select Pictures or Sounds and press the Center Select Key. 3. Select Phone Memory or Card Memory and press the Center Select Key [Set]. Phone Memory View the phone memory usage information and manage the files stored in the phone. - Page 40 Icon Glossary: View the list of icons with a brief description. Operating System: View the information of the operating system.
-
Page 41: For Your Safety
Only use the battery for the system for which it is specified. Only use the battery with a charging system that has been qualified by ZTE. Use of an unqualified battery or charger may present a risk of fire, explosion, leakage, or other hazard. -
Page 42: Aircraft Safety
Third party equipment: The use of third party equipment, cables, or accessories, not made or authorized by ZTE, may invalidate the warranty of your phone and also adversely affect the phone‟s safety and operation. Remember to make backup copies of all important data on your handset. -
Page 43: Road Safety
Third Party Equipment The use of third party equipment, cables or accessories, not made or authorized by ZTE, may invalidate the warranty of the handset and also adversely affect the handset‟s operation. For example, use only the ZTE charger supplied with the handset. -
Page 44: Emergency Services
The FCC has granted an Equipment Authorization for this model phone with all reported SAR levels evaluated as in compliance with the FCC RF exposure guidelines. SAR information on this model phone is on file with the FCC and can be found under the Display Grant section of http://www.fcc.gov/oet/ea/fccid after searching on FCC ID: Q78-ZTECF451 For body worn operation, this phone has been tested and meets the FCC RF exposure... -
Page 45: Copyright Notice
their mobile phones to assist hearing device users in finding phones that may be compatible with their hearing devices. Not all phones have been rated. Phones that have been rated have a label on the box. Your F451 has been tested for hearing aid device compatibility and has an M4 and/or T3 rating.