Table of Contents
Advertisement
INSTALLATION AND OPERATION MANUAL
MODEL
DST-1000
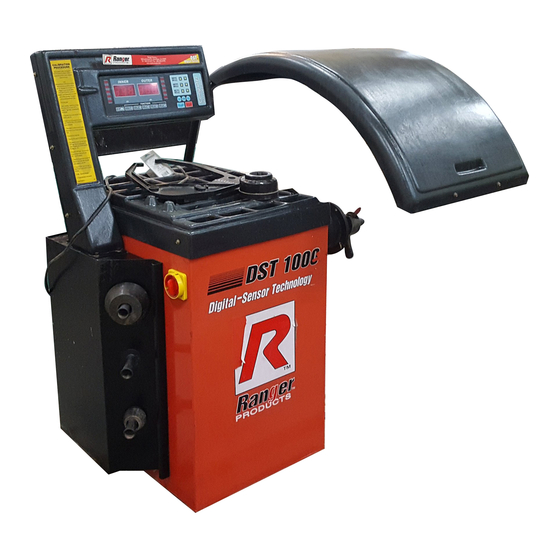
WHEEL BALANCER
FOR BALANCING
AUTOMOBILE
AND LIGHT TRUCK
TIRES / WHEELS
SHIPPING DAMAGE CLAIMS
When this equipment is shipped, title passes to the
purchaser
upon
Consequently, claims for the material damaged in
shipment must be made by the purchaser against the
transportation company at the time shipment is
received.
receipt
from
the
BE SAFE
Your new Ranger balancer was designed and
built with safety in mind. However, your overall
carrier.
safety can be increased by proper training and
thoughtful operation on the part of the operator.
DO NOT operate or repair this equipment
without reading this manual and the important
safety instructions shown inside.
Forward this manual to all operators.
Failure to operate this equipment as
directed may cause injury or death.
Keep this operation manual near the
machine at all times. Make sure that
ALL USERS read this manual .
1645 Lemonwood Dr.
Santa Paula, CA. 93060, USA
Tel: 1-805-933-9970
Fax: 1-805-933-9160
Revised 1/05/07
Advertisement
Table of Contents

Summary of Contents for Ranger DST-1000
- Page 1 Make sure that ALL USERS read this manual . BE SAFE SHIPPING DAMAGE CLAIMS Your new Ranger balancer was designed and When this equipment is shipped, title passes to the built with safety in mind. However, your overall purchaser...
-
Page 2: Table Of Contents
Optional Accessories ....6 or further information, contact: Specifications / Features ....6 Bend-Pak Inc. / Ranger Products Installation and Setup 1645 Lemonwood Dr., Mounting the Hood. -
Page 3: Definition Of Hazard Levels
This warranty is exclusive and in lieu of all other warranties expressed or implied. In no event shall Bend-Pak Inc. / Ranger Products be liable for special, con- sequential or incidental damages for the breach or delay in performance of the warranty. Bend-Pak Inc. / Ranger... -
Page 4: Safety Instructions/Cautions
IMPORTANT SAFETY INSTRUCTIONS READ BEFORE OPERATING UNIT Protective goggles, safety glasses, or a face shield Avoid dangerous environments. Do not use power must be worn by the operator. Care should be taken to tools or electrical equipment in damp or wet locations, or see that all eye and face safety precautions are followed expose them to rain and moisture. -
Page 5: Before You Begin
BEFORE YOU BEGIN Receiving The shipment should be thoroughly inspected as soon as it is received. The signed bill of lading is acknowledgement, by the carrier, of receipt in good condition of the shipment. If any of the goods called for on the bill of lading are shorted or damaged, do not accept them until the carrier makes a notation of the shorted or damaged goods on the freight bill. -
Page 6: Standard Accessories
Although it is not required, it helps to anchor the balancer to Technical Data / Features / Specifications the floor using concrete anchors through the holes Voltage ....110/220V 50/60HZ provided. -
Page 7: Mounting The Control Tower
4. Slide the hood assembly over the bracket axle then 4. Carefully connect the wire ribbons together making sure secure in place using the 3/8” allen bolt and washer. the snap connector is tightly fastened. (Note: The snap connector may be installed one way only. Do not force together. -
Page 8: Balancer Overview
NOTE: Disregard a short spin cycle with Err - 2 - displayed By using the WHEEL CALIPERS, the wheel width or the “b” on the control panel during this initial testing. MEASUREMENT tells the computer the location of the OUTER plane of the wheel for Dynamic and/or Alloy balancing. -
Page 9: Special Function Keys Fun Button Operation
SELECTING WEIGHT POSITIONS SELF-CALIBRATION PROCEDURE FOR DIFFERENT WHEEL TYPES The CAL button is used for self-calibration. Since this balancer is a precision machine Prior to balancing, a specific FUNCTION must it is required that you perform periodic be chosen for each particular wheel. The calibrations to assure its accuracy. -
Page 10: Gram / Ounce Selection
GRAM / OUNCE SELECTION MOUNTING WHEELS Select the most appropriate mounting method for the wheel This machine is capable of registering GRAM or OUNCE you are balancing. Using the proper method ensures secure readings. The setting for either GRAM or OUNCE will be mounting, accurate displays and safe balancer operation. -
Page 11: Front Cone Mounting
Front Cone Mounting A wheel should be centered by the outer side of the hub only when the inner surface will not provide an accurate surface to center on. 1. Select the cone that best fits the center hole in the wheel. 2. -
Page 12: Imputing Wheel Offset
WHEEL DATA KEY BOARD b - Wheel Width This is the width of the wheel at the inner edges. This distance is measured with the calipers. To enter Wheel Width data refer to the instructions below. 1. Position the calipers over the wheel and touch the tips against the wheel edges. -
Page 13: Spin Mode / Dynamic, Al1, Al3, Al4
Spin Mode / DYNAMIC, AL1, AL3, AL4 6. After the INNER weight is properly installed, turn the 1. Once the correct wheel data and FUNCTION have been wheel by hand until the weight position indicator lights on programmed, lower the hood to begin the spin mode. the side marked OUTER are fully illuminated. -
Page 14: Rechecking The Balance
STOP BUTTON 2. After the hood is lowered, or the START button is depressed, the wheel will spin for approximately six seconds then stop automatically. The STOP button IS NOT an emergency- stop button. It will not immediately shut down 3. -
Page 15: Maintenance And Calibration Preventative Maintenance
PARAMETER SETTINGS 4.To adjust the setting, use the “B” Up or Down buttons. BE CAREFUL: The following instructions are to view and/or reset the factory parameter settings only. If not followed in-I correctly the balancer will malfunction and/or instruct you to 5. - Page 16 _______________________________________________ MAINTENANCE _______________________________________________ DO NOT use harsh solvents to clean display or control _______________________________________________ board. _______________________________________________ _______________________________________________ NEVER use compressed air or water to clean any component of balancer. _______________________________________________ _______________________________________________ NEVER use a hammer to tighten or loosen the hub-nut. _______________________________________________ _______________________________________________ DAILY...
- Page 20 For Parts Or Service Contact: BendPak Inc. / Ranger Products 1645 Lemonwood Dr. Santa Paula, CA 93060 Tel: 1-805-933-9970 Fax: 1-805-933-9160 www.bendpak.com www.rangerproducts.com...