Advertisement
Advertisement
Table of Contents

Summary of Contents for DOD rubberneck
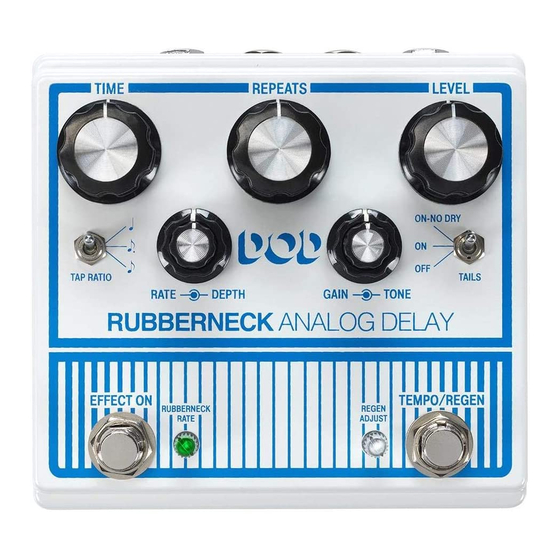
- Page 2 FS3X Footswitch to be connected for hands-free control of ® Rubbernecking, Modulation on/off, and Tap Tempo/Regen. The Rubberneck Analog Delay pedal is all you need for that truly classic analog delay sound, with modern feature enhancements to transport your delay effects into the future. FEATURES •...
-
Page 3: Quick Start
Press and hold the EFFECT ON footswitch to enable ‘Rubbernecking’ , a feature where the delay time is stretched or compressed in time. This can create ‘dive bomb’ or ‘chipmunk’-like delay stabs during a performance. Use the RUBBERNECK RATE control to adjust the attack/release of the delay stretching. • Repeats Oscillation Press and hold the TEMPO/REGEN footswitch to momentarily enable the REGEN ADJUST control. - Page 4 This is accomplished by shortening or lengthening the delay time at a variable rate. Adjusting the RUBBERNECK RATE pot will increase or decrease the time it takes to reach the full range of the stretched sound. The first (left) half of the control sets the time to stretch (divebomb) the delay signal and the second (right) half of the control sets the rate to compress the delay time.
- Page 5 TAP RATIO Switch Selects the ratio of tapped-in tempos to the delay time that is produced. There are three settings: ♩ Quarter Note – Tap interval selects the delay time in a 1:1 ratio. • ♪ Dotted Eighth Note – Provides a triplet feel when quarter notes are played. •...
- Page 6 TEMPO / REGEN footswitch is held. The REGEN ADJUST pot is a clear backlit potentiometer with a white LED underneath. The LED under the pot will blink at the delay time set by the TIME knob or by tapping in the tempo using the TEMPO/ REGEN footswitch.
- Page 7 Rubbernecking, Modulation on/off, and Tap Tempo/Regen. See ‘Using an External Footswitch’ on page 9 for more information. Power Jack Connect a Harman PS0913DC 9VDC or equivalent power adapter here. Rubberneck does not run on a battery and requires a power adapter for operation.
-
Page 8: Making Connections / Applying Power
MAKING CONNECTIONS / APPLYING POWER 1. Turn down the amplifier’s master volume control. 2. Make all connections to the Rubberneck as shown in ‘Connection Diagrams’ on page 8. 3. Connect the appropriate HARMAN power supply (sold separately) to the POWER input connector and connect the other end to an available AC outlet. -
Page 9: Connection Diagrams
CONNECTION DIAGRAMS Amplifier In-Line Setup HARMAN Power Supply (Sold Separately) OUT (RING/RETURN) IN (TIP/SEND) Feedback Path E ects Optional Use only unbalanced instrument cables for audio connections. Amplifier Effects Loop Setup HARMAN FX Return Power Supply (Sold Separately) FX Send Use only unbalanced instrument cables for audio connections. -
Page 10: Using An External Footswitch
Tap Tempo and Regen when using a third party momentary footswitch (latching footswitches will not work). When using a third party momentary footswitch with a TS cable, it must first be connected to the Rubberneck before applying power to allow the Rubberneck to detect it and function correctly. -
Page 11: Example Settings
EXAMPLE SETTINGS Try these settings to get started. Rockabilly Mod Delay Dirty Repeats Vibrato Echo Delay Bender Runaway (Press and hold EFFECT ON Footswitch) (Press and hold TEMPO/REGEN Footswitch) - Page 12 SPECIFICATIONS: Controls Time, Repeats, Level, Speed, Depth, Tone, Gain, Tap Ratio, Tails On/Off, Effect On/Off / Rubbernecking, Rubberneck Rate, Regen Adjust, Tempo/Regen Input 1/4” TS Unbalanced Effect off: 500 kΩ with Tails switch on Effect off: True hardwire bypass with Tails switch off Output 1/4”...


