Table of Contents
Advertisement
Atwood Mobile Products LLC
1120 North Main Street Elkhart, IN 46614-3203
USA & Canada 1-866-869-3118
Internet: http://www.atwoodmobile.com
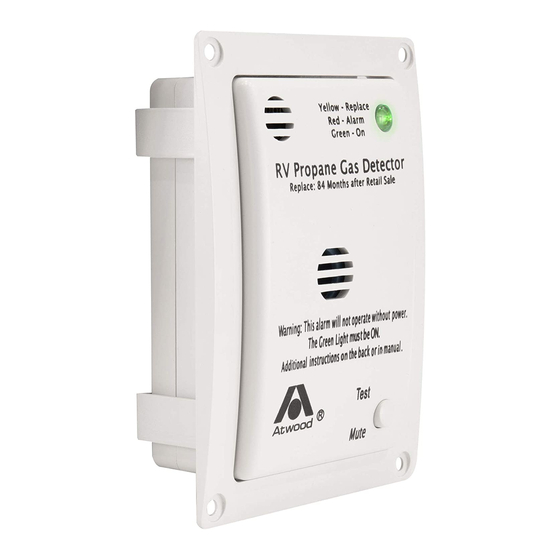
Model LP
USER'S MANUAL AND INSTALLATION
INSTRUCTIONS
TESTED TO UL1484
For questions concerning your Alarm, please call our
Customer Service at 1-866-869-3118
Please have the following information ready when calling:
Alarm Model Number (located on the back of alarm):
Alarm Assembly Number (located on the back of alarm):
Date of Manufactured (located on the bottom of alarm):
Date of Purchase:
Where Purchased:
P/N 30100 Rev D 4/15
Advertisement
Table of Contents

Summary of Contents for Atwood 36719
- Page 1 Atwood Mobile Products LLC 1120 North Main Street Elkhart, IN 46614-3203 USA & Canada 1-866-869-3118 Internet: http://www.atwoodmobile.com Model LP USER’S MANUAL AND INSTALLATION INSTRUCTIONS TESTED TO UL1484 For questions concerning your Alarm, please call our Customer Service at 1-866-869-3118 Please have the following information ready when calling:...
-
Page 2: Table Of Contents
Liquefied Petroleum Gas Awareness ..........3 ACTIVE ALARM PROCEDURES ............4 TESTING ....................6 MODEL DESCRIPTION ..............7 SPECIFICATIONS ................7 POWER CONSERVATION MODE ..............8 ALARM OPERATION .................8 Power Off Mode ....................8 Normal Stand-by Mode ..................8 Alarm Mode ......................9 Test Mode ......................9 Silence / Stabilization Mode................ -
Page 3: Liquefied Petroleum Gas Awareness
READ ENTIRE MANUAL BEFORE USING THIS ALARM Your new Atwood Propane (LP) alarm is a sophisticated instrument that has been carefully designed and tested to detect LP build up in a residential or recreation vehicle environment. Liquefied Petroleum (LP or Propane) gas can cause hazardous conditions when found in high concentrations. -
Page 4: Active Alarm Procedures
CAUTION This alarm will only indicate the presence of gas at the sensor. Gases may be present in other areas. Read this entire manual before using the alarm. ACTIVE ALARM PROCEDURES IF ALARM SIGNAL SOUNDS: Operate Test/Reset button; 1. Immediately move to fresh air-outdoors or by an open door/window. Do a head count to check that all persons are accounted for: Do not re-enter the premises move away from the open door/window until the emergency services responders arrive, the premises have been aired... - Page 5 sure that motor vehicles are not, or have not been operating in an enclosed area or in close proximity of other vehicles. Note: two self-adhesive emergency contact labels are provided. The user must add telephone numbers for the local emergency service provider and for a qualified service technician.
-
Page 6: Testing
vehicle. Do not start vehicle’s engine or electric generator. Contact nearest gas supplier or qualified Service Technician for repairs. If you cannot reach a gas supplier or qualified Service Technician, contact the nearest fire department. Do not run on gas supply until gas leak(s) have been repaired. TESTING Note: Unit must be powered for three minutes before test can be performed. -
Page 7: Model Description
MODEL DESCRIPTION LP=Propane D=12Vdc A=120Vac O=OEM R=Retail OEM Package Retail Package Model Part Color Model Part Color LP_DOW 36719 White LP_DRW 36720 White LP_DOB 31013 Black LP_DRB 31014 Black LP_AOW 36522 White LP_ARW 36523 White LP_AOB 31005 Black LP_ARB 31006... -
Page 8: Power Conservation Mode
7 years ( powered operation) Standards ETL tested to UL 1484 Residential and RV For Service and Information Contact Atwood Mobile Products LLC, 1874 South Pioneer Road Salt Lake City, Utah 84104-4226 Consumer Service Department, 1120 North Main, Elkhart, IN 46514 USA. Phone: 866-869-3118... -
Page 9: Alarm Mode
Alarm Mode This mode indicates that a gas concentration has achieved unsafe levels. In this mode the LED will be Red. The LP concentration is unsafe the Propane indicator will be lit. In this mode the audible indicator will signal an alarm, and the Reset function of the Test/Reset button will be active. -
Page 10: Functions
The Detector will operate in end-of-life mode after the Detector has been powered for 7 years +/- 128 days. This represents the operating life of the sensor used to detect LP gas. After 7 years, the sensor is no longer reliable and the Detector must be replaced. -
Page 11: Installation Instructions
IMPORTANT – If this alarm does not test properly return it immediately for repair or replacement. A flashing LED blinks once every second An audible alarm in “fault state” chirps once every 30 seconds An audible alarm in “alarm state” chirps 4 times every 5 seconds CAUTION Installation should be performed by a qualified technician... - Page 12 ground fault circuit. Usually you will find more than one suitable location that will also provide ease of viewing and connection to power. Never use detergents or solvents to clean the alarm, chemicals can permanently damage or temporarily contaminate the sensor. ...
-
Page 13: Wiring
WIRING Before routing the wires, disconnect the 12 VDC power supply to avoid shorting. Make sure that the power connections are made to a properly fused circuit (15 amp maximum) 1 amp fuse is recommended for single or multiple detector installation. Can be fused through a distribution panel or power supply box. -
Page 14: Flush Mounting
FLUSH MOUNTING A detachable mounting bracket allows the unit to be mounted as a flush installation supplied with the unit. Mounting brackets attached to the surface where the alarm is to be mounted with four screws, see instructions below. ... -
Page 15: Surface Mounting
Mount the unit using the 4 screws provided one in each corner of the flange. SURFACE MOUNTING 1. Mark on the desired mounting surface a box approximately 2-1/2” inch wide by 3-3/8” high and draw an X corner to corner to find center and cut a 1”... -
Page 16: Operating Instructions
outlet. Slide the adapter through the mounting box before screwing the box onto the wall. 2. Follow the steps outlined above for either surface or flush mounting of the alarm. 3. Adapter wire is run underneath the mounting bracket when installing a flush mounted alarm. -
Page 17: Power Failure
8 VDC. The Atwood Detector is designed to provide the user with a Low Voltage Warning before reaching that level and to provide additional distinct, clear warnings and alarms after the 8 VDC level is reached. -
Page 18: Warranty
This warranty extends to the original owner of the product only and is subject to the following conditions: For two years from the date of purchase, Atwood will repair or replace any part defective in material or workmanship. This warranty includes reasonable labor charges required to remove and replace the part. - Page 19 Atwood parts are the owner’s responsibility. Atwood does not assume responsibility for any loss of use of vehicle, loss of time, inconvenience, expense for gasoline, telephone, travel, lodging, loss or damage to personal property or revenues. Some...
- Page 20 90 day warranty. This includes the part at no charge and reasonable labor charges to replace it. This Gas Detector is designed for use in recreation vehicles for warning of LP gas. Any other use, unless authorized in writing by the Atwood Engineering Department, voids this warranty.