Table of Contents
Advertisement
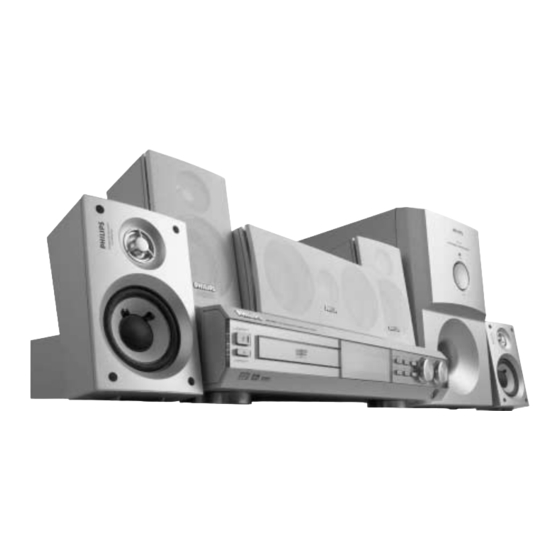
DVD VIDEO DIGITAL SURROUND SYSTEM
MX-3600D • MX-3700D
Read this manual first!
Congratulations on purchasing this Philips product.
We've included everything you need to get started.
If you have any problems, Philips Representatives can
help you get the most from your new product by explaining:
• Hookups,
• First Time Setup, and
• Feature Operation.
Do not attempt to return this product to the store.
Thank you for making Philips a part of your home!
pg 01-25/MX36-37xx/37-Eng
For fast help, call us first!
1-800-531-0039
1
DVD HOME
DVD HOME
CINEMA
CINEMA
SYSTEM
SYSTEM
Return
your Warranty
Registration Card
within 10 days
4/18/02, 5:55 PM
1
Advertisement
Table of Contents

Related Manuals for Philips MX-3700D


Summary of Contents for Philips MX-3700D
- Page 1 • First Time Setup, and • Feature Operation. Do not attempt to return this product to the store. For fast help, call us first! Thank you for making Philips a part of your home! pg 01-25/MX36-37xx/37-Eng 1-800-531-0039 4/18/02, 5:55 PM...
- Page 2 And most importantly you can count on our uncompromising commitment to your total satisfaction. All of this is our way of saying welcome – and thanks for investing in a Philips product. Sincerely, Lawrence J. Blanford President and Chief Executive Officer P.S.
- Page 3 G e t t i n g s t a r t e d ... Accessories POWERED SUBWOOFER STANDBY VOLUME (2x) Connecting to TV, antennas, optional components CD/Tape Recorder (for analog recording - example only) QS-MX36-37xx/37-Eng (2x) CD Recorder Pr/Cr (for digital recording - example only) Pb/Cb Pr/Cr Pb/Cb MX-3600D MX-3700D 4/18/02, 6:00 PM...
-
Page 4: Positioning The Speakers And Subwoofer
Connecting to speakers and subwoofer front speaker POWERED SUBWOOFER STANDBY VOLUME subwoofer Speakers Front Left (FL) Front Right (FR) Center (C) Surround Left (SL) Surround Right (SR) Positioning the speakers and subwoofer Printed in China QS-MX36-37xx/37-Eng center speaker Pr/Cr Pb/Cb rear rear speaker... - Page 5 Canada English: This digital apparatus does not exceed the Class B limits for radio noise emissions from digital apparatus as set out in the Radio Interference Regulations of the Canadian Department of Communications. Français: Cet appareil numérique n'emet pas de bruits radioélectriques dépassant les limites applicables aux appareils numériques de Class B prescrites dans le Règlement sur le Brouillage...
-
Page 6: Important Safety Instructions
IMPORTANT SAFETY INSTRUCTIONS Read these instructions. Keep these instructions. Heed all warnings. Follow all instructions. Do not use this apparatus near water. Clean only with dry cloth. Do not block any ventilation openings. Install in accordance with the manufacturer´s instructions. Do not install near any heat sources such as radiators, heat registers, stoves, or other apparatus (including amplifiers) that produce heat. -
Page 7: Table Of Contents
Introduction and General Information Features ... 6 Discs for playback ... 6 Player zone Supplied accessories ... 6 Environmental information... 6 Installation ... 6 Maintenance ... 6 Functional Overview Front and Rear panels ... 7 Remote Control ... 8 Connections Connecting antennas ... -
Page 8: Introduction And General Information
Introduction and General Information Features Your complete 7-piece 350-Watt (MX-3700D) / 300-WATT (MX-3600D) DVD Digital Home Cinema System creates the same dynamic sound qualities that you find in full-fledged cinemas and incorporates some of the best features in home theater technology. -
Page 9: Functional Overview
Front and Rear panels DVD VIDEO DIGITAL SURROUND SYSTEM STANDBY-ON OPEN•CLOSE STANDBY ON y – to switch between power on and standby modes. OPEN/CLOSE 0 (in Disc mode only) – to open or close the disc tray. Disc Tray Display screen –... -
Page 10: Remote Control
(surround) speakers’ level. CENTER +/- – to adjust the center speaker’s level. TV VOL +/- – to adjust Philips television’s volume level. SLEEP – to set the sleep (auto-off) timer function. – to select different brightness for the display screen. -
Page 11: Connections
POWERED SUBWOOFER STANDBY VOLUME IMPORTANT! – Before connecting the AC power cord to the wall outlet, ensure that all other connections have been made. – Never make or change any connections with the power switched on. – The type plate is located at the rear or bottom of the system. -
Page 12: Connecting The Speakers
Connecting the speakers Connect the supplied speaker systems using the supplied speaker cables by matching the colors of the jacks and speaker cables. Press up (or down) the speaker’s jack and fully insert the stripped portion of the speaker cable into the jack, then release. -
Page 13: Preparations
Inserting batteries into the remote control Open the battery compartment. Place the batteries in the compartment with the correct polarity as indicated by “+“ and “-“ symbols. Close the cover. CAUTION! – Remove batteries if they are exhausted or will not be used for a long time. -
Page 14: Changing The Volume Level
Changing the volume level You can change the speakers’ sound distribution to suit your surround sound needs. Press CENTER +/- to adjust the level of the center speaker. “CNT +XX DB” is displayed. Press REAR +/- to adjust the level of the rear surround speakers. -
Page 15: Setting The Sound
16:9 (Wide screen) 4:3 LB (Letter Box) 4:3 PS (Pan Scan) Note: – If your DVD is not encoded to allow you to change the aspect ratio, TV shape cannot be changed. – TV System Allows you to select the color system matching the connected TV set. -
Page 16: Setting The Language
Setting the language – Audio – Subtitle – Disc Menu This is to select the audio language, subtitle language and the language used on TV screen menus or DVD menus that will always be used for every disc to be played back. The default setting is English. -
Page 17: Basic Functions
Selecting the surround sound mode IMPORTANT! – For proper surround sound, make sure you have followed the “Connections” and “Preparations” procedures fully. – The center and surround speakers only operate when the system is set to surround sound mode and the source material being played is recorded or broadcast in Dolby Digital, DTS or Dolby Pro Logic surround sound. -
Page 18: Volume Control
Adjust VOLUME button (or press VOL +/-) to increase or decrease the volume level. “VOL XX” is displayed. “XX”denotes the volume level. For Philips TVs only Press TV VOL +/- on the remote control to adjust the TV’s volume level. -
Page 19: Discs Information
Discs information DVD-VIDEO DISC TITLE 1 CHAPTER 1 CHAPTER 2 CHAPTER 1 DVD video discs may have one or more Titles, and each Title may have one or more Chapters. Playback stops at the end of each Title. VIDEO CD TRACK 1 INDEX 1 INDEX 2... -
Page 20: Repeat Play
Repeat play You can only select the repeat play mode during playback. For DVD - Repeat chapter/title/disc Press REPEAT repeatedly to select the following : “R-1” – repeat chapter. “R-A” – repeat title/disc. For VCD/CD/MP3-CD - Repeat track/disc Press REPEAT repeatedly to select the following : “R-1”... -
Page 21: Changing Sound Track Language
Changing sound track language This operation works only on DVDs with multiple soundtrack language. from the menu bar and press 4 key to select Select the desired language. For VCD : Press 4 to select the desired audio channels for sound : LEFT VOCAL ™... -
Page 22: Zooming In
Zooming in This function allows you to enlarge the picture on the TV screen and to pan through the enlarged image. from the menu bar and press 4 key repeatedly Select to select a zoom factor : x1.5 ™ x2.0 ™ x4.0 ™ OFF. To pan through the enlarged image, press OK to confirm the zoom selection and use 1 2 34 keys to move the zoomed picture left, right, up and down. -
Page 23: Special Mp3-Cd Features
Special MP3-CD features – JPEG format – Max. 12 characters – Max. nested directory is 7 levels – The max. album number is 32 – Supported VBR bit-rate – Supported sampling frequencies for MP3 disc are : 32 kHz, 44.1 kHz, 48 kHz –... -
Page 24: Other Functions
Other Functions Tuning to radio stations Press STANDBY ON to switch on the last selected source. Adjust SOURCE (or press TUNER) to select TUNER mode. Press TUNER again to select the desired band : FM or AM. Press and hold S or T until the frequency indication starts to change, then release. -
Page 25: Specifications
AMPLIFIER SECTION Output power - Stereo mode (DIN) ... 2 x 50 W - Surround mode (1 kHz) ... 50 W RMS/channel Total Harmonic Distortion ... 10% at rated power (1 kHz) Frequency Response ... 180 Hz – 14 kHz / ±1 dB Signal-to-Noise Ratio ... -
Page 26: Troubleshooting
Troubleshooting WARNING! Under no circumstances should you try to repair the system yourself, as this will invalidate the warranty. Do not open the system as there is a risk of electric shock. If a fault occurs, first check the points listed below before taking the system for repair. If you are unable to solve a problem by following these hints, consult your dealer or service center. -
Page 27: Limited Warranty
This warranty gives you specific legal rights. You may have other rights which vary from state/province to state/province. Philips Service Solutions Group, P.O. Box 2976, Longview,Texas 75606, USA, (903) 242-4800 pg 01-25/MX36-37xx/37-Eng LIMITED WARRANTY...