Philips LX7000SA Manual
Philips home theater system model number: lx7000sa
Hide thumbs
Also See for LX7000SA:
- Service manual (66 pages) ,
- User manual (31 pages) ,
- Manual (31 pages)
Table of Contents
Advertisement
Quick Links
DVD VIDEO DIGITAL SURROUND SYSTEM
LX8000SA • LX7000SA
Read this manual first!
Congratulations on purchasing this Philips product.
We've included everything you need to get started.
If you have any problems, Philips Representatives can
help you get the most from your new product by explaining:
• Hookups,
• First Time Setup, and
• Feature Operation.
Do not attempt to return this product to the store.
Thank you for making Philips a part of your home!
For fast help, call us first!
1-800-531-0039
DVD HOME
DVD HOME
CINEMA
CINEMA
SYSTEM
SYSTEM
Return
your Warranty
Registration Card
within 10 days
LX7000SA
LX8000SA
1
Advertisement
Table of Contents

Related Manuals for Philips LX7000SA


Summary of Contents for Philips LX7000SA
- Page 1 • First Time Setup, and • Feature Operation. Do not attempt to return this product to the store. For fast help, call us first! Thank you for making Philips a part of your home! 1-800-531-0039 DVD HOME DVD HOME CINEMA...
-
Page 2: Connecting Speaker Cable And Setup
Hook Up Hook Up Guide Guide 8000SA 7000SA • LX Connecting Speaker Cable 0 . 3 1 " ( 8 m front right Center SPEAKER SYSTEMS (8 ) FRONT CENTER SURROUND Surround right Recommended Speaker Setup Center Speaker Front Subwoofer Speaker (Left) VIEWING AREA... -
Page 3: Playing A Disc
VOLUME SENSOR POWER ON/OFF DISC SYSTEM MENU 1 2 3 4 Connect ... Select input source from the remote control LX7000SA / LX8000SA CD Recorder AUX/DI Press to select "DI". DIGITAL "DIGITAL OUT" VCR / AUX/DI Laser disc player Press to select "AUX". - Page 4 And most importantly you can count on our uncompromising commitment to your total satisfaction. All of this is our way of saying welcome – and thanks for investing in a Philips product. Sincerely, Lawrence J. Blanford President and Chief Executive Officer P.S.
- Page 5 Canada English: This digital apparatus does not exceed the Class B limits for radio noise emissions from digital apparatus as set out in the Radio Interference Regulations of the Canadian Department of Communications. Français: Cet appareil numérique n'emet pas de bruits radioélectriques dépassant les limites applicables aux appareils numériques de Class B prescrites dans le Règlement sur le Brouillage...
-
Page 6: Important Safety Instructions
IMPORTANT SAFETY INSTRUCTIONS Read these instructions. Keep these instructions. Heed all warnings. Follow all instructions. Do not use this apparatus near water. Clean only with dry cloth. Do not block any ventilation openings. Install in accordance with the manufacturer´s instructions. Do not install near any heat sources such as radiators, heat registers, stoves, or other apparatus (including amplifiers) that produce heat. -
Page 7: Table Of Contents
Introduction and General Information Features ... 6 Discs for playback ... 6 Player zone Supplied accessories ... 6 Environmental information ... 6 Installation ... 6 Maintenance ... 6 Functional Overview Top and Front panels ... 7 Remote Control ... 8 Connections Connecting antennas ... -
Page 8: Introduction And General Information
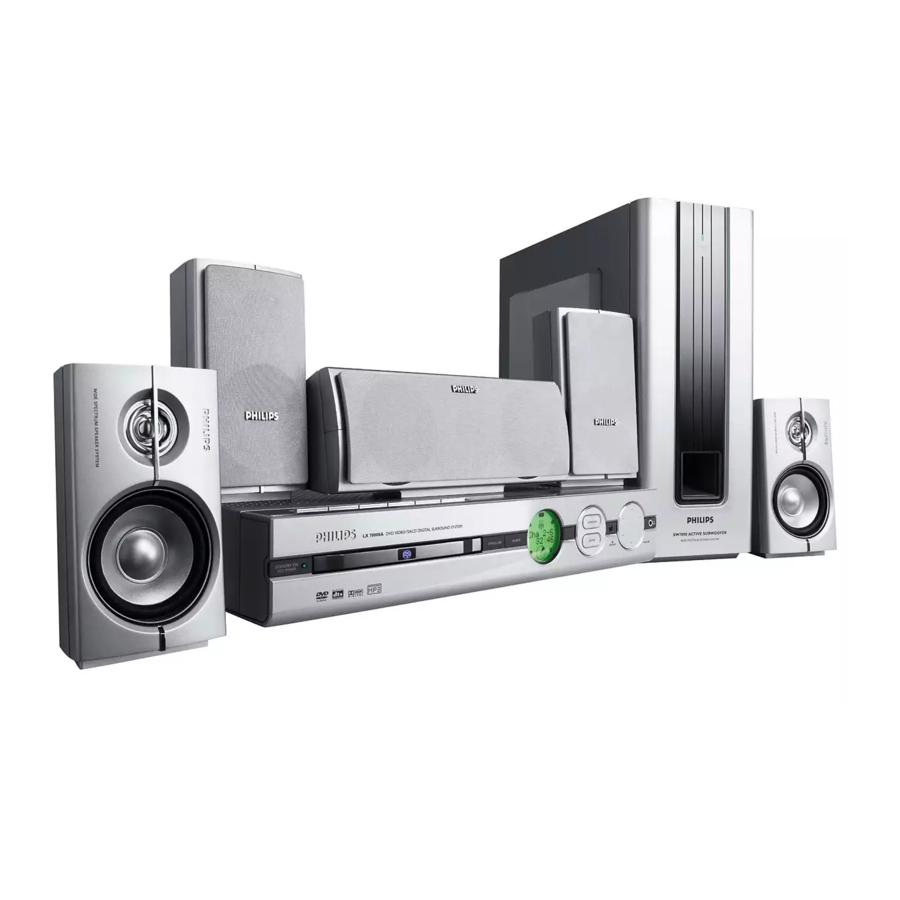
Introduction and General Information Features Your complete 7-piece 275-Watt (LX8000SA) or 200-Watt (LX7000SA) DVD Digital Home Cinema System creates the same dynamic sound qualities that you find in full-fledged cinemas and incorporates some of the best features in home theater technology. -
Page 9: Functional Overview
– in Clock mode, to set the hours and minutes. – in TV/AV mode, to change Philips TV’s channel (on the remote control only). Ç STOP / CLEAR – in Disc mode, to stop playback or to clear a program. -
Page 10: Remote Control
( § CENTER +/- ( ∞ – to adjust the center speaker’s volume level. TV VOL +/- ( ≤ – to adjust Philips television’s volume level. ( £ ™ SLEEP ™ – to set the sleep (auto-off) timer function. £... -
Page 11: Connections
SPEAKER SYSTEMS (8 ) FRONT CENTER SURROUND IMPORTANT! – Before connecting the AC power cord to the wall outlet, ensure that all other connections have been made. – Never make or change any connections with the power switched on. – The type plate is located at the bottom of the system. -
Page 12: Connecting The Speakers
Connecting the speakers Connect the supplied speaker systems using the supplied speaker cables by matching the colors of the jacks and speaker cables. Press up (or down) the clip on the speaker’s jack and fully insert the stripped portion of the speaker cable into the jack, then release the clip. -
Page 13: Connecting Additional Equipment
– The CVBS jack is usually yellow and might be labeled Video In, Composite or Baseband. Connecting additional equipment You can connect other audio and audio/visual equipment to the DVD system in order to use the Home Cinema Audio System’s surround sound capabilities. IMPORTANT! –... -
Page 14: Preparations
Preparations Setting up the surround sound system You must connect all the speakers and set up the system properly in order to enjoy the Digital Cinema experience at home (refer to “Connections - Connecting the speakers”). You will have the feeling of being in the middle of the action because sound is coming from everywhere around you. -
Page 15: Inserting Batteries Into The Remote Control
Inserting batteries into the remote control Open the battery compar tment. Place the batteries in the compar tment with the correct polarity as indicated by “+“ and “-“ symbols. Close the cover. CAUTION! – Remove batteries if they are exhausted or will not be used for a long time. -
Page 16: System Setup (Dvd)
S y s t e m S e t u p T h e t e m s y s s e t r i e c a r o u t c u s t o m i z e t h e D V D s y s t e m... - Page 17 ö D i g i t C r y s t a l C l e a r ( o n P r o g r e s s i v e S c a n V i d e o t h e n p r e e x i...
- Page 18 ö Speakers A l l o w s y o u s e l e c t t i m e a n d t e s t t h e Y o u c a n a l s a d j u s t h e S U B W...
-
Page 19: Access Control
Child lock Parental level Change country Change code IMPORTANT! – Philips denies any liability associated with unintended watching of discs. Make sure your discs play according to your Parental Controls settings before you allow children access to the player. – Some DVDs are not encoded with a rating though the movie rating is printed on the disc jacket. -
Page 20: Parental Level (Dvd)
Parental level (DVD) (only available in region 1 player) This feature lets you set a playback limitation level. Some DVDs may have a parental level assigned to the complete disc or to certain scenes on the disc. The rating levels are from 1 to 8 and are country dependent. -
Page 21: Basic Functions
Volume control Adjust VOLUME button (or press VOL +/-) to increase or decrease the volume level. For Philips TVs only Press TV VOL +/- on the remote control to adjust the TV’s volume level. To listen through the headphones Connect the headphones plug to the n socket at the front of the system. -
Page 22: Discs Information
Operations Discs information DVD-VIDEO DISC TITLE 1 CHAPTER 1 CHAPTER 2 CHAPTER 1 DVD video discs may have one or more Titles, and each Title may have one or more Chapters. TRACK 2 INDEX 1 INDEX 2 Video CDs may have one or more Tracks, and each Track may have one or more Indexes. -
Page 23: Continue Playback From The Last Stop Point (Dvd/Vcd)
Continue playback from the last stop point (DVD/VCD) Press RESUME to resume playback from the point at which it stopped (it is only applicable for the last five DVD/VCD played). To cancel the resume mode and start playback from the beginning In stop mode, press Ç. -
Page 24: Special Dvd/Vcd Features
Special DVD/VCD features A number of operations can be carried out directly via the multiple menu bars on the TV screen without interrupting disc playback (except for Setup Menu ( Setup (DVD)”). Access to the menu bar Press SYSTEM MENU. The menu bar will be displayed across the top of the TV screen. -
Page 25: Searching For A Particular Passage
Searching for a particular passage in the menu bar and press 4. Move to Use 1 2 to select the required search speed. (1 = reverse) –32, –8 , –4 (2 = forward) +4, +8, +32 To resume normal play, press É Å . Note: –... -
Page 26: Favorite Track Selection - Fts
Favorite Track Selection - FTS – The FTS function allows you to store your favorite titles and chapters (DVD) and favorite tracks and indexes (VCD) for a particular disc in the system memory. – FTS program can contain up to 20 items (titles, chapters etc.). -
Page 27: Special Vcd/Svcd Features
Special VCD/SVCD features Playback Control (PBC) PBC playback allows you to play Video CDs interactively, following the menu on the display. To set PBC on/off While playback is stopped, press DISC MENU to toggle between “PBC ON” and “PBC OFF”. When playing a disc with PBC, If PBC is set to Off Once the disc is loaded in the disc tray, it will start playback... -
Page 28: Radio Reception
Radio Reception Plug and Play Plug and Play allows you to store all available radio stations automatically. First time setup/power up When you turn on the power, "AUTO INSTALL - PRESS PLAY" is displayed. PressÉ Å on the system to start installation. "INSTALL TUNER"... -
Page 29: Listening To Preset Radio Stations
Radio Reception Listening to preset radio stations In tuner mode, press 1 or 2 or use the numeric keypad (0-9) on the remote control to select the desired preset number. The preset number, radio frequency, and waveband are displayed. Erasing a preset radio station Press 1 or 2 or use the numeric keypad (0-9) on the remote control to select the preset radio station to be erased. -
Page 30: Timer Setting
Clock/Timer Timer setting The system can switch on to DISC or TUNER mode automatically at a preset time, serving as an alarm to wake you up. IMPORTANT! – Before setting the timer, ensure that the clock is set correctly. – The timer will always be switched on after it has been set. -
Page 31: Specifications
Output power - LX8000SA ... 5 x 35 W RMS ... 2 x 25 W FTC - LX7000SA ... 5 x 30 W RMS ... 2 x 25 W FTC Total Harmonic Distortion ... 10% at rated power (1 kHz) Frequency Response ... -
Page 32: Troubleshooting
If a fault occurs, first check the points listed below before taking the system for repair. If you are unable to solve a problem by following these hints, consult Philips service center. Problem No power. -
Page 33: Limited Warranty
TO GET WARRANTY SERVICE IN U.S.A., PUERTO RICO, OR U.S. VIRGIN ISLANDS... Take the product to a Philips factory service center (see enclosed list) or authorized service center for repair.When the product has been repaired, you must pick up the unit at the center. Centers may keep defective parts.