Table of Contents

Related Manuals for Motorola MBP667CONNECT


Summary of Contents for Motorola MBP667CONNECT
- Page 1 User’s Guide ® Digital Video Baby Monitor With Wi-Fi Internet Viewing Models: MBP667CONNECT, MBP667CONNECT-2, MBP667CONNECT-3, MBP667CONNECT-4 The features described in this User’s Guide are subject to modifications without prior notice.
- Page 2 Please retain your original dated sales receipt for your records. For warranty service of your Motorola product, you will need to provide a copy of your dated sales receipt to confirm warranty status. Registration is not required for warranty coverage.
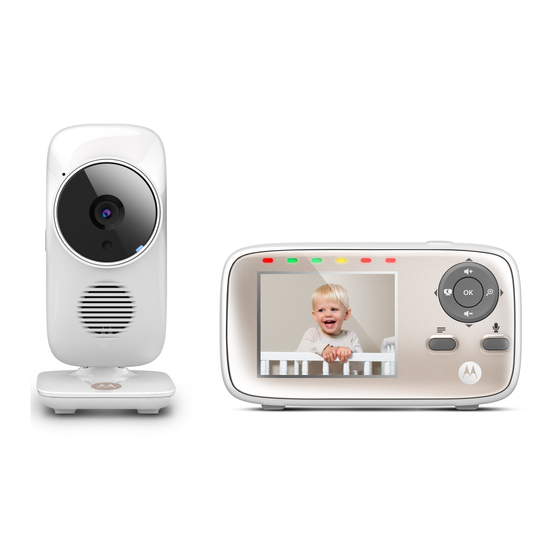
- Page 3 Overview of the Parent Unit Display (LCD screen) TALK button Sound Level indicators Press and hold to speak to your Show the sound level detected by baby. the Baby Unit - the louder the sound Power Adapter Socket detected, the more LEDs light up. Menu button M Power/Link indicator Press to open menu options.
- Page 4 Parent Unit menu icons Signal Level Indication (4 Levels) Night Vision Mode (Video also changes to Black/White) Battery Level Indication (4 Levels) Volume Level Control (5 Levels) Camera Control (scan, view, add, delete) Set Video On Timer (OFF, 5min, 30min, 60min) Brightness Level Control (5 Levels) Zoom Level Control (1X, 2X) Lullaby Control (5 Song Selection or OFF)
-
Page 5: Overview Of Baby Unit
Overview of Your Baby Unit POWER ON/OFF switch PAIR button Slide to turn the Baby Unit on or off. Press and hold to pair with the Microphone Parent Unit. Infrared LEDs (6) Power Adapter Socket Light Sensor (Night Vision Mode) Temperature Sensor Camera Lens Power/Link indicator... -
Page 6: Table Of Contents
Table of contents 1. Safety Instructions ..................7 2. Getting Started..................10 Baby Unit Power Supply................10 Parent Unit Battery Installation ..............10 Parent Unit Power Supply ................. 11 Registration (Pairing) ................12 3. Using the Baby Monitor................14 Setting Up....................14 Night Vision Mode .................. -
Page 7: Safety Instructions
1. Safety Instructions WARNING Strangulation Hazard: Children have STRANGLED in cords. Keep this cord out of the reach of children (more than 3ft (1m) away). Never use extension cords with AC Adapters. Only use the AC Adapters provided. Safety Instructions... - Page 8 CAMERA SET UP & USE: • Choose a location for the Baby Unit that will provide the best view of your baby in his/her crib. • Place the Baby Unit on a flat surface, such as a dresser, bureau or shelf, or mount the Baby Unit on a wall securely using the keyhole slots in the underside of the stand.
- Page 9 CAUTION There is a risk of explosion if the battery is replaced by an incorrect type. Dispose of used batteries according to the instructions. The Unit shall be setup and used so that parts of the user's body other than the hands are maintained at a distance of approximately 8 inches (20 cm) or more.
-
Page 10: Getting Started
2. Getting Started Baby Unit Power Supply ON/OFF switch 1. Connect the power adapter to an electrical outlet and insert the plug into the power socket on the back of the Baby Unit (Camera). 2. Slide the ON/OFF switch to the ON position. The power indicator LED will light up in blue. -
Page 11: Parent Unit Battery Installation
Parent Unit Battery Installation A rechargeable battery pack is supplied and should be installed and charged, so that the Parent Unit can be moved without losing the link and picture from the Baby Unit(s). Charge the battery in the Parent Unit before using it for the first time or when the Parent Unit indicates that the battery is low (flashes in red). -
Page 12: Registration (Pairing)
Parent Unit Power Supply 1. Insert the DC plug of the power adapter into the DC socket on the side of the Parent Unit. 2. Connect the other end of the power adapter to a suitable electrical outlet. The battery status indicator lights up in green. IMPORTANT Only use the supplied power adapter (5V DC / 1000mA) and battery pack. - Page 13 Desktop Stand of the Parent Unit Flip the stand on the back of the Parent Unit to set up the desktop stand. Getting Started...
-
Page 14: Using The Baby Monitor
3. Using the Baby Monitor Setting Up • Place the Baby Unit in a convenient location (e.g. on a table) and point the camera lens towards the area you want to monitor. • Adjust the Baby Unit’s camera angle by rotating it up, down, left and right until you are satisfied with the image that appears on the Parent Unit. -
Page 15: Parent Unit Menu Options
4. Parent Unit Menu Options Adjust Speaker Volume Volume 1 Volume 5 You can adjust the speaker volume from , or turn it off. Press + or - on the Parent Unit when it is in camera viewing mode. When the speaker volume is set to off, the screen displays LCD Brightness Level 1... -
Page 16: Monitor The Temperature
4.3.1 Set lullaby You can to play lullabies on the Baby Unit to comfort your baby. 1. Press M when the Parent Unit is in camera viewing mode. < 2. Press to scroll to 3. Press to choose your desired lullaby. 4. -
Page 17: Set Screen Off Time For The Parent Unit
Set Screen Off time for the Parent Unit You can set the screen off time for the Parent Unit after it is in idle mode for a specific time interval. 1. Press M when the Parent Unit is in camera viewing mode. <... -
Page 18: Multi-Camera Use
Multi-Camera Use You can pair up to 4 cameras with the Parent Unit. If more than one camera is paired with the Parent Unit, you can select which camera to view or set it in Patrol mode , where the Parent Unit automatically cycles through the paired cameras about every 15 seconds. -
Page 19: Wi-Fi ® Internet Viewing
® 5. Wi-Fi Internet Viewing Minimum System Requirements Web Portal ® • Windows ® • Mac OS 10.7 • Chrome™ 24 ® • Internet Explorer ® • Safari • Java™ 7 ® • Firefox 18.0 ® ® • Adobe Flash Player 15.0 Android™... -
Page 20: Getting Started - Connecting Devices
Getting Started - Connecting Devices How does it work? Access your Wi-Fi Router MBP667CONNECT Camera locally. View your Camera from any Camera compatible device remotely. Hubble Service When a user tries to access the Camera, the Hubble server will authenticate the user’s identity before it grants access to the Camera. -
Page 21: User Account And Camera Setup On Android™ Devices
Camera is ready for setup. 5.3.2 Download Hubble for Motorola Monitors App • Go to Google Play™ Store to search for "Hubble for Motorola Monitors". • Download "Hubble for Motorola Monitors" App from Google Play™ Store and install it on your Android™ device 5.3.3... - Page 22 5.3.4 Add the Camera to your account • Tap on the top right corner of the screen to add camera. (Picture A2) • The following setup instructions will appear on the screen. (Picture A3) • Plug in and switch on the camera, and wait for a couple of minutes for it to warm up.
- Page 23 • The following setup instructions will appear on the screen. (Picture A4) • Press and hold the PAIR button on the bottom left edge of the Camera Unit for 3 seconds. You will then hear a beep tone, followed by a voice prompt indicating that the Camera is ready for pairing.
- Page 24 ® • Select your Wi-Fi Network, enter your password and then tap Connect. (Pictures A7, A8) ® • It will take a few minutes for the Camera to connect to the Wi-Fi network before showing the connection status. (Pictures A9, A10) •...
-
Page 25: User Account And Camera Setup On Iphone /Ipad
5.4.2 Download Hubble for Motorola Monitors App • Go to App Store to search for "Hubble for Motorola Monitors". ® ® • Download "Hubble for Motorola Monitors" App and install it on your iPhone /iPad ® ® 5.4.3 Run Hubble for Motorola Monitors App on iPhone /iPad ®... - Page 26 5.4.4 Add the Camera to your account • Tap on the top right corner of the screen to add camera. (Picture i2) • The following Bluetooth setup instructions will appear on the screen. (Picture Wi-Fi® Internet Viewing...
- Page 27 . (Pictures i4,i5) • Press the HOME key to return to the home screen, then tap on "Hubble for Motorola Monitors" App to resume setup. • The following setup instructions will appear on the screen. (Picture i6) Note that if Bluetooth is on, you will be brought to this step directly.
- Page 28 • The following will appear on the screen. (Pictures i7, i8) • Name the location of your Camera Unit and tap Continue. (Pictures i9, i10) Wi-Fi® Internet Viewing...
- Page 29 ® • The Camera Unit will search for the Wi-Fi network (Picture i11) and display a list of available networks. (Picture i12) ® • Select your Wi-Fi network and tap Continue. (Picture i13) ® • Enter your Wi-Fi password and tap Next. (Picture i14) ®...
- Page 30 • If connection fails, tap Retry and repeat the steps starting from 3.3.4. • Tap View Live Camera to view the video captured by the Camera Unit. The LED indicator on the Camera Unit will light up in blue. Wi-Fi® Internet Viewing...
-
Page 31: Camera Functions
Camera Functions: 5.5.1 Connecting the Camera Unit to power • Connect the power adapter to an electrical outlet and insert the plug into the micro USB socket on the back of the Camera Unit. • Slide the ON/OFF switch to the ON position. The power indicator LED will light up in green. - Page 32 Lullaby Tap to access the Melody menu and select one of the 5 pre-set melodies you wish to play on your Camera Unit. Temperature The temperature reading from the temperature Measure sensor at the back of the Camera Unit will display on the screen of your Android™...
- Page 33 Camera Setting You can change the Camera settings by tapping on the Settings icon. • Tap Details to review Camera Name, Cloud Subscription, Change Image, Timezone, Camera Model, Firmware Version and Delete All Events. • Tap Notifications to set the sensitivity of Sound Detection, Motion Detection and to set Alerts for High temperature (Up to 33 C or 91...
-
Page 34: Working With Pc/Notebook
Working with PC/Notebook • Go to https://app.hubbleconnected.com/#login Enter your User Name and Password, and then click Login if you have already created an account. • Click on the Camera list paired in your account via Android™ device or ® ® iPhone /iPad , and the Camera view will appear on screen. -
Page 35: Disposal Of The Device (Environment)
6. Disposal of the Device (Environment) At the end of the product life cycle, you should not dispose of this product with normal household waste. Take this product to a collection point for the recycling of electrical and electronic equipment. The symbol on the product, user's guide and/or box indicates this. -
Page 36: Cleaning
7. Cleaning Clean your Digital Video Baby Monitor with a slightly damp cloth or with an anti- static cloth. Never use cleaning agents or abrasive solvents. Cleaning and care • Do not clean any part of the Digital Video Baby Monitor with thinners or other solvents and chemicals - this may cause permanent damage to the product which is not covered by the warranty. -
Page 37: Help
8. Help Display No display • Try recharging or replacing the battery pack. • Reset the Units. Disconnect the battery pack of the Parent Unit and unplug both the Units' electrical power, then plug them back in. • Is the Unit turned on? Press and hold the ON/OFF button on the Parent Unit to turn it ON. - Page 38 • Make sure that the Baby and Parent Units are not near other electrical equipment, such as a television, computer or cordless/mobile telephone. ® • Use of other 2.4 GHz products, such as wireless networks (Wi-Fi routers), Bluetooth™ systems, or microwave ovens, may cause interference with this product.
- Page 39 ® Troubleshooting for Wi-Fi Internet Viewing Category Problem Solution Description / Error Account I am unable to login Please check your user name and even after registration. password. Account I receive an error Please ensure that you have message saying: "Email registered with us.
- Page 40 Viewing When I am in "remote When you are accessing your Camera Camera mode", the video stops via a network different from your after 5 minutes. How home network (over the internet) your do I view for longer? video times out after 5 minutes. You can click on the Camera again from the Android™/iOS application to start streaming again.
- Page 41 General What is the A flashing LED indicates the following significance of LED status: flashing? Slow flashing: 1. Your Camera is in setup mode. You can add the Camera to your account in this mode. Out of the box, the Camera is in Setup mode. To reset to Setup mode, press and hold the PAIR button on the bottom of the Camera untill you hear a beep.
- Page 42 Connectivity Even though I am Please check your wireless router Issues accessing my Camera settings. For example, for Buffalo ® from the same Wi-Fi brand routers there is an option called network, I still find my Wireless Isolation. Please disable this Camera is shown as option.
- Page 43 App for Android™ and - Open the Google Play Store on iOS devices? your Android™ device. - Select Search - Type in "Hubble for Motorola Monitors" - The results will show the Hubble - Select to install it iOS Device:...
- Page 44 Features How many users can If you are accessing in Local Mode, access the Camera at two users are supported, after two one time? users all streaming will go through the remote server. This allows for unlimited user access to a single Camera at one time.
-
Page 45: General Information
To order a replacement battery pack for parent Unit, contact customer service. Consumer Products and Accessories Limited Warranty ("Warranty") Thank you for purchasing this Motorola branded product manufactured under license by Binatone Electronics International LTD ("BINATONE") What Does this Warranty Cover? Subject to the exclusions contained below, BINATONE warrants that this Motorola branded product ("Product") or certified accessory ("Accessory") sold... - Page 46 PROVIDED UNDER THIS EXPRESS LIMITED WARRANTY IS THE EXCLUSIVE REMEDY OF THE CONSUMER, AND IS PROVIDED IN LIEU OF ALL OTHER WARRANTIES, EXPRESS OR IMPLIED. IN NO EVENT SHALL MOTOROLA OR BINATONE BE LIABLE, WHETHER IN CONTRACT OR TORT (INCLUDING...
- Page 47 (c) use of the Products or Accessories for commercial purposes or subjecting the Product or Accessory to abnormal usage or conditions; or (d) other acts which are not the fault of MOTOROLA or BINATONE, are excluded from coverage.
- Page 48 Unauthorized Service or Modification. Defects or damages resulting from service, testing, adjustment, installation, maintenance, alteration, or modification in any way by someone other than MOTOROLA, BINATONE or its authorized service centers, are excluded from coverage. Altered Products. Products or Accessories with (a) serial numbers or date tags that have been removed, altered or obliterated;...
- Page 49 FCC and IC regulations FCC Part l5 NOTE: This equipment has been tested and found to comply with the limits for a Class B digital device, pursuant to Part 15 of the Federal Communications Commission (FCC) rules. These limits are designed to provide reasonable protection against harmful interference in a residential installation.
- Page 50 This Class B digital apparatus complies with Canadian ICES-003. CAN ICES-3(B)/NMB-3(B). WARNING Changes or modifications to this equipment not expressively approved by the party responsible for compliance could void the user’s authority to operate the equipment. The socket-outlet shall be installed near the equipment and shall be easily accessible.
-
Page 51: Technical Specifications
10. Technical Specifications BABY UNIT (Model: MBP667CONNECTBU) Frequency 2.4GHz to 2.48 GHz Image sensor color CMOS 1M Pixels IR LED 6 pcs Power Adapter Ten Pao International Ltd. S005ANU0500100 Input 100-240V AC, 50/60Hz, 200mA; Output: 5.0V DC, 1000mA WARNING Use only with provided power supply. Technical Specifications... - Page 52 PARENT UNIT (Model: MBP667CONNECTPU) Frequency 2.4 GHz to 2.48 GHz Display 2.4" diagonal Brightness control 8 steps Volume control 8 steps Power Adapter Ten Pao International Ltd. S006AKU0500100 Input: 100-240V AC, 50/60Hz, 200mA; Output: 5.0V DC, 1000mA WARNING Use only with provided power supply. Battery: Model - JUSTHIGH Ni-MH AAA 3.6V 900mAh rechargeable battery pack WARNING...
- Page 53 Manufactured, distributed or sold by Binatone Electronics International LTD., official licensee for this product. MOTOROLA and the Stylized M logo are trademarks or registered trademarks of Motorola Trademark Holdings, LLC. and are used under license. Apple logo and Safari are trademarks of Apple Inc., registered in the U.S.