Table of Contents
Advertisement
Advertisement
Table of Contents

Related Manuals for Teac HDR2250T


Summary of Contents for Teac HDR2250T
- Page 1 HDR2250T Twin Tuner PVR...
- Page 2 Keep your purchase receipt to enable you to proceed quickly in the event of a Warranty Service. If you require Warranty Service, please contact the TEAC Warranty Service Hotline at 1300 553 315 for assistance. Please ensure that you have the model number, serial number and purchase receipt ready when you call.
- Page 3 The serial number of the product is missing or has been tampered with. No one is authorised to assume any liability on behalf of TEAC or impose any obligation on it, in connection with the sale of any equipment other than as stated in this warranty and outlined above.
-
Page 4: Table Of Contents
Content 1.Reference ........................2 1.1General Features ....................2 1.2 Accessories......................2 1.3 Basic Function....................3 1.3.1 Front and Real Panel ..................3 2.Remote Control Unit (RCU) ..................4 3.Installation........................5 3.1 Terrestrial Auto Search ..................5 3.2 Terrestrial Manual Search .................5 3.3 Backup & Recovery ..................6 4.Channel Edit.........................6 4.1 Channel Edit......................7 4.2 Delete All Channels ..................8 4.3 Vertical Epg ......................8... -
Page 5: Reference
1.Reference 1.1General Features Fully DVB T2/T compliant • • Max 5000 Channels memory space • Multi-language OSD support with subtitles function • Easy and fast software upgrade via USB • Support Auto/NTSC/PAL and 4:3 16:9 widescreen • Parental lock function •... -
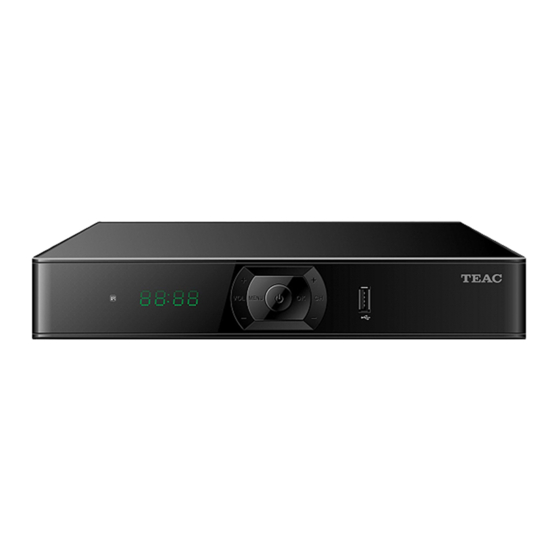
Page 6: Basic Function
1.3 Basic Function 1.3.1 Front and Real Panel Model No.:HDR2250T 100-240V~ 50/60Hz 25W MAX Standby: <1W LOOP OUT ANT IN SPDIF HD-OUT CVBS... -
Page 7: Remote Control Unit (Rcu)
2. Remote Control Unit (RCU) Function Turn on unit/switch to standby mode Media Enter Media Browser menu Enter digits or channel number Output mode Aspect ratio Sleep time Subtitles CH. FAV Enter Favourite Channel mode Recall (VOL) Increase/decrease volume (CH) Switch channels Mute sound. -
Page 8: Installation
3. Installation There are three sub items: DTV Auto Search DTV Manual Search Backup & Recovery: To import or export database Use the Installation menu to search for and add new channels. 3.1 DTV Auto Search Enter DTV Auto Search to search for channels automatically. -
Page 9: Backup & Recovery
3.2 DTV Manual Search DTV Manual Search Press”OK” button to selected the frequency, then press red button to search the channels 3.3 Backup & Recovery Select to import or export Database from USB 4. Channel Edit The channel edit menu has four items: Channel Edit, Delete All Channels, Vertical EPG, Horizontal EPG. To enter Channel Edit page, press [UP/DOWN] keys to highlight the channel item and then press [OK] to enter. -
Page 10: Channel Edit
4.1 Channel Edit A password is required to enter the Channel Edit menu (the default password is “0000”) Press [OK] to play the highlighted channel. Press Blue button to lock/unlock channels selected. Press Yellow button to delete channels selected. Press Green button to select/unselect the highlighted channel. Press Red button to sort channel list of current group, you can sort by Name/TP/Fav/FTA_CA/HD_SD/default/LCN. -
Page 11: Delete All Channels
4.2 Delete All Channels A password is required to enter the Delete All Channels menu (default password is “0000”) Afterwards, all channels can be deleted. Warning: Please note that once you perform Delete All, all channels will be deleted. This operation cannot be reversed. 4.3 Vertical EPG Press [EPG] button to switch between vertical EPG and horizontal EPG,... -
Page 12: Setting
5. Settings 5.1 Audio & Video Output Setting Video Resolution: Press [OK] button and then press [UP/DOWN] button to set video resolution (1080p,1080i,720p,PAL,NTSC). TV Aspect Ratio: Press left/right button to set set aspect ratio of TV picture(Auto,4:3 or 16:9.). Aspect Ratio Conversions: Press left/right button to set set aspect ratio mode(Full,Letter Box,Pan Scan). -
Page 13: Time
5.3 Time Enter Time Menu to edit time settings. Mode:In Auto, time info is obtained from TS. Display current date:Manually set current date. Display current ime:Manually set current time. Daylight Savings Time:Enable/disable Daylight Savings Time. Region:Set time zone. 5.4 Parental Control A password is required to edit Age Control settings. -
Page 14: System Information
Warning: Do not switch off power during upgrade, software and hardware may occur as a result. You can find and download the latest firmware updates at www.teac.com.au 5.7 Factory Default The default password is “0000”. All satellite, TP, Program database and system settings will restore to factory default. -
Page 15: Media Browser
6.2 Media Browser You can view media files in this menu. Press Left/Right button to select All/Recording/Media/Photo, files can also be removed and sorted. Press Red button to select/unselect all files, reverse select files. Press [OK] button to preview the selected file. Press Green button to select files Press Yellow button to Remove file Press Mode button to select the file mode... -
Page 16: Storage
6.5 Storage You can view the data on all connected USB storage devices. 6.6 PVR Setting Auto Time Shift: Enable/disable time-shift function. Time Shift Duration: Set the timeshift duration time. Recording Storage: Select USB storage device to record to. Playback Start Position: You can set the playback start position for media and PVR . -
Page 17: Technical Specification Tuner & Demodulator
7.2 Technical Speci ication Tuner & Demodulator Demodulator Type DVB-T2 BPSK, QPSK, 16QAM, 64QAM Constellation 16/32//128/256 QAM Bandwidth 6Mhz/7Mhz/8Mhz Standard ISO/IEC 13818-1 Input Max. Bit Stream Rate 45MBps Input connector 1 IEC Male Input Frequency 51MHz ~ 858MHz Input connector 2 IEC Male Input Frequency 51MHz ~ 858MH...