Table of Contents
Advertisement
Quick Links
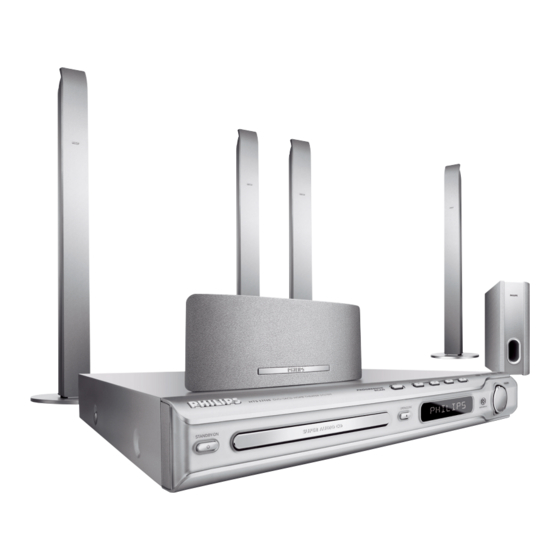
DVD HOME THEATER SYSTEM
User Manual
Manuel D'utilisation
Manual de Instrucciones
Bedienungsanleitung
Gerbruiksaanwijzing
Thank you for choosing Philips.
Read your Quick-Use Guide and/or User Manual first for quick
tips that make using your Philips product more enjoyable.
If you have read your instructions and still need assistance,
you may access our online help at www.philips.com/support
6
50
94
138
182
Need help fast?
HTS5310S
1
3139 115 2xxx1
Advertisement
Table of Contents

Related Manuals for Philips HTS5310S/51


Summary of Contents for Philips HTS5310S/51
- Page 1 Need help fast? Read your Quick-Use Guide and/or User Manual first for quick tips that make using your Philips product more enjoyable. If you have read your instructions and still need assistance, you may access our online help at www.philips.com/support...
-
Page 2: How To Connect Plug
See Copyright Act 1956 and The Performer’s Protection Acts 1958 to 1972. Italia DICHIARAZIONE DI CONFORMITA’ Si dichiara che l’apparecchio HTS3500S, Philips risponde alle prescrizioni dell’art. 2 comma 1 del D.M. 28 Agosto 1995 n. 548. Fatto a Eindhoven... -
Page 3: Luokan 1 Laserlaite
Advarsel: Usynlig laserstråling ved åbning når sikkerhedsafbrydere er ude af funktion. Undgå utsættelse for stråling. Bemærk: Netafbryderen er sekundært indkoblet og ofbryder ikke strømmen fra nettet. Den indbyggede netdel er derfor tilsluttet til lysnettet så længe netstikket sidder i stikkontakten. Klass 1 laseraparat Varning! Om apparaten används på... - Page 4 ® As an ENERGY STAR partner; Philips has determined that this product meets the ENERGY STAR guidelines for energy efficiency. ‘CONSUMERS SHOULD NOTE THAT NOT ALL HIGH DEFINITION TELEVISION SETS ARE FULLY COMPATIBLE WITH THIS PRODUCT AND MAY CAUSE ARTIFACTS TO BE DISPLAYED IN THE PICTURE.
-
Page 5: Language Code
Abkhazian 6566 Inupiaq Afar 6565 Irish Afrikaans 6570 Íslenska Amharic 6577 Italiano Arabic 6582 Ivrit Armenian 7289 Japanese Javanese Assamese 6583 Avestan 6569 Kalaallisut Aymara 6589 Kannada Azerhaijani 6590 Kashmiri Bahasa Melayu 7783 Kazakh Bashkir 6665 Kernewek Khmer Belarusian 6669 Bengali 6678 Kinyarwanda... -
Page 6: Table Of Contents
Contents Language Code General Information Supplied accessories ... 8 Cleaning discs ... 8 Setup ... 8 Basic Connections Step 1: Placing the speakers and subwoofer ... 9 Step 2: Connecting the speakers and subwoofer ... 10 Step 3: Connecting to TV ... 11 Option 1: Using Scart socket ... - Page 7 DVD Setup Menu Options Accessing General Setup Page ... 31 Locking/Unlocking the disc for viewing ... 31 Dimming system’s display panel ... 31 Programming disc tracks (not for Picture CD /MP3/SACD) ... 32 OSD language ... 32 Screen Saver – turning on / off ... 33 DivX(R) VOD registration code ...
-
Page 8: General Information
General Information Supplied accessories Scart cable (black) FM wire antenna MW loop antenna Remote control and two batteries (12nc: 3139 258 70111) Cleaning discs To clean a disc, use a micro fibre cleaning cloth and wipe the disc from the center to the edge in a straight line. -
Page 9: Basic Connections
Step 1: Placing the speakers and subwoofer For best possible surround sound, all the speakers (except subwoofer) should be placed at the same distance from the listening position. Place the front left and right speakers at equal distances from the TV and at an angle of approximately 45 degrees from the listening position. -
Page 10: Step 2: Connecting The Speakers And Subwoofer
Basic Connections Step 2: Connecting the speakers and subwoofer Front Left Speaker Subwoofer REAR L Rear Left Speaker Connect the supplied speakers system using the fixed speaker cables by matching the colours of the sockets and speaker cables. Helpful Hints: –... -
Page 11: Step 3: Connecting To Tv
Step 3: Connecting to TV VIDEO AUDIO IMPORTANT! – You only need to make one video connection from the following options, depending on the capabilities of your TV. – Connect the DVD system directly to the TV. – Proceed to page 19 for setting up the TV once you have completed the connections. -
Page 12: Step 4: Connecting To A Progressive
Basic Connections Step 4: Connecting to a Progressive Scan TV (optional) VIDEO AUDIO IMPORTANT! The progressive scan video quality is only possible when using Y Pb Pr and a progressive scan TV is required. – DO NOT connect both SCART and Y Pb Pr to a TV, it may affect the picture quality. -
Page 13: Step 6: Connecting The Power Cord
Step 6: Connecting the power cord DVD system After everything is connected properly, plug the AC power cord into the power outlet. The red Eco Power LED on the DVD system will light up. Never make or change any connections with the power switched on. -
Page 14: Connections To External Devices
Connections to External Devices Connecting a VCR or Cable/Satellite Box VCR or Cable/ Satellite Box DVD System Viewing and listening to the playback Connect the VCR or Cable/Satellite Box to the TV as shown. Connect the DVD system’s AUX IN (R/L) sockets to the AUDIO OUT sockets on the VCR or cable/satellite box. -
Page 15: Connecting Digital Audio Equipment
Connections to External Devices Connecting digital audio equipment (for example) Set-Top Box/ Game Console Listening to the playback Connect the DVD system’s DIGITAL IN socket to the DIGITAL OUT socket on a digital audio device. Press AUX/DI on the remote to select “DI”... -
Page 16: Remote Control
– DISC: enters or exits system setup menu. ZOOM – DISC: enlarges a picture on the TV screen. TV VOL +- – Adjusts TV volume (Philips TV only). SLEEP – Sets the sleep timer function. SURR – Selects multichannel surround or stereo... - Page 17 Numeric Keypad (0-9) – DISC: enters a track/title number. – TUNER: enters the preset radio station number. DISC MENU – DISC: enters or exits disc contents menu. For VCD, selects various preview function. DISPLAY – DISC: displays the current status or disc information.
-
Page 18: Main Unit
Main Unit STANDBY ON (B) – Switches to Eco Power standby mode, or turns on the system. Disc tray OPEN CLOSE 0 – Opens/Closes the disc tray. ECO POWER indicator – Lights up when in Eco Power standby mode. – Point the remote control towards this sensor. -
Page 19: Getting Started
Step 1: Inserting batteries into the remote control Open the battery compartment. Insert two batteries type R06 or AA, following the indications (+-) inside the compartment. Close the cover. CAUTION! – Remove batteries if they are exhausted or if the remote control is not to be used for a long time. -
Page 20: Setting Up Progressive Scan Feature (For Progressive Scan Tv Only)
Getting Started (continued) Setting up Progressive Scan feature (for Progressive Scan TV only) The progressive scan display twice the number of frames per seconds than interlaced scanning (ordinary normal TV system). With nearly double the number of lines, progressive scan offers higher picture resolution and quality. -
Page 21: Selecting The Matching Colour System
Selecting the matching colour system The colour system of the DVD system, DVD and TV should match. Only then will it be possible to play a DVD on this system. Before changing the TV system, determine the colour system of your TV. In disc mode, press SETUP. -
Page 22: Step 4: Setting Language Preferences
Getting Started (continued) Step 4: Setting language preferences You can select your preferred language settings so that this DVD system will automatically switch to the language for you whenever you load a disc. If the language selected is not available on the disc, the disc’s default language will be used instead. -
Page 23: Disc Operations
IMPORTANT! – If the inhibit icon (ø or X) appears on the TV screen when a button is pressed, it means the function is not available on the current disc or at the current time. – DVD discs and players are designed with regional restrictions. -
Page 24: Auto Eco Power Standby Mode
Disc Operations (continued) Auto Eco Power standby mode This is a power-saving feature, the system will automatically switch to Eco Power standby mode if you do not press any buttons within 30 minutes after a disc has stopped playing. Basic playback controls Pausing playback During playback, press 2;... -
Page 25: Other Operations For Video Playback (Dvd/Vcd/Svcd)
Other operations for video playback (DVD/VCD/SVCD) DISC MENU DISPLAY AUDIO SUBTITLE Using the Disc Menu A menu may appear on the TV screen once you load in the disc, depending on the disc format. To select a playback feature or item Use 1 2 3 4 keys or numeric keypad (0-9) on the remote, then press OK to start playback. -
Page 26: Advancing By Frame
Disc Operations (continued) Advancing by frame During playback, press Å on the remote. ➜ Play will pause and sound will be muted. Press Å repeatedly to view the next picture frame. To resume normal playback, press PLAY B. Resuming playback from the last stopped point This DVD system able to resume disc playback from its last stopped point (only... -
Page 27: Preview Function (Vcd Only)
Preview Function (VCD only) Press DISC MENU. Use 34 keys to highlight { Track Digest }, { Disc Interval } or { Track Interval }. Press OK to open one option. Select Digest Type: Track Digest Disc Interval Track Interval { Track Digest } This function will minimise the picture of every track in order to display every six... -
Page 28: Playing Mp3/Windows Media™ Audio/Jpeg / Mpeg-4 Disc
Disc Operations (continued) Playing an MP3/Windows Media™ Audio /JPEG/ MPEG-4 disc This DVD system can playback Windows Media™ Audio, MPEG-4, MP3, JPEG, VCD & SVCD files on a personally recorded CD-R/RW disc or commercial CD. IMPORTANT! You have to turn on your TV and set to the correct Video In channel. -
Page 29: Playing A Picture Disc (Slide Show)
Playing a picture disc (slide show) IMPORTANT! You have to turn on your TV and set to the correct Video In channel. (See page 19 “Setting the TV”). Load a Picture disc (Kodak Picture CD, JPEG). ➜ For a Kodak disc, the slide show will begin automatically. -
Page 30: Playing A Super Audio Cd (Sacd)
Disc Operations (continued) Playing a Super Audio CD (SACD) There are three types of SACD discs : single layer, double layer or hybrid discs. The hybrid disc contains both Super Audio CD and standard audio CD layers, only the SACD layer can be played back on this DVD system. -
Page 31: Dvd Setup Menu Options
This DVD system setup is carried out via the TV, enabling you to customise the DVD system to suit your particular requirements. Accessing General Setup Page Press DISC and followed by SETUP on the remote. Use 1 2 keys to select ‘General Setup Page’. -
Page 32: Programming Disc Tracks (Not For Picture Cd/Mp3/Sacd)
DVD Setup Menu Options Programming disc tracks (not for Picture CD/MP3/SACD) You can play the contents of the disc in the order you want by programming the playing order of the tracks. Up to 20 tracks can be stored. Press PROG on the remote. In ‘General Setup Page’, use 34 keys to highlight { Program }, then press 2 to select { Input Menu }. -
Page 33: Screen Saver - Turning On/Off
To return to the previous menu, press 1. To remove the menu, press SETUP. (continued) ® DivX VOD registration code Philips provide you the DivX ® (Video On Demand) registration code that allows you to rent and purchase ® videos using the DivX VOD service. -
Page 34: Accessing Audio Setup Page
DVD Setup Menu Options Accessing Audio Setup Page Press DISC and followed by SETUP on the remote. Use 1 2 keys to select ‘Audio Setup Page’. Press OK to confirm. Audio Setup Page Speakers Volume Speakers Delay Night Mode CD Upsampling Speakers Volume/Speakers Delay These menus contain speaker setup options that allow you to adjust the... -
Page 35: Accessing Video Setup Page
DVD Setup Menu Options Accessing Video Setup Page Press DISC and followed by SETUP on the remote. Use 1 2 keys to select ‘Video Setup Page’. Press OK to confirm. Video Setup Page TV Type TV Display Progressive Picture Setting Component TV Type This menu contains the options for... -
Page 36: Picture Setting
DVD Setup Menu Options Picture Setting This DVD system provides three predefined sets of picture colour settings and one personal setting which you can define yourself. In ‘Video Setup Page’, use 34 keys to highlight { Picture Setting }, then press { Standard } Select this for original colour setting. -
Page 37: Accessing Preference Setup Page
DVD Setup Menu Options Accessing Preference Setup Page Press Ç twice to stop playback (if any), then press SETUP. Use 1 2 keys to select the ‘Preference Page’. Press OK to confirm. Preference Page Audio Subtitle Disc Menu Parental MP3/JPEG Nav Password DivX Subtitle Default... -
Page 38: Pbc (Playback Control)
DVD Setup Menu Options Rating explanations 1Kid Safe – 2 G – General Audience; recommended as acceptable for viewers of all ages. 3 PG – Parental Guidance suggested. 4 PG13 – Material is unsuitable for children under the age of 13. 5 PGR –... -
Page 39: Changing The Password
DVD Setup Menu Options Changing the Password The same password is used for both Parental Control and Disc Lock. Enter your six-digit password to play a prohibited disc or if prompted for a password. The default password is 136900. In ‘Preference Page’, use 34 keys to highlight { Password }, then press 2 to select { Change }. -
Page 40: Tuner Operations
Tuner Operations IMPORTANT! Make sure the FM and MW antennas are connected. Tuning to radio stations Press TUNER on the remote (or press SOURCE control at the front panel) to select “FM” or “MW”. Press 3 / 4 briefly on the remote. ➜... -
Page 41: Automatic Presetting
Automatic presetting Use automatic presetting to store or reinstall all the preset radio stations. DVD system’s display panel FM / MW START.. Press TUNER on the remote to select “FM” or “MW”. Press and hold PROG until "START ..." appears. ➜... -
Page 42: Sound And Volume Controls
Sound and Volume Controls Individual speakers volume adjustment You can adjust the delay times (centre, rear speakers and subwoofer only) and volume level for individual speakers. These adjustments let you optimise the sound according to your surroundings and setup. IMPORTANT! Press SURR button on the remote to select Multi-channel surround mode before adjusting the speaker... -
Page 43: Selecting Surround Sound
Sound and Volume Controls Selecting surround sound Press SURR on the remote to select : MULTI-CHANNEL or STEREO. ➜ The availability of the various surround sound modes depends on the number of speakers used and the sound available on the disc. ➜... -
Page 44: Other Functions
Other Functions Setting the Sleep timer The sleep timer enables the system to switch to Eco Power standby mode automatically at a preset time. Press SLEEP on the remote repeatedly until it reaches the desired preset turn-off time. ➜ The selections are as follows (time in minutes): 15 ™... -
Page 45: Specifications
AMPLIFIER SECTION Output power 500 W RMS - Front 75 W RMS / channel - Rear 75 W RMS / channel - Centre 100 W RMS - Subwoofer 100W RMS Frequency Response 20 Hz – 20 kHz / –3 dB Signal-to-Noise Ratio >... -
Page 46: Troubleshooting
– such as Angles, Subtitles, or – multi-language Audio. Need Help? Visit us at www.philips.com/support Solution Check if the AC power cord is properly connected. Press the STANDBY ON on the front of the DVD system to turn on the power. - Page 47 – Unable to play DivX movies. – The DVD system does not work. Need Help? Visit us at www.philips.com/support Troubleshooting Solution Press STOP button twice before selecting the setup/system menu. Depending on the disc availability, some menu items cannot be selected.
-
Page 48: Glossary
Glossary Analogue: Sound that has not been turned into numbers. Analogue sound varies, while digital sound has specific numerical values. These sockets send audio through two channels, the left and right. Aspect ratio: The ratio of vertical and horizontal sizes of a displayed image. The horizontal vs. - Page 49 Multichannel: DVDs are formatted to have each sound track constitute one sound field. Multichannel refers to a structure of sound tracks having three or more channels. Parental control: Limits Disc play according to the age of the users or the limitation level in each country.