Advertisement
Available languages
Available languages
Quick Links
GMR223
• 8 GMRS / 14 FRS Channels
• Battery Level Meter
• 38 CTCSS Codes
• Channel Monitor
• Up to 5 Mile Range*
• Channel Scan
• Internal VOX Circuitry
• Keypad Lock
• 5 Selectable Call Tone Alerts
• Backlit LCD Display
• Headset Jack (Headset is optional
and not included)
• Battery Recharge Circuit
• 2 NiMH Battery Pack
• Dual Charging Cradle
with AC Adapter
* Range may vary depending on environmental and/or topographical conditions.
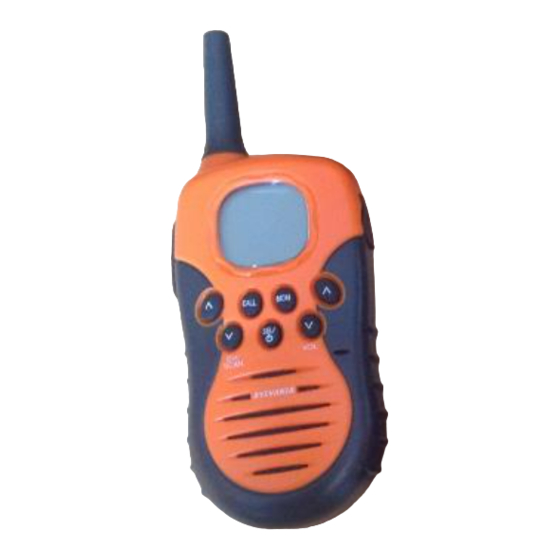
GMR223 RADIO
1 Antenna
12 Charging LED's
2 PTT (Push-To-Talk) Button
13 Battery Level Meter
3 CH/SCAN
(Channel/scan up) Key
14 Receive Indicator
4 CALL Key
15 Scan Indicator
5 CH/SCAN
(Channel/scan down) Key
16 Channel Indicator
6 SEL/
(Select/Power) Key
17 Call Indicator
7 Speaker
18 VOX Indicator
8 Headset Jack (Headset is optional and
19 Keypad Lock Indicator
not included)
20 Transmit Indicator
9 MON (Monitor) Key
21 Volume Setting Indicator
10 VOL
(Volume up) Key
22 CTCSS Indicator
11 VOL
(Volume down) Key
Congratulations on your purchase of the Sylvania GMR223
battery pack, you must recharge the battery pack in order to
(General Mobile Radio Service) radio. This product is a
continue using the radio.
lightweight, palm-sized radio. Use it at sporting events to stay
Warning! To avoid the risk of personal injury or property
in contact with family and friends, hiking, skiing, outdoors, or in
damage from fire or electrical shock, only use the Sylvania
a neighborhood watch for vital communication. This compact,
accessories specifically designated for this product.
state-of-the-art device is equipped with many features.
PACKAGE CONTENTS
In order to get the most out of your new radio, read this
Your package contains 2 x GMR223 radios, 2 x NiMH battery
reference guide completely before attempting to operate the
packs, 2 x belt clips, a dual recharging cradle with AC adapter
unit.
and this reference guide.
Turning the Radio On and Adjusting the Volume
1) Press and hold the SEL/
INSTALL THE BATTERIES
Your GMR223 radio uses the included NiMH battery pack or 4
2) Press and hold the SEL/
AAA alkaline batteries (not included). If alkaline batteries are
used, we recommend using high quality alkaline batteries.
Adjusting the Sound (Key Beeps)
To install the NiMH battery pack:
Your radio emits a beep each time one of the buttons or keys
(except for the PTT button and CALL key) are pressed. To turn
1) Make sure your radio is OFF.
2) Remove the battery compartment door by pressing the tab at
this sound OFF, press and hold CALL while turning ON the
the bottom of the compartment door allowing the door to be
radio. Repeat this step to turn the sound ON.
removed.
3) Place the NiMH battery pack in the compartment, making
Navigating through the Menu
sure that the charge contacts are on the lower half of the
To access the advanced features of the GMR223, your radio
battery pack and facing out. If the NiMH battery pack is
has a Menu function.
installed incorrectly, the unit will not operate.
4) Replace the battery compartment door.
5) The battery pack must be charged before using for the first
time. Place the GMR223 radio into the charging cradle
allowing 16 hours charging time to fully charge the battery
pack.
1) To enter the Menu, press the
Note: Always make sure your battery pack is fully discharged
2) Additional presses of the SEL/
before recharging to prolong the life of the battery pack. The
LED will illuminate while the radio is in the charging cradle.
3) Other methods of exiting the Menu function are:
To install 4 AAA alkaline batteries (not included):
a. Press and hold the SEL/
1) Make sure your radio is OFF.
b. Press PTT, MON, VOL
2) Remove the battery compartment door by pressing the tab
c. Wait 10 seconds until the unit automatically returns to
at the bottom of the compartment door allowing the door to
be removed.
3) Install 4 AAA alkaline batteries (not included) into the
Choosing a Channel
battery compartment. Be certain to follow the + and –
symbols in the compartment. Installing the batteries
Your radio has 22 channels and 38 CTCSS codes you can use
incorrectly will prevent the radio from operating.
to talk to others. In order to speak to someone, each of you
4) Replace the battery compartment door.
must be set to the same channel and CTCSS code.
To choose a channel:
With the radio in "Normal" operating mode press the CH/SCAN
BATTERY LEVEL AND LOW
BATTERY ALERT
displayed.
Note: Channels 1-14 have an expectancy range of up to
This unit has a battery level meter on the display to indicate
approximately 2 miles. Channels 15-22 have an expectancy
the status of the batteries. When the batteries in the unit are
range of up to approximately 5 miles.
low, the battery level meter icon
will flash. Replace the
alkaline batteries immediately or if you are using the NiMH
Choosing a CTCSS Code
Each of the channels 1-22 may have any one of the codes,
OFF or 1-38 selected. Code "OFF" indicates no CTCSS code
selected and your radio can receive a signal regardless of the
code settings of the transmitting radio.
1) Enter the Menu. The CTCSS code on the LCD display will
flash.
USING THE RADIO
2) Press the CH/SCAN
the code number displayed. You can also select "OFF" at this
stage.
3) Exit the Menu to return to "Normal" mode.
Talking on Your Radio
key to turn the unit ON, and
To talk to others using the radio:
increase the speaker volume by pressing the
key. To
1) Press and hold the PTT button and speak in a clear, normal
VOL
decrease the volume, press the
key.
voice about 2-3 inches away from the microphone. While you
VOL
key again to turn the unit OFF.
are transmitting, the
avoid cutting off the first part of your transmission, pause
slightly after pressing the PTT button before you start talking.
2) When you are finished speaking, release the PTT button. You
can now receive incoming calls. While receiving, the
will appear on the display.
Voice Operated Transmission
Your GMR223 radio is equipped with a user selectable Voice
Operated Transmitter (VOX) that can be used for automatic
voice transmissions. The VOX feature is designed to be used
with a headset with a microphone (not included). Transmission
is initiated by speaking into the remote microphone instead of
Normal
CTCSS
VOX Level
Call Tone
Key Lock
Normal
pushing the PTT button.
To select the VOX level:
off, 1-38
off, 1-3
1-5
ON-OFF
1) Enter the Menu. Advance through the Menu until the vox icon
appears on the display. The current level (off, 1-3) will be
SEL/
key.
indicated. Level "oF" disables VOX, while levels
key will advance you
the sensitivity of the VOX circuit.
through the Menu until exiting to "Normal" operating mode.
2) Press either the CH/SCAN
sensitivity level. Use level 1 for increased sensitivity to voice
key again.
in normally quiet environments, and use a higher level to
/
, and CALL.
reduce undesired activation in very noisy environments.
3) Exit the Menu.
"Normal" mode.
Transmitting a Call Tone
Your GMR223 radio is equipped with 5 selectable call tones
that will be transmitted when the CALL key is pressed.
To select a call tone:
1) Enter the Menu. Advance through the Menu until the call icon
is shown on the display. The current call tone number
(
2) Press the CH/SCAN
or
key to increase or decrease the channel number
the number to the desired call tone. Each tone will be heard
through the speaker.
3) Exit the Menu.
To transmit the selected call tone, press the CALL key.
The selected tone will automatically be transmitted for a fixed
length of time.
Channel Scan Feature
Your GMR223 radio has a channel Scan feature that allows
you to easily Scan all 22 channels. When an active channel is
detected, the radio will pause on that channel until the channel
is clear. Then after a 2 second delay, the radio will continue
scanning. Pressing PTT while the Scan is paused on a channel
will allow you to transmit on that channel.
or
key to increase or decrease
To turn ON channel scanning:
Press and hold either the CH/SCAN
scan icon is displayed. The channel number on the display will
change as the radio rapidly cycles through the channels.
To turn OFF channel scanning:
Press SEL/
Keypad Lock
To Lock the keypad:
icon will appear on the display. To
1) Enter the Menu. Advance through the Menu until the
icon appears on the display. The current key Lock status
(OFF) blinks on the display.
2) To switch the key Lock mode from OFF to ON, press the
icon
CH/SCAN
3) To confirm the setting, press the SEL/
The radio returns to the "Normal" mode.
Note: If you exit the setting mode before confirming your
selection by pressing the SEL/
be set to OFF.
To Unlock the keypad:
1) Press and hold the SEL/
2) Press and hold the SEL/
The keypad is unlocked.
Automatic Power Save Feature
-
set
Your GMR223 radio has a unique circuit designed to
dramatically extend the life of the batteries. If there is no
or
key to the desired VOX
transmission nor an incoming call within 3 seconds, your radio
switches to the Power Save mode. The radio is still able to
receive transmissions in this mode.
LCD Backlight
The LCD backlight will automatically turn ON when any key
(except PTT button) is pressed. The LCD display will illuminate for
10 seconds before turning OFF.
Monitor Mode Feature
Your GMR223 radio allows you to listen for weak signals on the
current channel at the press of a key.
To turn ON the monitor mode:
-
) will be indicated.
1) Press MON for brief listening, the
or
key to increase or decrease
2) Press and hold MON for 2 seconds for continuous listening.
The receiver circuit will stay open, and let in both the noise
and weak signals.
To turn OFF monitor mode:
Press MON to return to "Normal" mode, and the
stops blinking.
or
key until the
, CALL, or PTT.
key.
key.
key, the key Lock setting will
key to turn the radio OFF.
key again to turn the radio ON.
icon will blink.
icon
Advertisement

Related Manuals for Sylvania GMR223

Summary of Contents for Sylvania GMR223
- Page 1 To select a call tone: incorrectly will prevent the radio from operating. to talk to others. In order to speak to someone, each of you Your GMR223 radio allows you to listen for weak signals on the 1 Antenna 12 Charging LED’s 4) Replace the battery compartment door.
- Page 2 This Communication product is only warranted to (not included) or 67.0 136.5 not expressly approved by Sylvania could void your radio, or result in violation of regulations. However, should you experience difficulty, you are the original retail purchaser. This warranty...
- Page 3 1) Accédez au menu des fonctions. L’indicateur SSCT Pour sélectionner la tonalité d’appel qui vous convient : récepteur Sylvania GMR223. Ces appareils sont légers et 3) Placez les quatre piles alcalines AAA (non comprises) Pour accéder aux fonctions avancées des radios avec clignotera à...
- Page 4 été modifiés, égratignés ou effacés. dès qu’une des touches est pressée – à l’exception du radio jusqu’à ce qu’il soit entièrement sec. SYLVANIA se réserve le droit de changer le concept, PRODUIT PIÈCES ET MAIN-D'OEUVRE bouton micro. L’écran s’illumine pendant dix (10) Cet appareil est conforme aux règlements d’Industrie...