Philips DVDR3450H/ User Manual
Hdd & dvd player/ recorder
Hide thumbs
Also See for DVDR3450H/:
- Service instruction (16 pages) ,
- Specifications (3 pages) ,
- User manual (82 pages)
Table of Contents
Advertisement
Advertisement
Table of Contents

Related Manuals for Philips DVDR3450H/


Summary of Contents for Philips DVDR3450H/
-
Page 1: User Manual
HDD & DVD Player/ Recorder DVDR3450H DVDR3452H DVDR3460H DVDR3465H User Manual... - Page 2 Important notes for users in the U.K. Mains plug This apparatus is fi tted with an approved 13 Amp plug. To change a fuse in this type of plug proceed as follows: 1 Remove fuse cover and fuse. 2 Fix new fuse which should be a BS1362 5 Amp, A.S.T.A.
- Page 3 Italia DICHIARAZIONE DI CONFORMITA’ Si dichiara che l’apparecchio DVDR3450H/ DVDR3452H/ DVDR3460H/ DVDR3465H, Philips risponde alle prescrizioni dell’art. 2 comma 1 del D.M. 28 Agosto 1995 n. 548. Fatto a Eindhoven Philips Consumer Electronics Philips, Glaslaan 2 5616 JB Eindhoven, The Netherlands Norge Typeskilt fi nnes på...
- Page 5 This product incorporates copyright protection technology that is protected by US patents. Use of this copyright protection technology must be authorised by Macrovision, and is intended for home and other limited viewing uses only unless otherwise authorised by Macrovision. Reverse engineering or disassembly is prohibited.
-
Page 6: Table Of Contents
Table of Contents General Care and Safety Information ... 8 Setup precautions ...8 Cleaning discs ...8 HDD (Hard Disk Drive) handling care ...8 Product Information ... 9 Introduction ...9 Accessories supplied ...9 Region codes ...9 Copyright notice ...9 Special Features ...10 Product Overview Main Unit ... - Page 7 Timer Recording ... 37 About timer recording ...37 Timer recording (S Timer recording (manually) ...39 Changing/ Deleting a timer recording ... 40 Playback Playback from Hard Disk ... 41 Playback your HDD recordings ...41 Playback from Disc ... 42 Playable discs ... 42 Starting disc playback ...
-
Page 8: Care And Safety Information
Care and Safety Information CAUTION! High voltage! Do not open the device. You run the risk of getting an electric shock. The machine does not contain any user-serviceable parts. Please leave all maintenance work to qualifi ed personnel. Setup precautions Finding a suitable location –... -
Page 9: Product Information
Introduction This HDD and DVD recorder allows you the fl exibility of keeping recordings in the HDD or archiving to a recordable DVD for future playback. Model No. HDD Size USB Playback DVDR3450H 160GB DVDR3452H* DVDR3460H 250GB DVDR3465H* *These models are in black fi nish. Furthermore, you can take advantage of features like ‘Instant Replay’, or ‘Pause Live TV’;... -
Page 10: Special Features
You can fi nd this number in your favourite listings magazine. Philips DVD recorders support ‘dual media’ recording – the ability to create recordings on + and – discs : DVD+R/+RW, DVD–R/–RW discs. -
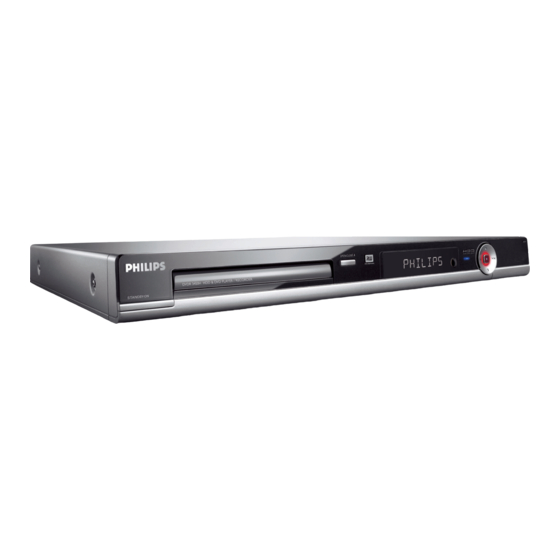
Page 11: Main Unit
STANDBY-ON – Switches on the recorder or switches to standby mode. Disc tray ç OPEN/CLOSE – Opens/closes the disc tray. Display panel – Show information about the current status of the recorder. – Point the remote control towards this sensor. HDD Active indicator –... -
Page 12: Remote Control
Remote Control PAUSE LIVE TV STANDBY-ON 2 – Switches on the recorder or switches to standby mode. USB/DV – Switches to ‘camera mode’ for camcorder connecting to DV IN socket. Recording can be made directly onto the HDD/DVD. (for DVDR3460H/ DVDR3465H) –... - Page 13 – Press and hold the key to open and close the disc tray. TV VOL +/ - – Adjust the volume of the TV set (Philips TV only). TV MUTE H – Mute the volume of the TV set (Philips TV only).
-
Page 14: Using The Remote Control
Remote Control Using the remote control Open the battery compartment. Insert two batteries of type R03 or AAA, following the indications (+-) inside the compartment. Close the cover. Aim the remote control directly at the remote sensor (IR) on the front panel. Select the source you want to control by pressing the TUNER, HDD, DVD or USB/DV key on the remote control. -
Page 15: Step 1: Basic Recorder Connections
Step 1: Basic Recorder Connections SATELLITE ANTENNA CABLE AUX - I/O TV-OUT ANTENNA-IN Connecting the antenna cables These connections enable you to watch and record TV programmes using this recorder. If the antenna signal is connected via a VCR, Cable Box or Satellite Receiver, ensure that these devices are turned on in order to watch or record the cable programmes. -
Page 16: Connecting The Video Cable
Step 1: Basic Recorder Connections AUX - I/O Option 1 Connecting the video cable This connection enables you to view the disc playback from the recorder. You only need to choose one of the options below to make your video connection. -
Page 17: Connecting The Audio Cables
Step 1: Basic Recorder Connections AUX - I/O TV-OUT ANTENNA-IN TV/ Stereo Connecting the audio cables This connection enables you to listen to the sound. However, this connection is not required if this recorder is connected to the TV using the supplied SCART cable. -
Page 18: Step 2: Optional Connections
Step 2: Optional Connections VIDEO CABLE SATELLITE ANTENNA EXT 2 AUX - I/O TV-OUT ANTENNA-IN Connecting to a Cable Box or Satellite Receiver Option 1 If your Cable Box/Satellite Receiver has only an antenna output socket (RF OUT or TO TV), see “Step 1: Basic Recorder Connections –... -
Page 19: Connecting To A Vcr Or Other Similar Device
Step 2: Optional Connections ANTENNA CABLE SATELLITE AUX - I/O TV-OUT ANTENNA-IN Connecting to a VCR or other similar device This connection enables you to record from a video tape to the HDD or a recordable DVD and allows the VCR to be used for playback if the recorder is turned off. -
Page 20: Connecting To A Vcr And Cable Box/Satellite Receiver
Step 2: Optional Connections Satellite Receiver/ Cable Box CABLE SATELLITE ANTENNA TV-OUT ANTENNA-IN Connecting to a VCR and Cable Box/Satellite Receiver Keep the existing aerial connection from the Cable Box/Satellite Receiver to your Use the supplied RF coaxial cable to connect the antenna output (RF OUT) socket on the Cable Box/Satellite Receiver to the ANTENNA-IN... -
Page 21: Connecting A Camcorder
Step 2: Optional Connections DV OUT Connecting a camcorder You can use the front sockets to copy camcorder recordings. These sockets are located behind the fl ap on the right hand side. Option 1: Using the DV IN socket Use this connection if you have a Digital Video or Digital 8 camcorder. -
Page 22: Connecting A Usb Fl Ash Drive Or Usb Memory Card Reader
Step 2: Optional Connections Connecting a USB fl ash drive or USB memory card reader (for DVDR3460H/ DVDR3465H only) You can only view the contents of a USB fl ash drive / USB memory card reader through this recorder. Editing the data and recording to the hard disk or a DVD±R/±RW is not possible. -
Page 23: Step 3: Installation And Setup
Before you start... When you complete the connections and switch on the recorder for the fi rst time, it is advisable that you make several basic settings. Please see the following pages on using the Setup Menu features to programme TV channels, menu language and system clock settings. -
Page 24: Select The Country Of Your Residence
Step 3: Installation and Setup Select the country of your residence Select the country of your area for auto channel tuning. SETUP PAUSE LIVE TV Press SETUP on the remote control. The setup menu appears on the TV. keys to highlight { SETUP MENU - SETUP } and press SETUP MENU - SETUP Menu Language... -
Page 25: Setting The Date & Time
Step 3: Installation and Setup Select { Auto Program } and press OK. A warning message will appear. Select and press OK on the remote control The automatic TV channel search will start. This process may take several minutes. Once complete, the total number of channels found will appear on the TV. -
Page 26: Control Tv Programmes
Control TV programmes Switching on to TV programme TUNER DISPLAY PAUSE LIVE TV PAUSE LIVE TV P +- Switch on the TV to the correct programme number for the recorder (e.g. ‘EXT’, ‘0’, ‘AV’). Press STANDBY-ON to switch on the recorder. -
Page 27: Recording
About temporary HDD storage (Time Shift Buffer) Once you switch on this recorder, the currently selected TV programme will be stored in a temporary hard disk storage called ‘Time Shift Buffer’ (TSB). The ‘TSB’ captures up to 6 hours of TV programmes. -
Page 28: Default Recording Settings
Before Recording Default Recording settings The default recording settings will allow you to preset auto chapter markers and the preferred mode of recording quality for HDD recording. Press SETUP on the remote control. The setup menu appears on the TV. keys to highlight { SETUP MENU - GENERAL } and press... -
Page 29: General Settings
GENERAL settings (underlined options are the factory default settings) Auto Chapter You can insert chapter markers within a title during recording Marker This lets you access to specifi c points on the recording. Press options. { 5min. } { 10min. } { 20min. -
Page 30: Record On Hard Disk
Record on Hard Disk IMPORTANT! Unrecordable pictures Television programmes, fi lms, video tapes, discs, and other materials may be copy-protected and therefore cannot be recorded on this recorder. Recording from various sources You can choose to record a TV programme or make recordings from an external device to the HDD. - Page 31 HDD to a recordable DVD, see “Before Recording.” Record on Hard Disk Recording from an external device (Camcorder/VCR/ DVD player) A copy protection system has been built into this recorder to prevent the transfer of data from pre-recorded DVDs or other copy protected material onto the recordable DVD.
-
Page 32: Instant Recording
Record on Hard Disk Press SOURCE repeatedly to select the correct input channel that matches the connected socket of the device. – { EXT 1 } : EXT 1 TO TV I/O scart socket at the back. – { EXT 2 } : EXT 2 AUX I/O scart socket at the back. -
Page 33: Watch Playback From Another Source During Recording
Watch playback from another source during recording While recording is in progress, you can watch another TV channel or the playback from another audio/video device which is connected to this recorder. USB/DV TV/DVD Watching playback from another device This is only possible if the recorder is connected to the TV using the EXT1 TO TV-I/O socket. -
Page 34: Record On Recordable Dvd
– Editing can be made on DVD±R discs as long as they have not been fi nalised. – To play a DVD±R disc on another DVD player, it must be fi nalised [see the section “Playing your recordings on other DVD players (DVD±R only)”]. -
Page 35: Recording From Various Sources
Record on Recordable DVD Recording from various sources You can choose to copy your recordings from the HDD or an external device to a recordable DVD. The storage capacity of the disc depends on the record quality that was selected for the recording in the recorder or device, see the previous page. -
Page 36: Recording Mode
Record on Recordable DVD Recording from an external device/ VCR/ DV Camcorder Switch on the TV to the correct programme number for the recorder (e.g. ‘EXT’, ‘0’, ‘AV’). Insert a recordable DVD into the recorder. Press DVD REC to switch to direct recording mode. -
Page 37: Timer Recording
About timer recording Use ‘Timer Recording’ to automatically start and stop a recording at a later date/ time. The recorder will tune to the right programme channel and begin recording at the specifi ed time. With this recorder, you can pre- programme up to 8 recordings. - Page 38 Timer Recording Use the numeric keypad 0-9 to enter ® the S / PlusCode programming number for the show you wish to record and press OK. (e.g. : 5-312-4 or 5,312 4, key in ‘53124’). ® To cancel the S / PlusCode programming, press BACK remote control.
-
Page 39: Timer Recording (Manually)
Timer recording (manually) Switch on the TV. Select the correct Video In channel at the TV. If you are recording directly to a DVD disc, insert the recordable DVD before proceeding to step Press TIMER on the remote control. The timer schedule appears. Timer Schedule Source Rec Mode Date Start End Rec To... -
Page 40: Changing/ Deleting A Timer Recording
Timer Recording Press TIMER to exit the menu. Press STANDBY-ON to turn off the recorder. If the recorder is not in standby mode, a warning message will appear three minutes before the recording starts. The ‘ ’ icon will light up on the TIMER display panel if a timer recording is set. -
Page 41: Playback
Playback your HDD recordings Each recording stored on the HDD is displayed in the HDD content menu with an index picture. Press HDD on the remote control. The HDD content menu appears. keys to highlight a title and press OK on the remote control to start playback. -
Page 42: Playback From Disc
Playback from Disc Playable discs Using this recorder, you can play and record on the following discs: Recording and Playback DVD±RW (ReWritable DVD); can be recorded on and overwritten repeatedly. DVD±R (Recordable DVD); can be recorded on only once. Playback only: DVD Video (Digital Versatile Disc) CD-RW (CD-ReWritable) - Page 43 Playing a DVD video disc The DVD disc is usually formatted with a disc menu. You may have to make your selection (e.g., subtitle or audio language) within the disc menu. Insert a DVD disc. Press DVD on the remote control. If the disc menu appears on the TV Use the numeric keypad 0-9 to input your selection or use...
- Page 44 Playback from Disc Playing a recordable DVD Insert a recordable DVD. Press DVD on the remote control. The Index Picture screen appears. keys to select a title and press PAUSE LIVE TV u to start playback. To stop playback, press STOPÇ. Helpful Hint: –...
- Page 45 Playing a picture disc (or musical slide show) You can display JPEG pictures in the selected roll automatically one after the other. Insert a JPEG picture disc (CD, CD-R/RW, DVD). Press DVD on the remote control. The disc content menu appears. keys to navigate within the menu and press OK to access the folder/ album.
-
Page 46: Playback From Usb
Playback from USB Playing from a USB fl ash drive/ USB memory card reader (for DVDR3460H/ DVDR3465H only) This USB port only supports the playback of JPEG/MP3 fi les. It is not possible to record the data from the USB port to this DVD recorder. -
Page 47: Additional Playback Features
Changing to another title/ chapter/track When a disc contains more than one track, title or chapter, you can change to a different track, title or chapter as follows: During playback, Press ë(NEXT) to go to the next title/ chapter/track. Press í(PREV) to return to the start of the previous chapter/track. -
Page 48: Using Display Options
Additional Playback Features Using DISPLAY options SELECT PAUSE LIVE TV During disc playback, press DISPLAY twice on the remote control. The playback menu appears on the TV. Mode Normal Play Trick mode Title 02/05 Chapter 01/22 Audio 01/02 - OTH Subtitle Angle 01/03... - Page 49 Additional Playback Features Creating a playlist You can play the contents of the disc in the order you want by programming the tracks to be played. Press DISPLAY twice on the remote control. The playback menu appears. Select { Mode } > { Program }. The programme menu appears.
- Page 50 Additional Playback Features Changing subtitle language This operation works only on DVDs with multiple subtitle languages, you can change the language you want while playing back the DVD. This function can also be accessed by pressing the SUBTITLE key on the remote control.
-
Page 51: Edit Recordings - Hdd
About HDD title edit menu In the HDD title edit menu, you can change the title name, hide unwanted scenes, delete titles, split a title. The edit options in the HDD title edit menu are: { Play Title } – Select a title (recording) to play. { Delete Title} ( For unprotected and unlocked titles only ) –... - Page 52 Edit Recordings - HDD Dividing a title You can divide the current title into two new titles. Each of these titles is characterised by its own index picture. Warning! Once a title is divided, the process cannot be reversed. In HDD title edit mode, use highlight { Divide Title } and press OK.
- Page 53 Rename a title The original title name is automatically generated by the recorder. You can change the disc name by following the steps below. In HDD title edit mode, use highlight { Rename } and press OK. The keyboard screen appears. keys to highlight a character on the keyboard and press OK to select.
-
Page 54: Edit Recordings - Recordable Dvd
{ Make Compatible } - DVD±RWs only – To ensure the edited changes remain when the disc is played back on another DVD player. (eg., hidden chapters to remain hidden). { Lock/Unlock Disc } - DVD±RWs only – Lock or unlock a disc to prevent accidental erasure or changes being made. - Page 55 Edit Recordings - Recordable DVD Rename disc The original disc name is generated automatically by the recorder. You can change the disc name by following the steps below. In disc editing menu, use select { Rename Disc } and press OK. The keyboard screen appears.
-
Page 56: Playing Your Recordings On Other Dvd Players (Dvd±R Only)
Edit Recordings - Recordable DVD Make compatible (DVD±RW only) The edited DVD±RW may still display the original titles or hidden scenes when playbacked on other DVD players. This function ensures that the edited changes of the DVD±RW remain when played back on other players. -
Page 57: About Dvd Title Editing
Edit Recordings - Recordable DVD About DVD title editing You can change the individual title information or delete a title (recording) on a recorded DVD disc. If the recordable DVD has been fi nalised, it cannot be edited. The displayed options in the title editing menu may differ depending on the type of disc. - Page 58 Edit Recordings - Recordable DVD Rename title The original title name is generated automatically by the recorder. You can give a new name to the title by following the steps below. In title editing menu, use select { Rename Title } and press OK. The keyboard screen appears.
-
Page 59: About Video Editing
Edit Recordings - Recordable DVD About video editing After a recording has been made, this recorder allows you to edit the video content. You can add/delete chapter marker, hide unwanted scenes, change the picture in the index picture screen and split a title (recording) into two. When you playback a recording in video edit mode, the entire recording will be played back including hidden scenes. - Page 60 Edit Recordings - Recordable DVD Selecting a title It shows the current title and the total number of titles in the disc. It also allows you to select another title. In edit mode, use keys to select { Title } and press OK. Use the numeric keypad 0-9 to key in a title and press OK.
- Page 61 Edit Recordings - Recordable DVD Hiding an unwanted chapter You can choose to hide certain scenes from playback (e.g. skipping a commercial scene) or make it visible again. Create a chapter marker at the scene you are going to hide. ( See previous page on “Creating chapter markers”).
-
Page 62: Setup Menu Options
Setup Menu Options Accessing the Setup Menu The setup menu provides various options for you to adjust the recorder to suit your preferences. SETUP PAUSE LIVE TV Press SETUP on the remote control. The setup menu appears on TV. keys to highlight a setup option and press to access. -
Page 63: Setup Settings
SETUP settings (underlined options are the factory default settings) Selects the menu language for this recorder on-screen display. Menu Language Select the country of your residence. Country Selection TV Shape The picture shape can be adjusted to fi t your TV. Press the options. -
Page 64: Setup Settings
Setup Menu Options SETUP settings Manual Program 2) Use Manual Program { Fine Tuning } Programme Number P001 CH023 Search Type Frequency Frequency 0 5 8 . 9 8 Mhz Fine Tuning Standard PAL B/G NICAM { Standard } Audio Dual A Decoder Skip... -
Page 65: Date/ Time Settings
SETUP settings Sort Sort your stored TV channels. 1) Use Sort P001 BC020 P002 SW006 CANCEL P003 CH008 P009 CH001 2) Use P004 CH004 P005 GG006 press P006 CH010 P007 CH012 The selected channel will move to the right side of the P008 CH005 screen. -
Page 66: General Settings
Record Quality See the chapter on “Default Recording Settings”. DivX(R) Video on Philips provides you with the DivX® VOD (Video On Demand) Demand registration code that allows you to rent and purchase videos using the DivX® VOD service. For more information, visit www.divx.com/vod. -
Page 67: Audio Settings
AUDIO settings (underlined options are the factory default settings) Press SPDIF Output the options. { RAW } { LPCM } LPCM Output This setting allows you to select between two levels: { LPCM 48 kHz} { LPCM 96 kHz} LANGUAGE settings Audio Language Selects the preferred audio language for DVD playback. -
Page 68: Preferences Settings
Setup Menu Options PREFERENCES settings (underlined options are the factory default settings) Change your password setting for locking/ unlocking a title Change Password recording. New Password 1) Use Enter password * * * * Enter new password * * * * Re-enter password 2) Use the numeric keypad 0-9 to enter your four-digit pin code. -
Page 69: Hdd Settings
HDD settings (underlined options are the factory default settings) Save Time Shift This option allows you to control the behaviour of the Time Shift Buffer Buffer. { Yes } { No } HDD Info Press OK to display information on: –... -
Page 70: Software Upgrade
Software Upgrade Installing the latest software Periodically, Philips will release upgrades for the software that was initially installed in your recorder as the software is continuously refi ned for greater stability and compatibility of the recorder. Caution! Power supply must not be interrupted during upgrade! Visit Philips’... -
Page 71: Frequently Asked Questions
Finalizing a disc locks the disc so it can no longer be recorded, only required for DVD±Rs. It will then be compatible with virtually any DVD player. To close a disc without fi nalizing it, simply stop recording and eject the disc. You will still be able to record on the disc if there is capacity for more recordings. -
Page 72: Troubleshooting
– The requested action requires that the time shift buffer (temporary HDD storage) to be cleared. All contents that were not marked for recording will be deleted. – Reformat the HDD again. – If the problem persists, please contact Philips for help. - Page 73 Problem (Playback) Disc will not play. The picture is distorted or black and white during playback. There is picture or sound interference with the TV reception. Distorted sound coming from a connected hi-fi system or amplifi er. The message ‘UNKNOWN DISC’ appears.
- Page 74 (recorded) after you programmed a recording using the S ® /VIDEO Plus+ system. The recorded DVD cannot be played back on another DVD player. Picture is fuzzy and brightness varies when copying DVD Video discs or prerecorded video cassettes. (continued) Solution –...
- Page 75 Problem (Recording) There is a power failure during the copying of fi les to a recordable DVD. During recording from the time shift buffer, it is not possible to start or stop a recording. Archiving does not end. Troubleshooting Solution –...
-
Page 76: Specifi Cations
Specifi cations Video Recording • Recording System: PAL • Compression formats: MPEG2 • Modes of Record Quality: High Quality : HQ Standard Play : SP Standard Play Plus : SPP Long Play : LP Extended Play : EP Super Long Play : SLP Super Extended Play : SEP... -
Page 77: Glossary
Analogue: Sound that has not been turned into numbers. Analogue sound varies, while digital sound has specifi c numerical values. These sockets send audio through two channels, the left and right. Aspect ratio: The ratio of vertical and horizontal sizes of a displayed image. The horizontal vs. -
Page 78: Display Panel Symbols /Messages
OPEN Disc tray is opened or opening. READING Disc is being recognised by the recorder. PHILIPS The recorder has been turned on. SCANXXX Please wait until this message disappears. The recorder is busy processing an operation. XXX indicates the number of found channels. -
Page 80: Tv System Guide
TV System Guide COUNTRY AFGHANISTAN PAL/SECAM B ALBANIA ALGERIA ANGOLA ARGENTINA AUSTRALIA AUSTRIA AZORES BAHAMAS NTSC M BAHRAIN BANGLADESH BARBADOS NTSC M BELGIUM BERMUDA NTSC M BOLIVIA NTSC M BOTSWANA BRAZIL BRUNEI BULGARIA SECAM D BURKINA FASO SECAM K1 BURMA NTSC M BURUNDI SECAM K1... - Page 81 COUNTRY LIBYA SECAM B LITHUANIA PAL D (was SECAM) LUXEMBOURG PAL B/SECAM L MADAGASCAR SECAM K1 MADEIRA PAL B MALAGASY SECAM K1 MALAWI PAL B MALAYSIA PAL B MALI SECAM K1 MALTA PAL B MARTINIQUE SECAM K1 MAURITANIA SECAM B MAURITIUS SECAM B MEXICO...
- Page 82 Meet Philips at the Internet www.philips.com http://www.philips.com/support DVDR3450H DVDR3452H DVDR3460H DVDR3465H CLASS 1 LASER PRODUCT 3139 245 24501 Sgp-0625/05/31-1...