
Related Manuals for Philips 99F2


Summary of Contents for Philips 99F2
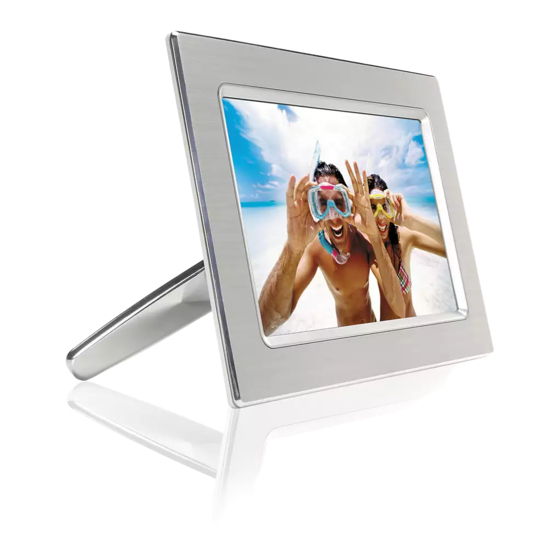
- Page 1 User manual Manuel d’utilisation Gebruikershandleiding Användar-handbok PhotoFrame™ Modern 9FF2M4 | Benutzerhandbuch | Manuale per l'utent | Manual del usuario | Manual do usuário 9FF2 Classic 9FF2CWO 9FF2CMI 9FF2CME...
-
Page 2: Table Of Contents
6. Getting help... - 63 - 6.1 Checking Display Status ... - 63 - 6.2 Taking Care of Photo Frame... - 64 - 6.3 Frequently asked questions... - 65 - —7— 7.3 Specification... - 67 - - 1 - Philips © 2006 Philips Electronics... - Page 3 Introduction Philips digital PhotoFrame™ can be placed either vertically or horizontally to fit the photos on display. Its internal rechargeable battery provides you with the freedom to pass it around and show photos without the power cord. Or, you can place it somewhere in a room for a continuous display by connecting it to the mains power supply.
-
Page 4: Getting Started
Digital PhotoFrame™ Power adaptor USB Cable to PC (male B type plug) Quick start guide User manual and Auto Run software on CD What else you'll need Power outlet Digital Photos on memory card or PC - 3 - Philips Electronics... -
Page 5: Initial Setup
The internal battery will start charging and the battery LED turns blue and flashes. This will take approximately 3 hours. Note: For safety reason and best stability Philips recommend to adjust the stand with the angle defined by the two clicked position. Using other positions may cause the PhotoFrame™ to fall and is under the entire responsibility of the user. -
Page 6: Locate Control Buttons
Navigation controller/ Menu Rest Button Power ON/OFF • Use your PhotoFrame™ by pressing the control buttons in the back. • The control buttons and instructions are shown at the bottom of the menu screen. Navigation Controller - 5 - Philips Electronics... -
Page 7: Turning On Photoframe
1.2.3 Turning on PhotoFrame™ Press the power ON/OFF button. The power LED will be blue and a slide show will play - 6 - Philips Electronics... -
Page 8: Select Your Preferred Language
Navigate up and down to select your preferred language (select between English, French, Spanish, Italian, German, Russian, Chinese and Japanese) Press the OK button to confirm your selection. The new setting will be effective immediately. - 7 - (Default Philips Electronics... -
Page 9: Setting Time, Date And Clock
If you want to use the PhotoFrame™ as a clock Navigate up and down to select Show clock Navigate right then up and down to select No Clock ,Full Screen , In Slideshow or Both Press the OK button to confirm selection. - 8 - Philips Electronics... -
Page 10: Play Photos From Memory Card
To remove the xD, xD, SD, MMC, or Memory Stick card, push the card again to unlock and then pull out the card. IMPORTANT NOTICE: Philips PhotoFrame™ do not support memory stick Duo, PRO Duo and RS-MMC even with adaptor Note: To copy photo from the memory card to the PhotoFrame™ read the copying photo section. -
Page 11: Copy Photos From Pc
• Disconnect the USB cable • After a few seconds, all photos will be copied to default album in PhotoFrame™ Note: Do not unconnect PhotoFrame™ when copying or transfering Photo betweeen PC and PhotoFrame™ - 10 - Philips Electronics... -
Page 12: Enjoying Photos
Note 2: For slideshow creation and management read the section “Creating and managing slideshow” Note 3: Photos are easily editable from slideshow mode by pressing the OK button. To go directly to thumbnail mode form read the photo menu section. - 11 - Philips Electronics... -
Page 13: Managing Photos And Albums
Navigate left and right to move between photos. Note: If you press left on the first photo you will return to the previous menu. Navigate up and down to move to the next 16 images. - 12 - Philips Electronics... -
Page 14: Quick Access To Thumbnai
Press OK to select individual images. (Select more than one picture by moving to a second picture and pressing OK again. To unselect a picture press OK again on the selected picture. Press OK for 3 seconds to select all visible thumbnails. - 13 - Philips Electronics... -
Page 15: Photo Menu
Select the Photo icon and navigate right or press the OK button to access the Photo menu. Navigate down to select the media to browse. Navigate right to enter the required album. Navigate right to view the photos in the chosen album. - 14 - Philips Electronics... - Page 16 The copy screen disappears upon completion and a resized copy of the photo is stored inside the selected album. You may move to other photos and continue this process until all the photos you want are copied to the selected album. - 15 - Philips Electronics...
- Page 17 To copy from PhotoFrame™ to PC • Copy the photos on PhotoFrame™ to PC the same way you transfer the contents of a digital camera to PC. All photos are stored in the sub-directories of the \DCIM\on the PhotoFrame™ drive. - 16 - Philips Electronics...
-
Page 18: Deleting Photos
Press the OK button to select individual images. Press the OK button for 3 seconds to select all visible thumbnails. Once all required photos have been selected press the menu button. Navigate down to select Yes delete. Press OK to confirm delete. - 17 - Philips Electronics... - Page 19 Note: To be able to delete photos on the memory card this function on the memory card must be allowed. To do so read the “Setup- Memory card” section. When you delete a photo, PhotoFrame™ will show the status and return to the album after completion. - 18 - Philips Electronics...
-
Page 20: Rotating, Zooming And Cropping
Navigate right to go to the orientation. Navigate down to select the rotation. Press OK to confirm rotation. You will then access the crop function window. Note: If you don’t want to crop your photos press the play slideshow button. - 19 - Philips Electronics... - Page 21 Press Play Slideshow to return to Main button Or navigate left to move back through the menus - 20 - Philips Electronics...
- Page 22 Navigate right to enter the required album. Navigate right to view the photos in the chosen album. Use the zoom + button decrease the crop frame. Use the Navigation button to move the frame around the image. - 21 - Philips Electronics...
- Page 23 Press OK to confirm crop. Press Play Slideshow to leave this menu and play the slideshow - 22 - Philips Electronics...
-
Page 24: Moving Photos
Press OK button for 3 seconds to select all visible thumbnails. Once all required photos have been selected press the menu button. Photo Menu Press the menu button to access the Move to Album. Navigate down to - 23 - Philips Electronics... - Page 25 Navigate down to select the storage source and then the Album and press OK to move Press Play Slideshow to leave this menu and play the slideshow - 24 - Philips Electronics...
-
Page 26: Photo Effects
Navigate right to view the photos in the chosen album. Select the photo to change. Photo Menu Press the menu button to access the Photo Effects. (select between No Effect, Navigate down to go to Black and White or Sepia .) - 25 - Philips Electronics... - Page 27 Press OK to apply effect. Press Play Slideshow to leave this menu and play the slideshow Note: Effects can be removed by selecting “no effect”. - 26 - Philips Electronics...
-
Page 28: Frames
Navigate right to enter the required album. Navigate right to view the photos in the chosen album. Press the OK button to select the photo to add the frame to. Navigate down to select the desired frame. - 27 - Philips Electronics... - Page 29 Press OK to apply the frame. Press Play Slideshow to leave this menu and play the slideshow Note: Frames can be removed by selecting “no frame”. - 28 - Philips Electronics...
-
Page 30: Album Menu
Use the navigation buttons and OK to enter the name of the album to be created, up to maximum of 24 characters. Highlight ENTER and press the OK button to confirm the name and return to the PhotoFrame™ menu. - 29 - Philips Electronics... -
Page 31: Rename Album
Use the navigation buttons and OK to enter the name of the album to be created, up to maximum of 24 characters. Highlight ENTER and press the OK button to confirm the name and return to the PhotoFrame™ menu. - 30 - Philips Electronics... -
Page 32: Delete Album
Navigate right to enter the required album. Press the menu button to access the album menu. Navigate down to select delete album. Navigate right to select Yes / No Press the OK button to validate - 31 - Philips Electronics... -
Page 33: Creating And Managing Slideshows
The new slideshow name appears in the list then press menu to add album to the slideshow. Navigate right to pick up the album to be added to the slideshow. Press OK to add. Repeat until finished. - 32 - Philips Electronics... -
Page 34: Play All Albums Or Selected Slideshow
Navigate right or OK button to access the slideshow menu. Slideshow menu shows the settings available for slideshows. Navigate right and to album list. Navigate up and down to select all albums or individual albums. Press slideshow to start playing the slideshow. - 33 - Philips Electronics... -
Page 35: Add Album To Slideshow
Navigate right to go to the slideshow list. Navigate down to go to the slideshow where the album is to be added Press the menu button. Navigate right to pick the album to be added and press OK to add. - 34 - Philips Electronics... - Page 36 Press Play Slideshow to leave this menu and play the slideshow - 35 - Philips Electronics...
-
Page 37: Remove Album From Slideshow
Navigate right to access the slideshow list. Navigate down to go to the slideshow. Navigate right and down to go to Remove Album. Navigate down to select the album to be removed. And press OK to remove the album - 36 - Philips Electronics... -
Page 38: Rename Slideshow
Navigate right to access the slideshow list. Navigate down to go to the slideshow you want to select and press the menu button. Navigate down to access rename slideshow and press OK to enter the on screen keyboard. - 37 - Philips Electronics... - Page 39 24 characters. Highlight ENTER and press the OK button to confirm the name and return to the PhotoFrame™ menu. Press Play Slideshow to leave this menu and play the slideshow - 38 - Philips Electronics...
-
Page 40: Delete Slideshow
Navigate down to go to the slideshow you want to delete and press the menu button. Navigate down to go to Delete slideshow, Navigate right to go to Yes or No. Navigate down to go to Yes and press OK to validate. - 39 - Philips Electronics... - Page 41 Press Play Slideshow to leave this menu and play the slideshow - 40 - Philips Electronics...
-
Page 42: Slideshow Sequence
Press Play Slideshow to leave this menu and play the slideshow Press the menu button to access the Main Menu. Navigate down to highlight the setup icon. Navigate right or OK button to access the slideshow menu. Navigate down to access the sequence menu. - 41 - Philips Electronics... -
Page 43: Transition Effects
Navigate right or press the OK button to access the slideshow menu. Navigate down to go to Transition Effect. Navigate right to highlight the effect. Navigate down to select between Random, Fade, Slide and Scroll. Press OK to confirm. - 42 - Philips Electronics... -
Page 44: Frequency
Navigate right or press the OK button to access the slideshow menu. Navigate down to access the frequency menu. Navigate Right. Navigate down to move to the required transition time. Press the OK button to confirm. - 43 - Philips Electronics... - Page 45 Press Play Slideshow to leave this menu and play the slideshow Note: This function applies to all the slideshows stored on all media. - 44 - Philips Electronics...
-
Page 46: Collage
Navigate right or press the OK button to access the slideshow menu. Navigate down to access the collage menu. Navigate Right. To access different the collage layout. Navigate down to select the preferred layout. Press OK to confirm selection. - 45 - Philips Electronics... -
Page 47: Background Color
Navigate right or press the OK button to access the slideshow menu. Navigate down to access the background color menu. Navigate Right to access the color list. Navigate up and down to select the color (select between Black or White) and press OK to confirm selection. - 46 - Philips Electronics... -
Page 48: Show Clock
Navigate right or press the OK button to access the slideshow menu. Navigate down to access the show clock menu. Navigate Right to access Yes/No Navigate up and down to select the color (select between Black or White) and press OK to confirm selection. - 47 - Philips Electronics... -
Page 49: Setup
Navigate down to highlight the setup icon. Navigate right or press the OK button to access the setup menu. Navigate right to access the brightness control. Navigate up and down to select the level of brightness. - 48 - Philips Electronics... -
Page 50: Language
Navigate right to enter the language menu. Navigate up and down to select your preferred language (select between English, French, Spanish, Italian, Polish, Chinese and Japanese). Press the OK button to confirm your selection. The new setting will be effective immediately. - 49 - Philips Electronics... -
Page 51: Memory Card
Navigate right or press the OK button to access the setup menu. Navigate down to Memory Card, Navigate right to Delete function, Navigate right select Do Not Allow or Allow. Press OK to confirm choice. - 50 - Philips Electronics... -
Page 52: Event Reminder
Use the navigation buttons and OK to enter the name of the album to be created, up to maximum of 24 characters. Highlight ENTER and press the OK button to confirm the name and return to the PhotoFrame™ menu. - 51 - Philips Electronics... - Page 53 Navigate down to select photo. Navigate right to go to the album list. Navigate down to select the album. Navigate right to go to the thumbnail. Navigate to select the photo. Press OK to confirm selection. - 52 - Philips Electronics...
- Page 54 You can choose to have this alarm every day or to schedule a specific date. Navigate left and right to select the days, months, years. Navigate up and down to move between days, months and years. - 53 - Philips Electronics...
- Page 55 Navigate right to go to Delete Alarm. Navigate up and down to select either yes or no Press the OK button to confirm selection. Press Play Slideshow to leave this menu and play the slideshow - 54 - Philips Electronics...
-
Page 56: Event Reminder Snooze
Navigate down to Alarm. Navigate right and down to go to snooze. Navigate right and down to go to select between ON/ Off, 5 minutes or 10 minutes. Press the OK button to confirm selection. - 55 - Philips Electronics... -
Page 57: Time, Date And Clock
If you want to use the PhotoFrame™ as a clock Navigate up and down to select Show clock Navigate right then up and down to select No Clock ,Full Screen , In Slideshow or Both Press the OK button to confirm selection. - 56 - Philips Electronics... -
Page 58: Auto On/Off
Note: There are 3 Time periods for morning, lunch and evening. Although a whole day can be used in 1 time slot. Each time period has 3 options (Set on, Auto On and Auto Off) Navigate Right to access the menu. - 57 - Philips Electronics... - Page 59 Press the menu button to access the Main Menu. Navigate down to highlight the setup icon. Navigate right or press the OK button to access the setup menu. Navigate down to select the Auto On/Off function. Navigate right to weekend. - 58 - Philips Electronics...
- Page 60 PhotoFrame™ will wake up until the next auto OFF period. Navigate right to select Auto ON/ OFF time. Navigate up and down to change the time. Navigate right to move between the hours and minutes. Press the OK button to confirm. - 59 - Philips Electronics...
-
Page 61: Auto Tilt
Navigate down to highlight the setup icon. Navigate right or press the OK button to access the setup menu. Navigate down to go to Auto tilt. Navigate right to go to On or Off. Press OK to confirm selection. - 60 - Philips Electronics... -
Page 62: Beep On/Off
Navigate down to highlight the setup icon. Navigate right or press the OK button to access the setup menu. Navigate down to go to beep. Navigate right to go to On or Off. Navigate down or Press OK to confirm selection. - 61 - Philips Electronics... -
Page 63: Status
If you have a memory card in the PhotoFrame™ it will give you the status of the card (card Type and free memory left). Press Play Slideshow to leave this menu and play the slideshow or Press OK to exit - 62 - Philips Electronics... -
Page 64: Getting Help
Navigate down to highlight the setup icon. Navigate right or press the OK button to access the setup menu. Navigate down button to go to status. The status of the PhotoFrame™ is shown in the right window. - 63 - Philips Electronics... -
Page 65: Taking Care Of Photoframe
Make sure the stand of your PhotoFrame™ is clear from cables as cables could pull the stand out of PhotoFrame™ to the floor. Temperature and humidity limitations Operating temperature: 0° ~ 45° (Celsius) / 32° ~ 113° (Fahrenheit) Humidity: 20% ~ 80% - 64 - Philips Electronics... -
Page 66: Frequently Asked Questions
PhotoFrame™ will automatically turn off its display exactly at the Auto-off time. If the time has already passed for the day, it will start entering Auto-off status at the specified time from the next day. - 65 - Philips Electronics... - Page 67 Note that this operation does not apply to photos in sub-directories. Q: Do Philips PhotoFrame™ support progressive JPEG ? A: PhotoFrame™ do support progressive JPEG format picture, but the slideshow display might be very slow...
-
Page 68: Specification
- Slideshow setting: Collage, Random, Sequential, Transition effect - Screen background color: Black, White, Gray - Setup function: Brightness adjustment, Language, Status, Auto on/off on weekday/weekend, Beep on/off, Set time and date, Clock display enable/ disable, Event reminder with snooze, - 67 - Philips Electronics... - Page 69 - Plug & Play Compatibility: Windows 2000/XP or later - Regulatory Approvals: BSMI, C-Tick, CCC, CE, FCC, GOST, PSB, UL, VCCI - Adjustable stand: Rotating, Tilt-adjustable - Wall mountable / Ceiling Throw: Wall mount ready - Other convenience: Kensington lock compatible - 68 - Philips Electronics...
- Page 70 Specifications are subject to change without notice. Trademarks are the property of Koninklijke Philips Electronics N.V. or their respective owners 2006 © Koninklijke Philips Electronics N.V. All rights reserved. www.philips.com...