Panasonic SD-ZB2512 Operating Instructions And Recipes
Automatic bread maker
Hide thumbs
Also See for SD-ZB2512:
- Operating instructions and recipes (268 pages) ,
- Operating instructions and recipes (112 pages) ,
- Operating instructions and recipes (56 pages)
Table of Contents
Advertisement
Advertisement
Table of Contents

Related Manuals for Panasonic SD-ZB2512


Summary of Contents for Panasonic SD-ZB2512
- Page 1 OPERATING INSTRUCTIONS AND RECIPES (Household Use) SD-ZB2512 Model No. Thank you for purchasing this Panasonic product. Please read these instructions carefully before using this product and save this manual for future use. This product is intended for household use only.
-
Page 2: Table Of Contents
Contents Before Use Safety Instructions ································································································································································· 3 Accessories/Parts Identification ················································································································································ 6 Bread-making Ingredients ······················································································································································· 8 How to Use List of Bread Types and Baking Options ····································································································································10 Baking Bread ······································································································································································12 When adding extra ingredients ················································································································································14 Baking Brioche ····································································································································································15 Baking Savoury ···································································································································································16 Rustic Sourdough/Rustic Sourdough Dough STAGE 1 Making Sourdough starter ········································································································································18 STAGE 2 Baking Rustic Sourdough ·········································································································································19... -
Page 3: Safety Instructions
Safety Instructions Please make sure to follow these instructions. In order to prevent accidents or injuries to the user, other people, and damage to property, please follow the instructions below. The following charts indicate the degree of damage caused by wrong operation. - Page 4 The main body is deformed or is abnormally hot. The appliance makes abnormal turning noise during use. Unplug the appliance immediately and consult a Panasonic dealer and have it serviced by an authorized technician. Do not touch, block or cover the steam vent holes during use.
- Page 5 Caution Unplug the power plug when the appliance is not in use. (Otherwise it may cause an electric shock, or fire due to electric leakage.) Please unplug and allow the appliance to cool down before cleaning it. (It may cause a burn.) Do not allow the power cord to hang over the edge of the table or touch a hot surface.
-
Page 6: Accessories/Parts Identification
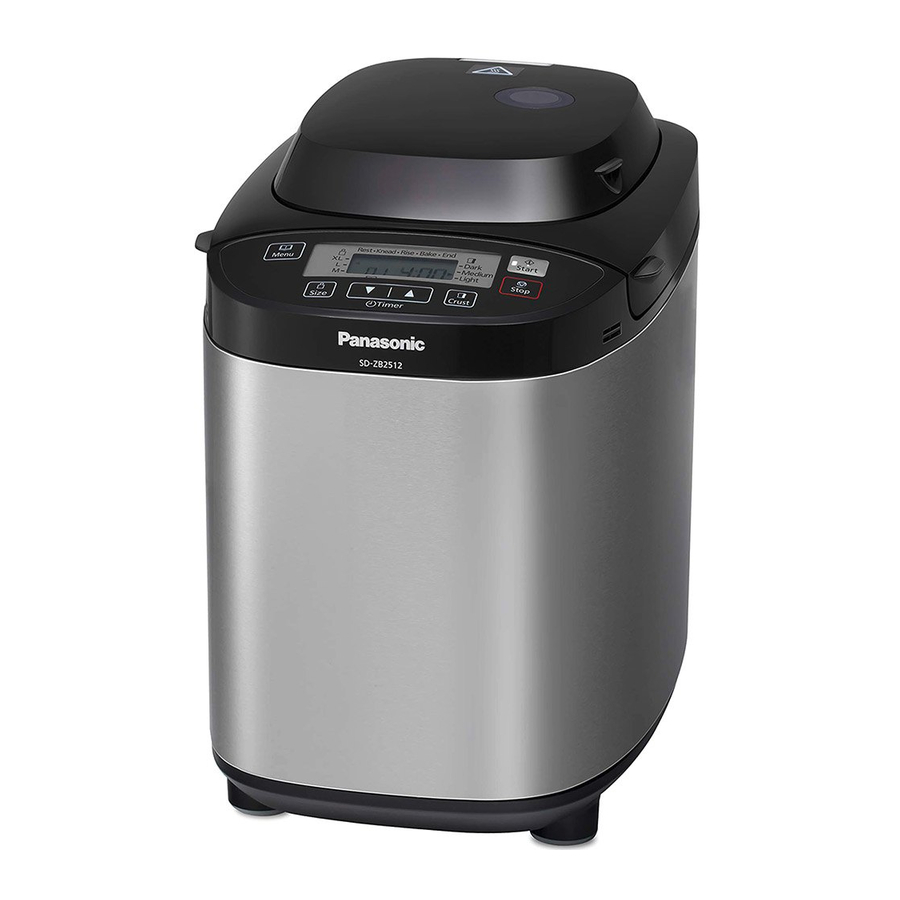
Accessories/Parts Identification Main Unit Raisin nut dispenser The ingredients placed in the raisin nut dispenser will drop into the bread pan automatically upon selecting the menu with raisin (3, 4, 7, 16, 20, 21, 23 and 31). Turn to P. 14 for ingredients which may be placed in the raisin nut dispenser. Never operate the Bread Maker without the dispenser being in place. -
Page 7: Control Panel
Control Panel Operation status : displayed for the current stage of the program. Ingredients are being regulated on the ‘Rest’ stage before kneading. : displayed when there is a problem with the power supply. : displayed when adding ingredients manually on menu 4, 13, 21 and 29. Time remaining until ready Also when adding ingredients manually, display will show the time until adding extra... -
Page 8: Bread-Making Ingredients
Bread-making Ingredients Flour Brown flour Main ingredient of bread, produces gluten. (helps the bread to rise, 10-15% of wheat grain removed during milling. gives it a firm texture) Use strong flour. Do not use soft or plain flour. Flour must be weighed on scales. Strong flour is milled from hard wheat and has a high content of protein which is necessary for the development of gluten. - Page 9 Water If using a bread mix... Use normal tap water. Use tepid water if using menu 2, 6, 8, 14 or 24 in a cold room. ■ Bread mixes including yeast Use chilled water if using menu 8, 9, 13, 15, 16, 24, 25, 29, 30 or ➀...
-
Page 10: List Of Bread Types And Baking Options
List of Bread Types and Baking Options Function Availability and Time Required • Time required for each process will differ according to room temperature. Options Processes Menu Menu Rest Knead Rise Bake Total Size Crust Timer Number 30 min– 1 hr 50 min– 4 hr–... - Page 11 Options Processes Menu Menu Rest Knead Rise Bake Total Size Crust Timer Number 30 min– 1 hr 10 min– — — — — Basic 2 hr 20 min 15–30 min 50 min 1 hr 30 min 30 min– 1 hr 10 min– —...
-
Page 12: Baking Bread
Baking Bread Turn to P. 29–32 for bread recipes Place the ingredients in the bread pan Kneading blade Yeast dispenser Place the measured ingredients Remove the bread pan and set the kneading blade in the bread pan ➀ Place the dry ingredients except dry yeast. - Page 13 Set the program and start Remove the bread Select a bake menu Turn off the power when the bread is ready (The display shows when menu ‘1’ is selected.) (machine beeps 8 times and the bar at ‘End’ flashes.) To change the size To change the crust colour Remove the bread immediately,...
-
Page 14: When Adding Extra Ingredients
When adding extra ingredients Adding extra ingredients to bread or dough By selecting a menu with Raisin (3, 4, 7, 16, 20, 21, 23 or 31), you can mix your favourite ingredients into the dough to make all kinds of flavoured breads. -
Page 15: Baking Brioche
Baking Brioche 400 g Bread flour Salt 1 tsp Sugar 3 tbsp Butter (Cut into 2 cm cubes and keep in 50 g fridge) Powdered milk 2 tbsp Eggs (Medium) 2 (100 g) Water 180 mL Dry yeast 1½ tsp * Butter for added later (Cut into 1–2 cm 70 g cubes and keep in fridge) -
Page 16: Baking Savoury
Baking Savoury To cancel/stop once started (hold for more than 1 second) 2, 3 ➀ Set the kneading blade into the bread pan. Preparations ➁ Place the ingredients in the bread pan in the order listed in the recipe. (P. 12) ➂... - Page 17 Turn to P. 30 for bread recipes Add additional ingredients when the beep For ingredients, use max. 100 g as size-M, 125 g sounds, then press ‘Start’ again as size-L or 150 g as size-XL. Complete placing the extra ingredients while ‘ ’...
-
Page 18: Rustic Sourdough/Rustic Sourdough Dough
Rustic Sourdough/Rustic Sourdough Dough STAGE 1 Making Sourdough starter Turn to P. 35 for sourdough starter recipe To cancel/stop once started (hold for more than 1 second) Remove the kneading blade. Sourdough starter spoon ➀ Mix all the ingredients well in the sourdough cup. Preparations Sourdough cup Bread pan... -
Page 19: Stage 2 Baking Rustic Sourdough
STAGE 2 Baking Rustic Sourdough Turn to P. 32 for bread recipes To cancel/stop once started (hold for more than 1 second) ➀ Set the kneading blade into the bread pan. Preparations ➁ Tip the sourdough starter in the bread pan. (P. -
Page 20: Stage 2 Making Rustic Sourdough Dough
Rustic Sourdough/Rustic Sourdough Dough STAGE 2 Making Rustic Sourdough Dough Turn to P. 35 for dough recipes To cancel/stop once started (hold for more than 1 second) ➀ Set the kneading blade into the bread pan. Preparations ➁ Tip the sourdough starter in the bread pan. (P. -
Page 21: Making Dough
Making Dough Turn to P. 35 for dough recipes To cancel/stop once started (hold for more than 1 second) ➀ Place the kneading blade into the bread pan. Preparations (P. 12) ➁ Place the ingredients in the bread pan in the order listed in the recipe. ➂... -
Page 22: Making Brioche Dough
Making Brioche Dough Turn to P. 41 for dough recipes To cancel/stop once started (hold for more than 1 second) 2, 3 Preparations ➀ Cut the butter for adding later for 1–2 cm cubes and keep them in fridge. (P. 12) ➁... -
Page 23: Making Savoury Dough
Making Savoury Dough Turn to P. 35 for dough recipes To cancel/stop once started (hold for more than 1 second) 2, 3 ➀ Set the kneading blade into the bread pan. Preparations (P. 12) ➁ Place the ingredients in the bread pan in the order listed in the recipe. ➂... -
Page 24: Baking Rustic Scone
Baking Rustic Scone Turn to P. 32 for bread recipes To cancel/stop once started (hold for more than 1 second) 2, 4, 6 Preparations ➀ Set the kneading blade into the bread pan. (P. 12) ➁ Place the ingredients in the bread pan in the following order: mixture of eggs and milk yogurt other ingredients. - Page 25 Open the lid and scrape off the dough, After 3 minutes have passed in step 5, the beeps shape the surface of the dough within sound and ‘Bake’ starts automatically. (The 3 minutes, when the beep sounds surface of the rustic scone became uneven, because you did not shape the surface of the dough.) Press ‘Start’...
-
Page 26: Baking Cake
Baking Cake Turn to P. 43 for cake recipe To cancel/stop once started (hold for more than 1 second) • Remove the kneading blade Preparations ➀ Prepare the ingredients according to the recipe. ➁ Line the bread pan with greaseproof paper and pour in the mixed ingredients. -
Page 27: Making Jam
Making Jam Turn to P. 44 for jam recipes To cancel/stop once started (hold for more than 1 second) Preparations ➀ Prepare the ingredients according to the recipe. ➁ Put the kneading blade into the bread pan. ➂ Place the ingredients into the bread pan in the following order: ➃... -
Page 28: Making Compote
Making Compote Turn to P. 44 for compote recipes To cancel/stop once started (hold for more than 1 second) Preparations ➀ Prepare the ingredients according to the recipe. (Remove the kneading blade.) ➁ Place the ingredients into the bread pan in the following order: ➂... -
Page 29: Bread Recipes
Bread Recipes • To raise bread, use strong high protein flour (Bread flour or Bakers flour). • Bread improver contain Vitamin C, and there is an effect to improve volume of bread. Please add it at the time of the recipe which using a lot of whole wheat flour. •... - Page 30 Bread Recipes Banana Cinnamon Loaf Chocolate Nut Bread Menu ‘3’ (4hr) Menu ‘3’ (4hr) Bread flour 420 g 520 g 600 g Bread flour 420 g 520 g 600 g Salt 1 tsp 2 tsp 2 tsp Salt 1 tsp 2 tsp 2 tsp Powdered milk...
- Page 31 Sesame & Bran Loaf Orange Poppyseed Loaf Menu ‘5’ (5hr) Menu ‘5’ (5hr) Whole wheat flour 300 g 370 g 450 g Whole wheat flour 300 g 370 g 450 g Bread flour 100 g 125 g 150 g Bread flour 100 g 125 g 150 g...
- Page 32 Bread Recipes [10 Rustic Sourdough] Rustic Sourdough Stage 1 Sourdough starter: Menu ‘27’ (24hr) : Timer can be used for recipes Turn to P. 18 and P. 35 for the sourdough starter recipe. with this symbol (5–9 hours) Stage 2: Menu ‘10’ (5hr) 400 g Bread flour Salt...
-
Page 33: Gluten Free Recipes
Gluten Free Recipes [1 Basic] Before making gluten free bread [14 Gluten Free] (gluten free bread mix / wheat free bread mix) Consult your doctor and follow the guidelines below! If you make gluten free bread as part of dietary therapy, it is important that you avoid cross- : Timer cannot be used contamination with flour that does contain gluten. - Page 34 Gluten Free Recipes Gluten free bread on Basic program Important Notes: Menu ‘1’–‘XL’ Size–‘Dark’ Crust (1hr 50min) 1. Do not leave gluten free bread in for keep warm. Remove bread from Machine when baking is Yeasted plain gluten free loaf complete.
-
Page 35: Dough Recipes
Dough Recipes Rolls Select one of the following recipes and follow the method below. Shape dough. Place onto a greased baking tray and allow to prove until doubled in size. Brush with beaten egg. [19 Basic] [20 Basic Raisin] [21 Savoury] [22 Whole wheat] [23 Whole wheat Raisin] until golden brown. - Page 36 Dough Recipes Croissants Roll up each triangle loosely, starting from the side opposite Menu ‘19’ (2hr 20min) the point. Curve ends. Bread flour 475 g Salt 2 tsp Powdered milk 3 tbsp Sugar ¼ cup Butter 30 g Water 300 mL Dry yeast 2 tsp Place seam side down on a greased baking tray.
- Page 37 Hot Cross Buns Olive & Rosemary Rolls Menu ‘20’ (2hr 20min) Menu ‘20’ (2hr 20min) Bread flour 475 g Bread flour 450 g Salt 2 tsp Salt 1 tsp Powdered milk 3 tbsp Powdered milk 2 tbsp Sugar 1¾ tbsp Sugar 1 tsp Butter...
- Page 38 Dough Recipes Swedish Tea Ring Sundried Tomato & Basil Rolls Menu ‘19’ (2hr 20min) Menu ‘20’ (2hr 20min) Bread flour 450 g Bread flour 450 g Salt 1 tsp Salt 1 tsp Powdered milk 3 tbsp Sugar 1 tsp Sugar 4 tbsp Olive oil 1 tbsp...
- Page 39 Bagels Whole Wheat Raisin Rolls Menu ‘19’ (2hr 20min) Menu ‘23’ (3hr 15min) Bread flour 450 g Bread flour 200 g Salt 1 tsp Whole wheat flour 200 g Powdered milk 2 tbsp Salt 2 tsp Sugar 1 tbsp Powdered milk Butter or oil 2 tbsp Sugar...
- Page 40 Dough Recipes Sunflower & Kibblewheat Rolls Rye & White Rolls Menu ‘22’ (3hr 15min) Stage 1 Culture: Menu ‘28’ (45min) Bread flour 225 g Bread flour 75 g Whole wheat flour 225 g Rye flour 150 g Salt 1 tsp Water 200 mL Powdered milk...
- Page 41 French Bread Brioche Dough (Chocolate Chip Brioche Roll) Menu ‘25’ (3hr 35min) ; for 12 rolls Menu ‘29’ (1hr 50min) Bread flour 420 g Salt 1½ tsp 400 g Bread flour Sugar 2 tsp Sugar 4 tbsp Butter Salt 1½ tsp Water 310 mL Butter (Cut into 2 cm cubes and keep in...
- Page 42 Dough Recipes Spelt Table Roll Focaccia ; for 8 rolls Menu ‘28’ (45min) Menu ‘30’ (2hr 45min) Bread flour 475 g Salt 2 tsp 500 g Spelt White Flour Powdered milk 2 tbsp Sugar 1½ tsp Sugar 2 tbsp Salt 1½...
-
Page 43: Cake Recipes
Cake Recipes Butter Cake Banana Yogurt Tea Bread Menu ‘18’ (50min) Menu ‘18’ (55min) Butter 100 g Plain flour 200 g Sugar 100 g Baking powder 2 tsp Egg, medium Baking soda ½ tsp Plain flour 275 g Brown sugar ½... -
Page 44: Jam Recipes
Jam Recipes Compote Recipes [32 Jam] [33 Compote] Spiced Apple Compote Jam setter can be used instead of pectin. Depending on the type of pectin, it may be better to increase or decrease the Menu ‘33’ (1hr 20min) amount. Apples, peeled, cored and diced 1000 g Strawberry Jam Cinnamon stick... -
Page 45: Care & Cleaning
Care & Cleaning Before cleaning, unplug your Bread Maker and allow it to cool down. To avoid damaging your Bread Maker... Wipe with a damp cloth Do not use anything abrasive! (cleansers, scouring pads etc) Do not wash any part of your Bread Maker in the dishwasher! Do not use benzine, thinners, alcohol, or bleach! After rinsing the washable parts, wipe with cloth. -
Page 46: To Protect The Non-Stick Finish
Care & Cleaning Dispenser lid Yeast dispenser Remove and wash with water. Wipe with a damp cloth and dry naturally. Raise the dispenser lid to an If wipe with a dry cloth, dry yeast will not drop into the bread pan angle of approximately 75 due to static. -
Page 47: Troubleshooting
Troubleshooting Before calling for service, please check through this section. Problem Cause Action [All bread] The quality of the gluten in your flour is poor, or you have not used strong flour. (Gluten quality can vary depending on temperature, humidity, how the flour is stored, and the season of harvest) Try another type, brand or another batch of flour. - Page 48 If the kneading mounting shaft does not rotate when the kneading blade is attached, you will need to replace the kneading mounting shaft unit. (Consult the place of purchase or a Panasonic service centre.) A small amount of dough will escape through the ventilation holes (so that it does not stop the rotating parts from rotating).
- Page 49 Problem Cause Action There is excess oil on the Did you add butter within 5 min of the beep? bottom of brioche. Do not put butter when display show remaining time until ready. (P. 15) The crust is oily. Butter flavor might be weak, but it can bake. My bread has big holes.
- Page 50 H01–H02 appears on the The display indicates a problem with the Bread Maker. display. Consult the place of purchase or a Panasonic service centre. The unit is hot (above 40°C/105°F). This may occur with repeated use. U50 appears on the display.
-
Page 51: Warranty
1. Subject to the conditions of this warranty Panasonic or it’s Authorised Service Centre will perform necessary service on the product without charge for parts or labour, if in the opinion of Panasonic, the product is found to be faulty within the warranty period. For Line Communications products (i.e. Cordless Phones, etc) the genuine battery(s) has a 3 month warranty. -
Page 53: Specification
Specification 230 – 240 V Power supply 50 Hz 505 – 550 W Power consumed Capacity (Strong flour) max. 600 g min. 300 g (Dry yeast) max. 7 g min. 2.1 g Capacity of raisin nut dispenser max. 150 g raisins Timer Digital timer (up to 13 hours) Dimensions (H×W×D) - Page 54 Memo...
- Page 56 Panasonic Taiwan Co., Ltd. Web Site: http://www.panasonic.com DZ50R187 MX0716E0 © Panasonic Taiwan Co., Ltd. 2016 Printed in China...