Table of Contents
Advertisement
Quick Links
Advertisement
Table of Contents

Related Manuals for Audiovox FPE2006DV - 20" LCD TV


Summary of Contents for Audiovox FPE2006DV - 20" LCD TV
-
Page 1: Operating Instructions
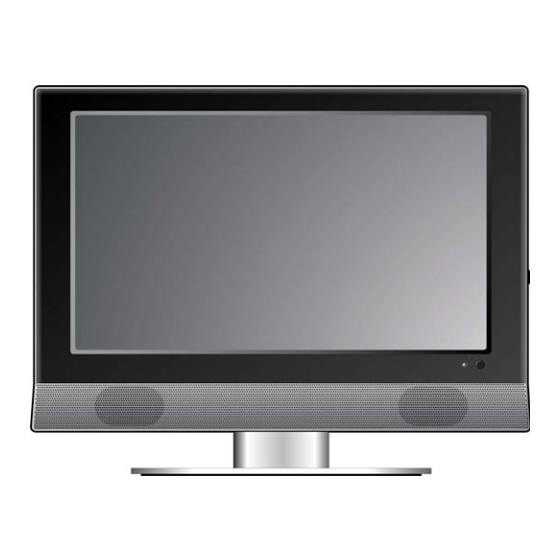
20” LCD TV with DVD Player Operating Instructions Model No. FPE2006DV For assistance, please call: 1-800-645-4994 Or visit us at WWW.AUDIOVOX.COM Before connecting, operating or adjusting this product, please read these instructions completely. Please keep this manual for future reference... -
Page 2: Table Of Contents
Table Of Contents Important Safety Instructions--------------------------------------------------1 Product Features ------------------------------------------------------------------3 Disc Information -------------------------------------------------------------------4 Front Panel---------------------------------------------------------------------------5 Rear Panel----------------------------------------------------------------------------7 Remote Control---------------------------------------------------------------------8 System Connections------------------------------------------------------------11 Connecting to External AV Signal Source------------------------------------11 Connecting to External AV Signal Source (YPbPr) ------------------------12 Connecting to External AV Device (AV Out)----------------------------------13 Connecting to PC ------------------------------------------------------------------14 Connecting to Earphone----------------------------------------------------------15 Connecting to Power Adapter---------------------------------------------------15... -
Page 3: Important Safety Instructions
Important Safety Instructions The lightning flash with arrowhead symbol, within an equilateral triangle, is intended to alert the user to the presence of un-insulated “dangerous voltage” within the product’s enclosure that may be of sufficient magnitude to constitute a risk of electric to persons. The exclamation point within an equilateral triangle is intended to alert the user to the presence of important operating and maintenance (servicing) instructions in the literature accompanying the appliance. - Page 4 Important Safety Instructions Note: 1. Read these instructions. 2. Keep these instructions. 3. Heed all warnings. 4. Follow all instructions. 5. Do not use near water. 6. Clean only with dry cloth. 7. Do not block any ventilation openings. Maintain well ventilated conditions around the product. Do not put product on bed, sofa or anything that blocks ventilation.
-
Page 5: Product Features
Product Features This product incorporates DVD player, LCD display and TV receiver in one system. Multiple Mode DVD mode Component mode VGA mode TV mode CVBS mode S-VIDEO mode High Quality Property High Resolution Adopt an MPEG2 decoding format to achieve horizontal resolution more than 500 lines. -
Page 6: Disc Information
Disc Information Discs Formats Supported By This Player DISC LOGO JPEG The operating method of some DVD discs is specified by the software maker. Please refer to the instruction manual of the disc. The DVD Player will play most recordable (CD-R) or erasable (CD-RW) CDs, but playback of CD-R or CD-RW discs created on a computer requires proper formatting and finalization of the disc for audio playback. -
Page 7: Front Panel
Front Panel 1. 20" color TFT screen 20" color TFT screen. 2. SOURCE button Press to select the modes: DVD, Component, VGA, TV, CVBS or S-VIDEO. 3. MENU button Press to enter or exit setup menu. 4. CH /▼ button ▲... - Page 8 Front Panel 7. ■ STOP button Press to stop playback, then press the PLAY button to resume normal playback in DVD mode. Press the STOP button twice repeatedly to stop completely. 8. Eject button Press to eject the disc out. 9.
-
Page 9: Rear Panel
Rear Panel 1. Y/Pb/Pr Input Jack Connected Y/Pb/Pr Component mode. 2. L/R Audio Input Jack Connected to the L/R audio input in Component mode. 3. AV Output Jacks Connected to the external AV input device. 4. AV and S-Video input Jacks In the S-VIDEO mode, connected to S-VIDEO signal input. -
Page 10: Remote Control
Remote Control Remote Control Drawing 1. POWER button Press to enter or exit the standby mode. 2. 0~9 Number buttons Press to select numbers. LAST button In the TV mode, press to return to the channel last viewed. 4. MTS button Press to activate MTS function in TV mode. - Page 11 Remote Control For DVD Operation PLAY button Press to play the disc in DVD mode. PAUSE button In DVD mode, press to pause the playback or start step-by-step playback. Then press PLAY button to resume normal playback. FB button Press the FB to search backward in DVD mode.
-
Page 12: Preparation Of Remote Control
Remote Control Preparation of Remote Control Softly push the back cover to open the battery compartment. Insert two batteries (1.5V, size AAA), please make sure the polarity matches the marks inside the compartment. Softly press the back cover to close it. Under normal use the battery will last for six months. -
Page 13: System Connections
System Connections Do not connect the power cord until all other connections have been made. Ensure that you observe the color cord when connecting audio and video cables. Connecting to External AV Signal Source Use the audio and video cable to connect the AV input jacks on the rear panel of the unit to the external AV signal source. -
Page 14: Connecting To External Av Signal Source Ypbpr
System Connections Connecting to External AV Signal Source YPbPr Use the audio and video cables to connect the Y/Pb/Pr input Jacks on the rear panel of the unit to the external AV signal source. After connection, turn on the power of the unit and external AV signal source and then press the SOURCE button to shift to Component mode. -
Page 15: Connecting To External Av Device (Av Out)
System Connections Connecting to External AV Device (AV Out) The unit supports audio and video signal input function, it can be connected to the external audio and video device. Use the audio and video cables to connect the AV output Jacks on the rear panel of the unit to the external AV input device. -
Page 16: Connecting To Pc
System Connections Connecting to PC The unit can be connected to PC (personal computer) via the VGA cable. Follow the steps and the figure below to connect: 1. Connect one end of the VGA cable to the VGA input jack on the rear panel of the unit. 2. -
Page 17: Connecting To Earphone
System Connections Connecting to Earphones This unit can be connected to an earphone for listening to music privately. See the below figure for details: After connecting to the earphone, the internal speakers output will turn off automatically. Connecting to Power Adapter Power is supplied through the provided power adapter, one end is connected to the DC 12V IN jack on the rear panel of the unit, the other end to the AC100~240V wall outlet. -
Page 18: Connecting To Tv Antenna
System Connections Connecting to TV Antenna This unit can be connected to the TV signal input source via the TV jack on the rear panel. After connection, turn on the power of the unit, press the SOURCE button to shift to TV mode. After connecting to the antenna, turn on the unit, and go on with program searching, you can follow the below steps to select channels: 1. -
Page 19: Tv Setup And Operation
TV Setup and Operation Preparations 1. After connection, press the POWER button to turn on the power. (If it is turned on, the power indicator is blue.) 2. Press the SOURCE button to shift to TV mode. You can go on with the following operations: Image Setting Note: This item is only available when there is signal input. -
Page 20: Audio Setting
TV Setup and Operation Contrast Setup Press the ▲▼ button to select Contrast and press the ◄► button to adjust the value. Press the MENU button to return to the previous menu. Hue Setup Press the ▲▼ button to select Hue and press the ◄► button to adjust the value. Press the MENU button to return to the previous menu. -
Page 21: Sleep Setting
TV Setup and Operation Treble Setup Press the ▲▼button to select Treble and press the ◄► button to adjust the level. Press the MENU button to return to the previous menu. Balance Setup Press the ▲▼ button to select Balance and press the ◄► button to adjust the level. Press the MENU button to return to the previous menu. -
Page 22: Parental Setting
TV Setup and Operation Parental Setting Note: The Parental Function is the same as that of V-CHIP. Press the MENU button to enter the setup menu. Press the ▲▼ button to select Parental and press the ENTER button to enter the menu shown on the right. - Page 23 TV Setup and Operation Clear All Press the ▲▼ button to select Clear All and press the ENTER button to enter. Press the ▲▼ button to select the desired item and then press the ENTER button to confirm your selection. Press the MENU button to return to the previous menu.
- Page 24 TV Setup and Operation CA Eng Rating Press the ▲▼ button to select CA Eng Rating and press the ENTER button to enter. Press the ▲▼ button to select the desired item and then press the ENTER button to confirm your selection. Press the MENU button to return to the previous menu.
-
Page 25: Setup Setting
TV Setup and Operation Setup Setting Press the MENU button once to enter the setup menu. Press the▲▼ button to select Setup and press the ENTER button to enter the menu shown on the right. In the Setup menu, press the▲▼ button to select the desired item and press the ENTER button to enter. - Page 26 TV Setup and Operation Channel System Press the ▲▼ button to select Channel System and press the ENTER button to enter. Press the ▲▼ button to select the desired item and then press the ENTER button to confirm your selection. Press the MENU button to return to the previous menu.
- Page 27 TV Setup and Operation Fine Tune Press the ▲▼ button to select Fine Tune and press the ENTER button to enter. Press the ► or ◄ button to start fine tuning forward or backward. Press the MENU button to return to the previous menu.
-
Page 28: Dvd Playback Operation
DVD Playback Operation Preparation After connections, turn on the unit and select the relevant video input before playback. Disc Loading Steps: 1. Press the POWER button to turn on the power. Press the SOURCE button to shift to DVD mode. 2. - Page 29 DVD Playback Operation Stop Press the ■ STOP button once to stop playback and then press PLAY button to resume. Press this button twice to stop playback completely. Pause Press the PAUSE button once to pause the playback, press it repeatedly to start step-by-step playback, press the PLAY button to resume normal playback.
- Page 30 DVD Playback Operation Language (Audio) There can be up to 8 audio languages on a DVD disc. When you play a multi-language DVD disc you can press the AUDIO button to select different audio languages. Subtitle The DVD player can support multiple kinds of subtitles. When you play a multi-subtitle disc you can press the SUBTITLE button to select different subtitle languages.
-
Page 31: Jpeg Playback
DVD Playback Operation Fast Playback Press the button on the remote control to activate fast forward or backward playback. Repeat Use the REPEAT button repeatedly to repeat Single, All or to cancel repeat. Some discs do not support the repeat function. Goto Press the GOTO button to access the time-selected state. - Page 32 DVD Playback Operation Menu Press the MENU button once to stop playback and return to the root menu. GOTO During playback, press the GOTO button on the remote control once, use the number buttons to input the file number. Picture Rotation This can be used only when the picture is normally displayed.
-
Page 33: Usb And Sd/Ms/Mmc Card Function
USB and SD/MS/MMC Card Function USB and SD/MS/MMC Card Function Preparation: 1. Connect the unit to the power supply. 2. Press the POWER to turn on the unit. 3. Press the SOURCE button to shift to DVD mode. 4. Insert the USB into the unit’s USB slot, or insert the SD/MS/MMC card into the SD/MS/MMC card slot on the right side of the unit. -
Page 34: Dvd System Setup
DVD System Setup Preparations 1. Connect to the power supply and turn on the unit. 2. Press the SOURCE button to shift to DVD mode. 3. Press the SETUP button on the remote control to display the settings menu. The menu includes General setup, Audio setup, Video setup, Preference and Password setup. - Page 35 DVD System Setup OSD Lang Captions Screen Saver Last Memory The item is used to select the OSD language. 1. Press the direction buttons to select OSD Lang. 2. Press the ENTER button to enter the setup. 3. Use the direction buttons to select items.
- Page 36 DVD System Setup Media Center Audio Setup Page Press the SETUP button to enter the General setup menu, then use the select Audio Setup Page, the screen will display as the below: Dolby Digital Setup Dual Mono 1. Press the direction buttons to select Media Center.
-
Page 37: Video Setup
DVD System Setup Dynamic Hdcd Setup In the Audio Setup Page, use the button to enter the setup, the screen will display as below: Video Setup Press the SETUP button to enter the General setup menu, then use the select Video Setup Page, the screen will display as the below: 1. - Page 38 DVD System Setup Video Quality Setup Select Quality, press the ENTER button to enter the menu as below: Sharpness Brightness Contrast 1. In the menu, Use the select the desired item. 2. Press the ENTER button to enter the item. 3.
- Page 39 DVD System Setup Preference Setup Press the SETUP button to enter the General setup menu, then use the select Preference Page, the screen will display as the below: Audio Subtitle Disc Menu In the menu, Use the select the desired item. Press the ENTER button to enter the item.
-
Page 40: Password Setup
DVD System Setup Parental Default Password Setup Press the SETUP button to enter the setup menu, then use the Password Setup Page, the screen will display as the below: DVD discs equipped with the child lock function are rated according to their contents and settings vary from disc to disc. - Page 41 DVD System Setup Password Mod Password Change 5. Press the direction buttons to select Password Mod. 6. Press the ENTER button to enter the setup, see the left figure: 7. Press the direction buttons to select On or Off. 8. Press the ENTER button again to confirm setting and return.
-
Page 42: Other Function
Other Functions External AV Input Function The unit has external AV input function. It supports CVBS, S-VIDEO and Component modes. Use the audio, video and S-Video cable to connect the unit to the external AV signal source such as recorder, vidicon, satellite receiver or game player etc. Then turn on the unit and the external AV signal source. -
Page 43: Troubleshooting
Troubleshooting SYMPTOM The player cannot play. There is no sound. LCD does not display Cannot continue to play and play a section repeatedly. There is no picture or picture moves up and down. The remote control does not work. Other Notes: Static or other external interfere may cause the player to behave abnormally. -
Page 44: Specifications
Specifications TFT-LCD Resolution TFT-LCD Screen Size Power Power Consumption Dimension Weight Ambient Temperature DESIGN AND SPECIFICATIONS ARE SUBJECT TO CHANGE WITHOUT NOTICE Manufactured under license from Dolby Laboratories. “Dolby” and the double-D symbol are trademarks of Dolby Laboratories. Confidential unpublished works. 1024 x 768 20 inches AC100 240V 50/60Hz...