Table of Contents
Advertisement
Quick Links
Advertisement
Table of Contents

Related Manuals for TrekStor SurfTab theatre 13.3


Summary of Contents for TrekStor SurfTab theatre 13.3
- Page 1 SurfTab theatre 13.3 ® OPERATING INSTRUCTIONS...
- Page 2 Contents...
-
Page 4: Intended Use
1) Welcome We hope you enjoy your new SurfTab. You have made the choice to buy a quality product. Please read the operating and safety instructions before using the device. IMPORTANT! Always follow the safety information in Section 3. IMPORTANT! The operating instructions, quick guide and the "Product safety and legal information"... -
Page 5: Safety Information
3) Safety information This booklet uses the following warning symbols and keywords: DANGER Indicates possible danger to life and/or danger of severe, irreversible injuries. CAUTION Follow instructions to avoid injuries and material damage. WARNING Follow instructions to avoid material damage. NOTE Additional information about using the device. - Page 6 DANGER Never open the casing of the device or the charger. Doing so may result in electrical shock, short circuit or fire! (There is a danger of electric shock, short circuit and fire!) If the device is defective, contact customer service instead. DANGER Do not insert any object into the ports or openings of the device or power adapter.
- Page 7 DANGER If smoke develops or if there are any strange sounds or smells coming from the tablet, immediately remove the power adapter from the power outlet, disconnect all devices connected to the device and switch off the device (take care due to the heat!). Ensure that the device and/or the power adapter is checked by a qualified individual before using it again.
- Page 8 CAUTION This device can generate high volume levels (particularly when used in combination with earphones/earbuds). Never listen at high volumes for long periods. Doing so can result in immediate or gradual hearing damage. Remember: Permanent hearing damage may only emerge later in life. You may become used to listening at high volume settings over time, making them appear normal to you.
- Page 9 WARNING Do not place objects of any kind on the device. WARNING Do not operate the display using pointed objects. Do not place any objects on the display and do not use the display to transport objects. Do not exert excessive pressure on the display as this may cause the glass panel to break.
-
Page 10: Operating Environment
NOTE Exposing your device to electrostatic discharge may interrupt the transfer of data between your device and a connected USB device (e.g., USB memory stick), disrupt the WiFi connection or cause the device to malfunction. If this happens, disconnect any USB devices that are attached and restart your device. It may be necessary to re-connect to the WiFi network. -
Page 11: Power Supply
WARNING Only operate and charge the device in ambient temperatures of between 5°C and 30°C. Protect the device from rapid temperature fluctuations (condensation from humidity can damage the device and may result in danger to the user). WARNING Only operate the device at a relative humidity of between 30 and 70 per cent. -
Page 12: Maintenance, Storage And Transport
WARNING Only connect the included power adapter to a suitable, professionally installed power outlet. Please read and observe the specifications on the power adapter’ s label. Only charge the device using the included power adapter. Do not charge the device on standard USB ports such as those found on desktop or laptop computers. -
Page 13: Information On The Specified Storage Capacities
WARNING Switch off the device before transporting it. When transporting the device, ensure that you use soft, stable packaging that protects the device from mechanical stress, moisture, dust and light. During transport, observe the recommended ambient temperature of 5°C to 30°C and try to ensure a constant temperature. -
Page 14: Technical Specifications
4) Technical specifications Processor (CPU): Intel® Atom™ x3-C3200RK processor (up to 1.1 GHz) RAM: 2 GB (DDR 3) Storage capacity: 16 GB Graphics processing unit (GPU): Mali-450 MP4 Display type: 10-point capacitive multi-touch Full HD IPS display Display size: 13.3" (33.8 cm) Aspect ratio: 16 : 9 Screen resolution:... -
Page 15: Technical Specifications Of The Power Adapter
microphone camera WiFi Bluetooth® 4.0 Miracast™ WiFi frequencies: 802.11 b/g/n: 2.4 GHz Supported memory cards: microSD, microSDHC, microSDXC (max. 32 GB) Playable video formats: H.263, H264 AVC, H.265/HEVC, MPEG-4 SP, VP8, VP9, XviD Supported video container formats: MOV, AVI, MP4, MKV, WEBM, 3gp Supported image formats: PNG, BMP, JPEG, GIF, WebP Playable audio formats:... -
Page 16: Package Contents
5) Package contents • SurfTab theatre 13.3 • Tablet stand • USB 2.0 host adapter cable (Micro-USB/USB-A (socket)) • USB 2.0 cable (Micro-USB/USB-A) • Power adapter (100 V – 240 V) • Cleaning cloth • Quick guide • Product safety and legal information Please unpack your SurfTab completely before using it. -
Page 17: Controls And Ports
6) Controls and ports SurfTab theatre 13.3 INPUT: 5V⎓3000mA Designed in Germany M.No.: ST13416-1 Made in China TrekStor GmbH, Berliner Ring 7 64625 Bensheim, Germany... - Page 18 A) Front camera B) Touch screen C) Microphone D) Stereo speaker E) Rear camera F) On/off switch G) Volume control H) Reset I) Charging socket J) Micro-USB socket K) Audio port L) Memory card slot...
- Page 19 7) Setting up the tablet stand The tablet stand comes folded up. It consists of a front base section (1) with an integrated holder for the SurfTab (5), a back rest bar (2), two locking screws (3) and a rear base section (4).
- Page 20 Only a few steps are needed to unfold and set up the tablet stand: a) First fold the front base section (1) forwards far enough so that it forms an angle of 45° – 90° with the rear base section (4). NOTE If the base section will not fold forwards without you having to exert considerable force, loosen the two locking...
- Page 21 b) Now fold the back rest bar (2) up high enough so that it forms an angle of approx. 90° with the base area of the stand. NOTE When folding up the back rest bar, hold the front and rear base section (4) in position with the palm of your hand if necessary.
- Page 22 Now you can set the SurfTab in the holder (5) provided in the front base section. The tablet stand can be folded up again at any time to save space during transport. NOTE Tighten the locking screws again after folding the stand up by turning them in a clockwise direction.
-
Page 23: Switching On The Surftab
8) Starting up the SurfTab for the first time Charging the SurfTab Please fully charge your SurfTab before you use it for the first time. To charge the SurfTab, connect the DC plug on the power adapter supplied to the charging socket (DC IN) on the SurfTab. Then plug the power adapter into a socket. - Page 24 NOTE If you do not have a Google account, type "O " r create a new accOunt here and create a new Google account. Your SurfTab will be configured once you complete the setup process. This may take a few minutes. Do not switch off the SurfTab during this period! Each time you turn on the SurfTab after setting it up, the lock screen will appear during start up.
-
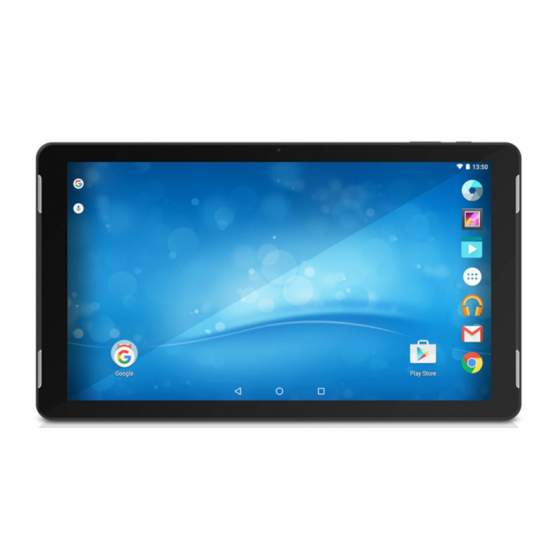
Page 25: Elements On The Start Screen
9) Elements on the start screen A) Google Now Tap this button to open Google Now. Google Now is a search and information service offering a variety of personalisation options. B) Language search Tap this button to open Language search. You can dictate a search term as soon as the prompt "L "... - Page 26 F) Home icon Tap this button to go back to the start screen. G) View all open elements Tap this button to view all open elements. To close a recently used element (app, widget, menu), place the tip of your finger on the element you want to close and drag the element to the left or right.
-
Page 27: Selecting An Element
10) Using the touch screen Selecting an element To open an element or select an option, briefly touch the icon you require with the tip of your finger. -
Page 28: Enlarging And Reducing The View
Enlarging and reducing the view You can change the size of some displays (images, Web pages and so on). Move two fingers apart on the screen to enlarge the display. In reverse, move two fingers towards each other on the screen to reduce the display again. -
Page 29: Using The Onscreen Keyboard
Scrolling To scroll on your SurfTab screen or in an app, place your fingertip on the screen and drag the screen in the opposite direction: If you would like to access an element further down on the screen ("scroll down"), drag the screen up with your fingertip. In reverse, you can "scroll up"... -
Page 30: Personalising The Home Screen
11) Personalising the home screen You can set up the home screen as you wish by adding or removing app shortcuts and widgets in the form of icons and altering the background. NOTE You can move an icon located on your home screen at any time. -
Page 31: Adding Widgets To The Start Screen
NOTE If you drag the icon to the page edge, you can place it on another page of the start screen. Adding widgets to the start screen In addition to app shortcuts, you can also add widgets to the start screen. To do so, proceed as follows: a) Touch an empty area of the screen background until the word "W "... -
Page 32: Removing App Shortcuts And Widgets From The Start Screen
NOTE If you drag the icon to the page edge, you can place it on another page of the start screen. NOTE To access an icon that is on a page other than the first page of the start screen, simply scroll to the relevant page (see Section 10, "S "). -
Page 33: Changing The Screen Background
NOTE This action only deletes the link between the app/widget and the start screen, not the app/widget itself. To find out how to remove an app completely from your SurfTab, see Section 19. Changing the screen background a) Touch an empty area of the screen background until the word "W "... -
Page 34: Setting Up An Identification Method For Screen Lock
13) Setting up an identification method for screen lock To make the data on your SurfTab more secure, we recommend that you set up an identification method for the screen lock. To do so, proceed as follows: a) Call up Settings (see Section 12). b) Scroll down in Settings and tap "s "... - Page 35 15) Connecting the SurfTab to the Internet Connecting to a stationary wireless network (WiFi) a) Call up Settings (see Section 12). b) In Settings, tap "W ". You are now in the WiFi menu. c) Use your fingertip to move the slider for WiFi from left to right. The word "o "appears in the top left of the screen.
-
Page 36: Launching The Internet Browser/Entering An Internet Address
16) Launching the Internet browser/ Entering an Internet address The browser can be found in the form of an app in the Applications menu. The browser app is recognisable from its icon, a blue globe with the title "B ". roWser Open the browser app in the Applications menu. -
Page 37: Receiving Emails
NOTE During the setup process, the configuration assistant will prompt you to enter an e-mail address and the associated password. Enter the details of the account you want to use to send and receive e-mails directly on your SurfTab. This can be a Gmail account or an account with another provider. -
Page 38: Downloading And Installing Apps From The Play Store
NOTE To add an attachment to an e-mail, tap the paperclip symbol top right and select the "a " option. The file explorer ttach file appears. Scroll to the required file in file explorer and tap it. The SurfTab jumps back to the e-mail app and shows the selected file as part of the new e-mail. -
Page 39: Uninstalling Apps
NOTE You can search the Play Store using the search bar at the top of the screen or by tapping the required category. The selected app will be downloaded and installed. The app will then be located in the Applications menu. If you do not yet have a Google account or are not signed in with it, you must perform these steps. -
Page 40: Using The Camera
WARNING Only uninstall apps that you have downloaded. Deleting or disabling system apps can lead to malfunctions or impede the functionality of your SurfTab. 20) Using the camera Your SurfTab has two cameras: a webcam on the front and a rear camera. -
Page 41: Shutter Button
A) Other camera options Here you will also find a button to toggle between front and rear camera (second option from the top). B) Shutter button Tap this button to take a photo. In video mode, tap to start recording and tap a second time to stop recording. NOTE You can zoom in on or away from your subject in both photo and video mode. -
Page 42: Other Devices
Tap "c " to switch to photo mode or "V " to switch to video amera ideo mode. NOTE A cogwheel also appears in the top right of the screen. Tap the cogwheel symbol to access other camera settings. 21) Transferring files between the SurfTab and other devices Transferring files via Bluetooth®... - Page 43 d) In the Bluetooth menu top right, use the tip of your finger to move the slider for Bluetooth from left to right. The word "o " appears in the top left of the screen. The SurfTab searches for all available Bluetooth devices nearby and then displays them as a list.
-
Page 44: Transferring Files Between The Surftab And A Pc
n) Tap the device you want to send the image to. The SurfTab will send the selected file to the required device. o) You may have to confirm receipt of the image on the destination device. NOTE Deactivate the Bluetooth function on both devices after successful transfer in order to save power. - Page 45 f ) Click "t pc" on the left in the file browser of your PC and double-click on the required destination folder to open it. j) Right-click a free area in the destination folder. The context menu appears. h) Click "p "...
-
Page 46: Putting The Surftab Into Recovery Mode/Loading Factory Settings
g) Tap "e " in the drop-down window. naBLe WireLess dispLay The SurfTab searches for all available Miracast devices nearby and then displays them as a list. h) Tap your television on the list. The SurfTab establishes a connection to the selected device. A short while later your television will display the screen of your SurfTab. - Page 47 Also press the On/off switch and hold both buttons down. d) As soon as the TrekStor logo appears, release both buttons. A few moments later the recovery mode menu appears. Use both volume control buttons to navigate in recovery mode.
-
Page 48: Switching Off The Surftab
The SurfTab now exits recovery mode, deletes all data, loads the factory settings and then starts as normal. As soon as the process is finished, the configuration assistant appears just like the first time you started using your SurfTab. 24) Switching off the SurfTab Standby Briefly press the On/off switch to put the SurfTab in standby mode. -
Page 49: Troubleshooting/Faq
26) Troubleshooting/FAQ In the following, you will find a list of frequently asked questions along with the appropriate answers and proposed solutions. Why does my SurfTab show less storage space than indicated on the packaging? The storage capacity indicated on the packaging and in the technical specifications refers to the total storage capacity of your SurfTab. - Page 50 Why does my SurfTab just switch off sometimes? If the energy level of the battery falls below a critical level, the SurfTab displays a corresponding warning. If you ignore these warnings, the SurfTab will turn off in order to counteract total discharge of the battery.
-
Page 51: Multi-Touch Display
27) Glossary Apps/applications An app (abbreviation of the word "a ") or application is a ppLications program that you can download from the Play Store, for example, and install on your SurfTab. Games, programs for playing back images and music files, word processing programs and a lot more are available. -
Page 52: Play Store
Play Store The Play Store is an online store offered by Google with lots of useful and interesting apps that you can download to your SurfTab. See Section 18 for information on how to download apps from the Play Store. Note that you need to pay for some apps (paid apps are clearly labelled as such in the Play Store). -
Page 53: Notes On Copyright And Trademarks
Intel, Intel Atom and the Intel Inside logo are trademarks of Intel Corporation in the U.S. and/or other countries. TrekStor and SurfTab are registered trademarks of TrekStor Ltd. in the European Community and other countries. Copyright © 2016 TrekStor GmbH. All rights reserved. -
Page 54: Notes On The Warranty
29) Notes on disposal and recycling Disposal This symbol indicates that this product and/or its battery contain components that are harmful to the environment and/or human health if not disposed of properly. As the owner of a used electrical or electronic device, you should not dispose of this device together with unsorted household rubbish. -
Page 55: Support Information
31) Support information If you have questions about your TrekStor product or problems, please proceed as follows: • Carefully read the operating instructions. • Take a look at our FAQ section of our website, where you will find answers to the most frequently asked questions about your product. -
Page 56: Open Source Software
License (GPL) as well as Lesser General Public License (LGPL). For further information visit http://www.gnu.org/licenses/gpl For additional informations concerning Source Code please consult http://www.trekstor.de/opensource/ Disclaimer of liability Since this is concerning free software Contributor does not give any guarantee about free software as far as permitted by law. - Page 57 E U D E C L A R AT I O N O F C O N F O R M I T Y As manufacturer and importer respectively: TrekStor GmbH Berliner Ring 7 D-64625 Bensheim, Germany I I I I I I I I I I I I I I I I I I I I I I I I I I I I I I I I I I I I I I I I I I I I I I I I I I I I I I I I I I I I I I I I I I I I I I I I I I I I I I I I I I I I I I I I I I I I I I I I I I I I I I I I I I I I I I I I I I I I I I I I I I I I I I I I I I I I I I I I I I I I I I I I I I I I I I I I I I I I I I I I I I I I I I I I I I I I I I I I...
- Page 58 TrekStor GmbH Berliner Ring 7 64625 Bensheim, Germany www.trekstor.de BA_STT133_V1-10-EN-160920...