
Related Manuals for ALDI WZTS 2000


Summary of Contents for ALDI WZTS 2000
-
Page 1: Table Saw
User Manual Spend a little Live a lot TABLE SAW WZTS 2000 Original instructions ID: #05007... - Page 2 Try it out now Just scan the QR code with your smartphone and find out more about the Aldi product you have purchased.* Your Aldi Service Portal All details mentioned above can also be found in the Aldi Service Portal at www.aldi.co.uk.
-
Page 3: Table Of Contents
Contents Overview ................4 Scope of delivery/device parts ...........6 General information ............7 Reading and storing the user manual ........7 Explanation of symbols ............7 Safety ...................8 Proper use ................. 8 Residual risks ................9 Safety instructions ..............9 Supplementary safety instructions ........12 Checking the saw and pack contents ........17 Assembly ................ -
Page 4: Overview
19 18 17... -
Page 6: Scope Of Delivery/Device Parts
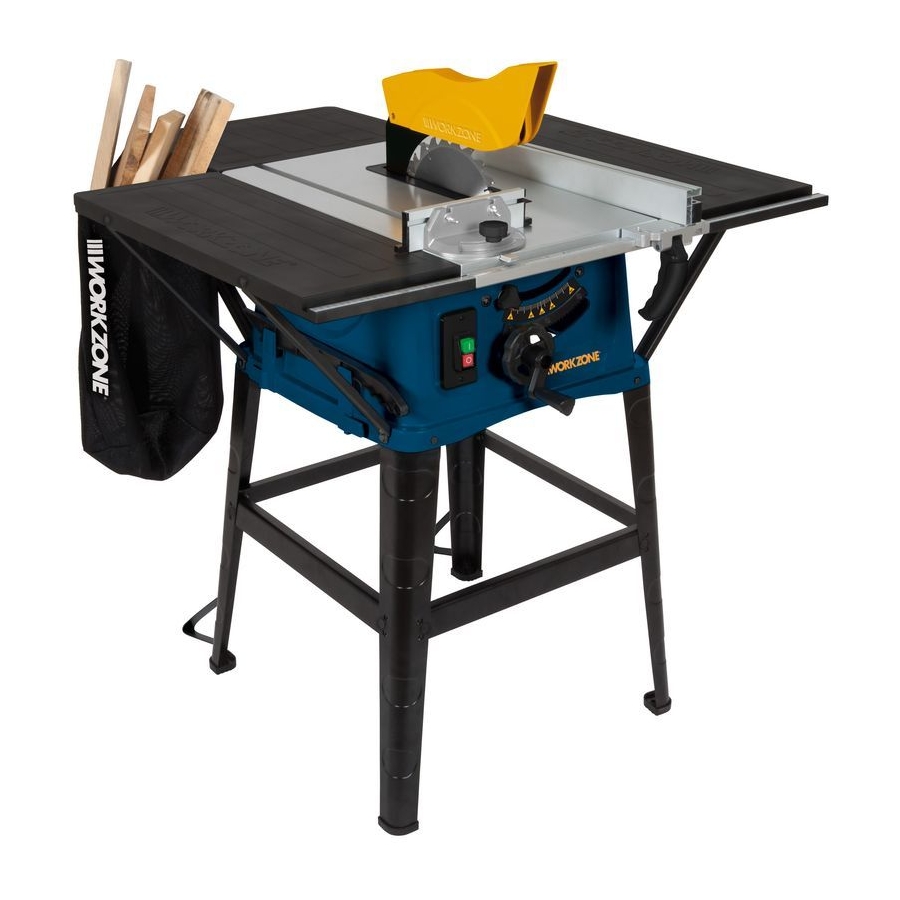
Pack contents/device parts Saw table Splitting wedge Table insert (with fixing screws, 2×) Waste bag Guide groove (saw table) Eccentric lever (parallel guide) Right table width extension Viewing window (parallel guide) Parallel guide Left table width extension (with carriage screw and knurled nut, 2×) Table length extension Guide rail (cross guide) Long table support, 2×... -
Page 7: General Information
General information General information Reading and storing the user manual This user manual accompanies this table saw. It contains important information on safety, usage and care. Read this user manual carefully before using the table saw. Pay particular attention to the safety instructions and warnings. Failure to follow the instructions in this user manual may result in serious injury or damage to the table saw. -
Page 8: Safety
Safety Wear a dust mask. Wear ear protection. Attention! Risk of injury due to sharp edges. This table saw is equipped with a class 2 laser. Do not look into the laser beam. This symbol identifies the table saw as a device belonging to protection class II. -
Page 9: Residual Risks
Safety • Modifications to the table saw; • Repair of the table saw by parties other than the manufacturer or a qualified professional; • Use of the table saw for commercial or industrial applications; • Operation or maintenance of the table saw by persons not familiar with how to handle the table saw and/or who are not aware of the related risks. - Page 10 Safety 3. Protect yourself against electrical shock. • Avoid contact between your body and earthed parts (e.g. pipes, radiators, electric stoves, cooling units). 4. Keep other persons away. • Do not allow other persons, particularly children, to touch the power tool or cable.
- Page 11 Safety 13. Do not overreach. • Keep proper footing and balance at all times. 14. Take good care of your power tools. • Keep cutting tools sharp and clean so that you can work more effectively and safely. • Observe the notes for lubricating and changing tools. •...
-
Page 12: Supplementary Safety Instructions
Safety • Damaged protective devices and parts must be properly repaired or replaced by a qualified workshop before using the table saw. • Damaged switches must be replaced by a customer service workshop. • Do not use any power tools if the switch cannot be turned on and off. 21. - Page 13 Safety − Wear personal protective gear when using the table saw. This may include: • Ear protection to reduce the risk of becoming hard of hearing; • Eye protection; • Respiratory protection to reduce the risk of inhaling dust that is hazardous to health;...
- Page 14 Safety − If an extension cord is required, make sure its diameter is sufficient to accommodate the power consumption of the table saw. Minimum sectional area 1 mm − Only use cable drums if the cable is completely rolled out. − Check the mains connection line. Do not use any faulty or damaged mains connection lines.
- Page 15 Safety − Observe the maximum speed. The maximum speed specified on the fitted tool must not be exceeded. Comply with the speed if specified. − Do not use any fitted tools that are cracked. Dispose of any cracked fitted tools. It is not permissible to repair them. −...
- Page 16 Safety Supplementary safety instructions for batteries WARNING! Risk of injury! Improperly handling batteries may result in severe injury. − Attention: Danger of explosion due to improper replacement of the batteries. Only replace the batteries with the same type or an equivalent battery type.
-
Page 17: Checking The Saw And Pack Contents
Checking the saw and pack contents Checking the saw and pack contents CAUTION! Risk of injury! Improper handling may pose a risk of injury. − The table saw is very heavy. Have a second person help you lift the table saw out of the packaging. -
Page 18: Assembly
Assembly Assembly WARNING! Risk of injury! Incorrectly assembling the table saw can result in serious injury. − Before start-up, assemble the table saw properly and completely, including all covers and safety devices. − Do not in any case insert the mains plug in the socket until you have completed assembly. -
Page 19: Mounting The Support Legs
Assembly Mounting the support legs 1. Attach one rubber foot to each of the support legs 2. Attach the four support legs and the free ends of the six table supports loosely onto the saw table using two M6×16mm hexagon bolts each and two large washers . -
Page 20: Mounting/Adjusting The Splitting Wedge
Assembly Mounting/adjusting the splitting wedge WARNING! Risk of injury! Unintended activation of the table saw and improper handling of the saw blade could result in serious injury. − Always pull the mains plug out of the socket before you make any adjustments to the table saw. - Page 21 Assembly 6. Use an AF 10 spanner loosen the clamp bolt behind the saw blade by turning it a few revolutions counterclockwise. 7. Insert the splitting wedge behind the clamping plate and push it all the way down. 8. Tighten the clamp bolt by turning it a few revolutions clockwise.
-
Page 22: Mounting The Saw Blade Guard
Assembly Mounting the saw blade guard 1. Remove the lens head screw on the back part of the saw blade guard 2. Pull the saw blade guard slightly apart and carefully guide it over the laser and onto the splitting wedge 3. -
Page 23: Mounting The Waste Bag
Operation Mounting the waste bag The waste bag is attached between the left table width extension and the table length extension and serves to collect smaller cutting rests. − Hold the waste bag between the left table width extension and the table length extension so that the logo on the waste bag is facing the open side. -
Page 24: Parallel Guide
Operation Parallel guide Stop height The stop rail for mounting on the parallel guide has two guide surfaces of different heights. Depending on the thickness of the materials to be cut, turn the stop rail into an upright position for thick material (work piece thickness over 25 mm) and into a flat position for thin material (work piece thickness under 25 mm). -
Page 25: Cross Guide
Operation 3. Push the stop rail until its back end touches the imaginary 45° line. 4. Tighten the knurled nuts again. Cross guide Do not push the stop rail of the cross guide too far towards the saw blade. There should be approx. 2 cm of space between the stop rail and saw blade. -
Page 26: Switching The Table Saw On And Off
Operation Inserting/changing the batteries of the laser The laser beam shows you exactly where the saw blade will cut next so that you can make very precise cuts. You will need two type AAA/LR03 1.5 V batteries to operate the laser (included in the pack contents). -
Page 27: Sawing
Operation Sawing WARNING! Risk of injury! Improperly handling the table saw poses a risk of serious injury. − When performing lengthwise cuts, do not stand directly in front of the table saw, instead stand diagonal to the cutting line. − When performing bevel cuts, always use the parallel guide. −... - Page 28 Operation Performing bevel cuts 1. Set the saw blade to the desired angle (see chapter “Setting the cutting angle”). 2. Set the parallel guide corresponding to the width and height of the work piece (see section “Parallel guide”). 3. Perform the cut corresponding to the width of the work piece (see chapter “Performing lengthwise cuts”).
-
Page 29: Removing Jammed Material
Operation When you are finished cutting 1. Switch the table saw off by pushing the red power switch 0 2. Disconnect the table saw from the power supply by pulling the mains plug out of the socket. 3. Wait until the saw blade ... - Page 30 Operation 5. Rotate the saw blade all the way out of the saw table by turning the crank clockwise up to the stop point. 6. Remove the splitting wedge by loosening the clamp bolt by turning it clockwise a few revolutions and then pulling the splitting wedge up and out. 7.
-
Page 31: Cleaning
Cleaning Cleaning WARNING! Risk of injury! Improperly handling the table saw poses a risk of serious injury. − Before cleaning, switch the table saw off and pull the mains plug out of the socket. − Wear suitable protective gloves when working on the table saw. WARNING! Burn hazard! The saw blade may become hot during operation, you could burn yourself on it. -
Page 32: Maintenance And Care
Maintenance and care Maintenance and care WARNING! Risk of injury! Improperly handling the table saw poses a risk of serious injury. − Before maintenance, switch the table saw off and pull the mains plug out of the socket. − Wear suitable protective gloves when working on the table saw. −... -
Page 33: Storage
Storage Checking the table saw Regularly check the condition of the table saw. Among other things, check to make sure: − that the switches are not damaged, − that the accessories are in proper condition, − that the mains connection line and the mains plug are not damaged, −... -
Page 34: Troubleshooting
Troubleshooting Troubleshooting Problem Possible cause Solution The motor of the The mains plug has not Insert the mains plug. table saw is not been inserted. running. The house fuse or residual Check the mains cord and, if current protection switch applicable, the extension cord has triggered. -
Page 35: Technical Data
Technical data Technical data Model: WZTS 2000 Supply voltage: 230–240 V~/50 Hz Output: 2000 W (S6 40%) Idle speed n 4250 min Electrical appliance class: Hard metal saw blade 24 teeth: Ø 254×Ø 30×2.8 mm Hard metal saw blade 48 teeth: Ø... -
Page 36: Noise Information
Ordering spare parts The following data should be provided when ordering spare parts: • Device type: WZTS 2000 • Article number (Einhell): 43.405. 72 • Ident number: 11016 • Spare part number of the required spare part You can find current prices and information at www.einhell.co.uk... -
Page 37: Disposal
Disposal Disposal Disposing of the packaging Dispose of the packaging separated into single type materials. Dispose of cardboard and carton as waste paper and foils via the recyclable material collection service. Disposing of the table saw Dispose of the table saw in accordance with the regulations in your country. Old devices must not be disposed of with household waste! This symbol indicates that this product must not be disposed of together with domestic waste in compliance with the Directive... -
Page 38: Declaration Of Conformity
EÚ a noriem pre výrobok Lýsir uppfyllingu EU-reglna og annarra staðla vöru a cikkekhez az EU-irányvonal és Normák szerint a következő konformitást jelenti ki Table Saw WZTS 2000 (Workzone) 2014/29/EU 2006/42/EC Annex IV 2005/32/EC_2009/125/EC Noti ed Body: TÜV Rheinland LGA Product Safety GmbH... -
Page 39: Warranty Card
WARRANTY CARD TABLE SAW WZTS 2000 Your details: Name Address E-mail Date of purchase* * We recommend you keep the receipt with this warranty card. Location of purchase Description of malfunction: If after contacting the manufacturer AFTER SALES SUPPORT you are requested to return the faulty 0044 151 649 1500 www.einhell.co.uk... -
Page 40: Warranty Conditions
Warranty conditions Dear Customer, The ALDI warranty offers you extensive benefits: Warranty period: 3 years from date of purchase. Costs: Free repair/exchange. No transport costs. ADVICE: Please contact our service hotline by phone, e-mail or fax before sending in the device. This allows us to provide support in the event of possible operator errors. - Page 41 PRODUCED IN CHINA FOR: ALDI STORES LTD. PO BOX 26, ATHERSTONE WARWICKSHIRE, CV9 2SH ALDI STORES (IRELAND) LTD.