Advertisement
Quick Links
Advertisement

Related Manuals for Salton SGH12

Summary of Contents for Salton SGH12
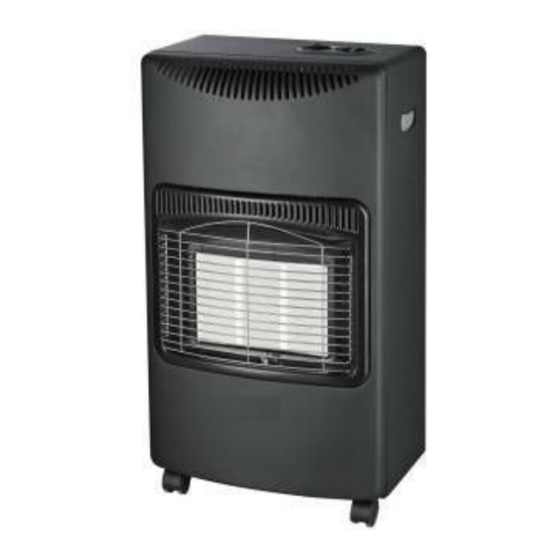
- Page 1 Model number – SGH12 User's Manual Dear Valued Customer: Thank you for purchasing the Salton gas heater. This instruction manual has been carefully prepared to ensure you will be able to easily operate, learn more about it and fully realize all its inherent capabilities. ...
-
Page 2: For Your Safety
FOR YOUR SAFETY Important: Read these instructions for use carefully so as to familiarize yourself with the appliance before connecting it to its gas container. Keep these instructions for future reference. This appliance is adjusted to operate on LPG only. IF YOU SMELL GAS: ➢ Turn off gas supply at bottle ➢ Extinguish all naked flames; ➢... -
Page 3: Installation
Operating Instructions: There are 3 controls, The first is the valve on the cylinder, which will be used to turn ON and OFF the gas supply. The second is the gas control knob with a dial which has 3 positions marked on it. This control knob is located on the top end of the heater (fig 4). The third is the piezoelectric ignition button next to the gas control knob (fig 4). Pressing this button will generate a spark on the pilot burner thus igniting the gas to the pilot burner. Installation put the cylinder into the gas heater install the protection baffle to make sure the cylinder can’t move connect the pipe to the gas valve with cap (make sure no leakage) connect another side of the pipe to the regulator with cap (make sure no leakage) open the gas tap before using the heater, and close the gas tap after using. ... - Page 4 Lighting heater: Before connecting the regulator to the gas cylinder, check whether there is a rubber washer on the regulator, and the washer must be in good condition. Connect the regulator to the gas cylinder by turning the hand wheel anticlockwise. Open the gas cylinder by turning the gas cylinder valve anticlockwise. Turn the gas control knob on the heater to setting 1(fig 4). Press the control knob down and hold in the pressed condition. This will allow gas to flow to the pilot and center burner. While holding the control knob in the pressed position, push the piezoelectric ignition (fig 4) button 2 or 3 tines. Each tine you strike this piezoelectric ignition you will hear a clicking sound as well as see a spark on the pilot burner. Once the pilot has lit, continue holding the gas control knob in the pressed position for a further 10 to 15 seconds thus activating the flame failure safety device. The pilot and center burner should remain alight. You may now adjust the heater setting to Low/Med/High as required. Turning off the heater: To turn off the heater, turn the control knob to position 1 and close the gas cylinder valve by turning the knob on the cylinder clockwise. Ensure that the pilot flame the center burner are extinguished. Testing gas leaks: When you suspect that the heater is leaking, turn off the gas supply and have the unit inspected by a qualified technician. Do not attempt to locate the source of leak with a naked flame. Locate it by sound, smell or by applying soapy water. Any bubbles forming will indicate the whereabouts of a leak. Safety tips: Do not move the heater while it is in use. Always face the heater towards the center of the room. Use it only in a wellventilated room. Ventilated is vital for the efficient performance of this heater and for safety of the occupants of the room in which it is being used. Allow plenty of fresh air in, never seal up the doorways and windows. Prevent young children and elderly people from touching very hot surfaces. The normal dress guard only protects against accidental clothing contact. Do not place clothes or other material on the heater. Keep all flammable materials at least one meter away from the heater. ...
-
Page 5: Maintenance
Recommend to use 50mm hose for connection, which should be certified according to applicable ENstandard; Regulator should be certified according to EN12864(from rate:max.1.5kg/h) Warning: ● read the instructions in the manual carefully, it has important information both for operation use and for your safety. ● do not use faulty appliances. ● maintenance and repairs must be carried out by a qualified person only. ● your heater should be checked manually by a qualified person for safe operation and to detect any fault. ● retain these instructions for future reference. If necessary, a new copy may be obtained from your dealer. ● turn off the gas container valve after use ● the appliance is suitable for 14.2kg/5.5kg lpg container, when change gas container , move the appliance to a flamefree atmosphere. ● do not move the appliance when in operation, avoid twisting the gas hose. ● do not place the heater near walls, curtains or furniture while in operation. Always face the heater towards the center of the room when in use. Do not put furniture or other objects in front of the heater; minimum clearance to combustibles to the rear and sides of the heater is 1000mm. ● the dress guard on this appliance conforms to standard requirements; however it does not provide full protection to individuals in close proximity of the heater. the guard is to prevent risk of injury and no part of it should be removed or altered. ● this appliance should be leakage tested before initial use and whenever the cylinder has been reconnected after filling. Never use a naked flame to test for leakage. ● this is a nonflue heater. Ensure the room is ventilated while the heater is operational. do not operate in a bedroom, bathroom, caravan, boat, or ... - Page 6 heater. ● light vacuuming with a soft brush will remove any dust on the surfaces of the ceramic elements. Do not scrape of knock these elements as they may become very fragile with use. ● do not clean products of the heater abrasively. ● watch the pilot flame while it is in operation. It should burn steadily, if it flickers or is yellow tipped, the heater should be checked for correct operation. ● if any parts need replacement, they must be replaced only with genuine original parts supplied by the manufacturer. The use of incorrect or substitute parts may be dangerous and will void any warranty. ...
- Page 7 W A R R A N T Y Home of Living Brands (Pty) Limited warrants to the original purchaser of this product (“the customer”) that this product will be free of defects in quality and workmanship which under normal personal, family or household use and purpose may manifest within a period of 1 (one) year from the date of purchase (“warranty period”). Where the customer has purchased a product and it breaks, is defective or does not work properly for the intended purpose, the customer must notify the supplier from whom the customer bought the product (“the supplier”) thereof within the warranty period. Any claim in terms of this warranty must be supported by a proof of purchase. If proof of purchase is not available, then repair, and/or service charges may be payable by the customer to the supplier. The faulty product must be taken to the supplier's service centre to exercise the warranty. The supplier will refund, repair or exchange the product in terms of this warranty subject to legislative requirements. This warranty shall be valid only where the customer has not broken the product himself, or used the product for something that it is not supposed to be used for. The warranty does not include and will not be construed to cover products damaged as a result of disaster, misuse, tamper, abuse or any unauthorised modification or repair of the product. This warranty will extend only to the product provided at the date of the purchase and not to any expendables attached or installed by the customer. If the customer requests that the supplier repairs the product and the product breaks or fails to work properly within 3 (three) months of the repair and not as a result of misuse, tampering or modification by or on behalf of the customer, then the supplier may replace the product or pay a refund to the customer. The customer may be responsible for certain costs where products returned are not in the original packaging, or if the packaging is damaged. This will be deducted from any refund paid to the customer. HOME OF LIVING BRANDS (PTY) LTD www.homeoflivingbrands.com 011 4909600 (Jhb) 031 7926000 (Dbn) 021 5525161 (CT) www.salton.co.za www.facebook.com/SaltonAppliances...