Table of Contents
Advertisement
Quick Links
Advertisement
Table of Contents

Related Manuals for Neets 2:25

Summary of Contents for Neets 2:25
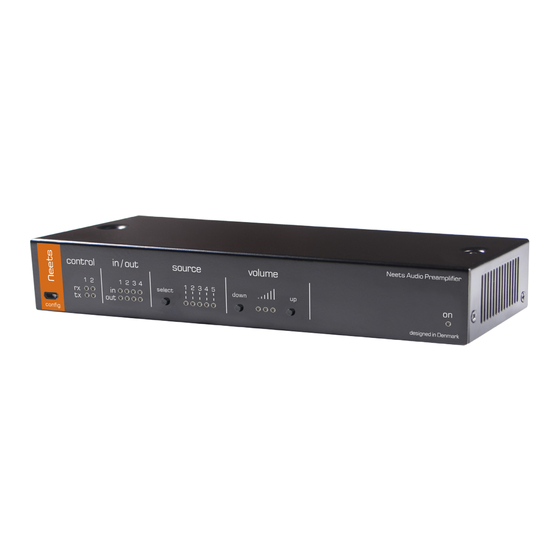
- Page 1 Neets Audio Amplifier 2:25 Neets Audio Preamplifier Installation Manual...
-
Page 2: Foreword
Foreword This document describes how to install and operate the Neets Amp 2:25 and the Neets Preamp. COPYRIGHT - All information contained in this manual is the intellectual property and copyrighted material of Neets. All rights are reserved. You may not allow any third party access to content, information or data in this manual without Neets’... -
Page 3: Important Safety Instructions
Contact your local Neets reseller or distributor. • If the equipment has slots or holes in the enclosure, these are provided to prevent overheating of sensitive components inside. -
Page 4: Table Of Contents
Specifications - Neets Audio Amplifier 2:25 ........ -
Page 5: Description
Description Neets Audio Amplifier – 2:25 and Preamplifier is network controlled stereo audio amplifier/pream- plifier controlled through LAN or RS-232. They adds additional RS-232 and I/O ports for expansion and integrates with Neets and 3rd party control systems. The USB audio input enables direct audio input and external volume control from a computer (PC or Mac). -
Page 6: Specifications Neets Audio Amplifier 2:25
Specifications Neets Audio Amplifier 2:25 Speaker output RS-232 / IR ports Ports 2 x bidirectional Output power Stereo 2 x 25 W @ 8 ohm Baud rate 1200 – 115200 bit/sec Data bits 7, 8 Stereo 2 x 35 W @ 4 ohm... -
Page 7: Specifications - Neets Audio Amplifier 2:25
Specifications Neets Audio Preamplifier Line output RS-232 / IR ports Balanced output 1 stereo output Ports 2 x bidirectional Output impedance 100 Ohm Baud rate 1200 – 115200 bit/sec Output level @ 0 dB/FS 1.3 Vrms/+4 dBu Data bits 7, 8... -
Page 8: Installation
Unpack the unit, place the unit on the surface where it should be mounted, and screw the two screws through the holes in the top as shown below: The unit also can be mounted in a 19 inch standard rack using the Neets Rack Shelf (Part number: 306-0017). See separate manual for installation instructions. -
Page 9: Front
Front USB configuration The front panel USB connector marked “config” is used for configuring the amplifier and updating the firmware. A built in web server enables quick configuration using your favorite browser on a Windows based PC, accessible when connected through the USB config port. -
Page 10: Rear
Connect using a USB A male to USB B male cable. Remember not to exceed the maximum USB cable length of 5 meters. Speaker output (Amplifier - 2:25 only) The loudspeakers are connected to the Speaker output using the supplied mating Euroblock connector. - Page 11 Pre-Out (Preamplifier only) The Pre-Out connection of the Preamplifier connects to a separate power amplifier using the supplied Euroblock connector. If the connected power amplifier supports balanced inputs, this is the preferred connection meth- od. Use good quality interconnect cables with proper shielding for best performance.
- Page 12 DC input and connect the mains cable to the AC supply only after all other connections to the amplifier have been made. Use only the included Neets mains power adaptor to supply power to the amplifier.
-
Page 13: How To Connect
How to connect Speaker output When using the amplifier in normal stereo When using the amplifier in parallel-bridge mode mode, connect left speaker positive to L+ ter- connect the speaker as shown by the “bridge” minal and negative to L- terminal. Right speaker indicators: Speaker positive to both L+ and positive connects to R+ terminal and negative L- terminal and speaker negative to both R+... -
Page 14: Rs-232 Connection
RS-232 port 1 (T1, R1 and G). The required commands for RS-232 control can be found in section “LAN and RS-232 protocol” on page 20. Neets Control Sierra II, EU Remember, it is not possible to control the amplifier or preamplifier by both... - Page 15 Using the amplifier or preamplifier as a RS-232 or LAN to IO gateway External equipment can be controlled through the unit’s IOs by either RS-232 or LAN. For example, a Neets Switching Relay – 2 can be controlled when connected as shown here. Powering external control systems from the preamplifier When powering the preamplifier from a PoE capable switch or power injector, the preamplifier can be used to source power for a connected control system.
-
Page 16: How To Use
How to use Control from the front panel The amplifier or preamplifier may be used in stand-alone mode without control systems connected. Front panel controls are provided for power, source selection, volume and mute status. Power on and off To toggle the amplifier’s or preamplifier’s power state, press and hold the unit’s source select button for three seconds. -
Page 17: Controlled From Lan By Remote Protocol
To access by USB, simply connect the unit to your PC. If you have installed Neets Project Design- er, all necessary drivers are already installed on your PC. (Note: If not available, please visit www. neets.dk and navigate to the download page for the amplifier. Here you find the driver files along with detailed information on how to install the driver.) -
Page 18: Special Functions
• The amplifier will now reboot and have all settings restored to factory default. Upgrade the firmware Use the Neets Project Designer program to update the firmware by following this procedure. • Start Neets Project Designer on your PC. •... -
Page 19: Troubleshooting
Please remove power from the amplifier, check all connections and loads, and re-apply power. If the error is not resolved, contact Neets or your local distributor. Internal storage error. Contact Neets or your local distributor. FW update error (No application found) Contact Neets or your local distributor. -
Page 20: Lan And Rs-232 Protocol
LAN and RS-232 protocol Command structure To understand and apply the commands below please keep the following rules in mind: Symbol Description: <A> When constructing the command, this part must be replaced with a number indicating the UNIT ID. When constructing the command, this part must be replaced with a string <B>... -
Page 21: Global Functions
Global functions Global functions allow user adjustment of all basic functions of the amplifier and preamplifier. Global functions also include system settings such as restoring to factory default or readout of software version number. All commands start of the with: NEUNIT=<A>, Where <A>... -
Page 22: Audio Inpput Settings
Audio input settings Audio input settings are used to adjust settings like input gain, enable mixer function and wake on signal settings. All commands start with: NEUNIT=<A>,SETTINGS=INPUT,INPUT=<B>, Where <A> is the unit ID, default 1 and <B> is the number of the INPUT you want to configure. All commands must end with a \CR. -
Page 23: Audio Output Settings
Audio output settings Audio output settings adjust amplifier output parameters such as equalizer settings, balance, and output power limit etc. All commands start with: NEUNIT=<A>,SETTINGS=OUTPUT, Where <A> is the unit ID, default 1. All commands must end with a \CR Description: Syntax <X>... -
Page 24: I/O Control
I/O control Below are the possible control commands for I/O if configured as OUTPUT or INPUT. All commands start with: NEUNIT=<A>,IO=<B>, Where <A> is the unit ID, default 1 and <B> is the number of the IO you want to configure. All commands must end with a \CR. -
Page 25: Screen Settings
Screen settings The screen control offers an easy and safe way to control electrical screens and lifts using two I/ Os. When combining two IOs in screen mode, screen up and down time are defined as part of the same command sequence. After this is set, you can simply send a command indicating the direc- tion the screen should move. -
Page 26: Lan Settings
Set the multicast address the MULTICASTAD- xxx.xxx.xxx.xxx 224.10.10.25 unit must use when communi- DRESS=<X> cating with other Neets units by LAN. (Remember when changing this value, it must also be done on all other systems this unit must communicate with.) After changing the multicast... -
Page 27: Rs-232 Settings
Data container. DATA=<X> Up to 500 Each byte must be converted to bytes of date a 2 byte ASCII value. Fx: “Neets” becomes “4E65657473” Example of use: NEUNIT=1,RS-232 =2,DATA=4E65657473\CR - Sends “Neets” on RS-232 port 2 Page 27 of 28... -
Page 28: Ir Commands (Advanced Users)
The IR codes that are employed conform to a commonly used format. This allows you to easily find IR codes from other sources than Neets, e.g. www.remotecentral.com If you want to control continuous functions such as volume on a device, you should remember to retransmit the IR command for as long as you want the volume to change.