AEG HK955070FB User Manual
Hide thumbs
Also See for HK955070FB:
- User manual (60 pages) ,
- User manual (20 pages) ,
- User manual (48 pages)

Related Manuals for AEG HK955070FB


Summary of Contents for AEG HK955070FB
- Page 1 Gebruiksaanwijzing HK955070FB Kookplaat User Manual Manual de instruções Placa...
-
Page 2: Table Of Contents
9. TECHNISCHE INFORMATIE.................. 17 10. ENERGIEZUINIGHEID..................17 VOOR PERFECTE RESULTATEN Bedankt dat u voor dit AEG-product heeft gekozen. Dit apparaat is ontworpen om vele jaren uitstekend te presteren, met innovatieve technologieën die het leven gemakkelijker helpen maken met functies die gewone apparaten wellicht niet hebben. -
Page 3: Veiligheidsinformatie
NEDERLANDS VEILIGHEIDSINFORMATIE Lees zorgvuldig de meegeleverde instructies voor installatie en gebruik van het apparaat. De fabrikant is niet verantwoordelijk voor letsel en schade veroorzaakt door een foutieve installatie. Bewaar de instructies van het apparaat voor toekomstig gebruik. 1.1 Veiligheid van kinderen en kwetsbare mensen Dit apparaat kan worden gebruikt door kinderen van 8 •... -
Page 4: Veiligheidsvoorschriften
Probeer brand nooit met water te blussen, maar • schakel in plaats daarvan het apparaat uit en bedek de vlam, d.w.z. met een deksel of blusdeken. Bewaar geen voorwerpen op de kookplaten. • Metalen voorwerpen, zoals messen, vorken, lepels en •... - Page 5 NEDERLANDS 2.3 Gebruik overeenkomt met de stroomvoorziening. Zo niet, neem dan contact op met een elektromonteur. WAARSCHUWING! • Zorg ervoor dat het apparaat correct Gevaar op letsel, is geïnstalleerd. Losse en onjuiste brandwonden of elektrische stroomkabels of stekkers (indien van schokken.
-
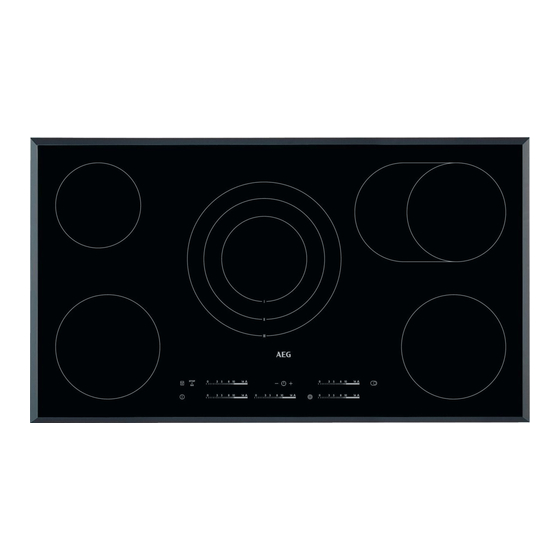
Page 6: Beschrijving Van Het Product
• Trek voor WAARSCHUWING! onderhoudswerkzaamheden de Risico op schade aan het stekker uit het stopcontact. apparaat. • Gebruik geen waterstralen of stoom om het apparaat te reinigen. • Zet geen heet kookgerei op het • Maak het apparaat schoon met een bedieningspaneel. - Page 7 NEDERLANDS 3.2 Indeling bedieningspaneel Gebruik de tiptoetsen om het apparaat te bedienen. De displays, indicatielampjes en geluiden tonen welke functies worden gebruikt. Tip- Functie Opmerking toets AAN/UIT De kookplaat in- en uitschakelen. Toetsblokkering / Het kin- Het bedieningspaneel vergrendelen/ derslot ontgrendelen.
-
Page 8: Dagelijks Gebruik
Weergave Omschrijving De kookzone wordt gebruikt. STOP+GO -functie is in werking. Automatisch opwarmen -functie is in werking. Er is een storing. + cijfer OptiHeat Control (3-staps restwarmte-indicatie) : doorgaan met ko- ken / warmhoudstand / restwarmte. Toetsblokkering / Het kinderslot functie is in werking. - Page 9 NEDERLANDS 4.3 De kookstand Om de functie in werking te stellen moet de kookzone Voor het instellen of wijzigen van de koud zijn. kookstand: Raak de bedieningsstrip aan bij de juiste Om de functie voor een kookzone te kookstand of beweeg uw vinger langs de activeren: raak aan ( gaat aan).
- Page 10 CountUp Timer (De timer met Om de functie in te schakelen: raak optelfunctie) aan. gaat branden. Gebruik deze functie om in de gaten te houden hoe lang de kookzone werkt. Om de functie uit te schakelen: Raak aan. De vorige kookstand gaat aan.
-
Page 11: Aanwijzingen En Tips
NEDERLANDS 4.10 OffSound Control (In- en • Elke fase heeft een maximale elektriciteitslading van 3700 W. uitschakelen van de geluiden) • De functie verdeelt het vermogen tussen de kookzones aangesloten op Schakel de kookplaat uit. Raak dezelfde fase. seconden aan. Het display gaat aan en •... -
Page 12: Onderhoud En Reiniging
Verwarmings- Gebruik om: Tijd Tips stand (min) Bereide gerechten warmhou- zoals Een deksel op het kookgerei den. nodig doen. 1 - 3 Hollandaisesaus, smelten: bo- 5 - 25 Van tijd tot tijd mengen. ter, chocolade, gelatine. 1 - 3... -
Page 13: Probleemoplossing
NEDERLANDS plaat en verwijder resten door het verkleuringen. Reinig de kookplaat blad over het oppervlak te schuiven. met een vochtige doek en een beetje • Verwijder nadat de kookplaat afwasmiddel. Droog de kookplaat na voldoende is afgekoeld: kalk- en reiniging af met een zachte doek. waterkringen, vetspatten en metaalachtig glanzende 7. - Page 14 Probleem Mogelijke oorzaak Oplossing Restwarmte-indicatie gaat De zone is niet heet, omdat Als de kookzone lang ge- niet branden. hij slechts kortstondig is be- noeg in werking is geweest diend. om heet te zijn, neemt u contact op met de klanten- service.
-
Page 15: Montage
NEDERLANDS de onderhoudstechnicus van de service center en de garantiebepalingen klantenservice of de vakhandelaar in vindt u in het garantieboekje. rekening gebracht, zelfs tijdens de garantieperiode. De instructies over het 8. MONTAGE • Vervang de beschadigde WAARSCHUWING! voedingskabel door het volgende Raadpleeg de hoofdstukken netsnoer (of hoger): H05BB-F Tmax Veiligheid. - Page 16 12 mm min. 28 mm min. 20 mm 8.6 Beveiligingsdoos Als u een beveiligingsdoos (een additioneel toebehoren) gebruikt, is de beschermingsvloer onder het fornuis niet noodzakelijk. De beveiligingsdoos is als toebehoren niet in elk land verkrijgbaar. Neem contact op met uw plaatselijke leverancier.
-
Page 17: Technische Informatie
NEDERLANDS 9. TECHNISCHE INFORMATIE 9.1 Typeplaatje Model HK955070FB PNC 949 595 124 01 Type58 HCD AA AO 220 - 240 V 50 - 60 Hz Vervaardigd in Duitsland Ser.nr....7.9 kW 9.2 Specificatie kookzones Nominaal vermogen (max warm- Kookzone... - Page 18 Energieverbruik per kook- Linksvoor 175,6 Wh / kg zone (EC electric cooking) Linksachter 196,8 Wh / kg Middenachter 180,2 Wh / kg Rechtsvoor 175,6 Wh / kg Rechtsachter 176,8 Wh / kg Energieverbruik van de 181,0 Wh / kg...
- Page 19 10. ENERGY EFFICIENCY..................33 FOR PERFECT RESULTS Thank you for choosing this AEG product. We have created it to give you impeccable performance for many years, with innovative technologies that help make life simpler features you might not find on ordinary appliances. Please spend a few minutes reading to get the very best from it.
-
Page 20: Safety Information
SAFETY INFORMATION Before the installation and use of the appliance, carefully read the supplied instructions. The manufacturer is not responsible if an incorrect installation and use causes injuries and damages. Always keep the instructions with the appliance for future reference. -
Page 21: Safety Instructions
ENGLISH Do not store items on the cooking surfaces. • Metallic objects such as knives, forks, spoons and lids • should not be placed on the hob surface since they can get hot. Do not use a steam cleaner to clean the appliance. •... - Page 22 • Make sure not to cause damage to • Do not use the appliance as a work the mains plug (if applicable) or to the surface or as a storage surface. mains cable. Contact our Authorised • If the surface of the appliance is...
-
Page 23: Product Description
ENGLISH • Deactivate the appliance and let it • Contact your municipal authority for cool down before you clean it. information on how to discard the • Disconnect the appliance from the appliance correctly. electrical supply before maintenance. • Disconnect the appliance from the •... - Page 24 Sensor Function Comment field ON / OFF To activate and deactivate the hob. Lock / The Child Safety De- To lock / unlock the control panel. vice STOP+GO To activate and deactivate the function. Heat setting display To show the heat setting.
-
Page 25: Daily Use
ENGLISH 3.4 OptiHeat Control (3 step Residual heat indicator) WARNING! There is a risk of burns from residual heat. The indicator shows the level of the residual heat. 4. DAILY USE 4.3 The heat setting WARNING! Refer to Safety chapters. To set or change the heat setting: Touch the control bar at the correct heat 4.1 Activating and... -
Page 26: Automatic Heat Up
4.5 Automatic Heat Up To stop the sound: touch If you activate this function you can get a CountUp Timer (The count up timer) necessary heat setting in a shorter time. You can use this function to monitor how The function sets the highest heat setting long the cooking zone operates. - Page 27 ENGLISH To deactivate the function: touch out. Touch for 3 seconds. The previous heat setting comes on. comes on. Touch of the timer to choose one of the following: 4.8 Lock • - the sounds are off You can lock the control panel while •...
-
Page 28: Hints And Tips
5. HINTS AND TIPS 5.2 Öko Timer (Eco Timer) WARNING! Refer to Safety chapters. To save energy, the heater of the cooking zone deactivates before the 5.1 Cookware count down timer sounds. The difference in the operation time depends on the... -
Page 29: Care And Cleaning
ENGLISH 6. CARE AND CLEANING 6.2 Cleaning the hob WARNING! Refer to Safety chapters. • Remove immediately: melted plastic, plastic foil, and food with sugar. If not, 6.1 General information the dirt can cause damage to the hob. Put the special scraper on the glass •... - Page 30 Problem Possible cause Remedy An acoustic signal sounds You put something on one Remove the object from the and the hob deactivates. or more sensor fields. sensor fields. An acoustic signal sounds when the hob is deactivated. The hob deactivates.
-
Page 31: Installation
ENGLISH 7.2 If you cannot find a surface) and an error message that comes on. Make sure, you operated the solution... hob correctly. If not the servicing by a service technician or dealer will not be If you cannot find a solution to the free of charge, also during the warranty problem yourself, contact your dealer or period. - Page 32 12 mm min. 28 mm min. 20 mm 8.6 Protection box If you use a protection box (an additional accessory), the protective floor directly below the hob is not necessary. The protection box accessory may not be available in some countries. Please contact your local supplier.
-
Page 33: Technical Information
ENGLISH 9. TECHNICAL INFORMATION 9.1 Rating plate Modell HK955070FB PNC 949 595 124 01 Typ 58 HCD AA AO 220 - 240 V 50 - 60 Hz Made in Germany Ser.Nr....7.9 kW 9.2 Cooking zones specification Nominal Power (Max heat set-... - Page 34 Energy consumption of the 181.0 Wh / kg hob (EC electric hob) EN 60350-2 - Household electric cooking • Put smaller cookware on smaller appliances - Part 2: Hobs - Methods for cooking zones. measuring performance • Put the cookware directly in the centre of the cooking zone.
- Page 35 9. INFORMAÇÃO TÉCNICA..................50 10. EFICIÊNCIA ENERGÉTICA...................51 PARA RESULTADOS PERFEITOS Obrigado por escolher este produto AEG. Criámo-lo para lhe oferecer um desempenho impecável durante muitos anos, com tecnologias inovadoras que tornam a sua vida mais fácil – funcionalidades que poderá não encontrar em aparelhos comuns.
-
Page 36: Informações De Segurança
INFORMAÇÕES DE SEGURANÇA Leia atentamente as instruções fornecidas antes de instalar e utilizar o aparelho. O fabricante não é responsável por lesões ou danos resultantes de instalação e utilização incorrectas. Guarde sempre as instruções junto do aparelho para futura referência. -
Page 37: Instruções De Segurança
PORTUGUÊS Deixar cozinhados com gorduras ou óleos na placa • sem vigilância pode ser perigoso e resultar em incêndio. Nunca tente extinguir um incêndio com água. Em vez • disso, desligue o aparelho e cubra as chamas com uma tampa de tacho ou manta de incêndio. Não coloque objectos sobre as zonas de cozedura. - Page 38 • O aparelho tem de ficar ligado à • Utilize apenas dispositivos de terra. isolamento correctos: disjuntores de • Antes de efectuar qualquer operação protecção, fusíveis (os fusíveis de de manutenção, certifique-se de que rosca devem ser retirados do o aparelho está...
- Page 39 PORTUGUÊS 2.4 Manutenção e limpeza gorduras e dos óleos quando cozinhar com este tipo de produtos. • Limpe o aparelho com regularidade • Os vapores libertados pelo óleo para evitar que o material da muito quente podem causar superfície se deteriore. combustão espontânea.
-
Page 40: Descrição Do Produto
3. DESCRIÇÃO DO PRODUTO 3.1 Disposição da placa Zona de cozedura Painel de comandos 265 mm 265 mm 145 mm 170 mm 170 mm 145/210/270 145/210/270 180 mm 180 mm 3.2 Disposição do painel de comandos Utilize os campos do sensor para controlar o aparelho. Os visores, indicadores e sons indicam as funções que estão em funcionamento. - Page 41 PORTUGUÊS Cam- Função Comentário po do sensor Para activar e desactivar o circuito exterior. Para activar e desactivar o circuito exterior. Para seleccionar a zona de cozedura. Para aumentar ou diminuir o tempo. Aquecimento Automático Para activar e desactivar a função. Barra de comandos Para regular o grau de cozedura.
-
Page 42: Utilização Diária
4. UTILIZAÇÃO DIÁRIA dedo ao longo da barra de controlo até ADVERTÊNCIA! chegar ao grau de cozedura que desejar. Consulte os capítulos relativos à segurança. 4.1 Activar e desactivar Toque em durante 1 segundo para activar ou desactivar a placa. - Page 43 PORTUGUÊS cozedura que desejar. Após 3 segundos, CountUp Timer (Temporizador da contagem crescente) acende. Pode utilizar esta função para Para desactivar a função: altere o grau monitorizar o tempo de funcionamento de cozedura. de uma zona de cozedura. Para seleccionar a zona de cozedura: 4.6 Temporizador toque em várias vezes até...
- Page 44 4.10 OffSound Control A função não desactiva as funções de temporizador. (Desactivação e activação dos sons) Para activar a função: toque em acende. Desactive a placa. Toque em durante Para desactivar a função: toque em 3 segundos. O visor acende-se e apaga- O visor apresenta o grau de cozedura se.
-
Page 45: Sugestões E Dicas
PORTUGUÊS 5. SUGESTÕES E DICAS 5.2 Öko Timer (Temporizador ADVERTÊNCIA! Eco) Consulte os capítulos relativos à segurança. Para poupar energia, o aquecedor da zona de cozedura é desactivado antes 5.1 Tachos e panelas que soe o alarme do temporizador da contagem decrescente. -
Page 46: Manutenção E Limpeza
Grau de coze- Utilize para: Tempo Sugestões dura (min.) 7 - 9 Cozer batatas a vapor. 20 - 60 Utilize, no máximo, ¼ l de água para 750 g de batatas. 7 - 9 Cozer grandes quantidades de 60 - 150 Até... - Page 47 PORTUGUÊS 7.1 O que fazer se… Problema Causa possível Solução Não consegue activar ou uti- A placa não está ligada à Verifique se a placa está li- lizar a placa. corrente eléctrica ou não es- gada correctamente à cor- tá ligada correctamente. rente eléctrica.
-
Page 48: Instalação
Problema Causa possível Solução É normal que exista uma área escura na zona múltipla. Existe uma área escu- ra na zona múltipla. O grau de cozedura alterna A função Gestão de Energia Consulte o capítulo “Utiliza- entre dois níveis. - Page 49 PORTUGUÊS placa de características encontra-se na utilize um cabo do tipo (ou superior): parte de baixo da placa. H05BB-F Tmax 90°C. Contacte um Centro de Assistência Técnica local. Número de série ......8.4 Instalar a junta vedante 1. Limpe o tampo na zona da área 8.2 Placas encastradas cortada.
-
Page 50: Informação Técnica
9. INFORMAÇÃO TÉCNICA 9.1 Placa de características Modelo HK955070FB PNC 949 595 124 01 Tipo 58 HCD AA AO 220 - 240 V / 50 - 60 Hz Fabricado na Alemanha N.º... -
Page 51: Eficiência Energética
10. EFICIÊNCIA ENERGÉTICA 10.1 Informação de produto de acordo com a norma UE 66/2014 Identificação do modelo HK955070FB Tipo de placa Placa encastrada Número de zonas de coze- dura Tecnologia de aquecimen-... - Page 52 • Coloque o tacho na zona de cozedura • Quando aquecer água, utilize apenas antes de a activar. a quantidade de que necessitar. • O fundo do tacho deve ter dimensão • Sempre que possível, coloque as igual à da zona de cozedura.
- Page 53 PORTUGUÊS...
- Page 54 www.aeg.com...
- Page 55 PORTUGUÊS...
- Page 56 www.aeg.com/shop...