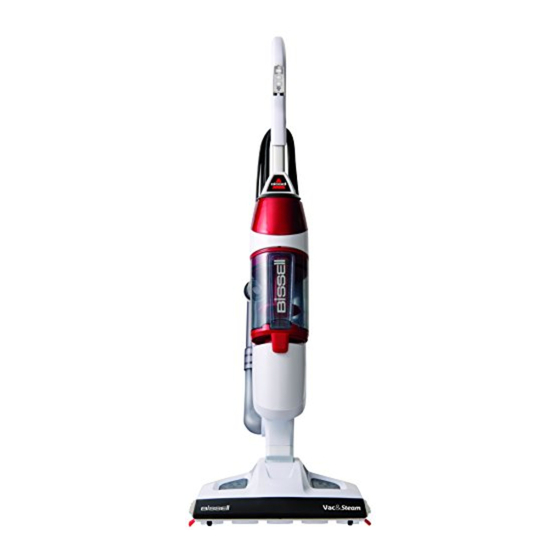
Bissell Symphony 1132 series Troubleshooting Manual
Hide thumbs
Also See for Symphony 1132 series:
- User manual (100 pages) ,
- User manual (12 pages) ,
- User manual (12 pages)

Related Manuals for Bissell Symphony 1132 series


Summary of Contents for Bissell Symphony 1132 series
-
Page 1: Table Of Contents
Troubleshooting Symphony 1132 Series Problem Page Knocking Noise No steam Steam Ready Light not on Filter turning BLUE Leaving too much water on the floor Leaks between machine and filter Yellow ring on vinyl or linoleum flooring Hot to touch... -
Page 2: Knocking Noise
NO steam DO NOT USE VINEGAR OR ANY OTHER SOLUTION OTHER THAN WATER OR BISSELL STEAM MOP DEMINERALIZED SCENTED WATERS IN THE TANK. 1) Is the water tank empty? If so, fill the tank and attempt to steam. 2) The “Steam Ready” light will blink until the machine is ready to steam (about 30 seconds). - Page 3 4) Make sure you are pushing the trigger on the handle to steam. 5) Make sure the water filter** is installed properly. **Not all machines have a water filter. Some have a “dummy” filter. A filter is required for this machine, just not a water filter, it is optional.
-
Page 4: "Steam Ready" Light Not On
7) Take the foot off the machine, remove the foot tray and also the pad and ream the steam tip on the foot as well as the foot tray with a paperclip to remove any obstructions. 8) If the machine still has no steam after troubleshooting has been completed, please set up an RA for the entire machine to Grand Rapids to the attention of Ann Song and Quality. -
Page 5: Filter Turning Blue
Filter turning BLUE 1) This machine does not require a filter to operate. The machine will either come with a water filter or a “dummy” filter. 2) If a calcium filter is being used, it will change from green to blue, which will usually occur over a period of 6 to 9-month time span depending on use. -
Page 6: Leaks Between Machine And Filter
Leaks between the machine and filter 1) Check the filter to ensure it is pushed securely onto the unit. 2) Check to see if there are any cracks in the filter/ “dummy” filter on the sides or the top, and even bottom as located in the photos. Check the whole filter and look at the plastic mold lines for any cracks. -
Page 7: Yellow Ring On Vinyl Or Linoleum Flooring
Undiluted white vinegar should remove the yellow from linoleum or vinyl. Use directly on the ring… DO NOT USE VINEGAR OR ANY OTHER SOLUTION OTHER THAN WATER OR BISSELL STEAM MOP DEMINERALIZED SCENTED WATERS IN THE TANK. Hot to touch. Unit below the dirt cup is quite warm to the... -
Page 8: Mop Pad Holes
Mop pad (new) has developed holes in it after little use 1) What type of flooring is being cleaned? Abrasive flooring such as rough tile, brick, etc. will impact the pad more-so than a smooth vinyl flooring. If abrasive flooring is being cleaned, you will go through more pads than if cleaning smooth flooring. -
Page 9: Tripping Circuit Breaker
“trip.” Using the machine does not pose a safety concern; however, it may be an annoyance to the consumer. 4) According to the BISSELL Manager of Compliance, most homes contain 15-20 amp circuit breakers. If the consumer continues having problems... -
Page 10: Water Door Hard To Open
If there is still no power, RA the unit if it is still within warranty to Grand Rapids attention Ann Song and Quality and detail in notes issue. Set up replacement per RA Dest. Guide. Water door hard to open Press the tabs on both tabs on each side of where the water goes in and pull open like a mail box. - Page 11 3. Make sure the dirt container is installed correctly. Move the lock button to the right until it is in the center of the unit. 4. Make sure the foot is fully inserted into the body of the unit. You will know it is inserted correctly when you hear the locking tab click.
- Page 12 6. Make sure the hose tube is connected properly. a. Grab the bottom end of the hose and pull the lower portion away from the body. Turn the upper hose to the left and pull out. b. Separate the two hoses and wash them both. Let them completely dry before reassembling.
- Page 13 d. Align the tabs on the clear hose to the openings in the machine and turn to the right until locked in place. e. Push the lower hose back into the hole on the bottom of the machine. K. Benedict 5/28/2014 C:\Users\vanwetjg\Documents\5 - Trouble Shooting Guides\Troubleshooting 1132 Vac &...
-
Page 14: Steaming While Vacuuming
7. Check the suction hole on the foot for any obstructions. Clear any if necessary. 8. If there is still no suction after troubleshooting has been exhausted, please RA the entire machine to Grand Rapids to the attention of Quality and Ann Song and set up a replacement machine per the RA Dest. -
Page 15: Filter Will Not Go Back Into Dirt Cup
Filter will not go back into the dirt cup There is a groove on the dirt up at the top that the filter will fit into (you will see where it says “Filter” on the dirt cup). Line up the notch on the filter with the filter groove and push into place. -
Page 16: General Information
General Information This machine can be used as a vacuum and steamer at the same time. Follow the table below for instructions of settings. It can also be run just as a vacuum and just as a steamer. There are 6 different settings for this machine. See table below of how a consumer can use this machine: Amp Ratings Model Number... - Page 17 Model Number and Serial Number Location The model and serial number are located behind where the dirt cup sits. Remove the dirt cup and you will see the motor rating label near the top of where the dirt cup sits next to the hose opening. Adding Solution to Tank NO solutions are to be added to the tank.
- Page 18 Tank Capacity & Run Time 12.8 oz, or 380 ml The machine will run approx. 12 minutes on a full tank with the trigger consistently being pressed. K. Benedict 5/28/2014 C:\Users\vanwetjg\Documents\5 - Trouble Shooting Guides\Troubleshooting 1132 Vac & Steam.doc...