Table of Contents
Advertisement
Quick Links
Advertisement
Table of Contents

Related Manuals for HP f505g


Summary of Contents for HP f505g
- Page 1 Car Camcorder User Manual...
-
Page 2: Table Of Contents
Contents About this Guide ................3 FCC Statement ................3 WEEE Notice .................. 4 CE Regulatory Notice ..............4 Battery warning ................4 Notes on Installation ..............5 Caution ..................5 Introduction ..............7 Features ................7 Package Contents ............. 7 Product Overview .............. - Page 3 3.1.3 Speed Cam Alert ..........18 3.1.4 LDWS (Lane Departure Warning Systems) ..19 3.1.5 FCWS (Forward Collision Warning System) ..20 3.1.6 Parking Mode ............21 3.1.7 Headlight Warning ..........22 3.1.8 Emergency Recording .........22 3.1.9 The Recording Screen..........23 Playback Videos and Photos ...........24 3.2.1 The Playback Screen ...........25 3.2.2...
-
Page 4: About This Guide
About this Guide The content in this document is for information purpose and is subject to change without prior notice. We made every effort to ensure that this User Guide is accurate and complete. However, no liability is assumed for any errors and omissions that may have occurred. -
Page 5: Weee Notice
WEEE Notice Disposal of Waste Electrical and Electronic Equipment and/or Battery by users in private households in the European Union This symbol on the product or on the packaging indicates that this cannot be disposed of as a household waste. You must dispose of your waste equipment and/or battery by handling it over to the applicable take-back scheme for the recycling of electrical and electronic equipment and/or... -
Page 6: Notes On Installation
Notes on Installation This product shall be installed near the rear view-mirror, at the center of windshield, if possible, for optimal viewing. Make sure that the lens is within the wiping range of the windscreen wiper to ensure a clear view even when it rains. Do not touch the lens with your fingers. - Page 7 Improper use or operation of the product may result in damage of the product or its accessories and void the warranty. HP Inc. is NOT responsible for the loss of any data/content during operation. Before you start using the system, it assumes that...
-
Page 8: Introduction
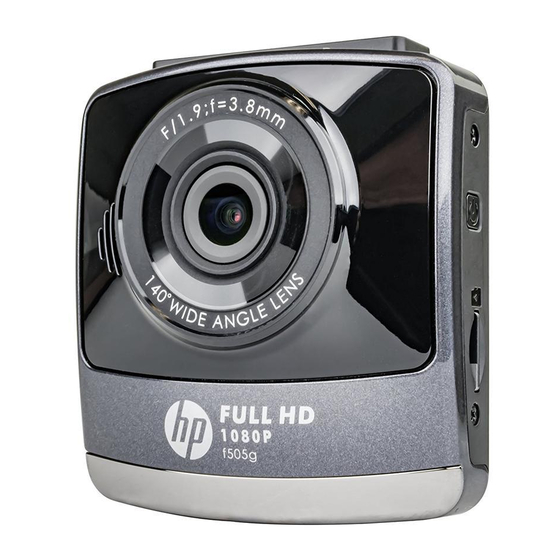
1 Introduction Thank you for purchasing this advanced Car Camcorder. This camcorder is specifically designed for real time video and audio recording when driving. 1.1 Features • WFHD camera (2560x1080 @ 30fps) • 2.4” LCD color screen • Up to 140 ゚ Wide angle lens •... -
Page 9: Product Overview
1.3 Product Overview Front View Top and Bottom Views Side (Left and Right) Views Rear View Item Item Bracket Socket LED Indicator Microphone LCD Panel Power Button Up Button ( Memory Card Slot Down Button ( USB Connector Enter Button ( HD(Mini HDMI) Connector Wide Angle Lens Back Button (... -
Page 10: Getting Started
2 Getting Started 2.1 Inserting the Memory Card Insert memory card with the gold section facing upward and the screen of the camcorder facing upward too, as illustrated. Push the memory card in until a click sound is heard, indicating the card is in position. -
Page 11: Installing In Vehicles
2.2 Installing in Vehicles 2.2.1 Mount to Windshield Attach the bracket to the camcorder. Slide it into the bracket holder until you hear a click. Before installing the bracket, please use alcohol to clean the windshield and suction cup of the bracket. Wait for dry and press suction-cup on the windshield. -
Page 12: Adjust The Camcorder Position
2.2.2 Adjust the camcorder position Loose the knob to swivel the camcorder vertically or horizontally. Knob Then tighten the knob to make sure the camcorder is securely locked in place. -
Page 13: Connecting To Power
2.3 Connecting to Power Use only the supplied car adapter to power up the camcorder and charge the built-in battery. Connect one end of the car adapter to the USB connector of the camcorder. USB port input: DC 5V / 1A. Plug the other end of the car charger to the cigarette lighter socket of your vehicle. - Page 14 Battery Status Indicator: Icon Description Full battery power. 2/3 battery power. 1/3 battery power. Out of battery power. Battery is charging. Connect the car adapter to charge the battery, battery is full charged. Low Voltage: Note: If the camcorder is connected to the car adapter and turned on, and the screen displays a charging reminder symbol such as the image above, it means that the available voltage is too low.
-
Page 15: Powering The Camcorder On / Off
2.4 Powering the Camcorder On / Off 2.4.1 Auto Power On/Off Once the vehicle engine is started, the camcorder automatically turns on. If the Automatic Record function is enabled, the recording will automatically start right away after the camcorder turns on. Once the vehicle engine is shut down, the camcorder automatically saves the recording and turns off the power within 10 seconds. -
Page 16: Initial Settings
2.5 Initial Settings Before using the camcorder, we recommend you to enable the Automatic Record function and set up the correct Date and Time. 2.5.1 Set the Date and Time To set the correct date and time, do the following: Press the button to enter the OSD menu. -
Page 17: Setting The Universal Time Code (Utc)
2.5.2 Setting the Universal Time Code (UTC) Depending on your location, you may need to change the current UTC setting of the camcorder so that the correct date and time are updated when a GPS signal is detected. 1. If recording is in progress, press the button to stop recording. -
Page 18: Using The Car Camcorder
3 Using the Car Camcorder 3.1 Recording Videos 3.1.1 Record videos while driving When the vehicle engine starts up, the camcorder automatically turns on and starts recording. Recording will automatically stop when the engine is switched off. Note: On some cars, the recording will continue when the engine is switched off. With some vehicle models, the automatic power up and off feature of this car camcorder will not function because the cigarette lighter/power socket is not linked to the ignition system. -
Page 19: Speed Cam Alert
3.1.3 Speed Cam Alert The Speed Cam Alert function is enabled by default. Once your car’s location is determined by GPS and approaches a speed cam, this product produces voice and screen message alerts. To enable the disabled Speed Cam Alert function: Press the button to enter the OSD menu. -
Page 20: Ldws (Lane Departure Warning Systems)
3.1.4 LDWS (Lane Departure Warning Systems) Once your car’s location is determined by GPS and the LDWS function is enabled, this product produces voice and screen message alerts when you drive off of or change lanes at speeds over 70 km/h (43 mile/h). To set the LDWS (Lane Departure Warning System), please do the following: 1. -
Page 21: Fcws (Forward Collision Warning System)
3.1.5 FCWS (Forward Collision Warning System) Once your car’s location is determined by GPS and the FCWS function is enabled, this product produces voice and screen message alerts when you drive at speeds over 60 km/h (37 mile/h) and are less than 20m away from the car in front of you. -
Page 22: Parking Mode
3.1.6 Parking Mode If Parking Mode is activated, when manual power off, or turned off the car adapter when the camcorder is turned on, the system alert message “Press OK Key to enter Parking Mode after 10sec.” will be displayed on the screen. -
Page 23: Headlight Warning
3.1.7 Headlight Warning The Headlight Warning function produces voice and screen message alerts when it detects poor lighting conditions through the recording displays of this product, including driving in rainy or cloudy weather, at night, and in basements, parking lots, and tunnels. Press the button to enter the OSD menu. -
Page 24: The Recording Screen
3.1.9 The Recording Screen Item Description Indicates turn off voice record Voice Record Duration Indicates the current recording duration. Date and time Indicates the current recording date and time. Guide icon Press the button to enter the OSD menu. (Menu) Guide icon Press the button to switch to Playback mode. -
Page 25: Playback Videos And Photos
3.2 Playback Videos and Photos During recording, press button to browse for the desired video and photo file. Press the button to select the file that you want to browse and press the button. Press the button to view the next or the previous file and press the button to view the file in full screen. -
Page 26: The Playback Screen
3.2.1 The Playback Screen Video Playback Screen Photo Playback Screen Description Item Guide icon Press the button to return to file selection (Back) display. Guide icon Press the button to view the previous (Previous) video/photo. Guide icon Press the button to view the next video/photo. (Next) Guide icon Press the... -
Page 27: Deleting Files
3.2.2 Deleting Files To delete file(s), do the following: If recording is in progress, press the button to enter the OSD menu. Press the button to select File Deletion and press the button. Press the button to select Delete One or Delete All, then press the button. -
Page 28: Adjusting The Settings
4 Adjusting the Settings 4.1 Using the Menu You can customize the video recording and other general settings via the on-screen display (OSD) menus. If recording is in progress, press the button to open the OSD menu. Press the button to select a menu option and press the button to enter the selected menu. -
Page 29: Menu Tree
4.2 Menu Tree Refer to the below table for details on menu items and available menu options. Menu option Description Available option Displays the current state of the Satellite Status satellite reception. Press button Automatically synchronize with the to set the satellite local satellite time. - Page 30 Menu option Description Available option Press button Set a customized maximum speed to set the speed limit. When the vehicle speed exceeds Speed Limit limit. You can set the the maximum, a warning tone is Alert off, or set the speed automatically triggered and a warning limit from 50km/h to message is displayed on the screen.
- Page 31 Menu option Description Available option When the LDWS is on, satellite positioning is set, and the vehicle is moving at the set speed, if the vehicle LDWS starts drifting out of the lane, the On / Off camcorder will sound an alert, and a warning image will be displayed as a reminder.
-
Page 32: Installing The Software
5 Installing the Software 1. Place the attached CD ROM into the CD player. 2. If the CD does not execute automatically, please use Windows File Manager to execute the Install_CD.exe file in the CD. The following screen will be shown up. 3. -
Page 33: Supercar
6 SuperCar Item Item Video Player File Path Play / Pause Browser File Previous File List Next File Name Stop Volume Current Duration / Total Electronic Map Duration Compass Signal Noise Ratio (SNR) Speed Meter G-Sensor Note: 1. To display the route on Electronic Map, please make sure the internet is connected before starting the video playback 2. -
Page 34: Specifications
Specifications Item Description Image sensor 1/2.7” CMOS sensor 1920 (H) x 1080 (V) Effective pixels Storage media Support Micro SDHC, up to 32GB class 6or above LCD display 2.4” LCD color TFT (112K pixels) Wide Angle Fixed Focus lens Lens F1.9, f=3.8mm Focus range 1.5m~Infinity... - Page 35 Item Description Battery Built-in 470mAH Li-polymer rechargeable Operating 0° ~ 60° C Temperature Operating Humidity 20 ~ 70% RH Storage -20° ~ 70° C Temperature Dimensions 70 x 63 x 27.2 mm Weight Approx. 90g...