Table of Contents
Advertisement
Before operating this product, please read the instructions carefully and save this
manual for future use.
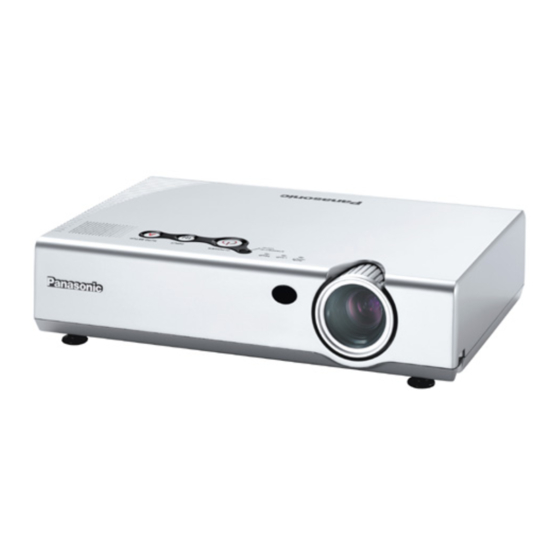
LCD Projector
Operating Instructions
Commercial Use
PT-LC80E
Model No.
PT-LC76E
PT-LC56E
POWER
INPUT
VIDEO
RGB
AUTO
MENU
SETUP
ENTER
FREEZE
SHUTTER
STD
VOLUME
D.ZOOM
INDEX
WINDOW
PROJECTOR
R
TQBJ 0123-2
Advertisement
Table of Contents

Related Manuals for Panasonic PT-LC56E


Summary of Contents for Panasonic PT-LC56E
-
Page 1: Operating Instructions
Before operating this product, please read the instructions carefully and save this manual for future use. LCD Projector Commercial Use Operating Instructions Model No. PT-LC80E PT-LC76E PT-LC56E POWER INPUT VIDEO AUTO MENU SETUP ENTER FREEZE SHUTTER VOLUME D.ZOOM INDEX WINDOW... -
Page 2: Important Safety Notice
This instruction booklet provides all the necessary operating information that you might require. We hope it will help you to get the most performance out of your new product, and that you will be pleased with your Panasonic LCD projector. -
Page 3: Table Of Contents
B Continued use of the projector in this condition may result in fire or electric shocks. B Contact an Authorised Service Centre for repairs. - Page 4 Do not place the projector on top of surfaces which are unstable. B If the projector is placed on top of a surface which is sloped or unstable, it may fall down or tip over, and injury or damage could result.
-
Page 5: Accessories
B If dust is left to build up inside the projector without being cleaned out, it can result in fire or problems with operation. B It is a good idea to clean the inside of the projector before the season for humid weather arrives. Ask your nearest Authorised Service Centre to clean the projector when required. -
Page 6: Before Use
The internal parts can be damaged, which may cause malfunctions or accidents. Do not set up the projector near high-voltage power lines or near motors. The projector may be subject to electromagnetic interference. If installing the projector to the ceiling, ask a qualified technician to carry out all installation work. -
Page 7: Location And Function Of Each Part
Location and function of each part Projector <Top, right and front> # Projector control panel(Top) http://www.gravis.com/ (page 14) NOTE: $ Zoom ring B Information given above may (page 23) be changed in future. % Focus ring (page 23) ' Leg adjuster buttons(L/R) &... -
Page 8: Remote Control Unit
(page 47) operation This indicator illuminates if an abnormally high temperature is <on connector detected inside the projector or panel:page 16> around it. If the temperature rises above a certain level, the power supply will be turned off automatically and the indicator will illuminate or flash. -
Page 9: Setting-Up
NGLISH Setting-up Projection methods In way of installing projector, any one of the following four projection methods are used. Select whichever projection method matches the setting-up method. (The projection method can be set from the OPTION2 menu. Refer to page 43 for details.) -
Page 10: Connections
Projector position Top edge of screen Screen Bottom edge of screen Screen Projection distances Projection distance (L) 4:3 Screen PT-LC80E PT-LC76E/PT-LC56E size Wide Telephoto Wide (diagonal) (LW) (LT) (LW) 0.84 m(33˝) 1.1 m(3´7˝) 1.02 m(40˝) 1.2 m(3´11˝) 1.4 m(4´7˝) 1.2 m(3´11˝) 1.27 m(50˝) -
Page 11: Preparation For The Remote Control Unit
NOTE: B It is better to shut down the computer before turning off the MAIN POWER switch of the projector. B Do not input the signal to the RGB2 IN/RGB1 OUT connector when the RGB2 SELECT item in the OPTION1 menu is set to OUTPUT. (Refer to page 42.) -
Page 12: Turning On The Power
Mains lead Input select BA picture will be projected in accordance with the selected input signal. Power indicator Follow the procedure below when you set the projector up first, and when you change the setup place. VIDEO buttons RGB1... -
Page 13: Turning Off The Power
BDo not cut power to the projector in any way while the cooling fan is still operating. Be careful not to switch off the MAIN POWER switch of the projector or unplug the mains lead from the electrical outlet. -
Page 14: Correcting Keystone Distortion And Automatic Positioning
Correcting keystone distortion and automatic positioning (AUTO SET UP) This projector detects its degree of tilt and the input signal. Keystone distortion and the position of the image can then be corrected automatically in accordance with the input signal. Press the AUTO SETUP button. -
Page 15: Enlarging The Picture
D.ZOOM times the normal size. INDEX WINDOW PROJECTOR The remote control unit functions during D.ZOOM (digital zoom) Use the F,G,IandHbuttons to move the enlarged area which you want to project. Use the D.ZOOM +/- buttons to change the enlargement ratio. -
Page 16: On-Screen Menus
On-screen menus Menu screens The various settings and adjustments for this projector can be carried out by selecting the operations from on-screen menus. The general arrangement of these menus is shown below. MAIN MENU PICTURE menu (page 35) When an RGB signal is being input... -
Page 17: Menu Operation Guide
A D J R E T R N B You can also select Unavailable on-screen menu items This projector has unadjustable items and unusable functions depending on the signal being input. When an item cannot be adjusted or a function cannot be used, the... -
Page 18: Adjusting The Picture
To obtain the best picture quality, set up the projector and screen in such a way that the amount of keystone correction required is as minimal as possible. -
Page 19: White Balance R/G/B
This adjusts the flesh tones in the picture. Press the H button to make AUTO1 flesh tones more greenish, and The projector automatically press the I button to make the distinguishes between NTSC/NTSC flesh tones more reddish. 4.43/PAL/PAL60/SECAM signals. -
Page 20: Adjusting The Position
Press the F or G buttons to move the picture vertically. Use the F and G buttons on the projector or remote control unit to P O S I T I O N select an item, and then use the I and H buttons to change the setting for that item. -
Page 21: Frame Lock
40-E NGLISH Changing the display language Use the F and G buttons on the projector or remote control unit to select a language, then press the ENTER button to accept the setting. Indicates the language which is L A N G U A G E... -
Page 22: Option Settings
During automatic setup, the angle of A U T O K E Y S T N tilt of the projector is detected and A U T O R G B I N R G B 2 S E L E C T... -
Page 23: Setting Up The Security Function
44-E NGLISH Setting up the SECURITY function This projector is equipped with a security function. A password input screen O F F can be displayed, or a company URL can be set up and displayed at the bottom of the projected image. -
Page 24: Text Display/Change
problem. -
Page 25: Cleaning And Replacing The Air Filter
Cleaning and replacing the air filter If the air filter becomes clogged with dust, the internal temperature of the projector will rise, the TEMP indicator will flash and the projector power will turn off. The air filter should be cleaned every 100 hours of use, depending on the location where the projector is being used. -
Page 26: Replacing The Lamp Unit
NOTE: B If the lamp usage time has passed 2000 hours (when LAMP POWER has been set to “HIGH”), the projector will switch to standby mode after approximately 10 minutes of operation. The steps ) to - on the next page should thus be completed within 10 minutes. -
Page 27: Before Calling For Service
B The lens cover may still be attached to the lens. B The lens focus may not have been set correctly. B The projector may not be at the correct distance from the screen. B The lens may be dirty. -
Page 28: Cleaning And Maintenance
B There may be a problem with the video tape or other signal source. B A signal which is not compatible with the projector may be being input. Picture from B The cable may be too long. computer does B The external video output for the laptop computer not appear. -
Page 29: Specifications
LCD panel: Panel size (diagonal): 0.7 type (17.78 mm) Aspect ratio: 4:3 (16:9 compatible) Micro lens array: PT-LC80E/PT-LC76E: Available PT-LC56E: Not available Display method: 3 transparent LCD panels (RGB) Drive method: Active matrix method Pixels: PT-LC80E/PT-LC76E: 786 432 (1 024 x 768) x 3 panels... -
Page 30: Appendix
Pin No. Earth (Luminance signal) Earth (Colour signal) & Luminance signal External view & Colour signal (RGB1 IN/RGB2 IN) Pin No. G/G·SYNC/Y HD/SYNC External view LW/LT PT-LC80E PT-LC76E / PT-LC56E LW=0.031xSD/0.0254-0.038 LT=0.037xSD/0.0254-0.038 PT-LC80E PT-LC76E / PT-LC56E LW=0.033xSD/0.0254-0.038 LT=0.040xSD/0.0254-0.038 Signal Signal NGLISH... -
Page 31: Using The Serial Connector
Using the SERIAL connector The serial connector which is on the side connector panel of the projector conforms to the RS-232C interface specification, so that the projector can be controlled by a personal computer which is connected to this connector. -
Page 32: Dimensions
Dimensions 81.2(3-3/16) 297(11-11/16) Trademark acknowledgements B VGA and XGA are trademarks of International Business Machines Corporation. B Macintosh is a registered trademark of Apple Computer, Inc. B S-VGA is a registered trademark of the Video Electronics Standards Association. All other trademarks are the property of the various trademark owners. These Operating Instructions are printed on recycled paper.