
Related Manuals for Brother S-7000DD


Summary of Contents for Brother S-7000DD
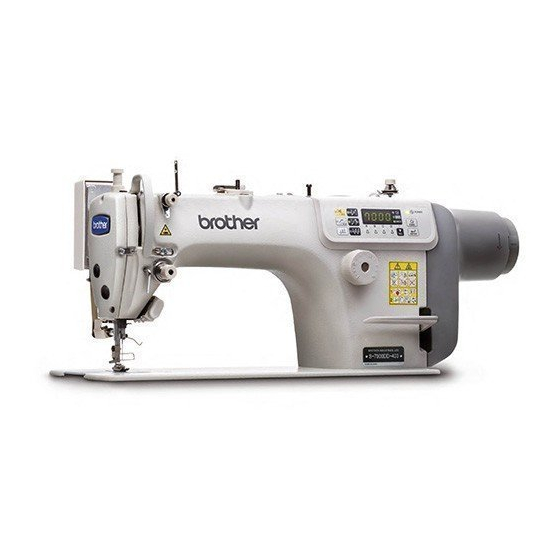
- Page 1 S-7000DD SERVICE MANUAL Draft Ver. 1 Please read this manual before making any adjustments. SINGLE NEEDLE DIRECT DRIVE STRAIGHT LOCK STITCHER WITH THREAD TRIMMER...
- Page 2 This service manual is intended for S-7000DD; be sure to read the S-7000DD instruction manual before this manual. Carefully read the “SAFETY INSTRUCTIONS” and the whole of this manual to understand this product before you start maintenance. As a result of research and improvements regarding this product, some details of this manual may not be the same as those for the product you purchased.
-
Page 3: Safety Instructions
This symbol ( ) indicates something that you must do. The picture inside the circle indicates the ・・・・・・ nature of the thing that must be done. (For example, the symbol at left means “you must make the ground connection”.) S-7000DD... - Page 4 Contact your Brother dealer or a qualified electrician for any electrical work that may need to Secure the table so that it will not move when tilting be done.
-
Page 5: Maintenance And Inspection
Secure the table so that it will not move when tilting Ask your Brother dealer or a qualified electrician to back the machine head. If the table moves, it may carry out any maintenance and inspection of the crush your feet or cause other injuries. - Page 6 The following warning labels appear on the sewing machine. Please follow the instructions on the labels at all times when using the machine. If the labels have been removed or are difficult to read, please contact your nearest Brother dealer. Touching areas where high voltages are present can Be careful not to get your hands result in severe injury.
- Page 7 Transformer box (110 V/400 V system only) Control box Oil tank 0591D S-7000DD...
- Page 8 S-7000DD...
-
Page 9: Table Of Contents
Protection setting method ........34 2-8. Software version checking method ...... 37 2-9. Maintenance information viewing method.... 38 2-10. Sewing machine reference position adjustment method ..........39 3. SLIDE SWITCH (SW1) SETTING METHOD..........4. SETTING METHOD FOR STANDARD DEPRESSION STROKES....S-7000DD... -
Page 10: List Of Special Functions When Power Is Turned On
Refer to “2-10. Sewing machine reference position Refer to “2-4. Error history checking method”. adjustment method”. Input checking function Maintenance information viewing mode Refer to “2-5. Input checking method”. Refer to “2-9. Maintenance information viewing method”. Output checking function Refer to “2-6. Output checking method”. S-7000DD... -
Page 11: Function Settings (Operation Panel)
Confirm the setting value (Setting item) To set other items, repeat the operations in steps 2 to 5 and change the settings. Basic function setting mode will be exited and normal operation will be possible. S-7000DD... - Page 12 [TRDI] [ OFF] [ OFF] Thread trimming enabled [ ON] Thread wiping enabled Thread wiping [ WIP] [ OFF] Thread wiping disabled OFF: Off Needle tip illumination [ OFF]/ [LAMP] 6 (Bright) 1 (Dark) lamp brightness 1] - [ S-7000DD...
-
Page 13: Memory Switch Setting Method
NOTE: The changed settings will be enabled after memory switch mode has been exited. Repeat steps 2 to 4 above to change other memory switch settings. Normal sewing machine operation will then be possible. 4193M S-7000DD... -
Page 14: List Of Memory Switch Settings
ON: Presser foot can be lifted and lowered. F015 ON/OFF (If F051 is “OFF”, the thread trimming pedal operation is disabled after the presser foot lifter pedal has been operated during standing operation.) OFF: No operation (Only possible by using presser foot lifter pedal.) S-7000DD... - Page 15 OFF: Presser foot lifts when treadle is returned to neutral position. Presser foot dropping when treadle is depressed forward to 1st step * This is disabled when F852 is set to “OFF”. F057 ON/OFF ON: Presser foot is lowered. OFF: Presser foot is not lowered. (Continued on next page) S-7000DD...
- Page 16 High speed range reaching point for standing operation variable speed pedal F087 -2 - 2 (S4) Treadle speed curve 0: Constant Speed 1: Curves downward 2: Curves upward 3: S line curve F088 0 - 3 Depression stroke 2014B Speed Neutral Depression stroke Treadle backward stroke 2015B S-7000DD...
- Page 17 Reverse operation needle up stop position 2 setting * This is only enabled when F156 is set to “ON”. * The reverse operation angle is 80° to 120°. -20 – 20 F157 (degrees) Reverse operation increases Reverse operation decreases (Continued on next page) S-7000DD...
- Page 18 (*1) The actual upper limit for the operating speed will be the speed set by F181. (*2) The actual lower limit for the operating speed will be the speed set by F181. (*3) The upper limit set will vary depending on the sewing machine head specifications. S-7000DD...
- Page 19 1: Needle up/down F312 1 - 5 2: Correction 3: Slow start 4: Thread trimming disable 5: Thread wiping Automatic operation during continuous backtack sewing (When F470 is “OFF”) F313 ON/OFF ON: AUTO operation enabled OFF: AUTO operation disabled S-7000DD...
- Page 20 0: Half stitch correction sewing / Single stitch correction sewing F354 0 - 3 1: No correction sewing / Single stitch correction sewing 2: Reverse correction sewing (reverse feed) / Single stitch correction sewing 3: Single stitch operation after thread trimming (once only) / Single stitch correction sewing S-7000DD...
- Page 21 * Operation when F470 is set to “ON” and pattern No. 4 (pleat presser sewing) is carried out F405 1 - 2 1: Reverse sewing operation when actuator switch is ON 2: Fixed stitch sewing operation when actuator switch is ON S-7000DD...
- Page 22 • Pattern 3: Name label sewing • Pattern 4: Pleat presser sewing • Patterns 5 to 9: Program sewing (20 steps) * Refer to “2-2-2. Program sewing expansion functions (F470=”ON”)” for details on the setting method for each pattern. S-7000DD...
- Page 23 (*4) To make it function as a quick reverse switch while sewing is in progress, F501 must be set to “1”. (*5) Operation is enabled when F960 is set to “1”. Functioning as a presser lifter switch is enabled when F960 is set to “1”. S-7000DD...
- Page 24 40 - 100 F573 Fully on time for quick reverse solenoid (ms) (ms) (ms) 10 - 60 F574 On duty when quick reverse solenoid is chopping (*1) This is not initialized during initialization mode. S-7000DD...
- Page 25 Presser foot lowering at the forward 1st step F852 ON/OFF ON: Enabled (*1) OFF: Disabled F890 0 - 1 [Do not change this setting.] (*2) (*1) This is not initialized during initialization mode. (*2) Not displayed for -[ ]05 specifications. S-7000DD...
- Page 26 Sewing speed when medium-speed operation switch is pressed 300 - * This is enabled when F950 is set to “3”. 3000 F956 4500 (sti/min) NOTE: The actual operating speed will be limited by the maximum (sti/min) sewing speed setting. S-7000DD...
- Page 27 Number of stitches for option output F968 (needles) (needles) * This is enabled when F960 is set to “7”. 0 - 99 Number of stitches for option output F969 (needles) (needles) * This is enabled when F960 is set to “7”. S-7000DD...
-
Page 28: Program Sewing Expansion Functions (F470="On")
[5-SS] No. of step stitches AUTO function 5 - 9 SS: step Automatic thread trimming function (1 - 20) * Can be set for each step. * The number of ABCD stitches cannot be set separately for each step. S-7000DD... -
Page 29: 4-Digit Display Switching Method (F470="On")
* There is no number of step stitches display for pattern 1. * If any of the indicators for the start backtacking, end backtacking and continuous backtacking keys are illuminated, you can switch to number of backtacking stitch display. If all indicators are switched off, this display will be skipped. S-7000DD... -
Page 30: Pattern Display Mode (F470="On")
Switches to pattern number Switches to step display (* Pattern 3 only) [Patterns 5 to 9] Step (1 to 20) Pattern number (5 to 9) Switches to No. of backtack stiches display Switches to pattern number Switches to step display S-7000DD... -
Page 31: Number Of Backtack Stitches Display Mode (F470="On")
* For patterns 5 to 9, the setting can be made for each step. NOTE: The thread trimming disable and slow start functions cannot be set in this display mode. Press the FUNC key to switch to pattern display before making these settings. S-7000DD... -
Page 32: Number Of Step Stitches Display Mode (F470="On")
* For patterns 5 to 9, the setting can be made for each step. NOTE: The thread trimming disable and slow start functions cannot be set in this display mode. Press the FUNC key to switch to pattern display before making these settings. S-7000DD... -
Page 33: Program Sewing (Patterns 5 To 9) Setting Procedure
• Press the FUNC key to switch to the number of step stitches display. Flashing Set step 1 • Press the D key to set the number of stitches D to 5. • Press the key to set the AUTO function to enabled. (Indicator illuminates) (Continued on next page) S-7000DD... - Page 34 (If automatic thread trimming is not enabled, the start backtack setting will not be stored even if you set it to be enabled.) ・ If automatic thread trimming is not enabled, the end backtack setting will not be stored even if you set it to be enabled. S-7000DD...
-
Page 35: Data Initialization Function
(Press for 2 seconds or more.) Function setting mode will be exited and normal operation will be possible. (If you would like to cancel initialization, set the power switch to OFF.) S-7000DD... -
Page 36: Error History Checking Method
(Error history number) ・When the D key is pressed, the next error code is displayed. ・When the C key is pressed, the display returns to the previous error code. [To exit error history display mode] Set the power switch to OFF. S-7000DD... -
Page 37: Input Checking Method
* When the SEL key (1) is pressed, the ABCD indicator will switch off and the display will return to the item number/item name display. 2) Repeat steps 2 to 4 above. Set the power switch to OFF and then turn the power back on again. S-7000DD... - Page 38 Slide switch on main P.C. board (*1): Input at middle position [ 22] [DIP4] [ ON] - [ OFF] “ON” at middle position, “OFF” at any other position (*1) Refer to “3. SLIDE SWITCH (SW1) SETTING METHOD” for details on the slide switch. S-7000DD...
- Page 39 2. FUNCTION SETTINGS (OPERATION PANEL) <Operation panel key input> Key name Display Key name Display [ F1] [A-UP] [ F2] [B-DN] [ HUD] [C-UP] [ SBT] [D-DN] [ EBT] [ RBT] [FUNC] [ ENT] S-7000DD...
-
Page 40: Output Checking Method
3) repeat the operations in steps 2 to 4 above. Press the power OFF switch to turn off the power, and then turn the power back on. S-7000DD... - Page 41 Stop improvement speed operation When the treadle is depressed, the upper shaft rotates at the stop [ 13] [ POS] improvement speed. When the treadle is returned to the neutral position, the upper shaft stops. (Continued on next page) S-7000DD...
- Page 42 When the treadle is returned to the neutral position, the signal turns off. Option output signal 2 When the treadle is depressed, the option output signal turns on. [ 18] [OUT2] When the treadle is returned to the neutral position, the signal turns off. S-7000DD...
-
Page 43: Protection Setting Method
* If the protection level is different from the original value, the protection level will flash in the display. [If set to level 1 – 2] Confirm the protection level (example: set to level 2) (Flashing) (Illminated) Protect setting mode will be exited and normal operation will be possible. S-7000DD... - Page 44 * If the individual protection setting value is different from the original value, the protection setting value will flash. Confirm the protection setting value The protection setting value will return to illuminating steadily. Protect setting mode will be exited and normal operation will be possible. S-7000DD...
- Page 45 * Values in brackets are for when the slide switch (SW1) on the main P.C. board is at the back position. (Refer to “3. SLIDE SWITCH (SW1) SETTING METHOD” for details on the slide switch.) * Individual settings are disabled if even one of 1 to 6 is ×. If all columns are blank, the setting is enabled. S-7000DD...
-
Page 46: Software Version Checking Method
Software type display Indicator Software Version display (when D key is ON) Main CPU [1.0.00] [1. MN] Panel CPU [1.000] [2. PL] Main IPL [1.000] [3. IPL] Version setting mode will be exited and normal operation will be possible. S-7000DD... -
Page 47: Maintenance Information Viewing Method
If the SEL key (1) is pressed, the ABCD indicator will switch off and the display will return to the item name. 2) Repeat steps 2 to 3 above. Exit maintenance display mode so that normal operation is possible S-7000DD... -
Page 48: Sewing Machine Reference Position Adjustment Method
(Adjustment item name) NOTE: Any changed settings will take effect after sewing machine reference position adjustment mode has been exited. Sewing machine reference position adjustment mode will be exited and normal operation will be possible. S-7000DD... -
Page 49: Slide Switch (Sw1) Setting Method
Front For maintenance [Do not set to this position for normal use.] (*1) For details, refer to <Protection setting list> (P.36). Back At treadle Back Middle Front Front (operator side) S-7000DD... -
Page 50: Setting Method For Standard Depression Strokes
“RR x.x” will appear in the display (1). (With your foot released from the treadle, press the SEL key.) Store the maximum backward depression amount “PD --” will appear in the display (1). (With the treadle depressed to the maximum backward position, press the SEL key.) S-7000DD... - Page 51 ・ If the treadle is not operated correctly, “E091” may be displayed. If this happens, after “FF x.x” appears in the display (1), repeat the operation from step 2. [To end treadle position adjustment mode] Set the power switch to OFF. S-7000DD...
- Page 52 SERVICE MANUAL S-7000DD Printed in Japan I3030996B 2013. 10. B (0)