Advertisement
Advertisement
Table of Contents

Related Manuals for Casio ap-24


Summary of Contents for Casio ap-24
- Page 1 AP-24 JUN. 2004 AP-24 ELECTRONIC KEYBOARD INDEX...
-
Page 2: Table Of Contents
CONTENTS Specifications ---------------------------------------------------------------------------------------------- 1 Block Diagram --------------------------------------------------------------------------------------------- 2 Circuit Description --------------------------------------------------------------------------------------- 3 Printed Circuit Board ------------------------------------------------------------------------------------ 4 Disassembly ------------------------------------------------------------------------------------------------ 6 Diagnostic Program ------------------------------------------------------------------------------------ 15 Schematic Diagrams ----------------------------------------------------------------------------------- 17 Exploded View ------------------------------------------------------------------------------------------- 26 Parts List --------------------------------------------------------------------------------------------------- 28... -
Page 3: Specifications
16 multi-timbre receive • Headphones: Stereo standard jacks × 2 Input/Output: • MIDI (OUT) (IN) ø12cm × 2 (Output: 20 W + 20 W) Speakers: Power Supply: AP-24: 120V AP-24V: 220-240V Power Consumption: AP-24: 55W AP-24V: 58W × 16 × 8 Dimensions: •... -
Page 4: Block Diagram
BLOCK DIAGRAM — 2 —... -
Page 5: Circuit Description
CIRCUIT DESCRIPTION KEY MATRIX Second contact First contact LSI (IC4) ML6763B-NNTC-116 A0#1 C1#1 D1#1 A0#2 C1#2 D1#2 F1#1 G1#1 A1#1 F1#2 G1#2 A1#2 C2#1 D2#1 F2#1 G2#1 C2#2 D2#2 F2#2 G2#2 A2#1 C3#1 D3#1 A2#2 C3#2 D3#2 F3#1 G3#1 A3#1 F3#2 G3#2 A3#2... -
Page 6: Printed Circuit Board
PRINTED CIRCUIT BOARD MAIN PCB M420-MAA1 Top view Bottom view — 4 —... - Page 7 SUB PCB M420-PSA1 Top view CONSOLE PCB M420-PSA3 POWER SUPPLY PCB M420-ACA1 JACK PCB M420-PSA2 LED PCB M420-PSA4 Bottom view — 5 —...
-
Page 8: Disassembly
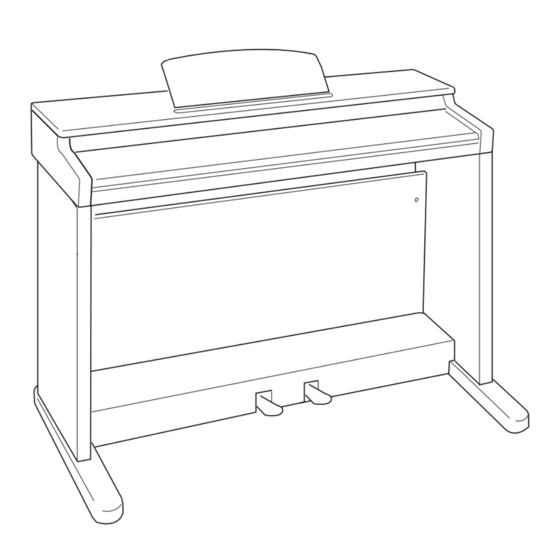
DISASSEMBLY To remove the piano from the stand 1. Remove the pedal plug from the pedal connector 2. Remove two butterfly bolts. on the bottom of the piano, and then remove the Slide the piano toward the rear side, and then pedal cord from the clip. - Page 9 To remove the top board 1. Remove eight screws. 2. Slide the top board toward the front side. Next, lift the top board and remove it from the piano. To remove the keyboard cover 1. Close the keyboard cover. 3. Lift the gear part upward(1), and then slide the 2.
- Page 10 To remove the keyboard 1. Remove the two A screws on the front side and the panel. 2. Remove the three C screws on the back side. Next, remove the eight B screws on the front side and remove the bracket. Front side Back side A screw...
- Page 11 3. Remove 19 screws on the back side. Next, remove three screws and one FPC on the front side, and then remove the key ASSY. Back side Front side — 9 —...
- Page 12 To remove the key PCB 1. Remove two screws and the bracket. 2. Remove the cushion (1), pull the hammer (2), 3. Insert the edge of the tweezers as shown in part and then remove the key from the hammer (3). a of the below figure to remove the key.
- Page 13 To remove the PCB 1. To remove the M420-MAA1 PCB Remove six screws and two connectors. 2. To remove the M420-PSA1 PCB 3. To remove the M420-ACA1U PCB Remove eight screws, five connectors, and five lead wires. R e m o v e f o u r l e a d w i r e s , o n e connector, and four clips.
- Page 14 4. To remove the transformer Remove four screws and seven lead wires. 5. To remove the speaker Remove eight screws and two connectors. — 12 —...
- Page 15 To remove the M420-PSA4 PCB 1. Remove six screws and the front board. 2. Remove two screws and the PSA4 PCB. To remove the M420-PSA2 PCB and the M420-PSA3 PCB 1. Remove three screws. 2. Remove two screws and the switch. —...
- Page 16 3. Remove two screws and the bracket. 4. Remove two nuts and the M420-PSA2 PCB. 5. Remove one screw and one volume knob, and then remove the M420-PSA3 PCB. — 14 —...
-
Page 17: Diagnostic Program
DIAGNOSTIC PROGRAM Initial Setup 1. Connect an AC adaptor. 2. Connect a Pedal. 3. “Main” volume: MAX. NOTE: If there is no pedal cable, pedal check can be skipped. How to start diagnostic program 1. Press the “POWER” button while pressing the “METRONOME” buttons. 2. - Page 18 4. Headphone check 1 Press “CONTROL” button. * The confirmation chord of C4, E4 and G4 sounds. 2 Connect the headphone to the jack. * “PART(R)” LED lights. 3 Remove the headphone from the jack. * “PART(L)” LED lights. 4 Connect the tuning meter to the jack. * “PART(R)”...
-
Page 19: Schematic Diagrams
SCHEMATIC DIAGRAMS MAIN PCB M420-MAA1 — 17 —... - Page 20 SUB PCB M420-PSA1 — 18 —...
- Page 21 JACK PCB M420-PSA2 — 19 —...
- Page 22 CONSOLE PCB M420-PSA3 — 20 —...
- Page 23 LED PCB M420-PSA4 — 21 —...
- Page 24 POWER SUPPLY PCB M420-ACA1 — 22 —...
- Page 25 Keyboard PCB MPCK-KYA1 — 23 —...
- Page 26 Keyboard PCB MPCK-KYB2 — 24 —...
- Page 27 Keyboard PCB MPCK-KYA3 — 25 —...
-
Page 28: Exploded View
EXPLODED VIEW — 26 —... - Page 29 Connecting the Pedal Clip Pedal plug — 27 —...
-
Page 30: Parts List
PARTS LIST AP-24 Notes: This parts list does not include the cosmetic parts, which parts are marked with item No. "R-X" in the exploded view. Contact our spare parts department if you need these parts for refurbish. Prices and specifications are subject to change with- out prior notice. - Page 31 Price Item Parts code Parts name Specification Code R Remarks MAIN PCB 1016 4281 PCB ASSY/MAIN TK-RJM503852*001 1005 2229 BATTERY CR2032/1HF1 3501 7259 CONNECTOR 30FMZ-BT 3501 3465 CONNECTOR B11B-PH-K-S 3500 5847 CONNECTOR B12B-PH-K-S 6932 0063 IC R1151N001C-TR 1012 3003 IC TC74VHCT08AFT(EL) 1004 0865 IC TC7SH04FU(TE85L)
- Page 32 Price Item Parts code Parts name Specification Code R Remarks 1005 2226 SPEAKER NET M441205-001 1005 2365 SIDE BLOCK/R M141157-001 1016 3747 SIDE BLOCK/L M141156-002V01 1016 4307 SW ASSY/POWER TK-RJM503866*001 1016 4451 RUBBER/KEY RJM503784-001V01 1005 2232 KNOB/RTR M341402-001 6924 5260 BUTTON/POWER M340318-001 1016 4303 BOARD ASSY/FRONT TK-RJM503767*001...
- Page 33 CASIO TECHNO CO.,LTD. Overseas Service Division 6-2, Hon-machi 1-Chome Shibuya-ku, Tokyo 151-8543, Japan...