Table of Contents
Advertisement
Quick Links
Advertisement
Table of Contents

Related Manuals for Char-Broil 14101550


Summary of Contents for Char-Broil 14101550
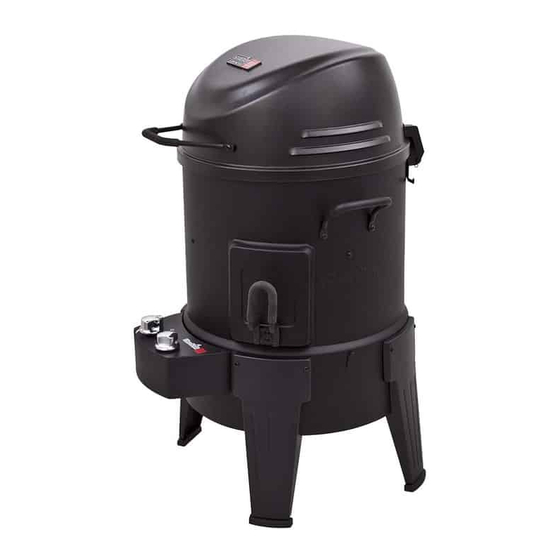
- Page 1 Smoker, Roaster 14101550 & Grill during assembly, please call 1-888-430-7870. l’assemblage, S’il vous plaît appelez 1-888-430-7870 durante el Ensamblado, llámenos Al 1-888-430-7870 ©2015 Char-Broil, LLC. Columbus, GA 31902. Printed in China. Imprimé en Chine. Impreso en China. 04/27/15 • 42805198...
-
Page 2: Table Of Contents
THIS GRILL IS FOR OUTDOOR TABLE OF CONTENTS CAUTION USE ONLY. Product Record Information..........1 Grease Fires For Your Safety..............2 DANGER • Putting out grease fires by closing the lid is Safety Symbols ...............2 not possible. Grills are well ventilated for safety reasons. -
Page 3: Food Safety
Food Safety •A disconnected LP cylinder in storage or being Storing Your Appliance Food safety is a very important part of enjoying the transported must have a safety cap installed (as • Clean cooking basket. outdoor cooking experience. To keep food safe from shown). - Page 4 5.Hold regulator and insert nipple into USE AND CARE LP cylinder valve. Hand-tighten the coupling nut, holding regulator in a LP Cylinder Exchange straight line with LP cylinder valve so as not to cross-thread the •Many retailers that sell grills offer you the option of connection.
- Page 5 Safety Tips Burner Flame Check WARNING • Before opening LP cylinder valve, check the coupling nut • Light burner. Looking through viewing hole on top of for tightness. appliance, you should see the flame height as shown • When this appliance is not in use, turn off control knob below.
-
Page 6: Spider Alert
Cleaning the Burner Assembly CAUTION Follow these instructions to clean and/or replace parts of burner assembly or if you have trouble igniting appliance. Turn gas OFF at control knob and LP cylinder and disengage regulator from cylinder. SPIDER ALERT! Open top cover, remove cooking basket and cooking Chamber, shown A. -
Page 7: Limited Warranty
LIMITED WARRANTY This warranty only applies to units purchased from an authorized retailer. Manufacturer warrants to the original consumer-purchaser only that this product shall be free from defects in workmanship and materials after correct assembly and under normal and reasonable home use for the periods indicated below beginning on the date of purchase*. -
Page 8: Parts List
PARTS LIST Description OUTER BODY INNER BODY BODY TOP RING BURNER HEAT SHIELD IGNITION KIT LOGO PLATE COOKING CHAMBER ROASTER BASKET SIDE HANDLE CONTROL PANEL IGNITOR KNOB CONTROL KNOB TOP LID LEG ASSEMBLY GREASE TRAY GREASE TRAY RAIL HOSE, VALVE, REGULATOR HEAT SHIELD, CONTROL PANEL LIFT HOOK MEAT THERMOMETER... -
Page 9: Parts Diagram
DIAGRAMA DE PIEZAS PARTS DIAGRAM SCHÉMA DES PIÈCES NOTE: Some appliance parts shown in the assembly steps may differ slightly in appearance from those on your particular model. However, the method of assembly remains the same. REMARQUE : certaines pièces montrées dans les étapes d'assemblage peuvent être légèrement différentes de celles destinées à... -
Page 10: Assembly
ASAMBLEA PASOS ASSEMBLÉE ÉTAPES ASSEMBLY STEPS... - Page 11 #10x3/8” Self-Tap Screw Vis 10 x 3/8 po Tornillo autorroscante No. 10 de 3/8" • Bottom Hole • Trou Inférieur • Orifico inferior Proper Valve to Burner Tube installation Screw hole for leg-use later. Assurez-vous que la valve est compromise tube Trou de vis pour la jambe utiliser plus tard.
- Page 13 #10-24X1” Screw Vis 10 - 24 x 1 po Tornillo No. 10-24 de ” • Install legs by engaging leg tabs over bottom edge of the appliance body. • Once the leg is in place, attach two #10-24x1" screws through the leg and into the appliance body. •...
- Page 14 #10-24X1/2” Screw Vis 10 - 24 x 1/2 po Tornillo No. 10-24 de 1/2”...
- Page 15 #10-24 Keps nut Écrou 10-24 Tuerca Keps No. 10-24 Fiber washer Rondelle de fibre Arandela de fibra #10-24X3/8” Screw Vis 10 - 24 x 3/8 po Tornillo No.10-24 de 3/8”...
- Page 16 #10-24X3/8” Screw Vis 10 - 24 x 3/8 po Tornillo No.10-24 de 3/8” #10-24X1” Screw Vis 10 - 24 x 1 po Tornillo No. 10-24 de ” Fiber washer Rondelle de fibre Arandela de fibra #10-24 Keps nut Écrou 10-24 Tuerca Keps No.
- Page 17 • Slide the cooking chamber into the appliance. Note that an alignment pin is located on the cooking pot. This pin ensures that the cooking chamber is installed correctly. The pin fits into a slot on the body top ring above the smoker box. There are arrows located on the body top ring and cooking chamber to aid in alignment.
-
Page 18: Accessory Use And Storage
Accessory Use and Storage Utilisation et rangement des accessoires Accesorio para uso y almacenamiento NOTE: Before cooking on your appliance for the first time, refer to the separate Cooking Guide on how to prepare the appliance for cooking. It is recommended that you season your appliance prior to cooking. •... - Page 19 Accessory Use and Storage Utilisation et rangement des accessoires Accesorio para uso y almacenamiento • When using the Roaster Basket, insert it into the Roaster Chamber as shown. • Pour utiliser la grille de cuisson, l'insérer dans l'enceinte de cuisson comme le montre l'illustration. •...
- Page 20 Accessory Use and Storage Utilisation et rangement des accessoires Accesorio para uso y almacenamiento All accessories properly stored. Tous les accessoires sont convenablement rangés. Todos los accesorios almacenados de manera adecuada. Smoker Box The smoker box fits on board the Smoker, Roaster, & Grill in the location provided. Barquette de charbon de bois La barquette rentre parfaitement sur le côté...
-
Page 21: Troubleshooting
EMERGENCIES: If a gas leak cannot be stopped, or a fire occurs due to gas leakage, call the fire department. Emergencies Possible Cause Prevention/Solution Gas leaking from • Damaged hose. • Turn off gas at LP cylinder or at source on natural gas systems. If hose is cut or cracked/cut/burned hose.