Dell poweredge r720 Installation, Maintenance And Troubleshooting Manual
Hide thumbs
Also See for poweredge r720:
- Technical manual (65 pages) ,
- Getting started manual (10 pages) ,
- Specifications (2 pages)

Related Manuals for Dell poweredge r720


Summary of Contents for Dell poweredge r720
- Page 1 Avaya Call Management System Dell PowerEdge™ R720 and R620 Computer Hardware Installation, Maintenance, and Troubleshooting October 2015...
- Page 2 © 2014-2015 Avaya Inc. All Rights Reserved. Concurrent User License (CU). End User may install and use the Software on multiple Designated Processors or one or more servers, so long as only the Notice licensed number of Units are accessing and using the Software at any given While reasonable efforts have been made to ensure that the information in this time.
- Page 3 Trademarks The trademarks, logos and service marks (“Marks”) displayed in this site, the Documentation and Product(s) provided by Avaya are the registered or unregistered Marks of Avaya, its affiliates, or other third parties. Users are not permitted to use such Marks without prior written consent from Avaya or such third party which may own the Mark.
-
Page 5: Table Of Contents
Determining the computer model......Dell PowerEdge™ R720 ....... . . - Page 6 ......... . . Avaya CMS Dell R720 and R620 Computer Hardware Installation...
-
Page 7: Chapter 1: Introduction
CMS. Document changes since last issue The following change has been made to this document since the last issue: Identified that the Dell R720 and R620 are supported for upgrades to CMS R18. ● Related resources Documentation See the following documents. -
Page 8: Avaya Mentor Videos
Use the following websites to view related support documentation: Information about Avaya products and service ● http://www.avaya.com Dell hardware documentation ● http://www.dell.com Avaya CMS Dell R720 and R620 Computer Hardware Installation October 2015... -
Page 9: Support
Use the online service request system to create a service request. Chat with live agents to get answers to questions, or request an agent to connect you to a support team if an issue requires additional expertise. Avaya CMS Dell R720 and R620 Computer Hardware Installation October 2015... - Page 10 Chapter 1: Introduction Avaya CMS Dell R720 and R620 Computer Hardware Installation October 2015...
-
Page 11: Chapter 2: Installation
32 Connecting to external interfaces on page 32 Turning on the system and verifying POST on page 33 Turning the system over for provisioning on page 33 Avaya CMS Dell R720 and R620 Computer Hardware Installation October 2015... -
Page 12: Preparing For Installation
Make sure that you have installed a Board slot System filler panel on all empty board slots. filler damage and panels overheating Avaya CMS Dell R720 and R620 Computer Hardware Installation October 2015... -
Page 13: System Precautions
20-amp circuit. Dell products are designed to work with single-phase power systems having a grounded neutral conductor. To reduce the risk of electrical shock, do not plug Dell products into another type of power source. Contact your facilities manager or qualified electrician if you are unsure what type of power is supplied to your building. -
Page 14: Unpacking And Inventorying The Equipment
This section includes the following topics: Parts list on page 15 ● Determining the computer model on page 15 ● Computer layout on page 17 ● Avaya CMS Dell R720 and R620 Computer Hardware Installation October 2015... -
Page 15: Parts List
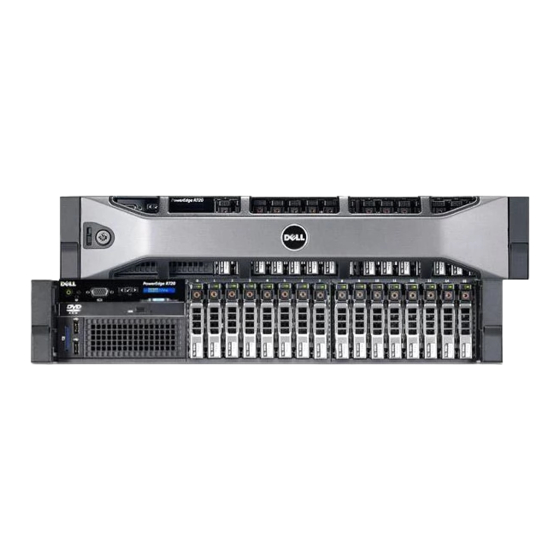
Avaya approved backup devices on page 31 for more ● information. Determining the computer model CMS R17.0 supports the Dell PowerEdge™ R720 MID, R620 MID and LOW computer models. Dell PowerEdge™ R720 on page 15, Dell PowerEdge™ R620 MID on page 16, and Dell PowerEdge™... -
Page 16: Dell Poweredge™ R620 Mid
Can be used as a desktop unit or can be configured for rack mounting ● SAS HBA w/external ports to support optional tape drive ● Optional backup device ● Avaya CMS Dell R720 and R620 Computer Hardware Installation October 2015... -
Page 17: Computer Layout
This button can be pressed using the end of a paper clip. Use this button only if directed to do so by qualified support personnel or by the operating system's documentation. Avaya CMS Dell R720 and R620 Computer Hardware Installation October 2015... - Page 18 Information tag A slide-out label panel, which allows you to record system information, such as Service Tag, NIC, MAC address, and so on as per your need. Avaya CMS Dell R720 and R620 Computer Hardware Installation October 2015...
- Page 19 Hard drives Up to eight 2.5 inch hot-swappable hard drives. Up to four 2.5 hot-swappable hard drives and up to two 2.5 inch Dell PowerEdge Express Flash devices (PCIe SSDs). Avaya CMS Dell R720 and R620 Computer Hardware Installation October 2015...
- Page 20 NOTE: The port is available for use only if the iDRAC7 Enterprise license is installed on your system. Serial connector Allows you to connect a serial device to the system. Avaya CMS Dell R720 and R620 Computer Hardware Installation October 2015...
- Page 21 Gbps SFP+ connectors PCIe expansion card Allows you to connect a PCIe expansion slot card. Power supply 495W, 750W or 1100W (PSU1) Power supply 495W, 750W or 1100W (PSU2) Avaya CMS Dell R720 and R620 Computer Hardware Installation October 2015...
- Page 22 15 seconds. USB connector (2) Allows you to insert USB devices to the system. The ports are USB 2.0-compliant. Avaya CMS Dell R720 and R620 Computer Hardware Installation October 2015...
- Page 23 Hard drives (8) Up to eight 2.5 inch hot-swappable hard drives. Up to four 2.5 hot-swappable hard drives and up to two 2.5 inch Dell PowerEdge Express Flash devices (PCIe SSDs). Avaya CMS Dell R720 and R620 Computer Hardware Installation October 2015...
- Page 24 Video connector Allows you to connect a VGA display to the system. USB connectors (2) Allows you to connect USB devices to the system. The ports are USB 2.0-compliant. Avaya CMS Dell R720 and R620 Computer Hardware Installation October 2015...
- Page 25 Gbps SFP+ connectors PCIe expansion card Allows you to connect a PCIe expansion slot (riser 3) card. Power supply 495W, 750W or 1100W (PSU1) Power supply 495W, 750W or 1100W (PSU2) Avaya CMS Dell R720 and R620 Computer Hardware Installation October 2015...
-
Page 26: Technical Specifications
(17.08 inch) without rack latches Depth 700.5 mm (27.58 inches) of eight-hard-drive systems ● Weight 18.58 kg (40.96 lbs) of eight-hard-drive systems VA Rating 6.5 A X 110 VAC = 715 VA Avaya CMS Dell R720 and R620 Computer Hardware Installation October 2015... -
Page 27: Mounting The Server Using The Rack Mount Kit
For more information about mounting the Dell R720 server using sliding rails, see ftp:// ftp.dell.com/Manuals/all-products/esuprt_ser_stor_net/esuprt_poweredge/ poweredge-r710_Setup%20Guide4_en-us.pdf. For more information about mounting the Dell R620 server using the Rack Mount Kit, see http:// support.dell.com/support/edocs/systems/peR620/en/placemat/rack/r620pmrack.pdf. Setting up power To set up the AC power:... - Page 28 If a UPS is not being used, you must use a grounded outlet on a minimum 15-amp circuit. Important: Do not turn on power at this time. Important: Avaya CMS Dell R720 and R620 Computer Hardware Installation October 2015...
-
Page 29: Peripheral Connectivity
Peripheral connectivity Peripheral connectivity The following diagram shows in general how equipment connects to the computer. The callouts are described in Parts list on page 30. Avaya CMS Dell R720 and R620 Computer Hardware Installation October 2015... -
Page 30: Parts List
USB mouse with cable Dell MS111 USB Optical Mouse, OptiPlex and Fixed Precision, Customer Install VGA Monitor with cable Dell E170S, 17 Inch Flat Panel, 17.0 Inch Viewable ImageSize, OptiPlex, Precision Latitude and Enterpr Gigabit ethernet ports (built-in) E (optional) Customer supplied HD-68 to VHDCI SCSI cable (3 feet, 0.8 meters) (or) SAS to SAS cable (0.5... -
Page 31: Avaya Approved Backup Devices
KVM solutions for CMS systems. CMS does not support the use of headless or KVM solutions for CMS systems. Use of these solutions is only by Permissive Use. Avaya CMS Dell R720 and R620 Computer Hardware Installation October 2015... -
Page 32: Connecting The Keyboard And Mouse
You must use ethernet port 1 for this connection. For detailed information about how to connect and administer the switch link, see Avaya Call Management System Switch Connections, Administration, and Troubleshooting. Avaya CMS Dell R720 and R620 Computer Hardware Installation October 2015... -
Page 33: Connecting To The Customer Network
After completing the physical installation of the system, the installation continues with software provisioning. This is often done with the support of the Avaya CMS Provisioning group. Provisioning the system consists of the following: Setting up CMS ● Avaya CMS Dell R720 and R620 Computer Hardware Installation October 2015... - Page 34 Setting up system alarming ● To continue with provisioning, see the chapter “Turning the system over to the customer” in the CMS Software Installation, Maintenance, and Troubleshooting document for your CMS release. Avaya CMS Dell R720 and R620 Computer Hardware Installation October 2015...
-
Page 35: Chapter 3: Maintenance
38 ● Maintaining tape drives on page 39 ● Connecting to external interfaces on page 39 ● Adding memory and replacing the CPU on page 41 ● Avaya CMS Dell R720 and R620 Computer Hardware Installation October 2015... -
Page 36: Precautions
Replacing a motherboard ● Changing the IP address of the CMS system ● Avaya CMS Dell R720 and R620 Computer Hardware Installation October 2015... -
Page 37: Turning The Computer Off And On
2. Make sure that the power is off. 3. Attach the Electro-Static Discharge (ESD) wrist strap to the chassis frame and to your wrist. 4. Unplug the AC power cord. Avaya CMS Dell R720 and R620 Computer Hardware Installation October 2015... -
Page 38: Maintaining Disk Drives
This procedure should be followed multiple times if replacing multiple disk drives. Note: 1. Dell SAS disks are hot-swappable. However, if the customer has the LOW system, it only has one disk. So you cannot apply hot-swapping to LOW systems. Follow the instructions in Software Installation, Maintenance, and Troubleshooting for your version of CMS to complete the procedures before removal of the disk. -
Page 39: Maintaining Tape Drives
Connecting to external interfaces This section describes the external interfaces connected to the computer. This section includes the following topics: Connecting the switch link on page 40. ● Avaya CMS Dell R720 and R620 Computer Hardware Installation October 2015... -
Page 40: Connecting The Switch Link
You must use ethernet port 0 for this connection. Connecting the tape drive Connections to the tape drive are for the Dell R720 and Dell R620 platform only. Connecting an optional SAS tape drive A Serial Attached SCSI (SAS) cable connects from the SAS port located on the back of the computer to the SAS port on the back of the tape drive. -
Page 41: Adding Memory And Replacing The Cpu
4. Press and release the power button. Adding memory and replacing the CPU Dell technicians, Avaya technicians, or Avaya business partner technicians can upgrade and repair memory and CPU. Contact Avaya support or your business partner if your system needs any upgrades or repairs. - Page 42 Chapter 3: Maintenance Avaya CMS Dell R720 and R620 Computer Hardware Installation October 2015...
-
Page 43: Chapter 4: Troubleshooting
Recovery procedures on page 44 ● Additional troubleshooting: See the Dell PowerEdge™ R720 Owner's Manual at the following Dell web site for additional troubleshooting procedures: http://downloads.dell.com/Manuals/Common/poweredge-r720_Owner's%20Manual_en-us.pdf See the Dell PowerEdge™ R620 Owner's Manual at the following Dell web site for additional troubleshooting procedures: http://support.dell.com/support/edocs/systems/peR620/en/om/r620omen.pdf... -
Page 44: Recovery Procedures
1. Log in to the system as root. 2. Enter: /usr/sbin/shutdown -h now This shuts down the system. 3. Turn off the system monitor. 4. Turn off all external devices. Avaya CMS Dell R720 and R620 Computer Hardware Installation October 2015... -
Page 45: Glossary
It uses a daisy-chained cabling arrangement that originates at the Host Adapter to interconnect up to seven intelligent peripheral controllers on the bus. The Dell computer uses a fast SCSI-2 implementation. SCSI ID Each tap on the SCSI bus is required to have a unique identification or address, which is the SCSI ID. - Page 46 Avaya CMS Dell R720 and R620 Computer Hardware Installation October 2015...
-
Page 47: Index
..preserve data after a system failure ....turning off the computer Avaya CMS Dell R720 and R620 Computer Hardware Installation October 2015... - Page 48 ....turning on the computer ..turning the system over for provisioning Avaya CMS Dell R720 and R620 Computer Hardware Installation October 2015...