Table of Contents
Advertisement
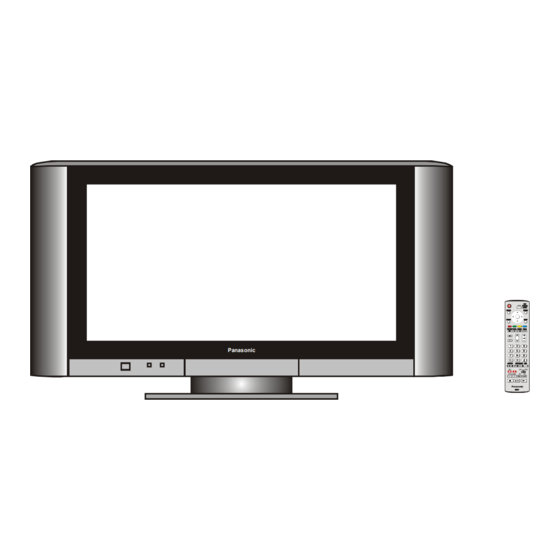
High Definition Digital Wide Screen LCD Television
®
TM
Operating Instructions
Please read these operating instructions completely before operating this set. Retain the booklet for future
reference.
Trade Mark of the DVB Digital Video Broadcasting Project (1991 to 1996)
®
Registration number 3727 (32LWD500A), 3725 (27LWD500A)
HDMI, the HDMI logo and High-Definition Multimedia Interface are trademarks or registered
trademarks of HDMI Licensing LLC.
Trademark of the SD Card Association
TM
Dolby and the double-D symbol are trademarks of Dolby Laboratories.
Manufactured under licence from Dolby Laboratories.
TX-32LWD500A
TX-27LWD500A
Panasonic
TQB4CM039-1
Advertisement
Table of Contents

Related Manuals for Panasonic TX-27LWD500A


Summary of Contents for Panasonic TX-27LWD500A
-
Page 1: Operating Instructions
HDMI, the HDMI logo and High-Definition Multimedia Interface are trademarks or registered trademarks of HDMI Licensing LLC. Trademark of the SD Card Association Dolby and the double-D symbol are trademarks of Dolby Laboratories. Manufactured under licence from Dolby Laboratories. TX-32LWD500A TX-27LWD500A Panasonic TQB4CM039-1... - Page 2 Panasonic and the Environment Dear Panasonic Customer Thank you for choosing to buy a Panasonic colour television. This product was assembled at our Panasonic Television Factory in Penrith, New South Wales, Australia under our Quality and Environmental Management System. You can therefore be assured that you have purchased a quality product incorporating environmentally friendly features including low standby power usage and lead free soldering.
- Page 3 WARNING: To reduce the risk of fire or electric shock, do not expose this apparatus to rain or moisture. Do not place liquid containers (flower vase, cups, cosmetics, etc.) above the set (including on shelves above, etc.). WARNING: 1) To prevent electric shock, do not remove cover. No user serviceable parts inside. Refer servicing to qualified service personnel.
- Page 4 Each one of these dots is precisely controlled by the electronics of the TV to produce the picture. Whilst Panasonic maintains the highest standards in manufacturing technology and processes in the construction of these panels, there are a number of allowable Pixel/Dot failures that would still allow the panel to be defined as a...
-
Page 5: Table Of Contents
Contents Getting Started...6 ~ 12 Battery Installation and Replacement ...6 Battery Precautions...6 Using the LCD stand ...6 Connectors...6 Connecting the Antenna ...7 Connecting DVD Players and VCRs etc ...7 Which connectors to use...8 Connecting Component Video equipment ...8 Connecting Video equipment...8 Turn on the television...9 Front Panel Controls ...9 Remote Control Buttons...10... -
Page 6: Getting Started
Getting Started Battery Installation and Replacement Place your fingernail under the battery cover hook. Apply a slight downward and backward pressure and lift the cover off. • Do Not use rechargeable batteries. • Do Not mix battery types • Do Not mix old and new batteries. Replace both batteries at the same time. -
Page 7: Connecting The Antenna
Connect the television to the antenna wall plate and a good quality outside / roof antenna. This television uses an “F” connector for the RF input. If your wall plate or antenna lead is the standard “Belling Lee” connector, use the supplied “F”... -
Page 8: Which Connectors To Use
TX-32LWD500A OUTPUT AUDIO Note: Take care not to swap the two red leads. Back of TV TX-32LWD500A OUTPUT S-Video VIDEO AUDIO TX-27LWD500A AUDIO INPUT L (White) VID EO VIDEO PC AUDIO IN R (Red) AUDIO AUDIO Y (Green) Pb (Blue) -
Page 9: Turn On The Television
When the television is in Stand-By it is possible to turn it back on by pressing the POWER Button on the front panel. This television is designed for the Australian Standard Mains Voltage of 240V 50Hz. Getting Started Turn on the television Panasonic Front Panel Controls P an aso nic options. -
Page 10: Remote Control Buttons
MULTI WINDOW (see page 22) AUDIO The Remote Control is capable of operating some functions of selected Panasonic VCRs and DVD (Digital Versatile Disc) equipment. Some VCR and DVD equipment have different functions, so to ensure compatibility please refer to the equipment's instruction book or consult your dealer for details. -
Page 11: Auto Setup
Plug the television into the mains and switch it on. Unless your dealer has already programmed the television for your state or territory, you will have to perform an Auto Setup. Use the UP or DOWN buttons to select the state or territory in which you live. -
Page 12: Picture Menu
Picture menu operation Press the MENU Button. Picture Menu Sound Menu Setup Menu Viewing mode Contrast Brightness Colour Sharpness Tint Backlight Colour balance P-NR Picture Menu Use the UP and DOWN buttons to move to the Contrast Picture Menu. Brightness Colour Press the LEFT, Sharpness... -
Page 13: Sound Menu
Press the MENU Button. Picture Menu Sound Menu Setup Menu Mode Bass Treble Balance Headphone volume Analogue MPX Ambience Audio Delay Sound Menu Use the UP and DOWN buttons to move to the Bass Sound Menu. Treble Balance Press the LEFT, RIGHT Headphone Volume or OK button to access Analogue MPX... -
Page 14: Setup Menu
Setup menu operation Press the MENU Button. Picture Menu Sound Menu Setup Menu AV4 In Select Power On Preference Volume correction Analogue Tuning Menu DVB System setup DVB Tuning Menu HDMI Audio PC Input Settings Setup Menu Use the UP and DOWN buttons to Power On Preference move to the Setup... -
Page 15: Dvb System Setup
Picture Menu Sound Menu Setup Menu Use the UP and DOWN buttons to move to the DVB System Setup menu. Press the LEFT or RIGHT button to access the DVB System Setup menu settings Signal Quality This function displays an indication of signal quality for each DVB programme position. The DVB system requires a good quality signal to provide the best picture. -
Page 16: Favourites Setup
Favourites Setup Allows you to set up a list of favourite channels allowing you to ‘channel surf’ through your personal favourites instead of through the entire range of channels. Many channels are duplicated. They have been set up by the broadcasters for future use. -
Page 17: Dvb Tuning Menu
Picture Menu Sound Menu Setup Menu Use the UP and DOWN buttons to move to the DVB Tuning Menu. Press the LEFT, RIGHT or OK button to access the DVB Tuning Menu settings Channel Installation Region Select Parental Guidance Change Password Shipping Condition Press the MENU Button. -
Page 18: Shipping Condition
Shipping Condition The Shipping Condition menu will reset all data; clearing all tuning information and resetting all control levels back to factory settings. DVB Mode Press the MENU Button. Use the UP and DOWN buttons to move to the Setup Menu. Press the LEFT or RIGHT button to access the Setup Menu. -
Page 19: Analogue Tuning Menu
Press the MENU Button. Picture Menu Sound Menu Setup Menu Analogue Auto Setup Use the automatic tuning procedure only if you wish to reset ALL Programme Location Numbers. Press OK to access the Analogue Auto Setup. You will be given a warning that all analogue data will be erased. You can press OK to confirm, or EXIT to cancel. -
Page 20: Special Buttons
Special Buttons Information The Information banner provides access to information on current and upcoming programmes and easy switching between all channels or just those in your Favourites list. Press the Information button. An information banner will appear with details of the current programme being broadcast. -
Page 21: Guide
The GUIDE button will display information about the current and following programmes. It can be used to set reminders for upcoming programmes, list programmes by category and change channels. The GUIDE button only operates in digital mode. NOTE: Not all broadcasters transmit this information and not all information transmitted is complete. Press the GUIDE button. -
Page 22: Aspect
Special Functions ASPECT This button is used to move through the different aspect ratios. The aspect options are: 16:9, 4:3, Just, Zoom1 and Zoom2. In Digital mode the TV automatically selects the 16:9 mode for best picture. In Analogue and AV Modes all aspect options are available for use. -
Page 23: Teletext Operation
Teletext is only available on certain broadcast channels. The time taken to display the teletext is determined by the broadcaster and not by the television. Teletext is also used for Closed Captioning of television programmes for the hearing impaired. Closed captions can be found on Teletext Page 801. -
Page 24: Card Reader
Card Reader This television has a built in Card Reader. You can insert six different types of card: - CF I, CF II, SD, SMC, MMC and MS. One or two cards can be inserted into the front panel card reader at any time. -
Page 25: Slideshow Setup
Press the MENU button. Use the UP or DOWN buttons to move to the Slideshow Menu. Use the OK button to access the Slideshow Menu. Use the UP or DOWN buttons to move to the option you want to change. Use the OK button to access the option you want to change. -
Page 26: Other Connections
AV input terminals. The front panels are particularly useful for temporary connections. For permanent connections we recommend that you use the rear inputs. * WARNING Panasonic AV 3 INPUT S- VIDEO VIDEO L AUD IO R... -
Page 27: Customer Information
Warnings and cautions To keep your Panasonic Television in good working order please observe the following warnings and cautions. Please be careful with this television. Like all electrical equipment it can cause serious injury or damage if it is mistreated. -
Page 28: Frequently Asked Question
Frequently asked questions Some minor problems can be corrected very quickly and easily without the cost of a service call. Panasonic has a Customer Care Centre that can answer most questions over the phone. Before you contact the Customer Care Centre with your question we have included the most commonly asked questions. -
Page 29: Troubleshooting
Problem Possible causes The display on the panel Power Mains cable is not does not light up. connected. No sound or picture. The A/V cord is not properly connected. Wrong selection of input mode. The remote control is not Battery exhausted. working. -
Page 30: Signal Strength
Customer Information DTV Reception Trouble Shooting Guide Signal Strength The signal received may be too poor to allow the digital receiver to find some or all available channels. Your old antenna may not be designed to receive all DTV channels. Antenna reception performance has deteriorated due to weathering, corrosion of antenna connections / cabling and broken elements. -
Page 31: Specifications
1280x720p at 60Hz 1920x1080i at 60Hz Audio Out: Approx. 400mV 2 Batteries Type ‘AA’ “F” – “Belling Lee” Adaptor Customer Information Specifications TX-27LWD500A 220-240V ~ 50/60Hz 145W LCD 27” 16:9 597.12 x 335.88 0.1555 (H) x 0.4665 (V) 600:1 16.7M 8 bit 16ms Grey to Grey 170°... - Page 32 1. The product is warranted for 12 months from the date of purchase. Subject to the conditions of this warranty Panasonic or it's Authorised Service Centre will perform necessary service on the product without charge for parts or labour if, in the opinion of Panasonic, the product is found to be faulty within the warranty period.