Panasonic SC-PT450 Operating Instructions Manual
Dvd home theater sound system
Hide thumbs
Also See for SC-PT450:
- Operating instructions manual (13 pages) ,
- Operating instructions manual (48 pages)
Table of Contents
Advertisement
Before connecting, operating or adjusting this product, please read the instructions
completely. Please keep this manual for future reference.
Your unit may not look exactly the same as illustrated.
The player plays DVD-Video marked with labels containing the
region number "4" or "ALL".
4
Wireless system surround sound
Optional wireless surround speaker connection.
High-quality picture
HDMI capability, Advanced progressive scan and more.
GN
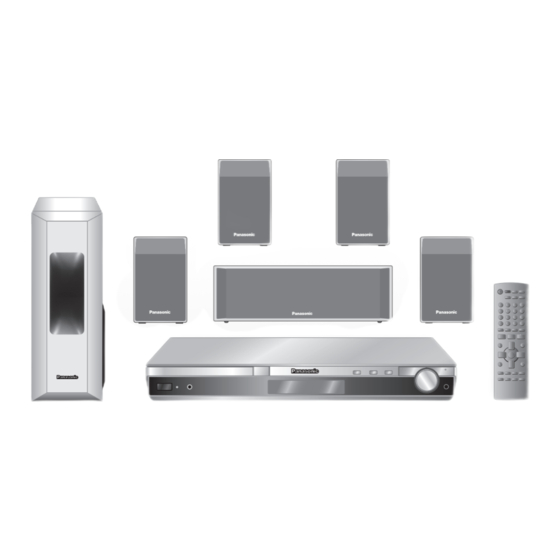
DVD Home Theater Sound System
2
3
ALL
4
Operating Instructions
Model No.
7
page
24
page
SC-PT450
RQTX0066-1L
Advertisement
Table of Contents

Related Manuals for Panasonic SC-PT450


Summary of Contents for Panasonic SC-PT450
- Page 1 The player plays DVD-Video marked with labels containing the region number “4” or “ALL”. Wireless system surround sound Optional wireless surround speaker connection. High-quality picture HDMI capability, Advanced progressive scan and more. Operating Instructions DVD Home Theater Sound System Model No. page page SC-PT450 RQTX0066-1L...
-
Page 2: Dear Customer
• DO NOT PLACE SOURCES OF NAKED FLAMES, SUCH AS LIGHTED CANDLES, ON THE UNIT. • DISPOSE OF BATTERIES IN AN ENVIRONMENTALLY FRIENDLY MANNER. RQT8043 Dear customer Thank you for purchasing this product. System SC-PT450 Main unit SA-PT450 Front speakers SB-HF450 Center speaker SB-HC450 Surround speakers... -
Page 3: Safety Precautions
-If you see this symbol- Information on Disposal in other Countries outside the European Union This symbol is only valid in the European Union. If you wish to discard this product, please contact your local authorities or dealer and ask for the correct method of disposal. Safety precautions Placement Set the unit up on an even surface away... -
Page 4: Table Of Contents
Table of contents GETTING STARTED Safety precautions ...3 Accessories ...5 Preparing the remote control ...5 Placement of speakers ...6 Speaker installation options ... 7 Simple setup ...8 Making the connections ... 8 Performing QUICK SETUP ... 10 Disc information ... 11 Discs that can be played ...11 Overview of controls ... -
Page 5: Accessories
Accessories Please check and identify the supplied accessories. 1 Remote control (N2QAYB000093) 2 Remote control batteries Preparing the remote control Insert so the poles (+ and –) match those in the remote control. R6/LR6, AA • Do not use rechargeable type batteries. -
Page 6: Placement Of Speakers
Placement of speakers Setup example Place the front, center, and surround speakers at approximately the same distance from the seating position. The angles in the diagram are approximate. FRONT SURROUND (L, R) (L, R) • Use only supplied speakers Using other speakers can damage the unit, and sound quality will be negatively affected. -
Page 7: Speaker Installation Options
Set your surround free! Optional Panasonic wireless accessory (example: SH-FX65) You can enjoy surround speaker sound wirelessly when you use the optional Panasonic wireless accessory (example: SH-FX65). For details, please refer to the operating instructions for the optional Panasonic wireless accessory. -
Page 8: Simple Setup
Simple setup Making the connections Making the connections Connect the AC mains lead only after all other connections have been made. • Ensure that you have the complete accessories before making the connections. Conserving power The main unit consumes a small amount of power, even when it is standby mode (approx. 0.8 W). To save power when the unit is not to be used for a long time, unplug it from the household mains socket. -
Page 9: Connect To Various Television Terminals
• Set “Video Output Mode” (\ page 20, Picture Menu). VIERA Link (“HDAVI Control”) If your Panasonic television is a VIERA Link compatible television, you can operate your television synchronising with home theater operations or vice versa (\ page 32). -
Page 10: Performing Quick Setup
Performing QUICK SETUP The QUICK SETUP screen assists you to make necessary settings. To display the picture from this main unit, switch on the television and change the television’s input mode which is connected to this main unit (example : VIDEO 1, AV 1, etc.). To change your television’s input mode, refer to its operating instructions. -
Page 11: Disc Information
Disc information Discs that can be played Discs that can be played 7 Commercial discs Disc Logo DVD-Video Video CD 7 Recorded discs ‡ : Playable, *: Not playable) Disc Logo DVD-RAM DVD-R/RW DVD-R DL +R/+RW — +R DL — CD-R/RW —... -
Page 12: Overview Of Controls
Overview of controls Main unit Main unit Standby/on switch [y/I] (14) Press to switch the unit from on to standby mode or vice versa. In standby mode, the unit is still consuming a small amount of power. MUSIC PORT jack Connect an external device (31) AC supply indicator [AC IN] This indicator lights when the unit... -
Page 13: Remote Control
Remote control Remote control Television operations (33) Switch the main unit on or off (14) Change the television’s video input mode (33) Select disc’s title numbers and etc., Enter numbers (15) Select preset radio stations (28) Show a disc top menu (15) or program list (15) Show on-screen menu (19), Show the display on the main unit (15),... -
Page 14: Disc - Basic Play
Disc — Basic play Using the main unit Using the main unit Power on. Load a disc in the tray. • Load double-sided discs so the label for the side you want to play is facing up. • For DVD-RAM, remove the disc from its cartridge before use. - Page 15 Stop The position is memorised while “RESUME” is on the display. • Press [3, PLAY] to resume. • Press [7, STOP] again to clear the position. Pause • Press [3, PLAY] to resume playback. Search (during play) • Play speed increases up to 5 steps. •...
-
Page 16: Advanced Play
Advanced play Displaying current playback condition Functions Menu (\ page 19) Off (No on-screen display) 7 Basics Example: Current playback number Playback condition Play mode 7 Details Example: Audio information Subtitle information Angle information Aspect of current title Total play time of current title Program and Random play (during stop) -
Page 17: Playing Data Discs Using Navigation Menus
Playing data discs using navigation menus Playing data discs Selecting “Play as Data Disc” in Other Menu (\ page 22) will be effective if the following functions are not available to play WMA, MP3 or JPEG contents. • Playing HighMAT™ discs (\ page 18). Playing items in order (Playback Menu) JPEG WMA/MP3... -
Page 18: Playing Highmat™ Discs
Playing data discs using navigation menus (continued) Playing HighMAT™ discs To select the item. • Repeat this step if necessary. Example: Menu: Takes you to the next menu which shows play lists or another menu To change the menu background Press [FUNCTIONS]. -
Page 19: Using On-Screen Menus
• On +R/+RW, a subtitle number may be shown for subtitles that are not displayed. • “On” or “Off” appears only with discs that contain subtitle on/off information (Subtitle on/off information cannot be recorded using Panasonic DVD Recorders). Confi rm 1 English 3/10 2 French 0:24:31... -
Page 20: Other Settings
Using on-screen menus (continued) Functions Menu (continued) Marker (VR) To recall a marker recorded on DVD- Video recorders Press [5, ∞] ] Press [ENTER] Angle (with multiple angles) To select a video angle Rotate To rotate pictures Picture Other Settings Play Speed To change play speed –... -
Page 21: Audio Menu
Other Settings (continued) Picture Menu (continued) Transfer If you have chosen “xxx p” (progressive) or Mode “1080i” (interlace) ( page 20, “Video Output Mode”), select the method of conversion for progressive output to suit the type of material. • The setting will return to Auto or Auto1 when the disc tray is opened, the unit is turned off or another source is selected. -
Page 22: Confi Rming Hdmi Information
Using on-screen menus (continued) Other Settings (continued) Display Menu (continued) Manual To zoom in and out manually Zoom – in 0.01-unit steps from “x1.00” to “x1.60” – in 0.02-unit steps from “x1.60” to “x2.00” • To change the steps quickly, press and hold [5, ∞]. -
Page 23: Changing The Player Settings
Changing the player settings HDMI Item Setting • If you have not performed QUICK SETUP (\ page 10), the QUICK SETUP screen appears. The settings remain intact even if you switch the unit to standby. • Underlined items are the factory settings in the following table. •... - Page 24 Changing the player settings (continued) QUICK SETUP enables successive settings of the items in the shaded area. Player settings (continued) 7 “Video” tab TV Aspect Choose the setting to suit your television and preference. TV Type Select to suit the type of television. Time Delay When connected with a Plasma display, adjust if you notice the audio is out of...
-
Page 25: Changing The Delay Time Of The Speakers
Player settings (continued) 7 “Display” tab Menu Language • English • Français • Español • Deutsch • Italiano • Nederlands • Svenska • Polski On-Screen Messages • On 7 “Others” tab FL Dimmer • Bright Change the brightness of the unit’s •... -
Page 26: Tips For Making Data Discs
Changing the player settings (continued) Tips for making data discs Tips for making data discs • When there are more than eight groups, the eighth group onwards will be displayed on one vertical line in the menu screen. • There may be differences in the display order on the menu screen and computer screen. •... - Page 27 Manufactured under license from Dolby Laboratories. Dolby, Pro Logic and the double-D symbol are trademarks of Dolby Laboratories. “DTS” and “DTS Digital Surround” are registered trademarks of DTS, Inc. This product incorporates copyright protection technology that is protected by method claims of certain U.S. patents and other intellectual property rights owned by Macrovision Corporation and other rights owners.
-
Page 28: Using The Radio
Using the radio Manual tuning To select “FM”. (main unit) To select “MANUAL”. (main unit) To select the frequency. (main unit) Press and hold [4 TUNE 3] until the frequency starts scrolling to start automatic tuning. Tuning stops when a station is found. Presetting the channel Up to 30 stations can be set for FM. -
Page 29: Using Sound Effects
Using sound effects Note • The following sound effects may not be available or have no effect depending on the type of source, disc as well as recording format or, when headphones are used. • You may experience a reduction in sound quality when these sound effects are used with some sources. -
Page 30: Enhancing The Stereo Sound: Dolby Pro Logic Ii
Using sound effects (continued) Enhancing the stereo sound: Dolby Pro Logic II Except Dolby Pro Logic II is an advanced decoder that derives 5-channel surround (Left and Right Front, Center, Left and Right Surround) from stereo sound sources, whether or not it has been specifi cally Dolby Surround encoded. -
Page 31: Operating Other Equipment
Operating other equipment Optional antenna connection Optional antenna connection Use the outdoor antenna if radio reception is poor. FM outdoor antenna (Using a television antenna) Rear panel of this main unit Optional connections Optional connections To your cable TV service or television antenna RF cable (not included) Audio cable... -
Page 32: Using The Viera Link "Hdavi Control
What is VIERA Link “HDAVI Control”? VIERA Link “HDAVI Control” is a convenient function that offers linked operations of this unit, and a Panasonic television (VIERA) under “HDAVI Control”. You can use this function by connecting the equipment with the HDMI cable. See the operating instructions for connected equipment for operational details. -
Page 33: Operating The Television
Operating the television Operating the television You can use the remote control to operate a Panasonic television. Aim the remote control at the television. To switch the television on or off To switch the television’s video input mode Adjust the volume... -
Page 34: Troubleshooting Guide
Troubleshooting guide Before requesting service, make the following checks. If you are in doubt about some of the check points, or if the solutions indicated in the chart do not solve the problem, consult your dealer for instructions. 7 Power No power. - Page 35 7 A-B repeat Point B is automatically set. • The end of an item becomes point B when it is reached. 7 Menus The Setup menu cannot be • Select “DVD/CD” as the source. accessed. • Cancel program and random play. 7 Sound abnormal or improper Sound is distorted.
-
Page 36: Progressive Video
Troubleshooting guide (continued) 7 Progressive video There is ghosting when progressive or HDMI output is on. Pictures not in progressive output. • Select “480p” or “576p” in “Video Output Mode” in Picture Menu. Closed captions not displayed. 7 Unit displays The display is dark. -
Page 37: Glossary
Glossary Decoder A decoder restores the coded audio signals on DVDs to normal. This is called decoding. Dolby Digital This is a method of coding digital signals developed by Dolby Laboratories. Apart from stereo (2-channel) audio, these signals can also be multi-channel audio. A large amount of audio information can be recorded on one disc using this method. -
Page 38: Specifi Cations
Specifi cations AMPLIFIER SECTION RMS Output Power: Dolby Digital Mode 125 W per channel (3 ), 1 kHz, 10 % THD Front Ch 125 W per channel (3 ), 1 kHz, 10 % THD Surround Ch 250 W per channel (6 ), 1 kHz, 10 % THD Center Ch 250 W per channel (6 ), 100 Hz, 10 % THD Subwoofer Ch... -
Page 39: Language Code List
Language code list Abkhazian: 6566 Danish: Afar: 6565 Dutch: Afrikaans: 6570 English: Albanian: 8381 Esperanto: Ameharic: 6577 Estonian: Arabic: 6582 Faroese: Armenian: 7289 Fiji: Assamese: 6583 Finnish: Aymara: 6589 French: Azerbaijani: 6590 Frisian: Bashkir: 6665 Galician: Basque: 6985 Georgian: Bengali; Bangla: 6678 German: Bhutani:... - Page 40 Matsushita Electric Industrial Co., Ltd. Web Site: http://panasonic.net RQTX0066-1L L0307LE1047...