Vermont Castings 1450 Service Manual
Encore non-catalytic
Hide thumbs
Also See for 1450:
- Homeowner's installation and operating manual (37 pages) ,
- Homeowner's installation and operating manual (36 pages)
Advertisement
Quick Links
Advertisement

Related Manuals for Vermont Castings 1450


Summary of Contents for Vermont Castings 1450
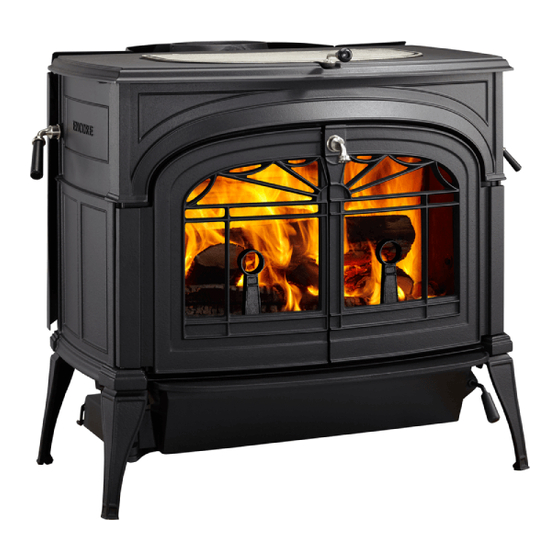
- Page 1 SERVICE MANUAL For the ENCORE NON-CATALYTIC WOODBURNING STOVE MODEL 1450...
-
Page 2: Service Procedures
SERVICE PROCEDURES Encore Non-Catalytic Model 1450 Wood Stove **Wear gloves, a dust mask and protective eye wear when servicing a stove Replace the Front Panel 1. Lift off the griddle and the doors. Locate the Phillips screw in the center of the front and the two ¼... - Page 3 4. Locate and remove the two tabs holding the primary air shutter and slide the shutter out of the linkage. FIG. 5 Remove Primary Air Shutter 5. Locate and remove the bolt in the center of the front at the bottom holding the front to the bottom. Located and remove the two side bolts holding the front to the sides.
- Page 4 Damper Ramp Adjustment View from inside the firebox looking up Tightening Nut Socket Set Adjuster Tightening Nut Phillips Screw for Holding Damper Ramp View from through the flue collar looking at the rear of the damper door showing the damper rod Damper Ramp Damper Rod Phillips Screw Holding...
- Page 5 Damper Adjustment Procedure – Damper Too Tight In all cases, be careful not to snap off the set screw, the damper ramp or the damper ramp screw by turning the screws when you feel resistance or without loosening the nuts. 1.
- Page 6 Replace the Fountain Assembly 1. Remove the andirons, griddle and the bottom grate. Carefully slide the refractory shoe out of the unit being careful not to damage the gasket on the bottom. 2. Remove the rear shroud to access the four hex head nuts attached to the damper housing bolts and the two hex head nuts attached to the lower refractory brick FIG.
- Page 7 Replacing Left or Right End 1. Lift off the griddle and the doors. Locate the Phillips screw in the center of the front and the two ¼ -20 hex head bolts in the interior rear left and right of the top. Remove the bolts and lift off the top.
- Page 8 FIG. 15 Remove Right Air Plate FIG. 14 Remove Right Brick 6. With your hand, pull the cotter pin holding the primary air linkage to the air shutter rod and put to one side. See Fig. 16. 7. Carefully lift up the adhesive gasket from the top of the right side only. This gasket continues around the front and side.
- Page 9 FIG. 19 Side Gasket FIG. 18 Lift Right Side From the Stove 9. Reverse the procedure to attached the new right side. Make sure the self-adhesive gasket is on the front panel of the new side exactly as it was on the old side. See Fig. 19. Ensure the air plate is properly seated on the side.