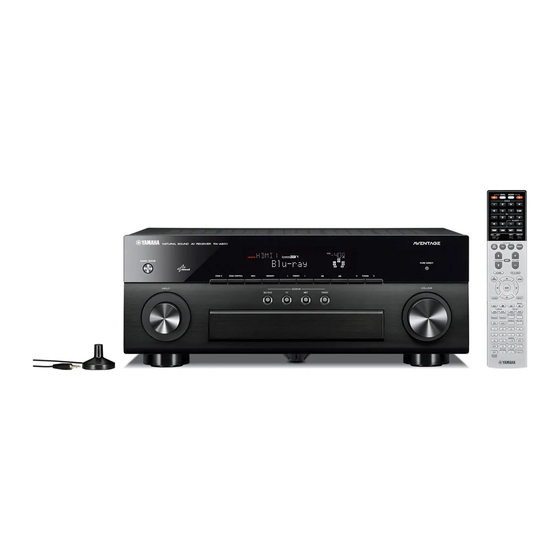
Yamaha RX-A820 Easy Setup Manual
Av receiver/receptor av
Hide thumbs
Also See for RX-A820:
- Easy setup manual (19 pages) ,
- Owner's manual (138 pages) ,
- New product bulletin (2 pages)
Summary of Contents for Yamaha RX-A820
- Page 1 English Español AV Receiver/Receptor AV Easy Setup Guide Guía de configuración sencilla...
- Page 2 PDF versions of this guide and “Owner’s Manual” can be downloaded from the • HDMI cable (x2) following website. http://download.yamaha.com/ • Audio pin cable (x1) • Digital optical cable (x1) (not required if your TV supports ARC [Audio Return Channel])
-
Page 3: Placing Speakers
Placing speakers Set up the speakers in the room using the following diagram as a reference. For information on other speaker systems, refer to “Owner’s Manual”. 5.1-channel system 7.1-channel system 10° to 30° 10° to 30° 30 cm (1 ft) or more 1 Front speaker (L) 2 Front speaker (R) 3 Center speaker... -
Page 4: Connecting Speaker Cables
Connecting speakers/subwoofer • Under its default settings, the unit is configured for 8-ohm Connect the front speakers (1/2) Connect the center speaker (3) to the speakers. When connecting 6-ohm speakers, set the unit’s speaker impedance to “6 Ω MIN”. For details, see “Setting the to the FRONT (//\) terminals. - Page 5 For 7.1-channel system Connect the surround speakers Connect the subwoofer (9) to the (4/5) to the SURROUND (//\) SUBWOOFER (1) jack. Connect the surround back speakers terminals. (6/7) to the SURROUND BACK (//\) terminals. The unit (rear) The unit (rear) The unit (rear) SPEAKERS SPEAKERS...
-
Page 6: Connecting External Devices
Connecting external devices Before connecting the power cable (General model only) Make sure you set the switch position of VOLTAGE SELECTOR according to your local voltage. Voltages are AC 110-120/220-240 V, 50/60 Hz. Audio out HDMI out HDMI in (optical) BD/DVD player OPTICAL HDMI... -
Page 7: Optimizing The Speaker Settings Automatically (Ypao)
Connect the YPAO microphone to the YPAO MIC jack on the front panel. The Yamaha Parametric room Acoustic Optimizer (YPAO) function detects speaker connections, measures the The following screen appears on the TV. distances from them to your listening position(s), and then automatically optimizes the speaker settings, such as volume balance and acoustic parameters, to suit your room. - Page 8 If “W-1:Out of Phase” appears Use the cursor keys to select “Save/Cancel” and press ENTER. Follow the procedure below to check the speaker connections. Depending on the type of speakers or room environment, this message may appear even if the speakers are connected correctly.
- Page 9 Playing back a BD/DVD Many more features! Now let’s play back a BD/DVD. The unit has various other functions. Press HDMI 1 to select “HDMI 1” as the We recommend playing back multichannel audio Please refer to “Owner’s Manual” on the supplied input source.
- Page 10 Se pueden descargar versiones PDF de esta guía y el “Manual de Instrucciones” • Cable HDMI (x2) desde el siguiente sitio web. • Cable de audio con patillas (x1) http://download.yamaha.com/ • Cable digital óptico (x1) (no es necesario si el TV es compatible con la función ARC [Audio Return Channel...
-
Page 11: Colocación De Los Altavoces
Colocación de los altavoces Instale los altavoces en la sala con ayuda del diagrama siguiente como referencia. Para obtener información sobre otros sistemas de altavoces, consulte el “Manual de Instrucciones”. Sistema de 5.1 canales Sistema de 7.1 canales De 10° De 10°... - Page 12 Conexión de los altavoces y el subgraves • Según sus ajustes predeterminados, la unidad está configurada para altavoces de 8 Ω. Si conecta altavoces de 6 Ω, ajuste la Conecte los altavoces delanteros (1/ Conecte el altavoz central (3) impedancia de los altavoces de la unidad en “6 Ω MIN”. Para 2) a los terminales FRONT (//\).
- Page 13 Para el sistema de 7.1 canales Conecte los altavoces surround (4/ Conecte el altavoz de subgraves (9) 5) a los terminales SURROUND (//\). a la toma SUBWOOFER (1). Conecte los altavoces traseros surround (6/7) a los terminales SURROUND BACK (//\). Unidad (parte trasera) Unidad (parte trasera) Unidad (parte trasera)
-
Page 14: Conexión De Los Dispositivos Externos
Antes de conectar el cable de alimentación (Sólo el Conexión de los dispositivos externos modelo general) Asegúrese de ajustar la posición del conmutador del VOLTAGE SELECTOR según su tensión local. Las Salida de audio Entrada HDMI Salida HDMI tensiones son 110-120/220-240 V CA, 50/60 Hz. (óptica) Reproductor BD/DVD OPTICAL... - Page 15 Aparece la siguiente pantalla en el TV. La función Yamaha Parametric room Acoustic Optimizer (YPAO) detecta las conexiones de los altavoces, mide las distancias desde la posición de escucha y optimiza automáticamente los ajustes de los altavoces como, por ejemplo, el balance del volumen y los parámetros acústicos, para adecuarlos a la sala.
- Page 16 Si aparece “W-1:Out of Phase” Utilice las teclas del cursor para seleccionar “Save/Cancel” y pulse ENTER. Siga el procedimiento que se indica a continuación para comprobar las conexiones de los altavoces. Dependiendo del tipo de altavoces o el entorno de la sala, puede aparecer este mensaje, incluso si los altavoces están correctamente conectados.
- Page 17 Reproducción de un BD/DVD Muchas más funciones Reproduzcamos ahora un BD/DVD. La unidad posee varias funciones más. Pulse HDMI 1 para seleccionar “HDMI 1” Recomendamos reproducir audio multicanal (canales Consulte el “Manual de Instrucciones” en el como fuente de entrada. -5.1 o más) para apreciar el sonido surround producido CD-ROM suministrado para sacar el máximo por la unidad.
- Page 18 © 2012 Yamaha Corporation Printed in Malaysia ZA83180...


