Advertisement
Quick Links
U-1
Printed in China ZA31330
English
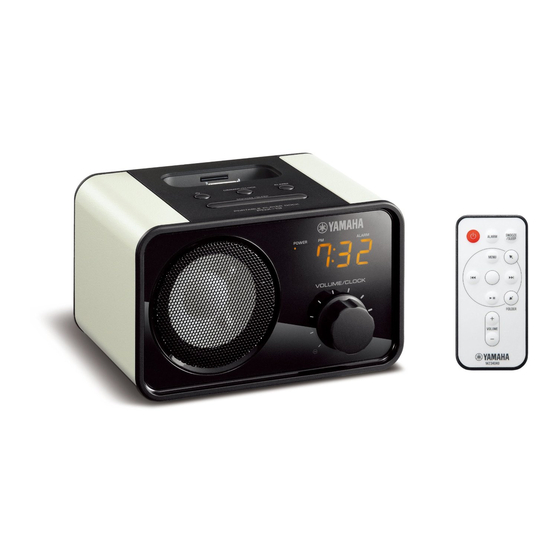
Portable Player Dock
PDX-13
Owner's Manual
Supplied Accessories
Please confi rm that the following accessories are
included before using the unit.
• Remote control • AC adaptor
Features
Multi-Source Mix
When an iPhone/iPod and another external device
are connected to PDX-13, audio can be enjoyed in
many ways—for example, by playing music while
listening to the news.
Integrated Volume Control
You can control the PDX-13's volume level by
operating the volume control function on the
iPhone/iPod.
Charge Your iPhone/iPod Battery
Alarm Function
Use the alarm function to wake up to music from
your iPhone or iPod.
Before Use
Connect the included AC adaptor.
②
①
12V ---
Connect the AC adaptor to PDX-13, before
connecting the power cable to the wall outlet.
Front Panel Display
Displays the current time, alarm time, and the
volume.
POWER LED
Lights up when the PDX-13's power is turned on.
Blinks when the sleep timer is set.
PM LED
When displaying the time with the 12-hour display, stays off during
the a.m. hours and lights up during the p.m. hours.
ALARM LED
Lights up when the alarm is set.
POWER
PM
ALARM
©2011 Yamaha Corporation
Turning on the Power
Push the
(Power).
When the power is on, the POWER LED will light up.
Control Panel
Power on/off
DIMMER/CLOCK
• Switches the brightness of the front panel
The current time is
displayed even when
display (Three levels)
the power is off.
• Sets the clock's time
ALARM
• Switches the alarm's
on/off status
• Sets the alarm
SNOOZE/SLEEP
Push to enable the snooze function and set
the sleep timer.
Press and hold down the
for three seconds or longer to activate the power-saving
mode.
During the power-saving mode, the front panel display turns off. Then the
operations from the remote control, alarm function, and iPhone/iPod charge
function are disabled.
Press the
on the control panel to cancel the power-saving mode.
VOLUME/CLOCK
Adjusts the volume/time.
Connecting Music Devices
Connect the iPhone/iPod to the iPod dock.
The battery of the connected iPhone/iPod will be charged.
• Be sure to use a dock adaptor included your iPhone/
iPod or applicable commercially available dock
Dock adaptor
adaptor. If you do not use an adaptor or the adaptor is
not compatible, the connection may be loose or poor,
causing damage to the connector. For more information
iPod dock
about the dock adaptor, refer to Apple's website.
• If the iPhone/iPod is forcibly connected while still
in a protective case, the connector may be damaged.
Make sure to remove any protective iPhone/iPod case
before connecting.
• When the unit is used with the iPhone/iPod shake
shuffl e function on, the iPhone/iPod might shuffl e due
to the vibration of speaker depending on the music
played back. If this happens, turn the shake shuffl e
function off. (Refer to the instruction manual of the iPhone/iPod to turn the function off.)
• If the iPhone/iPod is connected while playing videos or music on the iPhone/iPod, PDX-13
will turn on automatically and continue the play (except when PDX-13 is in power-saving
mode).
• You can always connect and disconnect the iPhone/iPod.
• The PDX-13's volume level can be adjusted using the iPhone/iPod. The volume level will
also be displayed on the iPhone/ iPod.
Connecting an External Device
Connect to the AUX on the rear panel.
To connect an external device to PDX-13, use a
commercially available 3.5 mm (1/8 in.) stereo mini
AUX
plug cable.
Playing Audio
If you start playback on the connected device, sound will come
from the PDX-13's speaker.
iPhone/iPod's playback can be controlled using either the included
remote control or the iPhone/iPod itself.
Alarm on/off
Push to enable the snooze
function and set the sleep timer.
Power on/off
SNOOZE
ALARM
/SLEEP
Show iPhone/iPod's menu
MENU
Select menu
Select folder
Skip
FOLDER
Backward/Forward
Volume control
VOLUME
Play/Pause
Remove the insulation
sheet before using.
Operate by the
Replacing the Battery
Remote control
Pull out the battery case as
shown in the diagram below
and change a battery.
Within 6 m
Back
(20 feet)
While pushing the release tab in
direction
, slide out the battery
holder in direction
.
Setting the clock
Press and hold down the DIMMER/CLOCK
on the control panel for two seconds or
longer.
The time display will blink.
② Turn the VOLUME/CLOCK to set to the
current time.
③ Push the DIMMER/CLOCK to set the time.
The time display will light up.
The display will switch between 12-hour display (12H)
and 24-hour display (24H) each time the SNOOZE/
SLEEP is pushed, when setting the clock's time.
Setting the alarm
Press and hold down the ALARM on the
control panel for two seconds or longer.
ALARM LED and time display will blink.
Turn the VOLUME/CLOCK to set the
alarm time.
Push the SNOOZE/SLEEP.
The alarm volume display will blink.
Turn the VOLUME/CLOCK to adjust the
alarm volume.
Push the ALARM to complete the setting.
The ALARM LED and time display will light up.
Three minutes before the alarm time, the iPhone/iPod will start playing the current song at
a low volume which will gradually increase.
When the alarm time is reached, a "beeping" sound will start.
Connect the iPhone/iPod before the set alarm time.
If an iPhone/iPod is not connected, the beeping sound will start at the alarm time.
Stopping the alarm
Turning the alarm off temporarily (snooze function)
Push the SNOOZE/SLEEP on the control
SNOOZE/SLEEP
panel or remote control.
The alarm will turn off and start again in fi ve minutes.
• If the iPhone/iPod is connected, the beeping sound will
stop when the SNOOZE/SLEEP is pushed once and the
iPhone/iPod's playback will stop when pushed twice.
• After fi ve minutes of stopping the iPhone/iPod's
playback, the playback will start again with an
increasing volume, then the beeping sound will start.
• During the snooze state, the ALARM LED and POWER
LED will blink.
Turning the alarm off
Push the ALARM on the control panel or remote
ALARM
control.
• The iPhone/iPod play and beeping sound will stop, and
the alarm will turn off.
• The ALARM LED will turn off.
If the alarm is not turned off, it turns off automatically
after 60 minutes.
Using the sleep timer
The power is turned off automatically, after the elapse of a period of time (30/60/90/120
minutes).
CR2025 button
cell battery.
Repeatedly press the SNOOZE/SLEEP on the
SNOOZE/SLEEP
control panel or remote control, and select the
timer time.
• The display will alternate in the order of "30" → "60" →
"90" → "120" → "current time" with each press of the
button.
• The current time will appear and the POWER LED will
blink, when the sleep timer is set.
Press the SNOOZE/SLEEP to disable the sleep timer
during the sleep timer is activated. The POWER LED will
turn on.
Advertisement

Related Manuals for Yamaha PDX-13


Summary of Contents for Yamaha PDX-13
- Page 1 PDX-13, audio can be enjoyed in control panel for two seconds or longer. • If the iPhone/iPod is connected while playing videos or music on the iPhone/iPod, PDX-13 many ways—for example, by playing music while will turn on automatically and continue the play (except when PDX-13 is in power-saving SNOOZE/SLEEP ALARM LED and time display will blink.
-
Page 2: Troubleshooting
CAUTION Yamaha and the Electronic Industries Association’s Consumer Electronics Group want you to get help, turn off the unit, disconnect the power cable, and contact the nearest authorized Yamaha dealer or service center. RISK OF ELECTRIC SHOCK DO the most out of your equipment by playing it at a safe level. One that lets the sound come through...