Table of Contents
Advertisement
Advertisement
Table of Contents

Related Manuals for Technics SL-PS7


Summary of Contents for Technics SL-PS7
-
Page 1: Operating Instructions
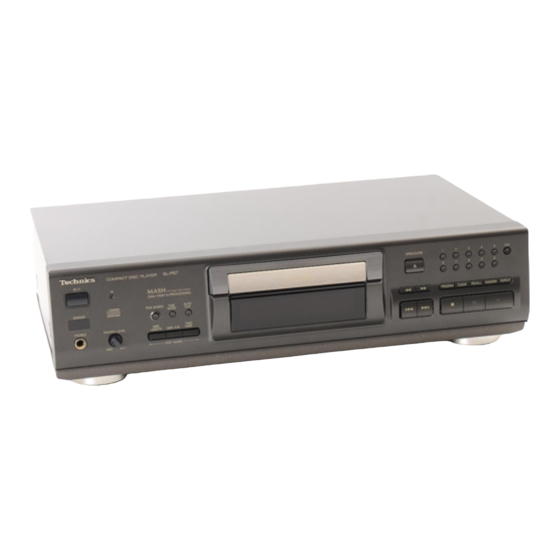
Compact Disc Player Operating Instructions SL-PS7 Model No. Note: “EB” on the packaging indicates the United Kingdom. Before connecting, operating or adjusting this prod- uct, please read these instructions completely. Please keep this manual for future reference. RQT5414-B... -
Page 2: Table Of Contents
Dear customer Supplied accessories Thank you for purchasing this product. For optimum performance and safety, please read these instructions Please check and identify the supplied carefully. accessories. Use numbers indicated in parentheses when asking for replacement parts. Table of contents AC mains lead . -
Page 3: Caution For Ac Mains Lead
Caution for AC mains lead (For United Kingdom) (“EB” area code model only) WARNING: DO NOT CONNECT EITHER WIRE TO THE EARTH TERMINAL WHICH IS MARKED WITH For your safety, please read the following text THE LETTER E, BY THE EARTH SYMBOL n OR carefully. -
Page 4: Ac Mains Lead
Suggestions for safety Placement Foreign materials •Ensure that no foreign objects, such as needles, coins, screwdriv- Avoid placing the unit in areas of: •direct sunlight ers etc., accidentally fall into the unit. •high temperature Otherwise, a serious electric shock or malfunction could occur. •Be extremely careful about spilling water or liquid on/into the unit, •high humidity •excessive vibration... -
Page 5: Stereo Phono Cable (Rjl2P004B08A)
Connections Before making connections, be sure that the power of this unit and all other system components is first turned off. Amplifier or receiver (not included) Stereo phono cable White (L) Red (R) Although the figure shows the AC mains lead being connected to a household mains socket, if the amplifier (or receiver) is equipped with an AC outlet, connect the cord to that outlet. -
Page 6: Controls
Controls Main unit Standby/on switch ( H H H H H / I ) Press to switch the unit from on to standby mode or vice versa. In standby mode, the unit is still consuming a small amount of power. Standby indicator ( H H H H H ) When the unit is connected to the AC mains supply, this indicator lights up in standby mode and goes out when the unit is turned on. -
Page 7: Sequential Play
Sequential play Press [ H H H H H/ I ] to turn the unit on. •“ no dISC ” indicates that a CD has not been inserted. •If a CD is already in the disc tray, it automatically begins play- ing from the first track. -
Page 8: Direct Access Play
Direct access play ≥10 With this function, a disc is played from a desired track to the last track and then stops automatically. Press the numeric buttons. Play will begin from the selected track number. To select a two-digit track Press [≥10] and then the two numbers you want within 7 seconds. -
Page 9: Program Play
Program play With this function, you can program up to 20 tracks in any order you like. While the disc is stopped: Press [PROGRAM]. If the button is pressed while the disc is playing, that track is programmed as the first. Press the numeric buttons to specify the track numbers in order. -
Page 10: Other Cd Play Functions
Other CD play functions REPEAT Repeat Play of all tracks or desired tracks will be repeated. Press [REPEAT] before or during play. To cancel repeat Press [REPEAT]. To repeat only one track or specific tracks Specify the track numbers. Perform steps 1 and 2 on page 9. Press [REPEAT]. -
Page 11: Time Fade
Other CD play functions Time fade With this function you specify a time, and when that time is reached, the volume is gradually decreased and play ends. While the disc is stopped or paused: Press [TIME FADE]. Press the numeric buttons to specify TIME the play time. -
Page 12: Auto Cue
Other CD play functions Auto cue With this function, play is paused at the beginning (where sound can be heard) of all tracks, one track at a time. Press [AUTO CUE]. If the disc was playing, play is paused at the beginning of the next track. -
Page 13: Cd Edit Recording
CD edit recording CD edit recording allows you to specify a tape length and then it auto- matically performs editing such that no tracks get cut off at the end of the tape. With this function, an interval is automatically added between tracks if an interval doesn’t already exist (auto space function). -
Page 14: To Listen With Headphones
CD edit recording ≥10 To add tracks in the extra space on the tape After step 2 on page 13, press the numeric buttons to specify the track number. A minus sign on the display indicates that the time remaining on the tape is insufficient. -
Page 15: Concerning Cds
Concerning CDs With this system, you can only play CDs having this mark. However, do not use irregular shape CDs. CDs of the sort can damage the unit. – Handling precautions •If you are taking the CD from a cold to a warm environment, mois- How to return CDs to their case ture may form on the CD. -
Page 16: Troubleshooting Guide
Troubleshooting guide Before requesting service for this unit, check the chart below for a possible cause of the problem you are experiencing. Some simple checks or a minor adjustment on your part may eliminate the problem and restore proper operation. If you are in doubt about some of the check points, or if the remedies indicated in the chart do not solve the problem, refer to the directory of Authorized Service Centers (enclosed with this unit) to locate a convenient service center, or consult your dealer for instructions.