Table of Contents
Advertisement
Advertisement
Table of Contents

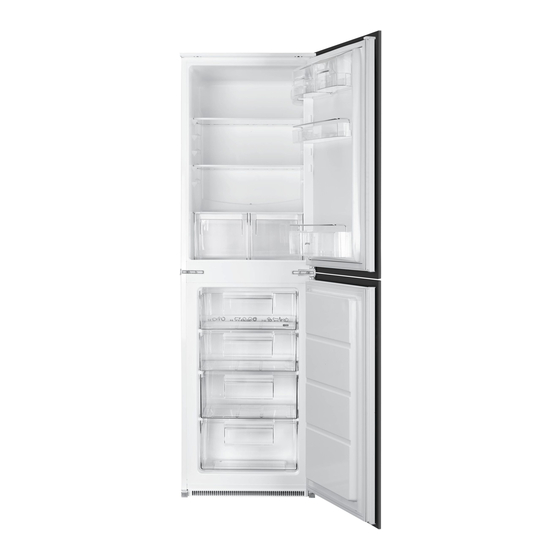
Summary of Contents for Smeg UKC3170P
- Page 1 Istruzioni per User Manual l’uso Fridge Frigo-Con‐ Freezer gelatore UKC3170P...
-
Page 2: Table Of Contents
CONTENTS Safety information Hints and tips Safety instructions Care and cleaning Operation Troubleshooting First use Installation Daily use Technical information Subject to change without notice. SAFETY INFORMATION Before the installation and use of the appliance, carefully read the supplied instructions. The manufacturer is not responsible if an incorrect installation and use causes injuries and damages. -
Page 3: Safety Instructions
Do not use mechanical devices or other means to accelerate • the defrosting process, other than those recommended by the manufacturer. Do not damage the refrigerant circuit. • Do not use electrical appliances inside the food storage • compartments of the appliance, unless they are of the type recommended by the manufacturer. - Page 4 electrician to change the electrical • Obey the storage instructions on the components. packaging of frozen food. • The mains cable must stay below the Internal light level of the mains plug. • Connect the mains plug to the mains •...
-
Page 5: Operation
OPERATION Switching on 1. Turn the Temperature regulator toward lower settings to obtain the minimum 1. Insert the plug into the wall socket. coldness. 2. Turn the Temperature regulator 2. Turn the Temperature regulator toward clockwise to a medium setting. higher settings to obtain the maximum coldness. -
Page 6: Storage Of Frozen Food
Storage of frozen food Do not move the glass shelf above the vegetable drawer and When first starting-up or after a period out the bottle shelf to ensure correct of use, before putting the products in the air circulation. compartment let the appliance run at least 2 hours on the higher settings. -
Page 7: Hints For Freezing
Hints for freezing • A whirring and pulsating sound from the compressor when refrigerant is pumped. To help you make the most of the freezing • A sudden cracking noise from inside process, here are some important hints: appliance caused by thermic dilatation (a natural and not dangerous physical •... -
Page 8: Care And Cleaning
CARE AND CLEANING every time the motor compressor stops, WARNING! Refer to Safety during normal use. The defrost water drains chapters. out through a trough into a special container at the back of the appliance, over General warnings the motor compressor, where it evaporates. CAUTION! Unplug the It is important to periodically clean the appliance before carrying out... -
Page 9: Troubleshooting
Defrost the freezer when the frost layer 5. Switch on the appliance. reaches a thickness of about 3-5 mm. After three hours reload the previously removed food into the freezer 1. Switch off the appliance, or pull out compartment. electrical plug from the wall socket. 2. - Page 10 Problem Possible cause Solution Many food products to be Wait some hours and then frozen were put in at the check the temperature again. same time. The room temperature is too Refer to climate class chart high. on the rating plate. Food products placed in the Allow food products to cool appliance were too warm.
-
Page 11: Installation
Problem Possible cause Solution There is no cold air circula- Make sure that there is cold tion in the appliance. air circulation in the appli- ance. 2. Replace the lamp with one of the same If the advice does not lead to power and shape, specifically designed the desired result, call the for household appliances. -
Page 12: Ventilation Requirements
with the coloured markings identifying the Some functional problems might terminals in your plug, proceed as follows: occur for some types of models 1. Connect the wire coloured green and when operating outside of that yellow to the terminal marked either range. -
Page 13: Door Reversibility
9. Install the door. CAUTION! Refer to the 10. Tighten the spacer and the upper pin. assembly instructions for the installation. Do a final check to make sure that: Door reversibility • All screws are tightened. • The magnetic seal adheres to the cabinet. - Page 14 7. Attach the appliance to the niche with 4 screws. 8. Remove the correct part from the hinge cover (E). Make sure to remove the part 4. Push the appliance in the direction of DX, in the case of right hinge, SX in the arrows (2) against the cupboard on opposite case.
- Page 15 16. Open the appliance door and the kitchen furniture door at an angle of 10. Install the vent grille (B). 90°. 11. Attach the hinge covers (E) to the hinge. 17. Insert the small square (Hb) into guide 12. Connect the appliance laterally to the (Ha).
-
Page 16: Technical Information
22. Press the part (Hd) on the part (Hb). 8 mm 20. Place the small square on the guide again and fix it with the screws Do a final check to make sure that: supplied. • All screws are tightened. 21. -
Page 17: Environment Concerns
The technical information are situated in the rating plate, on the external or internal side of the appliance and in the energy label. ENVIRONMENT CONCERNS dispose appliances marked with the symbol Recycle the materials with the symbol with the household waste. Return the Put the packaging in applicable containers product to your local recycling facility or to recycle it.


