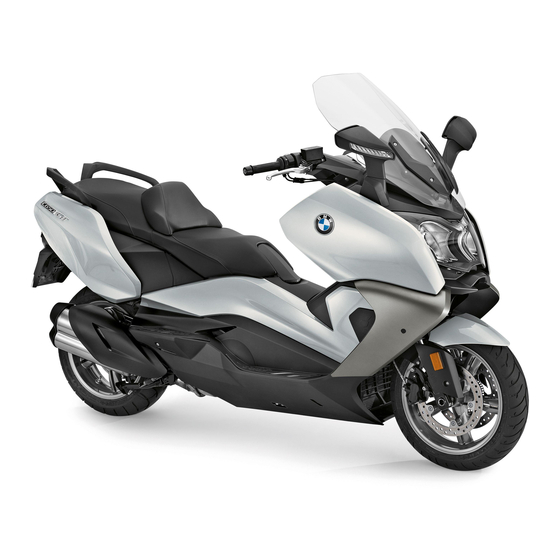
BMW C650GT Rider's Manual
Hide thumbs
Also See for C650GT:
- Rider's manual (194 pages) ,
- Rider's manual (143 pages) ,
- Rider's manual (155 pages)
Table of Contents
Advertisement
Quick Links
Advertisement
Table of Contents

Related Manuals for BMW C650GT


Summary of Contents for BMW C650GT
- Page 1 BMW Motorrad The Ultimate Riding Machine Rider's Manual (US Model) C 650 GT...
- Page 2 Motorcycle/Retailer Data Motorcycle Data Retailer Data Model Contact in Service Ms./Mr. Vehicle identification number Phone number Color number Initial registration Retailer's address/phone number (com- License plate pany stamp)
- Page 3 Welcome to BMW We hope that you enjoy your BMW Maxi-Scooter and wish you a safe and pleasant journey Congratulations on choosing a Maxi-Scooter from BMW Motorrad and welcome BMW Motorrad. to the community of BMW motorcycle owners and riders.
-
Page 4: Table Of Contents
Table of Contents Distance traveled since fuel Storage compartments ..56 reached reserve level ..22 Tires ......57 1 General instructions . - Page 5 Brakes ....132 BMW Motorrad ABS ..78 Topcase ....115 Wheels and tires .
- Page 6 13 Appendix ... . . 155 Certificate ....156 14 Index ....157...
-
Page 7: General Instructions
General instructions Overview ......6 Abbreviations and symbols ..6 Equipment . -
Page 8: Overview
Overview WARNING Hazard with Result of an activity. moderate risk. Failure to You will find an overview of your Reference to a page with avoid this hazard can result in Maxi-Scooter in Chapter 2 of the more detailed informa- death or serious injury. Owner's Handbook. -
Page 9: Equipment
Notice concerning Anti-theft alarm. equipment (OE) offered by BMW and selected optional accessories current status Electronic immobilizer. (OA). This explains why the man- The high safety and quality ual may also contain descriptions Tire Pressure Control standards of BMW Scooters of equipment which you have not (TPC/RDC). -
Page 11: Overviews
Overviews General view, left side ....11 General view, right side ... . . 13 Underneath seat ....14 Multifunction switch, left . -
Page 13: General View, Left Side
General view, left side Brake-fluid reservoir for rear brake ( Fuel filler opening (under the tank cover) ( Adjustable backrest Adjusting spring preload Oil filler opening and oil dipstick (under the foot- board) (... -
Page 15: General View, Right Side
General view, right side Brake-fluid reservoir for front brake ( Type plate (on the right of the head tube) Under the fairing side panel: Battery ( 108) Fuses ( 103) Diagnostic connector 112) Vehicle identification num- ber (on the right-hand frame tube) Coolant level indicator (through cutout in fairing... -
Page 16: Underneath Seat
Underneath seat Onboard tool kit ( Load capacity table Tire inflation pressure table Note on calibrating the Rider's Manual (US Model) -
Page 17: Multifunction Switch, Left
Multifunction switch, left Operation of high-beam headlight and headlight flasher ( Hazard warning flashers operation ( Windshield ( Turn indicators ( Horn TRIP/INFO rocker switch Selecting displays ( Resetting tripmeter Resetting average data Calling up the SETUP menu (... -
Page 18: Right
Multifunction switch, right with heated handlebar grips Operating heated grips with seat heating Operation of seat heating Emergency on/off switch (kill switch) ( Starter button (... -
Page 19: Cockpit
Cockpit Speedometer Multifunction display Warning and indicator lights ( Storage compartment Tank cover release (inte- grated in steering and igni- tion lock) ( Seat bench release (in- tegrated in steering and ignition lock) ( Storage compartment Outlet (in the storage com- partment) ( 114) Connector for optional ac-... -
Page 21: Displays
Displays Multifunction display ....20 Warning and indicator lights..21 Service display ..... . 22 Distance traveled since fuel reached reserve level . -
Page 22: Multifunction Display
Multifunction display Fuel fill level indicator with seat heating Set heating stage ( Text field for warnings Warning symbols ( Trip odometer ( Service display ( Display of distance driven since reaching fuel reserve Tachometer Onboard computer dis- plays ( Clock ( with heated handlebar grips... -
Page 23: Warning And Indicator Lights
Warning and indicator lights Indicator light for left turn indicator General warning light Photosensor for detecting ambient brightness with anti-theft alarm sys- tem (DWA) Alarm system LED ( Indicator light for right turn indicator ABS indicator and warning light ( Fuel-reserve warning light Emission warning light Headlight high beam indi-... -
Page 24: Service Display
Distance traveled since Service display steps of 100 miles. It is briefly displayed following the Pre-Ride- fuel reached reserve Check. level When a service date elapses without service, the general warning light lights up in yellow, appearing together with the date and mileage (kilometerage) display. -
Page 25: Tire Inflation Pressures
Engine at normal operating temperature. Further information on Engine idling for at least ten The displayed tire inflation pres- BMW Motorrad TPC/RDC can seconds. sures refer to a tire air temper- be found from page ( Side stand retracted. ature of 68 °F (20 °C). The fig- onwards. -
Page 26: Warning Lights
Maxi-Scooter is positioned ver- You will find an overview of the tically. potential warnings on the follow- ing pages. The displays which may appear in positions 1 and 2 mean the following: OIL OK : oil level correct. OIL CHECK : check oil level during next refueling stop. - Page 27 Overview of warning indicators Warning and indicator Warning symbols in the Meaning lamps display panel EWS! is indicated General warning EWS active ( light shows yellow. lights up Fuel down to reserve ( General warning appears on the Coolant temperature too high ( display light shows red.
- Page 28 Warning and indicator Warning symbols in the Meaning lamps display panel flashes ABS self-diagnosis not completed lights up ABS error ( flashes rapidly ASC intervention ( flashes slowly ASC self-diagnosis not completed lights up ASC switched off ( lights up ASC error ( CAL.
- Page 29 Warning and indicator Warning symbols in the Meaning lamps display panel LAMP! General warning is dis- Headlight bulb defective ( light shows yellow. played LAMP! General warning is dis- Tail light and headlight bulb defective light shows yellow. played appears on the Outside temperature warning ( display appears on the...
- Page 30 Warning and indicator Warning symbols in the Meaning lamps display panel Tire inflation pres- Tire inflation pressure of both tires is sures flash outside approved range ( : " " or " " Transmission error ( is indicated General warning appears on the TPC/RDC sensor defective or system light shows yellow.
- Page 31 Use the second ignition key. sures listed below. Have the defective ignition Fuel reserve key replaced, preferably by a Possible cause: BMW Motorrad partner. Coolant level is too low. Approx. 3.2 quarts (Approx. Checking coolant level ( 91). Fuel down to reserve...
- Page 32 Unusual handling when en- authorized workshop, preferably Possible cause: gine is no emergency operat- an authorized BMW Motorrad The engine control unit has diag- ing mode. retailer. nosed a fault. Accident hazard...
- Page 33 ABS warning lamp flashes. ized service facility, preferably BMW Motorrad Retailer. an authorized BMW Motorrad Retailer. Possible cause: Severe fault in the engine Possible cause: The self-diagnosis routine management system was not completed;...
-
Page 34: Asc Intervention
ASC warning light flashes as soon as possible at an au- ASC warning light lights up. slowly. thorized workshop, preferably an authorized BMW Motorrad Possible cause: retailer. The ASC system has been deac- tivated by the rider. Switch on ASC (... -
Page 35: Asc Error
It remains possible to continue Switch the ignition on and off. cialist service facility, preferably riding. It must be noted that an authorized BMW Motorrad Taillight defective the ASC function is not avail- Retailer. able. You should also take ac-... - Page 36 37 °F (3 °C). flashes. preferably an authorized Possible cause: WARNING BMW Motorrad retailer. The measured front tire inflation Danger of black ice even Tail light and headlight pressure is outside the permissi- above 37 °C (3 °C), despite bulb defective ble tolerance.
- Page 37 If it is still possible to drive with facility, preferably an authorized Check tire for damage and tire: BMW Motorrad retailer. suitability for continued use. If you are unsure about the tire's If it is still possible to drive with...
-
Page 38: Tire Inflation Pressure
Check tire for damage and facility, preferably an authorized BMW Motorrad retailer. suitability for continued use. BMW Motorrad retailer. If you are unsure about the tire's Are the tires still suitable for driv- If you are unsure about the driv-... - Page 39 Possible cause: Have fault eliminated at a spe- cialist service facility, preferably defective or system fault A system fault has occurred. an authorized BMW Motorrad Have fault eliminated at a spe- with Tire Pressure Control retailer. cialist service facility, preferably...
- Page 40 Contact an authorized service Contact an authorized service limited period. facility, preferably an authorized facility, preferably an authorized BMW Motorrad retailer. BMW Motorrad retailer. Contact an authorized service facility, preferably an authorized Battery charge current Anti-theft alarm battery BMW Motorrad retailer.
- Page 41 Possible cause: Alternator or alternator drive de- fective. Have the malfunction corrected as soon as possible at an authorized service facility, preferably an authorized BMW Motorrad Retailer.
-
Page 43: Operation
Operation Steering and ignition lock ... 42 Storage compartments ... . . 56 Seat ....... . 43 Tires . -
Page 44: Steering And Ignition Lock
Turn handlebars to left. formed. ( pose, preferably an authorized Switch off ignition BMW Motorrad retailer. Switching on ignition Turn key to position 3 while moving handlebars slightly. Turn the ignition key to Ignition, lights and all electrical the OFF position. -
Page 45: Seat
Emergency on/off Handlebars are locked. Left-hand storage compart- switch (kill switch) ment is locked. Key can now be removed. Seat Operating seat Switch off ignition. If seat is jammed, press down at rear and then raise at rear. To close, press the rear of the Emergency on/off switch seat down until it latches shut. -
Page 46: Lights
The engine can be switched Pull switch 1 toward rear to NOTICE off easily and quickly using the actuate headlight flasher. emergency on/off switch. The parking lights are a strain Parking lights on the battery. Do not leave the Switch off ignition. ignition switched on longer than absolutely necessary. -
Page 47: Turn Indicators
Turn indicators ing time and distance have been emergency flashing function as reached. long as the button is pressed. Operating turn indicators If the turn indicator button is Factory setting: Switch on the ignition. released, the emergency flasher Riding time = 10 s function becomes active again. -
Page 48: Display
Display after switching off the ignition Current fuel consumption FUEL and the date has changed. Selecting display readings DATE Fuel reserve reached: Distance Date Switch on the ignition. traveled since this point in time Oil level indicator Call up the settings menu: with Tire Pressure Control SETUP (TPC/RDC) -
Page 49: Setup
Press and hold down TRIP 1 Press and hold down INFO 2 Briefly press TRIP 1 repeatedly SETUP until trip distance recorder in until the displayed value in until 3 is displayed. panel 3 is reset. panel 4 is reset. Press and hold TRIP 1 to start SETUP Resetting average data... -
Page 50: Time And Date
Briefly press TRIP 1 in each Speed for the operation case to select the following is in SETUP SETUP parameter in CLOCK Set time display max 6 mph (max 10 km/h) DATE Set the date When the permissible speed Switch ASC on or off for operation is exceeded, ASC OFF ;... - Page 51 When the minutes have been set as desired, press and hold INFO 2. The minutes 6 no longer flash. Check the setting on the time display 8. The clock is now set. Press and hold TRIP 1. The on-board computer is dis- played.
-
Page 52: Automatic Stability Control
Briefly press TRIP 1 to move Press and hold TRIP 1. the year forwards. The on-board computer is dis- Briefly press INFO 2 to move played. the year backwards. Automatic Stability When the year has been set as desired, press and hold Control INFO 2. - Page 53 SETUP ASC prevent extreme acceleration is displayed. of the rear wheel while clear of the ground. This is in order to protect the drive train. Switch on ASC The Maxi-Scooter is stationary. Switch on the ignition. The onboard computer is dis- played.
- Page 54 Calibrating ASC on again, an ASC fault has oc- The menu item can only be curred. closed by switching the ignition Reduced stability reserves of the off and on. ASC control after tire change. Calibrating Calibration starts up and waits Switch on ASC ( 51).
-
Page 55: Anti-Theft Alarm System
Alarm signal The onboard computer is dis- sound can be set by an autho- played. rized BMW Motorrad retailer. The DWA alarm can be set off ASC calibration is completed. If a DWA alarm was activated You may continue driving. -
Page 56: Heated Handlebar Grips
Light signals on DWA LED The following settings are avail- able: 1 flash: Motion sensor 1 DWA ON : DWA is activated 2 flashes: Motion sensor 2 respectively is activated auto- 3 flashes: Ignition switched on matically when the ignition is with unauthorized ignition key switched off. -
Page 57: Seat Heating
100 % heating output Approx. 50 % heater out- Seat heating with seat heating Operating driver's seat Press button 1 repeatedly un- Press button 1 repeatedly un- heater til desired heating level 2 is til desired heating level 2 is Start engine. -
Page 58: Storage Compartments
switch on the high heater out- 100 % heating output Approx. 50 % heater out- HIGH Operate the rocker switch 1 on Approx. 50 % heater out- 100 % heating output the side with one dot, to switch on the low heater output Set the rocker switch 1 to the Operating passenger seat Storage compartments... -
Page 59: Tires
Ensure proper tyre inflation NOTICE pressure. The left-hand storage compart- WARNING ment is locked together with the steering lock. Automatic opening of verti- cally installed valve cores at Operating rear storage high speeds. compartment Sudden loss of tyre inflation Open seat. pressure. - Page 60 Tire pressure, rear 42.1 psi (2.9 bar) (with tire cold) If tire pressure is too low: Correct tire pressure.
-
Page 61: Setting
Setting Backrest ......60 Windshield ......60 Wind deflection wing. -
Page 62: Backrest
Backrest Tighten the longer screws 2 five turns. Adjust backrest Repeat this sequence until The backrest is delivered in the the backrest is firmly secured. rearmost of three possible posi- Here, tighten the screws only tions. hand-tight. Backrest on seat bench Position the mountings 4 in 1 lb/ft (2 Nm) the required position above the... - Page 63 goes active. The windshield Actuate windshield button to If automatic drive ends or is stop automatic drive. stops moving. stopped, the windshield can be adjusted with the rocker Automatic drive stops imme- diately if the windshield rocker switches while the engine is NOTICE running.
-
Page 64: Wind Deflection Wing
Move mirror into desired posi- consult a specialized workshop, tion by applying light pressure WARNING preferably an authorized at edge. BMW Motorrad retailer. Adjusting the slipstream de- Headlight flectors while driving. Brakes Adjusting headlight for Accident hazard... -
Page 65: Spring Preload
Adjusting spring preload Do not twist the handlebar fit- NOTICE ting or the handlebars. at rear wheel The adjusting screw can be Make sure ground is level and WARNING turned more easily if you push firm and place Maxi-Scooter on the brake lever forward when its center stand. - Page 66 Basic setting of spring preload, rear Increase from lowest preload by 3 notches (One-up without load) Increase from lowest preload by 4 notches (One-up with load) Increase from lowest preload by 6 notches (Two-up and load)
-
Page 67: Riding
Riding Safety instructions ....66 Observe checklist ....68 Starting . -
Page 68: Safety Instructions
Maxi-Scooter: of the year. Your authorized Setting for the suspension sys- BMW Motorrad retailer will be max 20 lbs (max 9 kg) happy to advise you and has Unevenly distributed load the correct clothing for every... -
Page 69: Catalytic Converter
Danger of overheating For this reason, observe the fol- WARNING lowing points: ATTENTION Do not run the fuel tank dry Harmful exhaust gas. Do not run the engine with the Danger of suffocation Engine idling for a lengthy spark-plug cap removed Do not inhale exhaust fumes. -
Page 70: Observe Checklist
Do not make any Checking brake fluid level of modifications. front brake ( 89). Checking brake fluid level for Observe checklist rear brake ( 90). Checking coolant level ( 91). Use the following checklist to check your motorcycle at regu- Starting lar intervals. - Page 71 The self-diagnosis routine switched on. is determining whether ABS warning light goes out. Phase 2 BMW Motorrad ABS is ready for If an ABS error is displayed after operation. The self-diagnosis The speedometer pointer is the ABS self-diagnosis is com- routine runs automatically when moved back.
-
Page 72: Riding
Speeds above approximately Watch all warning and indicator BMW Motorrad Retailer. 75 mph (120 km/h) are achieved lights on the display. If the ASC adjusts without re- by increasing the engine speed. -
Page 73: Breaking In
Breaking in Brakes Extension of the braking distance. Accident hazard. Engine How do you achieve Brake early. the shortest stopping Drive in frequently changing distances? load ranges prior to the pre- Tires delivery check. During braking the load distri- New tires have a smooth sur- Try to do most of your rid- bution changes dynamically be- face. -
Page 74: Maxi-Scooter Parking
ATTENTION Locking up of the front wheel When driving in the rain and is prevented by BMW Motorrad Poor ground conditions in through puddles. ABS. area of stand. After washing the motorcycle. -
Page 75: Refueling
Component damage cause by Component damage caused by Make sure ground is level and tipping over. tipping over. firm and place Maxi-Scooter on its center stand. Do not sit on the motorcycle Do not sit on the motorcycle when it is parked on the side while it is resting on the center stands. - Page 76 additives, e.g. manganese or iron. Refuel with a fuel of the qual- ity specified, continuing until fuel is no higher than the lower edge of the filler neck. NOTICE If refueling is carried out after In case of jamming, press tank running on fuel reserve, the re- WARNING cover 1 toward rear and then...
-
Page 77: Secure Motorcycle For Transport
Fuel reserve Approx. 3.2 quarts (Approx. 3 l) Press tank cover 1 into locking ATTENTION device. Motorcycle tips to the side Secure motorcycle for when raising. transport Component damage cause by tipping over. Protect all components, along Close the fuel filler cap 2. Secure the motorcycle against which straps are routed, tipping to the side, preferably... - Page 78 down against its springs with the suspension compressed as much as possible. Lay strap at rear right around ATTENTION retaining pin of muffler and ten- sion. Pinching of components. Component damage Do not pinch components, e.g. brake lines or wiring harnesses.
-
Page 79: Technology In
General instructions ....78 Brake system with BMW Motorrad ABS ....... . 78 Automatic Stability Control . -
Page 80: General Instructions
If the maximum transferable the road. At this point in time, due to heavy braking. brake force is exceeded when the BMW Motorrad ABS must Accident hazard the driver increases the brake assume extremely low friction When braking heavily, bear in... - Page 81 To ensure that the the back wheel lifted off the surface within the limits of driv- BMW Motorrad ABS is in a ground (wheelie) ing physics. The system is not properly maintained condition, optimized for the special condi-...
-
Page 82: Automatic Stability Control
BMW Motorrad recommends momentum take over and even out of very tight curves. that you respond to this condi- BMW Motorrad ABS is unable to tion by twisting back the throttle The system compares the rota- counteract their effects. grip somewhat to return to stable... -
Page 83: Tire Pressure Control (Tpc)
sors continue to transmit the Bear in mind that the rear wheel As a result, the pressure figures will spin on the loose surface and monitored data for approximately indicated by the gauges at fill- close the throttle in good time 15 minutes after the motorcycle ing stations will usually vary from comes to a stop. - Page 84 value must be increased by 3 psi (0.2 bar) to 37.8 psi (2.6 bar) in order to produce the correct tire inflation pressure.
-
Page 85: Maintenance
Wheels ......94 BMW Motorrad front wheel stand ......101 Fuses . -
Page 86: General Instructions
Only check the oil level after Replace the fuses. described here. If you are in a longer journey or when the Open-ended wrench doubt, consult an authorized engine is warm. Wrench size: 8/10 mm workshop, preferably your au- thorized BMW Motorrad retailer. - Page 87 Make sure ground is level and firm and place Maxi-Scooter on its center stand. Allow engine to run in neutral for one minute. Switch off ignition. Remove cover 2 upward. Clean the measuring range 2 on the oil dipstick with a dry Wipe area around oil fill loca- cloth.
-
Page 88: Brake System
If oil level is above MAX mark: Have fluid level corrected by an authorized workshop, preferably Mount step plate support 1. Specified level of engine an authorized BMW Motorrad Brake system retailer. between MIN and MAX mark- Check brake operation Install oil dipstick. - Page 89 If no clear resistance points can be felt or if the Maxi-Scooter can be pushed: Have the brakes checked at an authorized workshop, preferably an authorized BMW Motorrad retailer. Check front brake pad thickness Conduct a visual inspection Front brake-pad wear Make sure ground is level and of the brake pad thickness.
- Page 90 Have brake pads replaced at an authorized service facil- ity, preferably an authorized BMW Motorrad retailer. Conduct a visual inspection of Rear brake-pad wear Checking rear brake pad the brake pad thickness. View-...
- Page 91 Have brake pads replaced at for the parking brake fall below an authorized service facil- the minimum. ity, preferably an authorized BMW Motorrad retailer. Have brake pads replaced at an authorized service facil- Brake-pad wear limit of Checking brake pad...
-
Page 92: Checking Brake Fluid Level
If brake fluid level falls below the voir 1. approved level: NOTICE Have defect corrected as soon as possible by an authorized The brake fluid level in the brake- workshop, preferably an autho- fluid reservoir drops due to brake rized BMW Motorrad retailer. pad wear. -
Page 93: Coolant
1 below right-hand step If brake fluid level falls below the plate. approved level: Have defect corrected as soon as possible by an authorized workshop, preferably an autho- rized BMW Motorrad retailer. - Page 94 Topping up coolant Open the cap 2 of the coolant Setpoint setting for expansion tank and top up with Take off step plate support 1. coolant in expansion tank coolant to the specified level. Checking coolant level ( 91). between MIN and MAX mark- Close the cap of the coolant ing (With cold engine) expansion tank.
-
Page 95: Wheel Rims And Tires
1. tire. If the tire tread has worn ity, preferably an authorized down to the level of the marks, BMW Motorrad retailer. the tire is completely worn. The locations of the marks are indi- Check tire tread depth cated on the edge of the tire, e.g. -
Page 96: Wheels
For every size of tire, from conversion to wheels not version to wheels not installed BMW Motorrad has tested and installed as standard equipment as standard equipment can seri- approved certain makes as can seriously affect the control ously affect the control efficiency roadworthy. -
Page 97: Removing Front Wheel
Remove screws 1 and 2 on TPC/RDC sensor. Draw the at- left and right and take off front tention of the BMW Motorrad re- wheel cover toward front. tailer or tire fitter to the TPC/RDC sensor. -
Page 98: Bmw Motorrad Front Wheel
Raise Maxi-Scooter at Remove screws 2 of brake front, preferably using a calipers on left and right. BMW Motorrad front wheel stand, until the front wheel rotates freely. Mount front wheel stand 101). Remove screw 1 and take wheel speed sensor out of bore. - Page 99 Tightening sequence: Tighten quick-release axle 2 with Always have the tightening the screws 6 times, alternating torque. torques checked by a spe- between one and the other cialized workshop, preferably each time an authorized BMW Motorrad 6 lb/ft (8 Nm) retailer.
-
Page 100: Removing Rear Wheel
Removing rear wheel Remove front wheel stand. Sensor cable wearing through. Make sure that sensor cable is Make sure ground is level and Slide the brake calipers onto routed correctly. firm and place Maxi-Scooter on the brake rotors. its center stand. Insert wheel speed sensor in bore and install screw 1. - Page 101 Extend the side stand to acti- vate the parking brake, or apply the rear wheel brake. Move trim 2 backward in direc- Loosen nut 5. tion of arrow parallel to the rear silencer. Remove the bolts 4 from the Remove five screws 8 on rear grommets 3.
- Page 102 Always have the tightening Tightening sequence: tighten torques checked by a spe- diagonally cialized workshop, preferably an authorized BMW Motorrad 44 lb/ft (60 Nm) retailer. Roll and mount rear wheel onto rear wheel support. Insert screw 6 and tighten...
-
Page 103: Stand
Mount front wheel stand Place cover with bolts 4 onto The base stand and its acces- grommets 3. sories are available through your authorized BMW Motorrad re- tailer. Make sure ground is level and firm and place Maxi-Scooter on its center stand. - Page 104 Push mounts 3 on left and right far enough apart that front suspension fits between them. Use locating pins 4 on left and right to set front wheel stand to desired height. Center front wheel stand rela- tive to front wheel and push it against front axle.
-
Page 105: Fuses
Removing fairing side panel Close the cover. and remove the cover. 110). Locking device audibly en- gages. NOTICE If the fuses blow frequently, have the electrical system checked by an authorized specialized work- shop, preferably an authorized BMW Motorrad retailer. -
Page 106: Light Sources
Light sources Replacing bulbs for low- beam and high-beam headlight Make sure ground is level and firm and place Maxi-Scooter on its center stand. Switch off ignition. To replace the light source for Replace a defective fuse in the Remove the cover 1 to replace the low-beam headlight, re- fuse carrier with a fuse of the the light source for the high... - Page 107 Replace defective light source. Install the wire spring clip 4 in the retainers. Bulbs for low-beam headlight H7 12 V 55 W Bulb for high-beam headlight H7 12 V 55 W Disconnect plug 3. To avoid leaving contamina- tion deposits on the new bulb's glass surface, always hold it by Connect plug 3.
- Page 108 Replacing license plate Replace defective light source. light Bulb for license-plate Make sure ground is level and light firm and place Maxi-Scooter on W5W 12 V 5 W its center stand. Switch off ignition. To protect the glass on the new bulb against contamina- tion, always use a clean, dry cloth to hold it;...
-
Page 109: Jump-Starting
Jump-starting ATTENTION ATTENTION Jump-starting with a voltage higher than 12 V. Current too strong when Damage to the motorcycle's jump-starting the Maxi- electronics. Scooter The battery of the donor ve- Cable fire or damage to the vehi- hicle must have a voltage of cle electronics 12 V. -
Page 110: Battery
Battery Allow engine on support mo- Total discharge of battery leading torcycle to run while jump- to a rejection of warranty claims. Maintenance instructions starting. During riding breaks of more Correct battery maintenance Start engine of vehicle with dis- than 4 weeks, connect a combined with proper charging charged battery in usual way;... - Page 111 Comply with operating instruc- ATTENTION tions of charger. Once battery is fully charged, Charge a fully discharged disconnect charger's terminal battery via the power socket clips from battery terminals. or additional socket. Damage to the motorcycle's NOTICE electronics. Always charge a fully In the case of longer periods discharged battery (battery when the motorcycle is not be-...
-
Page 112: Fairings And Panels
Install battery panel, however also applies in the Then install negative battery cable 1. same way to the left side panel. Place battery in battery com- partment with positive terminal Install fairing side panel on left-hand side. 111). Set clock ( 48). - Page 113 Install fairing side panel Pull panel from top edge out of Install screw 4 in right-hand the bracket to the position 5. storage compartment. Seat the side panel in Then slightly raise the side Close storage compartment. mounts 6. panel and remove. NOTICE This description is provided based on the right-hand side...
-
Page 114: Diagnostic Connector
by authorized personnel. The Installing the diagnostic vehicle may otherwise suffer connector malfunction. Disconnect the diagnosis and Removing fairing side panel information system interface. 110). Fit the screw 1. Diagnostic connector Removing the diagnostic connector Seat diagnostic connector 2 The diagnostic connector is lo- Press the locks 1 together. -
Page 115: Accessories
Accessories General instructions ....114 Onboard power sockets ... 114 Topcase ......115 Scooter lock . -
Page 116: General Instructions
General instructions Onboard power sockets The safety, operation and suit- ability of BMW parts and ac- Information on using onboard cessory products have been CAUTION power sockets: checked extensively. Therefore, Use of products from other BMW assumes responsibility for Operating electrical acces- manufacturers. -
Page 117: Topcase
Cables must not restrict the steering angle and driving char- acteristics. Cables must not become trapped. Charger NOTICE Turn the key 1 in the topcase Pull release lever behind The power socket in the front left storage compartment is not lock to the OPEN position. - Page 118 Make sure that Topcase han- Turn the key 1 in the topcase Turn key in Topcase lock to dle 2 is extended. lock to the OPEN position. RELEASE position. Close Topcase lid and press Pull release lever 4 toward into locking device. Ensure that rear while simultaneously lifting no items are trapped between Topcase by carrying handle.
-
Page 119: Scooter Lock
Topcase. If you cannot find your combi- nation of motorcycle and top- case on the label, contact your BMW Motorrad Retailer. Make sure that the topcase The following values apply to the handle 2 is folded out and the... -
Page 120: Navigation System
Navigation system Lock the Scooter lock and re- move the key. with navigation system Install navigation device Turn the handlebars to the left and guide the Scooter lock to the end of the handlebars. As an alternative, the Maxi- Scooter can be connected to a Insert the navigation device 1 solid object, e.g. - Page 121 Remove navigation device Swing the navigation device 1 toward the front and press into Press the release 2. the latch mechanism 3 at the The red mark 3 indicates the upper edge. release. Navigation device engages. Remove navigation device 1. Check that the navigation de- vice is secure in the cradle.
-
Page 123: Care
Care Care products ..... 122 Washing your motorcycle ..122 Cleaning sensitive motorcycle parts . -
Page 124: Care Products
BMW Motorrad recommends tors and brake pads are dry. that you use cleaning and BMW Motorrad recommends care products available at your that you use BMW insect re- ATTENTION authorized BMW Motorrad mover to soften and wash off retailer. BMW CareProducts... -
Page 125: Cleaning Sensitive Motorcycle
Use of unsuitable cleaning agents. Carefully clean chrome parts with ATTENTION Damage to plastic surfaces. plenty of water and BMW car Do not use abrasive cleaners or shampoo, especially if the mo- Use of silicone sprays for torcycle has been exposed to cleaners containing alcohol or care of rubber seals. -
Page 126: Maxi-Scooter Storage
Returning to use Removing battery ( 109). fluid as well as bird droppings. Remove the protective wax It is advisable to use BMW Car Spray the brake lever, main coating. Polish or BMW Paint Cleaner in stand and side stand mounts Clean the Maxi-Scooter. -
Page 127: Technical Data
Technical data Troubleshooting chart ... . . 126 Performance data ....138 Threaded fasteners ....127 Anti-Theft Alarm System . -
Page 128: Troubleshooting Chart
Troubleshooting chart Engine does not start at all or is very difficult to start. Possible cause Remedy Side stand extended Retract side stand. Starting without actuating brake Actuate a brake lever during starting. No fuel in tank Refueling ( 73). Battery drained Charging battery ( 109). -
Page 129: Threaded Fasteners
Threaded fasteners Front wheel Value Valid Quick-release axle in axle mount M18 x 1.5 22 lb/ft (30 Nm) Clamping screws (quick-release axle) in telescopic forks M6 x 30 Tighten the screws 6 times, alternating between one and the other each time 6 lb/ft (8 Nm) Brake caliper on fork leg M8 x 32 - 10.9... - Page 130 Seat Value Valid Backrest on seat bench Middle screw, M6 x 30 1 lb/ft (2 Nm) Outer screws, M6 x 40 1 lb/ft (2 Nm)
-
Page 131: Engine
Engine Engine number location Crankcase, on left below alternator Engine design Water-cooled 2-cylinder four-stroke engine with four rocker-arm-actuated valves per cylinder, two overhead camshafts and dry-sump lubrication Displacement 647 min Cylinder bore 3.1 in (79 mm) Piston stroke 2.6 in (66 mm) Compression ratio 11.6:1 Rated output... -
Page 132: Fuel
SAE 15W-50, API SJ/JASO MA2, Additives (for instance, molybdenum-based substances) are prohibited, because they would attack the coat- ings on engine components, BMW Motorrad rec- ommends BMW Motorrad ADVANTEC Pro Oil Engine oil, quantity for topping up max 0.5 quarts (max 0.5 l), Difference between... -
Page 133: Clutch
Clutch Clutch design Centrifugal clutch Transmission Transmission design CVT (Continously Variable Transmission) Primary gear ratio 1:1.06 Gear ratio of secondary transmission 1:3.28 Rear-wheel drive Type of final drive Chain drive Number of teeth of rear-wheel drive (Pinion/ 16/27 sprocket) Secondary gear ratio 1.688... -
Page 134: Suspension
Suspension Type of front suspension Upside-down telescopic forks Spring travel, front 4.5 in (115 mm), on front wheel Type of rear suspension Cast-aluminum single swinging arm Type of rear suspension Directly linked spring strut with adjustable spring preload Spring travel, rear 4.5 in (115 mm), On wheel Brakes Type of front brake... -
Page 135: Wheels And Tires
Wheels and tires Recommended tire combinations An overview of the current tire approvals is avail- able from your authorized BMW Motorrad retailer or on the Internet at bmw-motorrad.com. Speed category of front/rear tires S, minimum requirement: 112 mph (180 km/h) -
Page 136: Electrical System
Tire inflation pressure Tire pressure, front 36.3 psi (2.5 bar), with tire cold Tire pressure, rear 42.1 psi (2.9 bar), with tire cold Electrical system Electrical rating of onboard sockets max 7.5 A, Power socket in the rear storage com- partment Battery Battery design... - Page 137 Light sources Bulbs for low-beam headlight H7 12 V 55 W Bulb for high-beam headlight H7 12 V 55 W Bulb for parking light Bulbs for flashing turn indicators, front Bulbs for flashing turn indicators, rear Bulb for taillight/brake light Bulb for license-plate light W5W 12 V 5 W Fuses...
-
Page 138: Frame
Fuse 7 4 A, License plate light Fuse 8 4 A, Terminal 15 (DME/ABS/instrument cluster) / relay Fuse 9 40 A, Instrument cluster/ignition lock/voltage regu- lator Fuse 10 30 A, Anti-Lock Brake System (ABS) Frame Frame design Steel-tube frame with partially self-supporting drive unit, steel-tube rear frame Location of the vehicle identification number Main frame front right at bottom... -
Page 139: Dimensions
Dimensions Motorcycle length 88 in (2235 mm), measured across license-plate carrier Motorcycle height 55.9...60.8 in (1420...1545 mm), measured above windshield, at DIN unladen weight Motorcycle width 31.7 in (805 mm), without mounted parts Rider's seat height 31.7 in (805 mm), measured without rider at DIN unladen weight Rider's inside-leg arc, heel to heel 75 in (1905 mm), measured without rider at DIN... -
Page 140: Performance Data
Performance data Start-off capacity on uphill grades (with permissi- 20 % ble total weight) Top speed 110 mph (177 km/h) Anti-Theft Alarm System with anti-theft alarm system (DWA) Activation time Approx. 15 s Alarm duration Approx. 26 s Activation time between two alarms 12 s Temperature range -40...185 °F (-40...85 °C) -
Page 141: Service
Service Reporting safety defects ... 140 BMW Motorrad Service ... . 141 BMW Motorrad Mobility Services ......141 Maintenance procedures . -
Page 142: Reporting Safety Defects
National Highway Traffic Safety Ad- ministration (NHTSA) in addition to notifying BMW of North America, LLC. If NHTSA receives similar complaints, it may open an investigation, and if it finds that a safety defect exists in a group of vehicles, it may order a recall and remedy campaign. -
Page 143: Bmw Motorrad Service
Services With its worldwide service net- work, BMW Motorrad can attend The BMW Motorrad Mobility Ser- To ensure that your BMW Maxi- to you and your Maxi-Scooter in vices furnish you and your new Scooter consistently remains in over 100 countries around the... - Page 144 300 mls (500 km) and 750 mls (1200 km). BMW Service BMW service is carried out once a year. The scope of the ser- vices performed may be de- pendent on the vehicle owner and the mileage driven. Your...
-
Page 147: Maintenance Schedule
Maintenance schedule BMW running-in check Standard BMW Service 146) Engine oil change with fil- Replacing air cleaner insert Replacing the CVT belt with rollers Replacing the chain kit Replace all spark plugs Check valve clearance Changing the transmission 10 Checking the clutch (clutch... -
Page 148: Standard Bmw Service
Standard BMW Service Checking the chain sag and retightening the screw connec- The standard BMW Service in- tion of the swing arm housing cludes the following maintenance cover. work: Checking the tyre pressure and Checking the battery state of tread depth. -
Page 149: Confirmation Of Mainte
Confirmation of maintenance work BMW Pre-Delivery BMW Running-in Check Check Conducted Conducted Odometer reading Next service at the latest or, if reached sooner, Odometer reading Stamp, Signature Stamp, Signature... - Page 150 BMW Service BMW Service BMW Service Conducted Conducted Conducted Odometer reading Odometer reading Odometer reading Next service Next service Next service at the latest at the latest at the latest or, if reached sooner, or, if reached sooner, or, if reached sooner,...
- Page 151 BMW Service BMW Service BMW Service Conducted Conducted Conducted Odometer reading Odometer reading Odometer reading Next service Next service Next service at the latest at the latest at the latest or, if reached sooner, or, if reached sooner, or, if reached sooner,...
- Page 152 BMW Service BMW Service BMW Service Conducted Conducted Conducted Odometer reading Odometer reading Odometer reading Next service Next service Next service at the latest at the latest at the latest or, if reached sooner, or, if reached sooner, or, if reached sooner,...
- Page 153 BMW Service BMW Service BMW Service Conducted Conducted Conducted Odometer reading Odometer reading Odometer reading Next service Next service Next service at the latest at the latest at the latest or, if reached sooner, or, if reached sooner, or, if reached sooner,...
-
Page 154: Confirmation Of Service
Confirmation of service The table is intended as proof of maintenance and repair work, the installed optional accessories and any special campaign (recall) work carried out. Work carried out Odometer Date reading... - Page 155 Work carried out Odometer Date reading...
- Page 157 Appendix Certificate ......156...
- Page 158 Certification RDC (tire pressure control / FCC ID: MRXBC54MA4 FCC ID: MRXBC5A4 Contrôle de pression des pneus) IC: 2546A-BC54MA4 IC: 2546A-BC5A4 EWS (electronic immobilizer / FCC ID: 2AACW-K18KMMG FCC ID: 2AACW-K19KMMG antidémarrage électronique) IC: 11117A-K18KMMG IC: 11117A-K19KMMG This device complies with Part 15 of the FCC Le présent appareil est conforme aux CNR Rules and with Industry Canada license-exempt d'Industrie Canada applicables aux appareils...
- Page 159 Recharging connected Abbreviations and symbols, 6 Calibrating, 52 battery, 108 Loss of the adaptation values Removing, 109 Self-diagnosis, 69 for the radii of the tires, 94 Technical data, 134 Technology in detail, 78 Operating, 50 Warning for battery charge Warning indicators, 31 Self-diagnosis, 69 current, 38 Accessories...
- Page 160 Bulbs Clock Dimensions Replacing high-beam headlight Adjusting, 47, 48 Technical Data, 137 bulb, 104 Clutch Centrifugal clutch, 70 Replacing LED tail light, 33 Electrical system Technical data, 131 Replacing license plate Technical data, 134 Confirmation of maintenance light, 106 Emergency on/off switch (kill work, 147 Replacing low-beam bulb in switch)
- Page 161 Technical data, 130 Fuses Immobilizer Position on motorcycle, 13 EWS Warning indicator, 29 Topping up, 84 Replacing, 103 Indicator lights Warning for engine oil level, 30 Overview, 21 Technical Data, 135 Equipment, 7 Instrument cluster Overview, 17 Electronic immobilizer, 29 Hazard warning flashers Control, 15 Jump-start, 107...
- Page 162 Multifunction switch Overviews Maintenance General view, left, 15 Cockpit, 17 General instructions, 84 General view, right, 16 Instrument cluster, 17 Maintenance schedule, 145 Left side of vehicle, 11 Maintenance intervals, 141 Left-side multifunction Navigation devices Maxi-Scooter switch, 15 Care, 121 Installing, 118 Multifunction display, 20 Cleaning, 121...
- Page 163 Rear-wheel drive Settings Storage compartment Technical data, 131 Backrest, 60 front, 56 Refueling, 73 Handbrake lever, 62 Operating, 56 Fuel specifications, 73 Headlight, 62 Position on motorcycle, 17 Rider's Manual (US Model) Mirrors, 62 Rear, 57 Position on motorcycle, 14 Spring preload, 63 Suspension Technical data, 132...
- Page 164 Performance data, 138 Transmission Battery charge current, 38 Technical data, 131 Rear-wheel drive, 131 Coolant temperature, 29 Trip distance recorder Spark plugs, 134 Display, 24 Displaying the odometer, 46 Standards, 7 Electronic engine Displaying the trip distance Suspension, 132 management, 30 recorder, 46 Threaded fasteners, 127 Electronic immobilizer EWS, 29...
- Page 165 Wheels Checking wheel rims, 93 Install front wheel, 97 Install rear wheel, 99 Removing front wheel, 95 Removing rear wheel, 98 Size change, 94 Technical data, 133 Wind deflection wing Adjusting, 62 Windshield, 60 Adjusting, 61 Automatic park- and drive position, 60...
- Page 167 Errors and omissions excepted. © 2015 Bayerische Motoren Werke Aktiengesellschaft 80788 Munich, Germany Reprints and duplication of this work, in whole or part, are pro- hibited without the express writ- ten approval of BMW Motorrad, Aftersales.
- Page 168 36.3 psi (2.5 bar), with tire cold Tire pressure, rear 42.1 psi (2.9 bar), with tire cold You'll find additional information on all aspects of your motorcycle at: bmwmotorrad.com BMW recommends *01418566137* Order No.: 01 41 8 566 137 09.2015, 2nd edition, 07...