Advertisement
Quick Links
Advertisement

Related Manuals for Samsung SHP-3701H


Summary of Contents for Samsung SHP-3701H
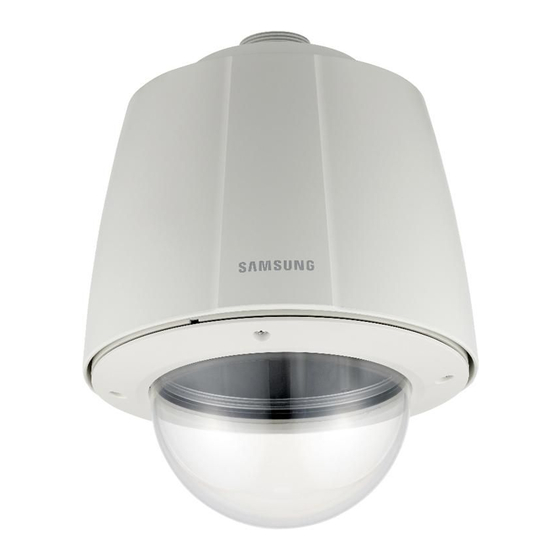
- Page 1 Outdoor Housing Installation Manual SHP-3701H...
-
Page 2: Cautions On Installation
OVERVIEW The outdoor-type housing (SHP-3701H) is the housing used to install the smart dome camera or network camera on a wall or ceiling outdoors. CAUTIONS ON INSTALLATION For the power supply of the housing, please use the AC24V (3A) adaptor. - Page 3 Please use in combination with the wall mount adaptor (SBP-300WM, SBP-300WM1). ⑤ PARAPET MOUNT ADAPTOR (SBP-300LM): Please use this unit when facing the camera outside by installing it onto the inner wall of the building rooftop. SHP-3701H _3...
-
Page 4: Installation (Scp-3430 Series)
Please install the camera adaptor onto the housing by using the tapping screw provided as an accessory. Please make sure that the guide holes of the camera adaptor are fi t by using two guide pins on the lower bracket. Guide Holes Alignment Directions 4_ SHP-3701H... - Page 5 1.5”PF (38.1mm) Outer Cable Pitch 0.091”(2.311mm) Thread angle 55° 1.5”PF (38.1mm) Tefl on Tape Housing Install onto the pipe by turning the housing in a clockwise direction while referring to the fi gure below. Pipe or Mount Housing SHP-3701H _5...
- Page 6 (For the details on the cable connection, please refer to the camera installation manual.) Please install the camera onto the housing. Please confi rm that the adaptor hook is properly fi xed on the camera. 6_ SHP-3701H...
- Page 7 fi rmly using 4 screws. INSTALLATION (SCP-3370/SNP-5200 SERIES) Using the machine screws provided, fasten 3 screw holes in the inside of the housing and 3 holes on the camera adaptor, referring to the fi gure below. Alignment Directions SHP-3701H _7...
- Page 8 1.5”PF (38.1mm) Outer Cable Pitch 0.091”(2.311mm) Thread angle 55˚ 1.5”PF (38.1mm) Tefl on Tape Housing Install onto the pipe by turning the housing in a clockwise direction while referring to the fi gure below. Pipe or Mount Housing 8_ SHP-3701H...
- Page 9 ※ Remove the dome cover of the camera and install it onto the housing. After confi rming that the unit is installed properly, attach the housing cover and fasten it fi rmly using 4 screws. SHP-3701H _9...
- Page 10 Please install the install base onto the housing by using the tapping screws provided as an accessory. Align the position mark on the lower bracket with the screw direction on the install base, and assemble them. Install Base Screw Alignment Guide Marks of lower bracket 10_ SHP-3701H...
- Page 11 Pipe or Mount 1.5”PF (38.1mm) Outer Cable Pitch 0.091”(2.311mm) Thread angle 55˚ 1.5”PF (38.1mm) Tefl on Tape Housing Install on the pipe by turning the housing in a clockwise direction, referring to the fi gure below. Pipe or Mount Housing SHP-3701H _11...
- Page 12 (FAN: AC24V, 5W, HEATER: AV24V, 45W) CABLE ADAPTOR After inserting the external camera cable into the housing, connect it to the corresponding jack on the adaptor. (For details on cable connection, please refer to the installation manual of the camera.) 12_ SHP-3701H...
- Page 13 ※ When assembling the install base and the camera, please proceed with the installation by referring to the directions shown in the fi gure. Fixing Bracket Alignment Direction Guides Alignment Direction Guides Screw Fixing Bracket Lower Bracket SHP-3701H _13...
-
Page 14: Camera Removal
Attach the housing cover and tighten the unit fi rmly using 4 screws. Dome Cover CAMERA REMOVAL Loosen 4 screws fastening the housing cover, open the housing cover using a screw driver and remove the camera. (Refer to the fi gure below.) 14_ SHP-3701H... -
Page 15: Product Specifications
Pitch 0.091”(2.311mm) Thread angle 55˚ Ø235mm (Housing Body) Ø250mm (Shield Sun) ACCESSORIES Lower Bracket ........ 1unit Installation Manual ......Book 1 Waterproofi ng Guide ...... Book 1 Machine Screw (M4XL10)(White) ..3 units Tapping Screw (M4XL10)(Black) ..4 units SHP-3701H _15... - Page 16 MEMO...
- Page 17 MEMO...
- Page 18 SAMSUNG TECHWIN EUROPE LTD. • • 100 Challenger Rd. Suite 700 Ridgefield Park, NJ 07660 Samsung House, 1000 Hillswood Drive, Hillswood Business Toll Free : +1-877-213-1222 Direct : +1-201-325-6920 Park Chertsey, Surrey, UNITED KINGDOM KT16 OPS Fax : +1-201-373-0124 TEL : +44-1932-45-5300 FAX : +44-1932-45-5325 www.samsungcctvusa.com...