Table of Contents
Advertisement
Available languages
Available languages
Advertisement
Chapters
Table of Contents

Related Manuals for Electrolux EWF12022


Summary of Contents for Electrolux EWF12022
- Page 1 ........................EWF12022 WASHING MACHINE USER MANUAL MESIN CUCI PANDUAN BAGI PENGGUNA MÁY GIẶT TÀI LIỆU HƯỚNG DẪN SỬ DỤNG...
-
Page 2: Table Of Contents
ENVIRONMENT CONCERNS ..................33 WE’RE THINKING OF YOU Thank you for purchasing an Electrolux appliance. You’ve chosen a product that brings with it decades of professional experience and innovation. Ingenious and stylish, it has been designed with you in mind. So whenever you use it, you can be safe in the knowledge that you’ll get great results every time. -
Page 3: Safety Information
ENGLISH SAFETY INFORMATION Conditions of use Wash small items such as socks, laces, washable belts etc in a washing bag or pillow case as it is possible for This appliance is intended to be used in such items to slip down between the household and similar applications tub and the inner drum. -
Page 4: Child Safety
After having installed the appliance, Never use the washing machine if the check that it is not standing on the power supply cable, the control panel, inlet and drain hose and the worktop the working surface or the base are... -
Page 5: Product Description
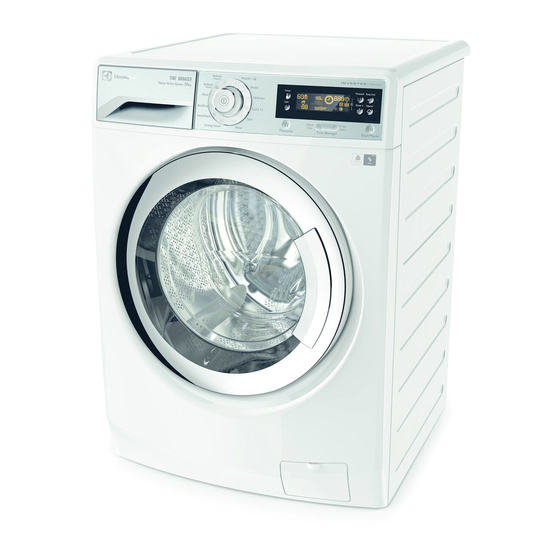
ENGLISH PRODUCT DESCRIPTION Worktop Detergent/Softener Dispenser Control Panel Door Handle Door Level Adjustment Feet (Front) Mains Cable Water Inlet Hose Water Drain Hose Hose Support (2pcs) Transit Bolts (3pcs) Level Adjustment Feet (Back) Child Safety Device Rating Label Drain Pump Filter ACCESSORIES Plastic Caps To close the holes on... -
Page 6: Control Panel
CONTROL PANEL 11 12 14 13 On/Off Button Display Program Knob Rinse Plus Touchpad Favourite Touchpad Prewash Touchpad Temperature Touchpad Easy Iron Touchpad Spin Selection Touchpad Vapour Touchpad Adjust Time Touchpad Start/Pause Touchpad Delay Start Touchpad Child Lock Option (See page 17) 3.1 On/Off Button... - Page 7 ENGLISH Rinse Hold 3.4 Temperature Touchpad By selecting this option the water of Press this touchpad repeatedly to the last rinse is not emptied out and increase or decrease the wash the drum turns regularly to prevent temperature if you want your the laundry creases.
- Page 8 If you wish to add laundry in the You can cancel the delay time at machine during the delay time any moment, by pressing ‘Delay press Start/Pause touchpad to put Start’ touchpad repeatedly till the the machine in pause mode. Add display shows delay time ‘...
- Page 9 ENGLISH 3.13 Start/Pause Touchpad 3.11 Easy Iron Touchpad When selecting this option the To start the selected program, laundry is gently washed and press the ‘Start/Pause’. spun to avoid creasing. In this To interrupt a program which is way ironing is easier. running, press the ‘Start/Pause’...
- Page 10 3.15 Programs + Options Program; Type of load; Max. weight Cycle Options can be Temperature of load (dry clothes) description combined White and coloured Wash Spin Reduction - 1200 to 400 rpm cotton with heavy level Rinses Cottons - No Spin of soil;...
- Page 11 ENGLISH Program; Type of load; Max. weight Cycle Options can be Temperature of load (dry clothes) description combined Spin Reduction Baby cotton clothes and - Wash - 1200 to 400 rpm delicate knitting items - Rinses - No Spin Baby Wear; with normal soil;...
-
Page 12: Before First Use
BEFORE FIRST USE Ensure that the electrical and water Select a Cottons cycle at 90 °C, connections comply with the without any laundry in the machine, installation instructions. to remove any manufacturing residue from the drum and tub then start the Put 2 litres of water in the detergent machine. - Page 13 ENGLISH If you want your laundry to be spun When these touchpads are pressed, or use temperature different from the corresponding pilot lights come the one proposed by the washing on. When they are pressed again, machine, the pilot lights go out. pess the Spin ‘...
- Page 14 Make sure that no laundry Close the door. remains between the seal and the door. Step 3 - Using Detergent And Additives Detergent Dispenser Drawer Powder or liquid detergent. Position down : Position down : for liquid for liquid detergent.
-
Page 15: Starting A Program
ENGLISH Do not put more liquid than If required, pour fabric softener the maximum level. into the compartment marked (the amount used must not Do not set the PREWASH exceed the “MAX” mark in the phase. drawer). Do not set the DELAY START. If you use thick softeners it Measure out the detergent and is recommended to dilute... - Page 16 5.2 Interruption Of A Program If you can not open the door but you need to open it you have to switch To pause press Start/ Pause. the machine off by pressing the The indicator will start flashing. ‘On/Off’ button to deactivate the Press the Start/Pause again.
- Page 17 ENGLISH When The Washing Program 5.9 Child Lock Feature Is Completed, But There Is Your appliance is provided with Water In The Drum CHILD SAFETY LOCK which permits you to leave the appliance The drum turns regularly to unsupervised with the door closed prevent the creases in the laundry.
-
Page 18: Washing Hints
WASHING HINTS 6.1 Sorting The Laundry Remove persistent stains before washing. Follow the wash code symbols on Rub particularly soiled areas with a each garment label and the special detergent or detergent paste. manufacturer’s washing instructions. Treat curtains with special care. -
Page 19: Detergents And Additives
ENGLISH 6.6 Detergents and Additives Rust: oxalic acid dissolved in hot water or a rust removing product Good washing results also depend used in cold water. Be careful with on the choice of detergent and use rust stains which are not recent of the correct quantities to avoid since the cellulose structure will waste and protect the... - Page 20 Any fabric softener or starching Use less detergent if: additives must be poured into the you are washing a small load, compartment marked ‘ ’ before the laundry is lightly soiled, starting the wash program. large amounts of foam form Follow the product manufacturer’s...
-
Page 21: International Wash Code Symbols
ENGLISH INTERNATIONAL WASH CODE SYMBOLS These symbols appear on fabric labels, in order to help you choose the best way to treat your laundry. Energetic wash Max. wash Max. wash Max. wash Max. wash Hand wash DO NOT temperature temperature temperature temperature wash at all... -
Page 22: Maintenance Wash
8.3 After Each Wash Leave the door open for a while. This helps to prevent mould and stagnant smells forming inside the appliance. Keeping the door open after a wash will also help to preserve the door seal. 8.4 Maintenance Wash... -
Page 23: Cleaning The Pump
ENGLISH 8.7 Cleaning The Pump squeeze Regularly examine the drain pump the legs and make sure that it is clean. on both sides Clean the pump if: The appliance does not drain the water. The drum cannot turn. The appliance makes an unusual noise because of the blockage of the drain pump. - Page 24 4. When the container is full of water, put the Make sure that the impeller of the drainage duct back again and empty the pump can turn. If this does not container. Do step 3 again and again until no occur, contact the service centre.
-
Page 25: Cleaning The Water Inlet Filter
ENGLISH 6. Install again the inlet hose. 8.8 Cleaning The Water Inlet Filter Make sure that the couplings are If your water is very hard or tight to prevent leakages. contains traces of lime deposit, the 7. Open the water tap. water inlet filter may become clogged. -
Page 26: Troubleshooting
TROUBLESHOOTING Certain problems are due to lack of simple maintenance or oversights, which can be solved easily without calling out an engineer. Before contacting your local Service Centre, please carry out the checks listed below. During machine operation it is possible that the red Start/Pause pilot light flashes to indicate that the machine is not working. - Page 27 ENGLISH Malfunction Possible cause Solution Too much detergent or unsuitable Reduce the detergent detergent (creates too much foam) quantity or use another one. has been used. Check whether there are any leaks Check the water inlet hose There is water from one of the inlet hose fittings.
-
Page 28: Emergency Door Opening
Malfunction Possible cause Solution The electronic unbalance detection Pause the machine and redistribute laundry device has cut in because the manually. laundry is not evenly distributed in the drum. The laundry is redistributed by reverse rotation of the drum. -
Page 29: Technical Data
ENGLISH To open the door, proceed as follows: 1. Press the button to switch the appliance off. 2. Disconnect the mains plug from the mains socket. 3. Open the filter flap. 4. Keep the emergency unlock trigger 5. Take out the laundry. (red object) pulled downward and, at the same time, open the appliance 6. -
Page 30: Installation
INSTALLATION 11.1 Positioning When the washing machine is levelled, try to rock it from corner It is important that your washing to corner. If it does rock, adjust the machine stands firm and level legs again until it is levelled and on the floor to ensure correct does not rock. -
Page 31: Water Drainage
ENGLISH The inlet hose must not be lengthened. If it is too short and you do not wish to move the tap, you will have to purchase a new, longer hose specially designed for this type of use. For the correct functioning of the 11.3 Water Drainage machine the drain hose must remain hooked on the proper... - Page 32 If the supply cord is If this appliance is supplied from a damaged, should the cord extension set or electrical appliance power supply portable outlet device, the cord cable need to be replaced, extension set or electrical portable this shall be carried out by device must be positioned so that our Service Centre.
-
Page 33: Environment Concerns
ENGLISH ENVIRONMENT CONCERNS 12.1 Packaging Materials 12.3 Ecological Hints The materials marked with To save water, energy and to the symbol help protect the environment, we recyclable. recommend that you follow these tips: >PE<=polyethylene >PS<=polystyrene Normally soiled laundry may be washed without prewashing in >PP<=polypropylene order to save detergent, water... - Page 34 KEPEDULIAN LINGKUNGAN ..................68 WE’RE THINKING OF YOU Terima kasih telah membeli peralatan Electrolux. Anda telah memilih produk yang menghad- irkan pengalaman profesional dan inovasi selama beberapa dekade. Cerdas dan bergaya, didesain dengan memperhatikan Anda. Jadi, kapan pun Anda menggunakannya, Anda dapat merasa tenang bahwa Anda akan mendapatkan hasil yang hebat setiap saat.
-
Page 35: Informasi Keselamatan
BAHASA INDONESIA INFORMASI KESELAMATAN Syarat penggunaan Jangan memasukkan benda apa pun seperti koin, peniti, paku, sekrup, batu atau benda keras dan benda tajam Peralatan ini dimaksudkan digunakan lainnya ke dalam mesin karena dapat untuk rumah tangga dan aplikasi menyebabkan kerusakan parah. serupa seperti: Cucilah barang-barang kecil, seperti Rumah pertanian... - Page 36 1.2 PEMASANGAN Jangan membebani mesin secara berlebihan. Lihat bagian terkait di buku Mesin ini berat. Berhati-hatilah apabila petunjuk. memindahkan mesin. Sebelum mencuci, pastikan semua Setelah membuka kemasan, kantung baju dikosongkan dan kancing periksalah apakah mesin tidak rusak. serta ritsleting ditutup. Jangan mencuci...
- Page 37 BAHASA INDONESIA Jangan sampai ada anak kecil atau binatang peliharaan masuk ke dalam tabung. 1.5 PERANGKAT KEAMANAN ANAK Ketika Anda mengaktifkan perangkat ini, Anda tidak bisa menutup pintu. Ini mencegah anak-anak atau piaraan Untuk menonaktifan alat ini supaya terkunci di dalam. pintu bisa ditutup kembali, putar tombol berlawanan arah dengan jarum Untuk mengaktifkan alat ini, putar...
-
Page 38: Deskripsi Produk
DESKRIPSI PRODUK Alas Atas Deterjen/Pelembut Dispenser Panel Kontrol Pegangan pintu Pintu Kaki penyesuaian kedataran (depan) Kabel Listrik Selang asupan air Selang pembuangan Air Penyangga Selang Baut Transit Kaki penyesuaian kedataran (Belakang) Tombol Penahan Pintu Rating Plate Filter Pompa pembuangan Air... -
Page 39: Panel Kontrol
BAHASA INDONESIA PANEL KONTROL 11 12 14 13 Tombol On/Off [Hidup/Mati] Layar Knop Program Touchpad Rinse Plus [Bilas Plus] Touchpad Favourite [Favorit] Touchpad Prewash [Pracuci] Touchpad Easy Iron [Setrika Mudah] Touchpad Temperature [Suhu] Touchpad Spin Selection Touchpad Vapour [Uap] [Pilihan Perasan] Touchpad Start/Pause [Mulai/Jeda] Touchpad Adjust Time Opsi Kunci Pengaman untuk Anak... - Page 40 Anda dapat memanggil kembali Pintu masih terkunci untuk menunjuk- program pencucian favorit HANYA bila kan bahwa air harus dikosongkan. mesin cuci: Pintu tetap terkunci dengan air dalam mode pemilihan program. di dalam tabung. Untuk melanjutkan siklus Anda harus Jika tidak, menyentuh Favourite tidak menekan (Mulai/Jeda).
- Page 41 BAHASA INDONESIA Tambahkan cucian, tutup pintu Anda bisa membatalkan waktu dan tekan lagi touchpad penundaan kapan saja, dengan Start/Pause (Mulai/Jeda). menekan touchpad "Delay Start [Tunda Pelaksanaan]" berulang-ulang hingga layar menampilkan waktu tunda ‘ ’, lalu tekan Touchpad Start/Pause [Mulai/Jeda]. 3.8 Layar Ikon Rinse Hold [Tahan Bilasan] Ikon tunda pelaksanaan Kecepatan Spin [Perasan]...
- Page 42 3.10 Touchpad Prewash Pada akhir siklus penguapan pakaian akan menjadi lebih Pilih opsini jika Anda ingin menggun- hangat, lebih lembut dan terlepas nakan fitur pra-cuci sebelum dari tabung. pencucian utama. Gunakan opsi ini Jika opsi uap dipilih, suhu untuk kotoran tanah berat.
- Page 43 BAHASA INDONESIA 3.15 Program + Opsi Program; Jenis beban; Bobot maks. Deskripsi Opsi bisa Suhu beban (Pakaian kering) siklus dikombinasikan Spin: Katun putih dan berwarna Cuci - 1200 hingga 400 rpm dengan tingkat kotoran Bilas Cottons - No Spin tanah yang tinggi; Perasan - Rinse Hold [Katun] ;...
- Page 44 Program; Jenis beban; Bobot maks. Deskripsi Opsi bisa Suhu beban (Pakaian kering) siklus dikombinasikan Putih dan tidak luntur, katun Cuci Spin: dengan kotoran tanah normal. Bilas - 1200 400 rpm hingga Energy Saver Atur program ini untuk Perasan - No Spin...
-
Page 45: Sebelum Menggunakan Pertama Kali
BAHASA INDONESIA Program; Jenis beban; Bobot maks. Deskripsi Opsi bisa Suhu beban (Pakaian kering) siklus dikombinasikan Program Vapour [Uap] untuk Pakaian Delay Start item kain sintetis atau digiling Refresh campuran. Siklus ini meng- dalam Mixed hilangkan bau dan membantu uap. [Segarkan melicinkan kerutan cucian;... -
Page 46: Penggunaan Sehari-Hari
PENGGUNAAN SEHARI-HARI Hubungkan steker listrik ke stop kontak listrik. Nyalakan keran air. 5.1 Panduan Lima Langkah untuk Memulai Langkah 1 - Mengatur Program untuk Pencucian Tekan tombol On/Off untuk meng- Tekan Touchpad opsi, jika Anda hidupkan mesin cuci. ingin cucian dicuci dengan beberapa fungsi. - Page 47 BAHASA INDONESIA Langkah 2 - Memuat Cucian Buka pintu dengan hati-hati, tarik PENTING ! pegangannya ke arah luar. Jangan sampai ada benda logam yang tertinggal di kain (misalnya, jepit rambut, peniti, pin) Pastikan Anda mencuci peng- umpul tiras secara terpisah dari penghasil tiras.
- Page 48 Langkah 3 - Menggunakan Deterjen dan Aditif Laci Dispenser Deterjen Deterjen bubuk atau cair. Dispenser deterjen dibagi ke Posisi ke bawah : Posisi ke bawah : dalam tiga wadah. untuk deterjen untuk deterjen cair. cair. Wadah ‘MAIN WASH’ (CUCIAN UTAMA)
- Page 49 BAHASA INDONESIA Jika Anda menggunakan Ukur deterjen dan pelembut kain; pelembut pakaian yang Tarik keluar laci deterjen kental, disarankan untuk sampai berhenti. mengencerkannya dengan air. Ukur jumlah deterjen yang diperlukan, tuangkan ke dalam wadah cuci utama ( ) dan, jika Anda ingin melaksanakan fase “Prewash [Pracuci]”, tuangkan ke dalam wadah bertanda...
- Page 50 Langkah 4 - Memulai program Untuk memulai program, tekan Mesin otomatis akan Touchpad Start/Pause menyesuaikan durasi [Mulai/Jeda] ( ), lampu pilot program yang dipilih yang terkait akan berhenti menurut jenis dan ukuran berkedip dan durasi program beban. default akan ditampilkan di Layar akan menampilkan layar.
- Page 51 BAHASA INDONESIA 5.2 Menyela Program Jika indikator kunci pintu ‘ ’ tidak lenyap, artinya mesin sudah panas Untuk menjeda, tekan Start/Pause dan level air ada di atas sisi bawah [Mulai/Jeda]. Indikator akan mulai pintu atau tabung berputar. Jika berkedip. demikian, pintu TIDAK BISA dibuka. Tekan tombol Start/Pause Jika Anda tidak bisa membuka pintu [Mulai/Jeda] lagi.
- Page 52 Ketika Program Pencucian 5 Menit setelah proses pencucian berakhir. Selesai, Tapi masih tersisa air di Tabung Tekan tombol “ On/Off” untuk mengaktifkan kembali Tabung berputar secara reguler perangkat yang di gunakan. untuk untuk mencegah kerutan cucian. Putar tombol program untuk mengatur pengaturan yang baru.
-
Page 53: Petunjuk Mencuci
BAHASA INDONESIA PETUNJUK MENCUCI 6.1 Memilah Cucian Kancingkan sarung bantal, tutup risleting, kancing kait dan kancing Ikuti simbol kode mencuci pada tekan. Kaitkan ikat pinggang atau setiap label pakaian dan petunjuk ikat pita yang panjang. pencucian dari produsen. Pilah Hilangkan noda membandel cucian sebagai berikut: putih, sebelum dicuci. - Page 54 Cat berbasis minyak: lembapkan Tinta: Tergantung pada jenis dengan penghilang noda bensin, tintanya, lembapkan terlebih dulu letakkan pakaian di atas kain yang dengan aseton (*), kemudian lembut, kemudian tekan-tekan gunakan asam asetat; hilangkan nodanya; lakukan beberapa kali. sisa noda pada kain putih dengan...
- Page 55 BAHASA INDONESIA 6.7 Jumlah Deterjen yang Deterjen dan bahan aditif harus ditempatkan di wadah yang sesuai Digunakan dalam laci dispenser yang tepat Jenis dan jumlah deterjen tergan- sebelum program cuci dimulai. tung pada jenis bahan, jumlah Tuangkan deterjen cair ke dalam cucian, tingkat kekotoran dan kompartemen laci deterjen bertanda kesadahan air yang digunakan.
-
Page 56: Simbol Kode Cuci Internasional
SIMBOL KODE CUCI INTERNASIONAL Simbol ini muncul pada label kain, untuk membantu Anda memilih cara terbaik untuk memperlakukan cucian Anda. Cuci energik Suhu Suhu Suhu Suhu Cuci tangan JANGAN pencucian pencucian pencucian pencucian cuci sama maksimal maksimal maksimal maksimal sekali 95 °C... - Page 57 BAHASA INDONESIA Cara ini akan membantu mencegah terbentuknya endapan kerak. 8.3 Setelah Setiap Kali Mencuci Biarkan pintu terbuka selama beberapa saat. Ini membantu mencegah penggumpalan dan pembentukan bau stagnan di dalam mesin. Membuka pintu setelah selesai mencuci akan membantu mengawetkan sekat pintu. 8.4 Pencucian Perawatan Dengan menggunakan pencucian suhu rendah, hal ini memungkinkan...
- Page 58 8.7 Membersihkan Pompa meremas Periksa secara teratur pompa kaki di pembuangan air dan pastikan kedua sudah bersih. sisi Bersihkan pompa jika: Mesin tidak menguras air. Tabung tidak bisa berputar. Mesin mengeluarkan bunyi yang tidak biasa karena tersumbatnya pompa pembuangan air.
- Page 59 BAHASA INDONESIA 4. Ketika wadah sudah penuh air, kembalikan Pastikan impeller bisa berputar. lagi saluran pembuangan dan kosongkan Jika tidak demikian, hubungi pusat wadah. Lakukan langkah 3 kembali dan lagi layanan. hingga tidak ada lagi air mengalir keluar dari pompa pembuangan air. Bersihkan filter di bawah keran air.
- Page 60 8.8 Membersihkan saringan Masukan Air Jika air sangat sadah atau berisi jejak endapan kapur, filter masukan air mungkin bisa tersumbat. Karena itu ada baiknya membersihkannya dari waktu ke waktu. Untuk membersihkan saringan masukan air: 1. Tutup keran air. 2. Lepaskan selang masukan air dari keran air.
-
Page 61: Pemecahan Masalah
BAHASA INDONESIA Tarik ke depan saluran pembuan- 8.9 Bahaya Kebekuan gan dan yang dari selang Jika mesin terpaparkan ke suhu di masukan dalam mangkok yang bawah 0°C, lakukan sejumlah ditempatkan di lantai dan biarkan langkah pencegahan. air mengalir keluar. Lepaskan steker listrik dari stop kontak. - Page 62 Malafungsi Kemungkinan penyebabnya Solusi Mesin tidak mau Listrik tidak stabil (bila kode Tunggu hingga listrik stabil berfungsi : tampil di layar) . dan mesin akan berjalan normal secara automatis. Keran air tertutup. (Kode Buka keran air. kesalahan: Selang air masuk terjepit atau Periksa sambungan selang tertekuk.
- Page 63 BAHASA INDONESIA Malafungsi Kemungkinan penyebabnya Solusi Menggunakan deterjen terlalu Tambah jumlah deterjen sedikit atau jenisnya tidak sesuai. atau gunakan deterjen yang lain. idak dilakukan tindakan apa pun Gunakan produk yang Hasil cuci pada noda membandel sebelum dijual di toko untuk tidak dicuci.
- Page 64 Malafungsi Kemungkinan penyebabnya Solusi Jeda mesin dan bagi Perangkat elektronik pendeteksi ketidak- seimbangan diaktifkan karena cucian tidak ratakan cucian secara terbagi rata dalam tabung. Cucian akan manual. didistribusi-ulang dengan memutar tabung ke Pemerasan arah berlawanan. Ini dapat terjadi beberapa...
-
Page 65: Data Teknis
BAHASA INDONESIA 2. Cabut kabel listrik dari tempat listrik. 3. Buka tutup penyaring (filter). 4. Tahan pemicu pembuka darurat ke bawah dan pada saat yang bersamaan, buka pintu. 5. Ambil cucian keluar. 6. Tutup kembali pintu penyaring ( filter). Jika Anda tidak dapat menentukan atau mengatasi masalahnya, hubungi pusat layanan kami. -
Page 66: Pemasangan
PEMASANGAN 11.1 Pemosisian Jika guncang, sesuaikan lagi kaki-kakinya hingga rata dan tidak Penting agar mesin cuci Anda lagi berguncang. berdiri kokoh dan rata dengan lantai untuk memastikan pengoperasian yang benar. Mesin tidak boleh dipasang di balik pintu yang dapat dikunci, pintu... - Page 67 BAHASA INDONESIA Selang air masuk tidak boleh Selang pembuangan tidak boleh diperpanjang. Jika selang terlalu ditekuk. Bentangkan di sepanjang pendek dan Anda tidak ingin lantai, hanya bagian yang ada di memindahkan keran air, Anda dekat titik pembuangan yang harus harus membeli selang baru yang ditinggikan.
-
Page 68: Kepedulian Lingkungan
Jika kabel listrik mesin Jika daya mesin ini disuplai dari harus diganti, penggan- kabel listrik sambungan atau tian ini harus dilakukan perangkat stop kontak portabel, oleh Pusat Layanan kabel perpanjangan atau kami. perangkat portabel listrik itu harus diposisikan sehingga tidak bisa... - Page 69 CHÚNG TÔI LUÔN NGHĨ V KHÁCH HÀNG C m ơn b n đã mua thi t b Electrolux. B n đã ch n m t s n ph m trong đó có ch a đ ng c hàng th p niên kinh nghi m chuyên gia và s đ i m i. Tinh t và sành đi u, thi t b này đư...
-
Page 70: Thông Tin V An Toàn
THÔNG TIN V AN TOÀN Các đi u ki n s d ng Gi t nh ng đ v t nh ch ng h n như v , dây bu c, dây lưng gi t đư c, v.v. trong túi gi t ho c bao g i vì nh ng đ... - Page 71 TI NG VI T Sau khi l p đ t thi t b , hãy ki m tra đ Không đư c s d ng máy gi t n u dây đ m b o thi t b không ép lên ng n p ngu n, b ng đi u khi n, b m t làm và...
-
Page 72: Mô T S N Ph M
MÔ T S N PH M N m máy Ngăn Đ nh Lư ngB t Gi t/ Ch t Làm M m V i B ng Đi u Khi n Tay C m C a Đi u Ch nh M c Đ Chân Trư c Dây Đi n... -
Page 73: B Ng Đi U Khi N
TI NG VI T B NG ĐI U KHI N 11 12 14 13 Nút On/O (B t/T t) Phím Đi u Khi n Rinse Plus (X B Sung) Núm Chương Trình Phím Đi u Khi n Prewash (Gi t sơ b ) Nút lưu chương trình yêu thích/hay dùng Phím Đi u Khi n Easy Iron (D là/ i) Phím Đi u Ch nh Nhi t Đ... - Page 74 Phím Đi u Khi n Nhi t Đ B ng đi u ch nh th i gian Nh n phím đi u khi n này l p đi l p l i đ tăng ho c gi m nhi t đ gi t Ch c năng này cho phép b n đi u...
- Page 75 TI NG VI T 3.8 Màn hình hi n th Bi u tư ng trì hoãn Bi u tư ng Rinse hold (gi x ) T c đ v t Bi u tư ng khóa c a Bi u tư ng Extra silent (Yên Tĩnh Hơn) N u ch báo phát sáng, b n không th m c a.
- Page 76 LƯU Ý: 3.13 Phím Đi u Khi n Start/Pause Hơi nư c không nh t thi t th y đư c bên trong thùng gi t trong chu kỳ gi t b ng hơi nư c. Hơi nư c đư c t o ra bên dư i thùng Đ...
- Page 77 TI NG VI T Chương trình; Lo i qu n áo; Tr ng lư ng Mô t chu Có th k t h p các Nhi t đ qu n áo t i đa (qu n áo khô) kỳ tùy ch n Spin: V i nh y c m như...
- Page 78 Chương trình; Lo i qu n áo; Tr ng lư ng Mô t Có th k t h p Nhi t đ qu n áo t i đa (qu n áo khô) chu kỳ các tùy ch n Spin: Gi t Chương trình đ...
-
Page 79: Trư C Khi S D Ng L N Đ U
TI NG VI T TRƯ C KHI S D NG L N Đ U Đ m b o r ng các k t n i đi n và nư c Ch n chu kỳ Cottons (V i Bông) t i phù... - Page 80 N u b n mu n đ gi t c a mình Khi nh n các phím đi u khi n này, các đư c v t ho c s d ng nhi t đ khác đèn hư ng d n tương ng phát sáng.
- Page 81 TI NG VI T Ch c ch n r ng không còn đ Đóng c a l i. gi t gi a mi ng đ m và c a. Bư c 3 - S D ng B t Gi t Và Ch t Ph Gia Ngăn Đ...
- Page 82 Khi nào thì s d ng nư c gi t t y: Không s d ng b t gi t d ng Không đ t giai đo n GI T SƠ B . l ng gel ho c đ c.
- Page 83 TI NG VI T Bư c 4 - B t đ u chương trình Đ b t đ u m t chương trình, Thi t b s t đ ng đi u nh n phím đi u khi n Start/ ch nh th i gian ch y Pause (B t Đ...
- Page 84 Gián Đo n Chương Trình N u ch báo khóa c a ‘ ’ không t t, đi u này có nghĩa là máy đang Đ t m d ng, hãy nh n Start/Pause nóng lên và m c nư c trên mép (B t Đ...
- Page 85 TI NG VI T Tính Năng Child Lock (Khóa Khi Hoàn Thành Chương Tr Em) Trình Gi t, Nhưng Có Nư c Trong L ng gi t Thi t b c a b n đư c cung c p KHÓA AN TOÀN CHO TR EM cho L ng gi t xoay thư...
-
Page 86: G I Ý Gi T
G I Ý GI T Lo i b v t khó gi t trư c khi gi t. Phân Lo i Đ Gi t Chà nh ng ch b b n đ c bi t b ng Tuân theo các bi u tư ng mã gi t b t gi t chuyên d ng ho c b t gi t. - Page 87 TI NG VI T B t Gi t và Ch t Ph Gia G s t: axit oxalic hòa tan trong nư c nóng ho c s n ph m lo i b g Hi u qu gi t t t cũng ph thu c s t đư...
- Page 88 Lư ng Ch t Gi t T y C n Làm theo các khuy n ngh c a nhà s n xu t s n ph m v kh i lư ng s Đư c S D ng d ng và không vư t quá d u MAX (T I ĐA) trong ngăn đ...
-
Page 89: Các Bi U Tư Ng Mã Gi T Qu C T
TI NG VI T CÁC BI U TƯ NG MÃ GI T QU C T Bi u tư ng này xu t hi n trên nhãn v i đ giúp b n l a ch n cách t t nh t đ x lý... - Page 90 Sau M i L n Gi t Đ c a m trong m t lúc. Đi u này giúp ngăn ch n n m m c và mùi đ ng l i hình thành bên trong thi t b . Đ c a m sau khi gi t cũng s giúp b o qu n gioăng c a.
- Page 91 TI NG VI T V sinh Bơm Ép chân Thư ng xuyên ki m tra bơm x và trên c ch c ch n r ng bơm s ch. hai bên V sinh bơm n u: Thi t b không x nư c. Thùng gi t không th xoay.
- Page 92 Đ m b o r ng cánh qu t bơm có 4. Khi đ ch a đ y nư c, đ t l i ng x và làm th xoay. N u đi u này không x y c n đ ch a. Th c hi n l i các bư c 3 cho ra, liên h v i trung tâm d ch v .
- Page 93 TI NG VI T V Sinh B L c N p Nư c L p l i ng n p nư c.Đ m b o r ng các kh p n i đ u ch t đ N u nư c r t c ng ho c ch a các v t ngăn rò...
-
Page 94: Kh C Ph C S C
KH C PH C S C M t s v n đ là do thi u b o trì đơn gi n ho c sơ su t mà có th đư c gi i quy t d dàng mà... - Page 95 TI NG VI T H ng hóc Nguyên nhân có th có Gi i pháp S d ng quá nhi u b t gi t ho c b t gi t Gi m kh i lư ng b t gi t ho c s không thích h p (t o ra quá...
- Page 96 H ng hóc Nguyên nhân có th có Gi i pháp Thi t b đi n t phát hi n s m t cân T m d ng máy và dùng tay phân b b ng b phát tín hi u b i vì đ gi t l i đ...
-
Page 97: D Li U K Thu T
TI NG VI T 3. M c a b l c. 4. Gi nút m khoá kh n c p (màu đ ) đ ng th i kéo xu ng phía dư i và m c a thi t b . 5. -
Page 98: L P Đ T
L P Đ T Đ nh V 11.1 Khi máy gi t đư c đ t b ng ph ng, hãy c g ng l c t góc này qua góc Đi u quan tr ng là máy gi t c a kia. - Page 99 TI NG VI T ng n p không đư c kéo dài. N u ng quá ng n và b n không mu n di chuy n vòi nư c, b n s ph i mua ng m i dài hơn, đư c thi t k riêng cho m c đích s d ng này.
-
Page 100: Các V N Đ V Môi Trư Ng
Khi thi t b đư c l p đ t dây N u thi t b này đư c cung c p ngu n đi n ph i ti p c n đư c t b dây n i dài ho c thi t b d dàng. - Page 101 NOTE / CATATAN / LƯU Ý...
- Page 102 NOTE / CATATAN / LƯU Ý...
- Page 104 www.electrolux.com...