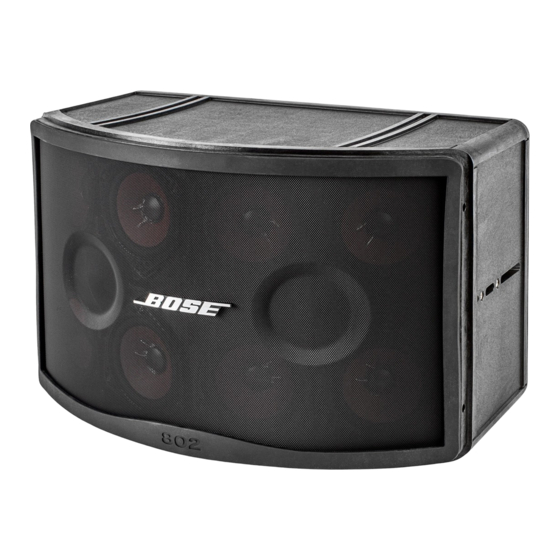
Bose Panaray 802 Series IV Installation Manual
Full-range-driver array loudspeakers
Hide thumbs
Also See for Panaray 802 Series IV:
- Installation manual (2 pages) ,
- Installation manual (32 pages)
Table of Contents
Advertisement
Quick Links
- 1 Panaray Series IV Loudspeaker Dimensions
- 2 Panaray ® 802 ® Series IV Loudspeaker U-Bracket
- 3 Panaray ® 802 ® Series IV Loudspeaker Mounting Options
- 4 Installation
- 5 Recommended Power Amplifiers
- 6 Recommended Dsp Settings
- 7 Panaray 802 Series IV Loudspeaker Specifications
- 8 Panaray 502 a Series Loudspeaker Specifications
- Download this manual
Advertisement
Table of Contents

Related Manuals for Bose Panaray 802 Series IV


Summary of Contents for Bose Panaray 802 Series IV
- Page 1 ® Series IV ® ® Series IV Panaray Full-Range-Driver ® Array Loudspeakers Installation Guide...
-
Page 2: Table Of Contents
Contents pro.Bose.com Introduction Overview ....................................5 Panaray ® ® Series IV loudspeaker dimensions......................6 Panaray Series IV loudspeaker dimensions......................7 ® ® Panaray A loudspeaker dimensions ........................8 ® ® Installation Panaray Series IV loudspeaker mounting options .......................9 ® ® Panaray Series IV loudspeaker U-bracket ......................9 ®... -
Page 3: Important Safety Instructions
3. Los altavoces Bose Panaray incluyen piezas de ajuste roscadas M8 para facilitar el montaje del arreglo de altavoces a los instaladores profesionales. ¡NO utilice accesorios roscados SAE de 5/16”! Utilice únicamente accesorios métricos. Las abrazaderas deberán ser de Clase 8.8 métrica (destinadas a soportar carga) o equivalentes. No deberán emplearse abrazaderas sin marca (no destinadas a soportar carga). -
Page 4: Wichtige Sicherheitshinweise
3. Les enceintes Bose Panaray sont dotées d’un système de fixation fileté M8 intégré, destiné à en faciliter le montage par un installateur professionnel. Ne PAS utiliser de composants filetés au pas SAE 5/16” ! Utiliser uniquement des composants à mesure métrique. Les fixations doivent être de classe métrique 8.8 (pour la résistance à la charge) ou équivalente. Ne pas utiliser de fixations dont la classe de résistance à... -
Page 5: Overview
For more than five decades, Bose has been improving the performance of full-range cone transducers to provide unmatched reliability, natural sound quality, and wide coverage patterns. -
Page 6: Panaray Series Iv Loudspeaker Dimensions
Introduction pro.Bose.com Panaray Series IV loudspeaker dimensions ® ® Top View Front View Right View Back View Bottom View... -
Page 7: Series Iv Loudspeaker Dimensions
Introduction pro.Bose.com Panaray Series IV loudspeaker dimensions ® ® Top View Left View Front View Right View Back View Bottom View... -
Page 8: Panaray ® 502 ® A Loudspeaker Dimensions
Introduction pro.Bose.com Panaray A loudspeaker dimensions ® ® Top View Back View Left View... -
Page 9: Installation
CAUTION: 802 Series IV loudspeakers weigh 13.6 kg (30 lb). Use caution when lifting to avoid injury and/or damage to the loudspeaker. Do not rest loudspeakers on their grilles. Choose a mounting location that will safely support the weight (13.6 kg (30 lb)) of the loudspeaker. Refer to “Guide- lines for permanent installation of Bose Panaray loudspeakers” on page 3. -
Page 10: Suspension Bracket
Installation pro.Bose.com Place the loudspeaker on the bracket. Tilt the loudspeaker to the desired angle and insert the second M8 cap screw on each side of the loudspeaker. Wall mount pitch angles Ceiling mount pitch angles 5.6 Nm (50 in-lb) Using a 5 mm Allen wrench, tighten all four cap screws to 5.6 Newton-meters (50 inch-pounds). -
Page 11: Wbp-8 Wall Bracket
Installation pro.Bose.com WBP-8 wall bracket (for indoor use only) Panaray Series IV loudspeaker mounting options ® ® RMUBRKT1 and WBPWR-50 pan-and-tilt bracket kit M8 x 20 mm (4) M8 x 45 mm (4) For Panaray For other ® ® loudspeakers... - Page 12 Installation pro.Bose.com Attach the bracket to the wall. Follow the instructions provided with the wall bracket. Choose a position and mounting method consistent with local building codes and regulations. Ensure the mounting surface and the method of attaching the loudspeaker to the surface is structurally capable of supporting the weight of the loudspeaker (7.3 kg (16 lb)).
-
Page 13: Suspension Bracket Kit
Installation pro.Bose.com Adjust the pitch and yaw using the specified tightening torque. 11 Nm (8 ft-lb) 30° 9 Nm (7 ft-lb) 25 Nm (18 ft-lb) SB-4 suspension bracket kit (for indoor use only) M8 x 16 mm (2) M8 (2) Attach the bracket to the rear of the 402 loudspeaker. -
Page 14: Panaray
M5 x 10 mm M8 x 20 mm (2) Choose a mounting location that will safely support the weight of the loudspeaker . Refer to “Guidelines (6.8 kg (15 lb)) for permanent installation of Bose Panaray loudspeakers” on page 3. ® ®... -
Page 15: Wbp-5 Wall-Mount Kit
M6 x 25 mm M8 x 16 mm (5) Choose a mounting location that will safely support the weight of the loudspeaker . Refer to “Guidelines (6.8 kg (15 lb)) for permanent installation of Bose Panaray loudspeakers” on page 3. ® ®... - Page 16 Installation pro.Bose.com Remove both screws from the bracket and separate the two pieces. Hold the wall bracket in the mounting location to mark and drill the holes. Use four (4) screws per bracket to attach it to the wall. The loudspeaker can be mounted vertically on a wall (A), angled down from a ceiling (B) or angled out from a wall (C).
-
Page 17: Csb-5A Suspension Bracket Kit
Installation pro.Bose.com Mount the loudspeaker on the wall plate. Slide the fin of the speaker bracket into the wall bracket and install the M8 x 25 mm pivot screw, and then the M6 x 25 mm pitch locking screw. M8 X 25 mm M6 X 25 mm Set the pitch and yaw of the loudspeaker. - Page 18 Installation pro.Bose.com Remove the screw from the end of the 502 ® A loudspeaker. Mount the bracket to the loudspeaker. M8 x 1.25 x 12 mm 2.3 – 2.8 Nm (20 – 25 in-lb) Choose a position and mounting method consistent with local building codes and regulations.
-
Page 19: Recommended Power Amplifiers
EQ values can be downloaded using the Hardware Manager feature in ControlSpace Designer software. The following table contains recommended loudspeaker parametric EQ values that have been confirmed with Bose ControlSpace Designer software and Bose Engineered Sound Processor (ESP) hardware. Results may vary with other brands of DSP hardware. -
Page 20: Panaray 802 Series Iv Loudspeaker Specifications
1. Frequency range measured on-axis with recommended EQ in an anechoic environment. 2. Bose extended-lifecycle test: pink noise, IEC268-5 filtered, 6-dB crest factor, 100-hour duration, with recommended EQ. 3. AES component test: pink noise, IEC268-5 filtered, 6-dB crest factor, 2-hour duration, with recommended EQ. -
Page 21: Panaray 402 Series Iv Loudspeaker Specifications
1. Frequency range measured on-axis with recommended EQ in an anechoic environment. 2. Bose extended-lifecycle test: pink noise, IEC268-5 filtered, 6-dB crest factor, 100-hour duration, with recommended EQ. 3. AES component test: pink noise, IEC268-5 filtered, 6-dB crest factor, 2-hour duration, with recommended EQ. -
Page 22: Panaray 502 A Series Loudspeaker Specifications
1. Frequency range measured on-axis with recommended EQ in an anechoic environment. 2. Bose extended-lifecycle test: pink noise, IEC268-5 filtered, 6-dB crest factor, 100-hour duration, with recommended EQ. 3. AES component test: pink noise, IEC268-5 filtered, 6-dB crest factor, 2-hour duration, with recommended EQ. -
Page 23: Additional Resources
Additional Resources pro.Bose.com Visit us on the web at pro.Bose.com for more information, including specifications, technical literature, product warranty, parts and accessories, and global support contact information. Americas Hong Kong (USA, Canada, Mexico, Central America, South America) Bose Limited Bose Corporation... - Page 24 ©2015 Bose Corporation, The Mountain Framingham, MA 01701-9168 USA AM747960 Rev.01...