Advertisement
Table of Contents
- 1 Table of Contents
- 2 Before Use
- 3 Junior Seat Isofix/Junior Seat I-II/Junior Seat
- 4 Safety Instructions for Using Child Restraint Systems
- 5 Operating Instructions
- 6 Use in the Car
- 1 Junior Seat Isofix/Junior Seat I-II
- 2 Junior Seat ISOFIX for Class I (9-18 Kg)
- 3 Junior Seat III for Class III (22-36 Kg)
- Download this manual
Advertisement
Table of Contents

Summary of Contents for BMW Junior Seat ISOFIX
- Page 1 Bedienungsanleitung Junior Seat ISOFIX Junior Seat I-II Junior Seat III BMW Group...
- Page 2 Junior Seat ISOFIX ISOFIX 9-18 kg 9-18 kg 15-25 kg...
- Page 3 Junior Seat ISOFIX Top Tether...
- Page 4 Junior Seat I 9-18 kg Junior Seat II 15-25 kg Junior Seat III 22-36 kg...
- Page 5 Junior Seat I-II...
-
Page 6: Table Of Contents
Installation with ISOFIX system 39 Removal with ISOFIX system 43 Installation with a three-point automatic-reel belt 44 Junior Seat ISOFIX/Junior Seat I-II for class I (9–18 kg): Installation with a three-point automatic-reel belt 44 Junior Seat ISOFIX/Junior Seat I-II for class II (15–25 kg): Installation with a three-point automatic-reel belt 45 Junior Seat III for class III (22–36 kg):... -
Page 7: Before Use
The item numbers in the text always relate to this illustration: Colours used • Junior Seat ISOFIX, see page 5. • Junior Seat I-II, see page 9. The safety belt and the ISOFIX system are highlighted in colour in these operating In order to facilitate easier understanding instructions. - Page 8 ISOFIX sys- children of class I (9–18 kg). tem is used using the top tether. Please note the specifications in your car’s owner’s hand- book. The Junior Seat ISOFIX is approved for ISOFIX size class B....
-
Page 9: Junior Seat Isofix/Junior Seat I-Ii/Junior Seat
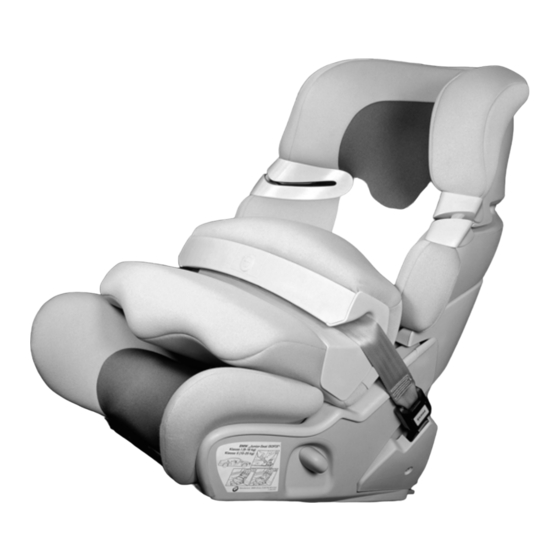
Junior Seat ISOFIX/Junior Seat I-II: Overview of operating elements Junior Seat ISOFIX Junior Seat I-II 1 Shoulder belt guide 1 Shoulder belt guide 2 Back cushion 2 Back cushion 3 Lap belt guide 3 Lap belt guide 4 Locking lever (inclination of the backrest) -
Page 10: Safety Instructions For Using Child Restraint Systems
(compliant with ECE R16 or an equivalent standard). • Ensure that the three-point automatic-reel belt and the impact cushion strap are not • The Junior Seat ISOFIX can also be used twisted. with the ISOFIX system. • Never leave your child unattended in the car. -
Page 11: Operating Instructions
If the shoulder belt section of the three-point auto- matic-reel belt runs over the child’s neck, there is a risk that the child’s neck could be crushed. Ensure that the belt does not run over your child’s neck. Do not dismantle the child seat in any way other than that described in the operating instructions and... -
Page 12: Use In The Car
Use in the car The ECE Directive test label is affixed to the child seat. The permissible use of the Junior Seat child seat as a child restraint system is described below. Class I (9–18 kg) Securing the child seat Securing the child Special features ISOFIX-System + top... - Page 13 Class II (15–25 kg) Securing the child seat Securing the child Special features Junior Seat Three-point automatic- Three-point automatic- • If installed in the middle position on reel belt reel belt ISOFIX/ the back seat, the Junior Seat I-II middle seat must be equipped with a three-point auto- matic-reel belt.
- Page 14 ISOFIX mountings and three-point automatic-reel belts. When using the Junior Seat ISOFIX/ Junior Seat I-II: If your car has side airbags, ensure that your child’s head is nowhere near them.
-
Page 15: Junior Seat Isofix/Junior Seat I-Ii
Junior Seat ISOFIX/Junior Seat I-II: Basic settings Adapting the child seat to the size Adjusting the inclination of the of the child backrest The child’s head must under no circum- Ensure that the locking lever (4) on the stances jut out above the upper edge left and right is fully engaged.... -
Page 16: Junior Seat Isofix For Class I (9-18 Kg)
Junior Seat ISOFIX for class I (9–18 kg): Installation with ISOFIX system More information about the ISOFIX Repeat the process if necessary until mounts can be found in your car’s the locking arms (11) remain extended. owner’s handbook. Installing the child seat Your car has two ISOFIX mounts on each outer seat in the back. - Page 17 3. Shake the child seat roughly to ensure that Ensure that the top tether (14) is not it is securely attached. twisted. Ensure that the belt adjuster (17) cannot be The child seat has been correctly installed if released, for instance by objects in the it lies firmly against the rear seat backrest.
- Page 18 Modifying the length of the impact cushion strap A tension display is fitted to the top of the safety hook (18). The top tether (14) is not correctly fitted until the colour Depending on the height and weight of your display (19) for the belt tension is green....
- Page 19 Unbuckling the child The child seat must remain secured in the car even if there is no child actually in the car. 1. Press the red button on the belt buckle (21) and remove the impact cushion strap (22). 2. Remove the impact cushion (10) and take your child out of the child seat.
-
Page 20: Removal With Isofix System
Junior Seat ISOFIX for class I (9–18 kg): Removal with ISOFIX system 1. Open the belt adjuster (17) on the top tether (14) and pull the top tether (14) to lengthen it. 2. Release the safety hook (18) from its securing point in the car. -
Page 21: Installation With A Three-Point Automatic-Reel Belt
Junior Seat ISOFIX/Junior Seat I-II for class I (9–18 kg): Installation with a three-point automatic-reel belt Only use the Junior Seat in combination with a fixed-installation three-point automatic-reel belt (compliant with ECE R16 or an equivalent standard). Ensure that the three-point automatic-reel belt only runs over the guides marked in red on the child seat and impact cushion.... -
Page 22: Installation With A Three-Point Automatic-Reel Belt
Junior Seat ISOFIX/Junior Seat I-II for class II (15–25 kg): Installation with a three-point automatic-reel belt When the Junior Seat for children of class II (15–25 kg) is used, the use of the ISOFIX system is not permitted. Only use the Junior Seat in combination with... -
Page 23: Junior Seat Iii For Class Iii (22-36 Kg)
Junior Seat III for class III (22–36 kg): Installation with a three-point automatic-reel belt Only use the Junior Seat III in combina- tion with a fixed-installation three-point automatic-reel belt (compliant with ECE R16 or an equivalent standard). Ensure that the three-point automatic-reel belt is not twisted.... -
Page 24: Care And Storage
Care and storage Only use the Junior Seat with original covers or seat covers approved by the manufacturer, since these form an important part of the safety equipment. Never use the Junior Seat without seat covers, since otherwise the protective effect will be lost.... - Page 25 Store the Junior Seat in a dry place and protect it from dust and direct sunlight. Junior Seat ISOFIX Always store the Junior Seat ISOFIX with its locking arms (11) retracted. Should the locking arms (11) be extended: • Pull the release mechanism (13).
- Page 26 01 29 2 158 367 5/2009 (Z/Z)