Table of Contents
Advertisement
Available languages
Available languages
Quick Links
Advertisement
Table of Contents

Related Manuals for Pioneer DVR-SK12D


Summary of Contents for Pioneer DVR-SK12D
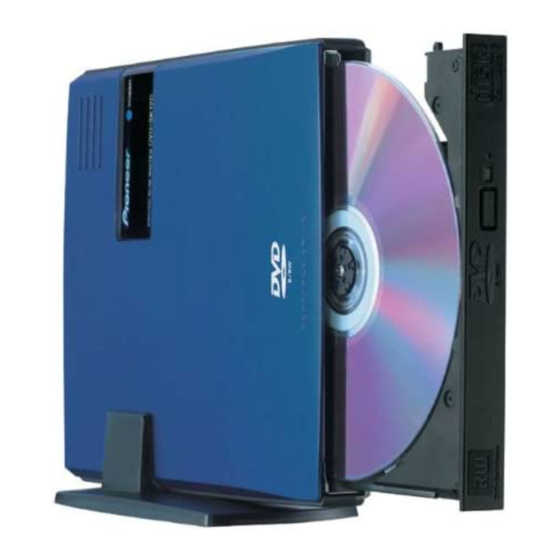
- Page 1 DVD / CD WRITER LECTEUR DE DVD / CD DVD- / CD-WRITER REGISTRATORE PER DISCHI DVD O CD GRABADORA DE DISCOS DVD Y CD DVD / CD WRITER DVR-SK12D Operating instructions Mode d’emploi Bedienungsanleitung Istruzioni per l’uso Manual de instrucciones...
- Page 3 El triángulo equilátero con el símbolo de un relámpago PRECAUCIÓN: El triángulo equilátero con un signo de admiración en su en su interior tiene por objeto alertar al usuario de la PARA EVITAR EL RIESGO DE DESCARGA ELÉCTRICA, interior tiene por objeto alertar al usuario de la existencia presencia de “voltaje peligroso”...
- Page 4 Location: Bottom of the unit CLASS 1 LASER PRODUCT LASER KLASSE 1 L’étiquette d’avertissement suivante apparaît sur votre appareil. Emplacement: Fond de l’appareil CLASS 1 LASER PRODUCT LASER KLASSE 1 Das nachstehende Hinweisschild befindet sich am Gerät. Lage: Unterseite des Gerätes CLASS 1 LASER PRODUCT LASER KLASSE 1 Sull’apparecchio è...
- Page 5 Op het apparaat is het volgende waarschuwingslabel aangebracht. Plaats: Onderkant van het apparaat CLASS 1 LASER PRODUCT LASER KLASSE 1...
- Page 6 Product Name: DVD / CD WRITER Model Number: DVR-SK12D Responsible Party Name: PIONEER ELECTRONICS (USA) INC. Custormer Support Division Address: 1925 E. DOMINGUEZ ST. LONG BEACH, CA 90810 U.S.A. Phone: (310) 952-2820 WARNING:...
-
Page 7: Operating Environment
÷ Location exposed to high humidity, or poorly ventilated location Precautions Regarding Use 7 Pioneer may not be held liable for the loss of any data or any other direct or indirect damage suffered as the result of the use or breakdown of this prod- uct. -
Page 8: Important Safety Instructions
IMPORTANT! SAFETY INSTRUCTIONS 1. READ INSTRUCTIONS – All the safety and operating instructions should be read before the appliance is operated. 2. RETAIN INSTRUCTIONS – The safety and operating instructions should be retained for future reference. 3. HEED WARNING – All warnings on the appliance and in the operating instructions should be adhered to. 4. -
Page 9: Recommended Discs
PRECAUTIONS Caution Regarding Main Unit 1. While main unit is operating: ÷ Do not subject the unit to vibration or impact. ÷ Do not turn off the power switch or disconnect cables. 2. Do not leave the unit with the disc tray in the open position, since dust may enter the unit causing malfunctions. - Page 10 INTERFACE 1 Power Indicator 5 Eject Button Lights when the unit is on. Press to open the disc tray. Lights green when a USB 1.1 connection is used. 6 Forced Ejection Hole Lights blue when a USB 2.0 connection is Insert a stiff rod into the hole and push to used.
- Page 11 INTERFACE Suggested Operating Environment The following conditions are general recommendations, and do not represent conditions for guaranteed performance. • Operating System: Windows 98SE, Windows 2000, Windows ME, Windows XP. • CPU: Pentium III (500 MHz or greater recommended) • Memory: 128 MB or more (256 MB or more recommended). •...
-
Page 12: Ac Adapter Connection
CONNECTIONS Connect the unit to the supplied AC adapter and connect the USB or IEEE 1394 cable. AC adapter connection Connect the AC adapter plug to the DC IN connector on the rear panel of the unit and use the power cord to connect the AC adapter to a wall outlet. Do not use other than the supplied AC adapter. -
Page 13: Operation
CONNECTIONS IEEE 1394 cable connection This is a hot plug unit. 1. Turn on the unit. 2. Turn on the computer and start up Windows. 3. Connect the IEEE 1394 connector on the rear of the unit to the computer using the supplied IEEE 1394 cable. -
Page 14: Troubleshooting
What may at first seem like a malfunction may only be a simple operation error. Check the list below before doing anything else. If the problem still persists, contact your dealer or the local Pioneer Service Station. Contact the software manufacturer for software problems. -
Page 15: Specifications
SPECIFICATIONS [Installation Type] Horizontal or vertical mount ÷ When using vertical installation, use the accessory vertical stand and install so the power switch is upwards. [Interface] USB 2.0 (USB1.1) or IEEE 1394.a [Disc Size] 12 cm (4.72”) / 8 cm (3.15”)* * 12 cm conversion adapters cannot be used. - Page 16 • Performance specifications are during use of USB 2.0 or IEEE1394 connectinons. The unit will not demonstrate its full performance when using a USB 1.1 connection. • Specifications and design subject to possible modifications without notice, due to improvements. Published by Pioneer Corporation. Copyright C 2003 Pioneer Corporation. All rights reserved.
-
Page 17: Conditions De Fonctionnement
÷ Lieux exposés à une forte humidité ou lieux peu ventilés Précautions relatives à l’utilisation 7 Pioneer ne sera aucunement responsable de la perte de données ou de tout autre dommage, direct ou indirect, subi du fait de l’utilisation ou d’une panne de cet appareil. -
Page 18: Important ! Instructions De Sécurité
IMPORTANT ! INSTRUCTIONS DE SÉCURITÉ 1. LISEZ CES INSTRUCTIONS -- Vous devez lire toutes les explications sur la sécurité et le fonctionnement avant d’utiliser l’appareil. 2. CONSERVEZ CES INSTRUCTIONS -- Les explications sur la sécurité et le fonctionnement doivent être conservées pour s’y référer éventuellement par la suite. - Page 19 PRÉCAUTIONS Précautions relatives à l'appareil principal 1. Pendant que l'appareil principal fonctionne: • Ne soumettez pas l'appareil à des vibrations ou des chocs. • Ne coupez pas l'interrupteur d'alimentation et ne débranchez pas les câbles. 2. Ne laissez pas le plateau de disque de l'appareil en position ouverte car de la poussière peut s'y infiltrer et provoquer des défaillances.
- Page 20 INTERFACE 1 Voyant d'alimentation 5 Touche d'éjection Il s'allume lorsque l'appareil est sous Sa pression permet d'ouvrir le plateau du tension. disque. S'allume en vert à l'emploi d'une 6 Orifice d’éjection forcée connexion USB 1.1. Insérer une tige rigide dans l’orifice et S'allume en bleu à...
- Page 21 INTERFACE Environnement d'exploitation recommandé Les conditions suivantes forment des recommandations générales et il ne s'agit pas des conditions nécessaires à l'obtention de performances garanties. • Système d'exploitation : Windows 98SE, Windows 2000, Windows ME, Windows • Unité centrale de traitement : Pentium III (500 MHz ou plus recommandé) •...
-
Page 22: Branchement De L'adaptateur Secteur
BRANCHEMENTS Raccordez l'appareil sur l'adaptateur secteur fourni et branchez le câble USB ou IEEE 1394. Branchement de l'adaptateur secteur Branchez la fiche de l'adaptateur secteur dans la prise DC IN sur le panneau arrière de l'appareil et servez-vous du cordon d'alimentation pour raccorder l'adaptateur secteur à... - Page 23 BRANCHEMENTS Branchement du câble IEEE 1394 Cet appareil accepte une fiche sous tension. 1. Mettez l'appareil sous tension. 2. Mettez l'ordinateur sous tension et lancez Windows. 3. Raccordez le connecteur IEEE 1394 du panneau arrière de l'appareil sur l'ordinateur au moyen du câble IEEE 1394 fourni. ÷...
-
Page 24: Guide De Dépannage
Ce qui apparaît comme une défaillance n’est souvent que le résultat d’une simple erreur d’utilisation. Passez donc en revue la liste ci-dessous. Si la difficulté subsiste, contactez votre revendeur ou un centre de service Pioneer. Contactez le fabricant du logiciel pour tout problème, lié au logiciel. -
Page 25: Fiche Technique
FICHE TECHNIQUE [Type d'installation] Montage horizontal ou vertical ÷ Pour une installation verticale, utilisez le support vertical fourni comme accessoire et installez de telle sorte que l'interrupteur d'alimentation soit en haut. [Interface] USB 2.0 (USB 1.1) ou IEEE 1394.a [Taille de disque] 12 cm / 8 cm* * Un adaptateur de conversion 12 cm peut être utilisé. - Page 26 L'appareil ne déploiera pas toutes ses performances à l'emploi d'une connexion USB 1.1. • Les caractéristiques techniques et présentation de ce produit sont sujets à des changements sans préavis pour améliorations. Publication de Pioneer Corporation. C 2003 Pioneer Corporation. Tous droits de reproduction et de traduction réservés.
-
Page 27: Vorsichtshinweise Zum Betrieb
¶ Orte mit hoher Luftfeuchtigkeit oder schlechter Belüftung Vorsichtshinweise zum Betrieb 7 Pioneer übernimmt keinerlei Haftung für Datenverluste oder irgendwelche anderen direkten oder Folgeschäden, die auf den Gebrauch oder eine Funktionsstörung dieses Gerätes zurückzuführen sind. Es wird dringend angeraten, in regelmäßigen Abständen Sicherungskopien von allen wichtigen Daten zu erstellen. - Page 28 WICHTIG! SICHERHEITSHINWEISE 1. BEDIENUNGSANLEITUNG LESEN – Bitte lesen Sie vor der Inbetriebnahme des Gerätes alle Sicherheitshinweise und den gesamten Text der Bedienungsanleitung durch. 2. BEDIENUNGSANLEITUNG AUFBEWAHREN – Bitte bewahren Sie die Sicherheitshinweise und die Bedienungsanleitung für spätere Bezugnahme griffbereit auf. 3.
- Page 29 VORSICHTSMASSNAHMEN Vorsichtshinweise zum Hauptgerät 1. Während das Hauptgerät in Betrieb ist: • Setzen Sie das Gerät weder mechanischen Schwingungen noch Erschütterungen aus. • Schalten Sie die Stromzufuhr nicht aus, und trennen Sie keine Kabel ab. 2. Lassen Sie das Disc-Fach nicht in seiner ausgefahrenen Stellung, da anderenfalls Staub in das Geräteinnere eindringen und Funktionsstörungen verursachen kann.
- Page 30 SCHNITTSTELLE 1 Einschaltanzeige 5 Auswurftaste Diese Anzeige leuchtet beim Einschalten des Drücken Sie diese Taste, um das Disc-Fach Gerätes auf. auszufahren. Bei Verwendung eines USB 1.1-Anschlusses 6 Loch für erzwungenen Auswurf leuchtet diese Anzeige grün. Bei Verwendung eines USB 2.0-Anschlusses Wenn die Schublade nach dem Drücken der Eject- leuchtet diese Anzeige blau.
- Page 31 SCHNITTSTELLE Empfohlene Betriebsumgebung Bei den nachstehend aufgeführten Systemvoraussetzungen handelt es sich lediglich um allgemeine Empfehlungen; sie bieten keinerlei Gewähr dafür, dass das Gerät seine volle Leistung in einer Betriebsumgebung erfüllt, die diese Voraussetzungen erfüllt. • Betriebssystem: Windows 98SE, Windows 2000, Windows ME, Windows XP •...
-
Page 32: Anschließen Des Netzadapters
ANSCHLÜSSE Schließen Sie zunächst den mitgelieferten Netzadapter an das Gerät an, und schließen Sie dann das USB- oder das IEEE 1394-Kabel an. Anschließen des Netzadapters Schließen Sie den Gleichstromstecker des Netzadapters an die DC IN-Buchse an der Rückwand des Gerätes, und verbinden Sie dann den Netzadapter über das Netzkabel mit einer Netzsteckdose. -
Page 33: Bedienung
ANSCHLÜSSE Anschließen des IEEE 1394-Kabels Dieses Gerät besitzt eine Warmsteckerausführung. 1. Schalten Sie das Gerät ein. 2. Schalten Sie den Computer ein, und starten Sie Windows. 3. Verbinden Sie den IEEE 1394-Anschluss an der Rückwand des Gerätes über das mitgelieferte IEEE 1394-Kabel mit dem Computer. ÷... - Page 34 Sie bitte zunächst die Hinweise in der folgenden Liste. Falls sich die Störung auf diese Weise nicht beseitigen lässt, wenden Sie sich bitte an Ihren Fachhändler oder eine Pioneer-Kundendienststelle. Bei Problemen im Zusammenhang mit der Software nehmen Sie bitte Kontakt mit dem Hersteller der Software auf.
-
Page 35: Technische Daten
TECHNISCHE DATEN [Aufstellungsweise] Horizontale oder vertikale Aufstellung ÷ Wenn eine vertikale Aufstellung des Gerätes gewünscht ist, verwenden Sie den mitgelieferten Ständer für vertikale Aufstellung, und stellen Sie das Gerät so auf, dass sich sein Netzschalter oben befindet. [Schnittstelle] USB 2.0 (USB 1.1) oder IEEE 1394.a [Disc-Durchmesser] 12 cm / 8 cm* * 12-cm-Adapter können nicht verwendet werden. - Page 36 IEEE 1394. Bei Anschluss an eine Schnittstelle der Norm USB 1.1 kann das Gerät seine volle Leistung nicht entwickeln. • Technische Änderungen zum Zweck der Produktverbesserung ohne vorherige Bekanntmachung vorbehalten. Veröffentlicht von Pioneer Corporation. Urheberrechtlich geschützt C 2003 Pioneer Corporation. Alle Rechte vorbehalten.
-
Page 37: Condizioni Ambientali Di Funzionamento
¶ luoghi esposti a condizioni di alta umidità o scarsa ventilazione H045 It Precauzioni per l’uso 7 La Pioneer non può essere considerata responsabile di una eventuale perdita di dati o di qualsiasi altro eventuale danno diretto o indiretto sofferto come risultato dell’uso o della rottura di questo apparecchio. - Page 38 IMPORTANTE! ISTRUZIONI PER LA SICUREZZA 1. LEGGERE LE ISTRUZIONI. Leggere attentamente tutte le istruzioni per la sicurezza e il funzionamento prima di passare all’uso dell’apparecchio. 2. CONSERVARE IL MANUALE DI ISTRUZIONI. Il manuale di istruzioni per la sicurezza ed il funzionamento deve esere cponservato per ogni eventuale futura necessità.
- Page 39 PRECAUZIONI Precauzioni concernenti l’apparecchio principale 1. Mentre l’apparecchio principale è in funzione: • non sottoporlo a vibrazioni o urti; • non spegnere l’interruttore di accensione e non staccare cavi. 2. Non lasciare l’apparecchio con il piatto portadischi in posizione aperta, per evitare l’accumularsi di polvere, che potrebbe causare disfunzioni dell’apparecchio.
- Page 40 INTERFACCIA 1 Spia dell’alimentazione 5 Tasto di espulsione Si illumina ad apparecchio acceso. Premerlo per aprire il piatto portadischi. Si illumina in verde in caso di uso del 6 Foro per l’espulsione forzata collegamento USB 1.1. Se il vano portadischi non si apre alla Si illumina in blu in caso di uso del normale pressione del tasto di espulsione, collegamento USB 2.0.
- Page 41 INTERFACCIA Ambiente di funzionamento consigliato Le condizioni descritte qui di seguito sono dei consigli di carattere generale e non costituiscono delle condizioni necessarie per garantire le relative prestazioni. • Sistema operativo: Windows 98SE, Windows 2000, Windows ME, Windows XP • Processore (CPU): Pentium III (consigliato da 500 MHz o più) •...
-
Page 42: Collegamento Del Cavo Usb
COLLEGAMENTI Collegare all’apparecchio l’adattatore a corrente alternata fornito in dotazione e anche il cavo USB o il cavo IEEE 1394. Collegamento dell’adattatore a corrente alternata Collegare la spina dell’adattatore a corrente alternata alla presa DC IN ubicata sul lato posteriore dell’apparecchio ed usare poi il cavo di alimentazione in dotazione per collegare l’adattatore ad una presa di corrente alternata di rete. -
Page 43: Funzionamento
COLLEGAMENTI Collegamento del cavo IEEE 1394 Questo apparecchio è del tipo per collegamenti “a caldo” (cioè ad apparecchio attivato). 1. Accendere l’apparecchio. 2. Accendere il computer ed avviare Windows. 3. Collegare il cavo IEEE 1394 (fornito) all’apposito connettore IEEE 1394 ubicato sul lato posteriore dell’apparecchio, ed al computer. - Page 44 Controllare la seguente lista di possibili disfunzioni prima di procedere a qualsiasi altro passo. Se il problema persiste, rivolgersi al rivenditore o alla locale stazione di servizio Pioneer. In caso di problemi di software, rivolgersi al produttore del software stesso.
-
Page 45: Dati Tecnici
DATI TECNICI [Tipo di installazione] Montaggio orizzontale o verticale ÷ Se si fa uso dell’installazione verticale, utilizzare il sostegno verticale fornito come accessorio ed installare l’apparecchio in modo che l’interruttore di accensione si trovi in alto. [Interfacce] USB 2.0 (USB 1.1) o IEEE 1394.a [Dimensioni dei dischi utilizzabili] da 12 cm e da 8 cm* * Gli adattatori per conversione a 12 cm non possono essere usati. - Page 46 IEEE 1394. In caso di uso del connettore USB 1.1 l’apparecchio non è in grado di sivluppare tutte le proprie capacità. I dati tecnici e l’aspetto esterno possono subire variazioni senza preavviso a seguito di • miglioramenti apportati al prodotto. Pubblicato da Pioneer Corporation. Copyright © 2003 Pioneer Corporation. Tutti i diritti riservati.
-
Page 47: Condiciones De Funcionamiento
÷ lugar expuesto a alta humedad, o lugar poco aireado Precauciones relacionadas con la utilización 7 Pioneer no se hace responsable por la pérdida de datos ni por ningún otro daño directo o indirecto sufrido como resultado del empleo o avería de este producto. -
Page 48: Importante! Instrucciones De Seguridad
¡IMPORTANTE! INSTRUCCIONES DE SEGURIDAD 1. LEA LAS INSTRUCCIONES - Deberá leer todas las instrucciones de seguridad y de operación antes de poner en funcionamiento el aparato. 2. GUARDE LAS INSTRUCCIONES - Deberá guardar las instrucciones de seguridad y de operación para poderlas consultar en el futuro. - Page 49 PRECAUCIONES Precauciones relacionadas con la unidad principal 1. Mientras la unidad principal esté funcionando: • No someta la unidad a vibraciones ni golpes. • No desconecte el interruptor de la alimentación ni desenchufe los cables. 2. No deje la unidad con la bandeja del disco en la posición abierta, porque podría introducirse polvo en la unidad y causar mal funcionamiento.
- Page 50 INTERFAZ 1 Indicador de la alimentación 5 Botón de expulsión Se enciende cuando el aparato está Púlselo para abrir la bandeja de disco. encendido. 6 Orificio de expulsión forzada Se enciende en verde cuando se emplea Inserte una varilla rígida en el orificio y una conexión USB 1.1.
- Page 51 INTERFAZ Entorno de operación aconsejado Las condiciones siguientes son recomendaciones generales, y no representan condiciones que garanticen el rendimiento. • Sistema operativo: Windows 98SE, Windows 2000, Windows Me, Windows XP • CPU: Pentium III (se recomienda 500 MHz o superior) •...
-
Page 52: Conexión Del Adaptador De Ca
CONEXIONES Conecte el aparato al adaptador de CA suministrado y conecte el cable USB o IEEE 1394. Conexión del adaptador de CA Conecte la clavija del adaptador de CA al conector DC IN del panel posterior del aparato y emplee el cable de alimentación para enchufar el adaptador de CA a una toma de corriente de la pared. -
Page 53: Operación
CONEXIONES Conexión del cable IEEE 1394 Es una unidad de clavija activa. 1. Conecte la alimentación del aparato. 2. Conecte la alimentación del ordenador e inicie Windows. 3. Conecte el conector IEEE 1394 de la parte posterior del aparato al ordenador empleando el cable IEEE 1394 suministrado. -
Page 54: Solución De Problemas
Si el problema todavía persiste, póngase en contacto con su distribuidor o con el centro de servicio técnico Pioneer de su localidad. Para los problemas del software, póngase en contacto con el fabricante del software. 7 El ordenador o el software no reconocen la unidad. -
Page 55: Especificaciones
ESPECIFICACIONES [Tipo de instalación] Montaje horizontal o vertical ÷ Cuando emplee la instalación vertical, emplee el soporte vertical accesorio y efectúe la instalación de modo que el interruptor de alimentación quede arriba. [Interfaz] USB 2.0 (USB 1.1) o IEEE 1394.a [Tamaño de los discos] 12 cm / 8 cm* * No pueden utilizarse los adaptadores de conversión de 12 cm. - Page 56 USB 1.1. • Especificaciones y diseño sujetos a posibles modificaciones sin previo aviso por razones de mejora del producto. Publicado por Pioneer Corporation. Copyright © 2003 Pioneer Corporation. Todos los derechos reservados.
- Page 57 ÷ Bij hoge vochtigheidsgraad of op een slecht verluchte plaats Voorzorgsmaatregelen betreffende het gebruik 7 Pioneer kan niet aansprakelijk worden gesteld voor het verlies van gegevens of andere directe of indirecte schade als gevolg van het gebruik of een defecte werking van het apparaat.
- Page 58 BELANGRIJK! VEILIGHEIDSMAATREGELEN 1. LEES DE GEBRUIKSAANWIJZING – Lees alle veiligheids- en bedieningsinstructies voordat u het apparaat in gebruik neemt. 2. BEWAAR DE GEBRUIKSAANWIJZING – Bewaar de gebruiksaanwijzing op een veilige plaats voor het geval u deze in de toekomst nogmaals nodig hebt. 3.
- Page 59 VOORZORGSMAATREGELEN Opmerkingen betreffende het hoofdapparaat 1. Wanneer het hoofdapparaat in bedrijf is: • Stel het apparaat niet bloot aan trillingen of schokken. • Schakel het apparaat niet uit en maak ook geen kabels los. 2. Laat de disclade van het apparaat niet openstaan, want anders kan er stof in het apparaat terechtkomen met een defect tot gevolg.
- Page 60 INTERFACE 1 Spanningsindicator 5 Uitwerptoets Licht op wanneer het apparaat is Druk op deze toets om de disclade te ingeschakeld. openen. Licht groen op wanneer een USB 1.1 6 Gat voor geforceerd uitwerpen verbinding wordt gebruikt. Druk met een dun staafje in dit gat om de Licht blauw op wanneer een USB 2.0 lade naar buiten te laten komen, indien deze verbinding wordt gebruikt.
- Page 61 INTERFACE Aanbevolen werkomgeving De volgende omstandigheden zijn algemene aanbevelingen en geven niet altijd de condities aan voor optimale werking. • Besturingssysteem: Windows 98SE, Windows 2000, Windows ME, Windows XP. • CPU: Pentium III (500 MHz of hoger is aanbevolen) • Geheugen: 128 MB of meer (256 MB of meer is aanbevolen). •...
- Page 62 AANSLUITINGEN Sluit de bijgeleverde netspanningsadapter op het apparaat aan en sluit de USB of IEEE 1394 kabel aan. Aansluiten van de netspanningsadapter Steek de stekker van de netspanningsadapter in de DC IN aansluiting op het achterpaneel van het apparaat en gebruik dan het netsnoer om de netspanningsadapter op een stopcontact aan te sluiten.
- Page 63 AANSLUITINGEN Aansluiten van de IEEE 1394 kabel Dit is een hotplug-apparaat. 1. Schakel het apparaat in. 2. Schakel de computer in en start Windows. 3. Verbind de IEEE 1394 aansluiting aan de achterkant van het apparaat met behulp van de bijgeleverde IEEE 1394 kabel met de computer. ÷...
-
Page 64: Verhelpen Van Storingen
Als u de storing aan de hand van de aanwijzingen niet kunt verhelpen, neem dan contact op met uw plaatselijke Pioneer servicecentrum. Contact de softwarefabrikant bij problemen met de software. -
Page 65: Technische Gegevens
TECHNISCHE GEGEVENS [Type opstelling] Horizontale of verticale opstelling ÷ Bij verticale opstelling moet u de bijgeleverde standaard voor verticale opstelling gebruiken en het apparaat zodanig monteren dat de aan/uit-schakelaar aan de bovenkant is. [Interface] USB 2.0 (USB 1.1) of IEEE 1394.a [Discformaat] •... - Page 66 • Prestatiegegevens bij gebruik van USB 2.0 of IEEE 1394 aansluitingen. Dit apparaat zal niet de optimale prestaties bereiken bij gebruik van een USB 1.1 aansluiting. • Wijzigingen in ontwerp en technische gegevens op grond van verbeteringen voorbehouden, zonder voorafgaande kennisgeving. Uitgegeven door Pioneer Corporation. Copyright © 2003 Pioneer Corporation. Alle rechten voorbehouden.
- Page 68 1925 East Dominguez St. Long Beach, CA 90810, U.S.A. TEL: 310-952-2820 PIONEER EUROPE NV Multimedia Division: PIONEER House, Hollybush Hill STOKE POGES, SLOUGH SL2 4QP U.K. TEL: +44-1753-789-789 PIONEER ELECTRONICS OF CANADA, INC. Industrial Products Department: 300 Allstate Parkway, Markham, Ontario L3R OP2, Canada TEL: 905-479-4411 PIONEER ELECTRONICS AUSTRALIA PTY.