Table of Contents
Advertisement
Quick Links
Download this manual
See also:
Manual
Advertisement
Table of Contents

Related Manuals for Seagate 8-Bay Rackmount NAS


Summary of Contents for Seagate 8-Bay Rackmount NAS
- Page 1 Seagate 8-Bay Rackmount NAS User Manual 機型: 8-Bay Rackmount NAS 按一下此處存取該文件 按一下此處存取該文件 最新線上版本。您也可以找到最新內容,以及可擴展圖像、簡易導覽和搜尋功能。...
-
Page 2: Table Of Contents
......................... . Seagate NAS OS . - Page 3 5 System LEDs ................... .
- Page 4 .........................
-
Page 5: Regulatory Compliance
20cm between the radiator & your body. This transmitter must not be co-located or operating in conjunction with any other antenna or transmitter. The availability of some specific channels and/or operational frequency bands are country Seagate 8-Bay Rackmo unt NAS 2/17/16... -
Page 6: Industry Canada
EN 60950-1:2006/AC:2011: Information technology equipment - Safety - Part 1: General requirements EN 55022: 2010/AC:2011: Information technology equipment - Radio disturbance characteristics Limits and methods of measurement EN 55024: 2010: Information technology equipment - Immunity characteristics - Limits and methods of measurement Seagate 8-Bay Rackmo unt NAS 2/17/16... - Page 7 Česky Seagate tímto prohlašuje, že tento Rackmount NAS je ve shodě se základními požadavky a [Czech] dalšími příslušnými ustanoveními směrnice 2004/5/ES. Dansk Undertegnede Seagate erklærer herved, at følgende udstyr Rackmount NAS overholder de [Danish] væsentlige krav og øvrige relevante krav i direktiv 2004/5/EF.
-
Page 8: Power Source
Niniejszym Seagate oświadcza, że Rackmount NAS jest zgodny z zasadniczymi wymogami [Polish] oraz pozostałymi stosownymi postanowieniami Dyrektywy 2004/104/EC. Português Seagate declara que este Rackmount NAS está conforme com os requisitos essenciais e [Portuguese] outras disposições da Directiva 2004/104/CE. Slovensko Seagateizjavlja, da je at Rackmount NAS v skladu z bistvenimi zahtevami in ostalimi [Slovenian] relevantnimi določili direktive 2004/104/ES. - Page 9 Secondary cells and batteries give their best performance when they are operated at normal room temperature (20°C±5°C). Retain the original product literature for future reference. Use only the cell or battery in the application for which it was intended. Dispose of properly. Seagate 8-Bay Rackmo unt NAS 2/17/16...
-
Page 10: Introduction
Introduc on What is in this manual Thank you for purchasing a Seagate 8-bay Rackmount NAS. Offering both high-end performance and advanced data sharing, your 8-bay Rackmount NAS is the next generation of Business Storage. This user manual gives you step-by-step instructions on installation, hardware maintenance, and troubleshooting. - Page 11 5. Power supply cables (x2) 6. Ethernet cable 7. Cable management arm kit 8. Seagate 8-bay Rackmount NAS 9. Hard drives 10. Inner rack rails (A1, A2) and outer rack rails (B1, B2) An additional plastic sac of screws has been provided to fasten hard drives to the NAS drive drawers. Make certain to use these screws when installing drives in NAS enclosures that are not fully populated.
-
Page 12: Minimum System Requirements
Gigabit Ethernet routers and peripherals, and that the computers on the network support Gigabit Ethernet. Seagate 8-Bay Rackmo unt NAS 2/17/16... -
Page 13: Safety Guidelines
Safe handling The 8-bay Rackmount NAS must run with all of its parts and units in place. In order to comply with applicable safety, emission and thermal requirements, no covers should be removed and all drives must be installed... -
Page 14: Environment
Caution: Do not remove covers from the PSU: there is a danger of electric shock inside. If the PSU fails during the warranty period, return it to Seagate. Fans Warning:Removing the enclosure cover when the NAS is powered on will reveal moving parts, ... -
Page 15: Rack Installatio N Prerequisites
When loading a rack cabinet with the units, fill from the bottom up and empty it from the top down. Do not add any load onto the 8-bay Rackmount NAS when it is mounted on its rack rails and installed on its slide.Doing so can bend the rails and prevent the slide from proper operation. -
Page 16: Equipment Handling Precautio Ns
Drives are fragile and must be handled with care during removal/replacement. Data security Any loss, corruption, or destruction of data while using a Seagate drive or a Seagate drive system is the sole responsibility of the user, and under no circumstances will Seagate be held liable for the recovery or restoration of this data. -
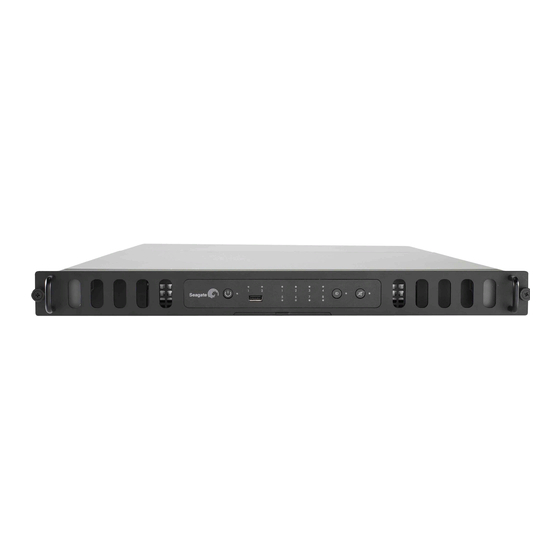
Page 17: System Overview
System Overview The 8-bay Rackmount NAS is a 1U-sized hard drive enclosure. It houses up to eight 3.5-inch hard drives in its front chassis (see the illustration above). Enclosures shipped with hard drives feature Seagate's high-end nearline hard drives. For more information... -
Page 18: Seagate Nas Os
When adding hard drives to the enclosure, consider using Seagate nearline storage. Seagate NAS OS The 8-bay Rackmount NAS is managed by Seagate NAS OS. Written to all drives within the enclosure, NAS OS helps you to create volumes with RAID protection. Direct attached storage (DAS) can be connected to the enclosure's external ports for NAS backup. -
Page 19: Front Panel View
Front panel view 1. Rackmount brackets: Attaches your Seagate 8-bay Rackmount NAS to standard, 19-inch computer equipment racks. See Setting 2. Power button: Used to turn the system on and off. See Operation. 3. Status LED: Indicates that the device is powered on and provides status signals. See System LEDs. -
Page 20: Rear Panel View
3. Power inputs: Where you plug in the AC adapter supplied with the drive. See Setting 4. PS/2 ports: Connect a mouse and keyboard for maintenance. 5. Hi-Speed USB 2.0 ports: Can be used for direct-attached storage (DAS) or USB devices such as a mouse Seagate 8-Bay Rackmo unt NAS 2/17/16... -
Page 21: Usb Ports
Setting USB ports The 8-bay Rackmount NAS has three USB 2.0 ports, which lets you connect DAS or other USB devices: Storage devices connected to a USB port should be formatted using one of the following file systems: FAT32, NTFS, HFS+, EXT2, EXT3, EXT4, and XFS. Other storage formats will not be recognized by the NAS. - Page 22 The 8-bay Rackmount NAS has two drive frames, each housing four 3.5-inch form factor disk drives. The frame has mounting locations for SATA drives. The drive frame provides thermal conduction, radio frequency, and electro-magnetic induction protection and affords the drives physical protection.
- Page 23 Seagate 8-Bay Rackmo unt NAS 2/17/16...
-
Page 24: System Leds
System LEDs The 8-bay Rackmount NAS features three sets of LEDs that provide information on the system's status. Review the illustrations below for the LED locations on the chassis. Front 1. Status LED 2. Ethernet LEDs 3. Disk LEDs 4. Identification LED 5. -
Page 25: Interior Chassis
1. Identification LED and LED button Interior chassis 1. Disk LEDs Seagate 8-Bay Rackmo unt NAS 2/17/16... -
Page 26: Led Behavior
Status LED Behavior Disk LEDs Behavior State Blinking blue Blinking blue for working disks Occurs as the device is booting and (until they are fully initialized) will cease once the drives are fully initialized. Seagate 8-Bay Rackmo unt NAS 2/17/16... - Page 27 SATA connection or it is not receiving power. Solid purple Solid blue Updating hardware Blinking purple Solid blue Communication has been lost. See Hardware Maintenance. Ethernet, iden fica on, and mute LEDs Seagate 8-Bay Rackmo unt NAS 2/17/16...
-
Page 28: Ethernet Leds
The identification feature is off. Mute LED Behavior State Solid amber The mute button has been pushed to turn off an audible alert or, to stop the unit from sounding an audible alert. The mute feature is off. Seagate 8-Bay Rackmo unt NAS 2/17/16... -
Page 29: Setting Up
The instructions are also available in the Quick Start Guide included with the NAS. Step 1 - Rack 1. Attach the inner rack rails to the Seagate 8-Bay Rackmount NAS using four screws on each side. 2. Unlock the rear screws on the outer rack rails to extend the sliding brackets. - Page 30 3. Attach the outer rack rails to the rack. Seagate 8-Bay Rackmo unt NAS 2/17/16...
-
Page 31: Step 2 - Cable Management Arm
4. Slide the Seagate NAS into the rack. You will hear a click indicating that the NAS is securely fastened to the rack. Step 2 - Cable Management Arm Attach the cable management arm to the back of the rack rails. -
Page 32: Step 3 - Cables
2. Snap the left connection into the outside rail. 3. Guide the right inner connection into the inner rack rail. Step 3 - Cables Connec ons Seagate 8-Bay Rackmo unt NAS 2/17/16... -
Page 33: Placement
A mouse, a keyboard and a VGA monitor for maintenance. Placement 1. Open the panels on the cable management arm and thread the cables. Allow slack for external connections and sliding the NAS on its rails. Seagate 8-Bay Rackmo unt NAS 2/17/16... -
Page 34: Network And Power
2. Close the panels. Network and power Seagate 8-Bay Rackmo unt NAS 2/17/16... -
Page 35: Step 4 - Drives
1. Connect the Ethernet cables to your router. 2. Connect the power cables to outlets. Step 4 - Drives Remove the cover 1. Slide the NAS toward you until it locks into position. Seagate 8-Bay Rackmo unt NAS 2/17/16... - Page 36 2. Release the cover by simultaneously pushing both front latches toward you. 3. Lift the cover. Seagate 8-Bay Rackmo unt NAS 2/17/16...
-
Page 37: Insert The Drives
Insert the drives Important info: Make certain that you are properly grounded before touching the disks. 1. Push the disk’s lock button to open the latch. Seagate 8-Bay Rackmo unt NAS 2/17/16... - Page 38 2. Place the disk on the NAS’s hard drive guides. Confirm that the disk is correctly aligned on the guides by gently pushing it away from the SATA connection. Seagate 8-Bay Rackmo unt NAS 2/17/16...
- Page 39 3. Slide the disk into the SATA connection. Seagate 8-Bay Rackmo unt NAS 2/17/16...
- Page 40 4. Close the disk’s latch. Seagate 8-Bay Rackmo unt NAS 2/17/16...
- Page 41 6. Close the cover and slide the NAS into the rack. To unlock the rails, pull the rail fasteners on each side toward you. Secure the NAS to the rack using the two front screws. Seagate 8-Bay Rackmo unt NAS 2/17/16...
-
Page 42: Step 5 - Log On To The Nas
Step 5 - Log on to the NAS 1. Power on the NAS. Wait for the status LED to turn solid before moving to the next step. Seagate 8-Bay Rackmo unt NAS 2/17/16... - Page 43 2. From a workstation on your network, launch a web browser to enter http://seagate-r8 or, http://seagate- r8.local for Mac or any workstation using Bonjour. 3. Follow the on-screen instructions to complete the installation. Seagate 8-Bay Rackmo unt NAS 2/17/16...
- Page 44 Seagate 8-Bay Rackmo unt NAS 2/17/16...
-
Page 45: Operation
Powering off the NAS 1. Make certain the NAS is not being accessed by users on the network. 2. Use NAS OS to turn the NAS off or, apply a short push on the power button. Seagate 8-Bay Rackmo unt NAS 2/17/16... - Page 46 NAS OS. A long push of more than four seconds will cut the power from the NAS, forcing it to shut down immediately. A long push is not recommended as it may result in data loss. Seagate 8-Bay Rackmo unt NAS 2/17/16...
-
Page 47: Software
So ware The Seagate 8-bay Rackmount NAS is preinstalled with Seagate NAS OS. To manage the NAS, the administrator can launch the web-based administration tool. Use NAS OS to: Allocate the NAS's drives into volumes Configure RAID Set up the NAS's network connection... -
Page 48: Hardware Maintainance
Hardware Maintainance The 8-bay Rackmount NAS has a front and rear chassis, each with its own cover. Review the details below for hardware module locations and, where applicable, replacement. Refer to the product's Warranty before performing any hardware repairs or maintenance that is ... - Page 49 3. Release the cover by simultaneously pushing both front latches toward you. 4. Lift the cover and remove it from the NAS. Seagate 8-Bay Rackmo unt NAS 2/17/16...
- Page 50 Front chassis informa on Seagate 8-Bay Rackmo unt NAS 2/17/16...
- Page 51 1. Fans (x3) 2. Frame 1, hard drives 1 - 4 3. Hard drive LEDs; SATA connections 4. Frame 2, hard drives 5 - 8 Seagate 8-Bay Rackmo unt NAS 2/17/16...
-
Page 52: Replace A Po Wer Supply Unit (Psu)
PSU: 1. Locate the PSU on the rear of the NAS. 2. Unlock the PSU by pushing its latch toward the handle. 3. Remove the PSU by pulling the handle away from the NAS. Seagate 8-Bay Rackmo unt NAS 2/17/16... -
Page 53: Replace A Hard Drive
4. Insert the replacement PSU into the empty PSU slot. Replace a hard drive If a failed hard drive is under warranty, make certain to contact Seagate customer support to receive a replacement disk. When adding or replacing hard drives, consider using Seagate hard drives that are optimized for use with your 8-bay Rackmount NAS. - Page 54 3. Place the disk on the NAS’s hard drive guides. Confirm that the disk is correctly aligned on the guides by gently pushing it away from the SATA connection. Seagate 8-Bay Rackmo unt NAS 2/17/16...
- Page 55 4. Slide the disk into the SATA connection. Seagate 8-Bay Rackmo unt NAS 2/17/16...
- Page 56 5. Close the disk’s latch. Seagate 8-Bay Rackmo unt NAS 2/17/16...
- Page 57 7. Replace the cover and slide the NAS into the rack. To unlock the rails, pull the rail fasteners on each side toward you. Secure the NAS to the rack using the two front screws. Seagate 8-Bay Rackmo unt NAS 2/17/16...
-
Page 58: Replace A Fan
8. Log on to the Seagate 8-bay Rackmount NAS from a workstation on your network to manage the new storage. 9. Rebuild the NAS volume. For details, refer to Software. Replace a fan Caution: The fans are hot-swappable and can be replaced when the NAS is powered on. You ... - Page 59 2. Using your forefinger and thumb, pinch the clips that secure the fan to its slot. 3. Lift the fan from its slot. Show caution when removing the fan since moving parts can cause severe damage. The fan should stop rotating once it is removed from its slot. Seagate 8-Bay Rackmo unt NAS 2/17/16...
-
Page 60: Rear Chassis
1. Power off, unplug the power supplies, then wait for the components to completely cool. 2. Slide the NAS toward you until it locks into position. 3. Remove the two screws on the rear cover. Seagate 8-Bay Rackmo unt NAS 2/17/16... - Page 61 4. Slide the cover toward the rack and remove it from the NAS. Rear chassis informa on Seagate 8-Bay Rackmo unt NAS 2/17/16...
- Page 62 1. PCIe slots 2. Battery 3. Central Processing Unit (CPU) 4. RAM slots 5. Power supplies (x2) Installed components Seagate 8-Bay Rackmo unt NAS 2/17/16...
-
Page 63: Installed Co Mpo Nents
Use caution when replacing the battery. There is a strong risk of explosion if the battery is replaced by an incorrect type. 1. Power off the system, unplug the power supply, and remove the rear cover as described above. 2. Remove the screws from the extension card support. Seagate 8-Bay Rackmo unt NAS 2/17/16... - Page 64 3. Gently unfasten the extension card support from the extension card and remove it to provide access to the battery. Seagate 8-Bay Rackmo unt NAS 2/17/16...
- Page 65 4. Use one hand to press the battery's retaining clip away from the batter and use the other hand to lift the battery from its socket. Seagate 8-Bay Rackmo unt NAS 2/17/16...
-
Page 66: Adding A Dimm (Ram) To An Empty Slo T
Adding a DIMM (RAM) to an empty slot 1. Power off the NAS, unplug the power supply, and remove the cover as described above. 2. Locate an empty DIMM slot and press its retaining clips outward. Seagate 8-Bay Rackmo unt NAS 2/17/16... - Page 67 3. Align the DIMM on the slot's socket. Make certain that the edge of the DIMM's notch matches the key for the socket. Seagate 8-Bay Rackmo unt NAS 2/17/16...
- Page 68 4. Hold the DIMM on both ends and carefully insert it into the socket. The DIMM is properly inserted when you cannot push it further and the retaining clips snap into place. Seagate 8-Bay Rackmo unt NAS 2/17/16...
-
Page 69: Remo Ve A Dimm (Ram)
Important info: Always insert the DIMM vertically to avoid damaging the notch. You may have to apply a limited amount of force on the DIMM's edges when pushing it into the socket. Remove a DIMM (RAM) Seagate 8-Bay Rackmo unt NAS 2/17/16... - Page 70 A blinking purple LED indicates that the backplane and motherboard cannot communicate. Follow the steps below to determine if the cable is properly seated: 1. Power off the 8-bay Rackmount NAS. 2. Remove the rear cover. 3. Confirm that the communication cable between the backplane and motherboard is firmly connected. The cable is located directly in front of the PCIe SATA Extender.
- Page 71 4. If the connection is loose, try to fix it into place. 5. Install the rear cover. 6. Power on the 8-bay Rackmount NAS. If the LED continues to blink purple, contact Seagate support. Seagate 8-Bay Rackmo unt NAS 2/17/16...
-
Page 72: Troubleshooting Topics
NAS's power supply units. Your NAS has redundant power supplies that allow for one to fail. Contact Seagate support if you believe that one or both power supplies have failed. In the rare case in which both power supplies fail at the same time, you may be asked to send NAS to Seagate for review. - Page 73 A: Connect no more than three bus-powered USB devices and/or make sure that none of the devices is drawing an inordinate amount of power. Q: Did the product turn off as soon as the USB device and the 8-bay Rackmount NAS's USB port came into contact? A: The USB device may have caused a short circuit.