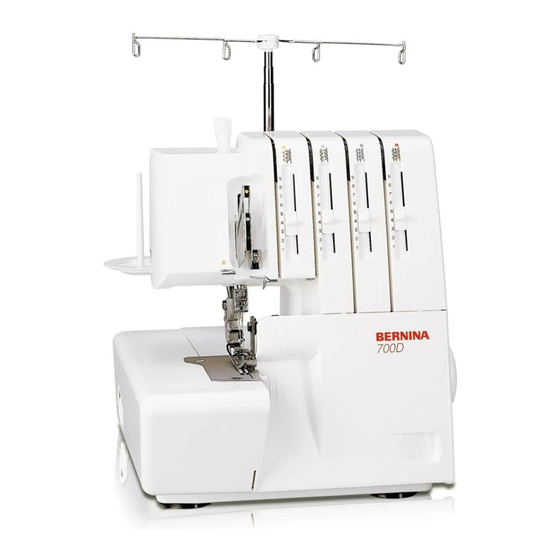
Bernina 700D Instruction Manual
Hide thumbs
Also See for 700D:
- Owner's workbook (74 pages) ,
- Instruction manual (40 pages) ,
- User manual (28 pages)

Related Manuals for Bernina 700D


Summary of Contents for Bernina 700D
- Page 1 Instruction Manual Manual de instrucciones Bedienungsanleitung Manuel d’instructions 700D 800DL...
-
Page 2: Safety Instructions
“IMPORTANT SAFETY INSTRUCTIONS” When using an electrical appliance, basic safety precautions should always be followed, including the following: Read all instructions before using this overlock sewing machine. “DANGER _____To reduce the risk of electric shock:” 1. The appliance should never be left unattended when plugged in. 2. -
Page 3: Table Of Contents
Congratulations on your choice! Le felicitamos por la compra de su nueva BERNINA 800DL/700D. Your BERNINA 800DL/700D is made to the highest standards. It will La BERNINA 800DL/700D es una máquina overlock polifacética. Corta, cut, sew and neaten for you in one smooth operation giving a professional sobrehila y cose en una fase de trabajo y da a su guardarroba un toque look to anything you make. -
Page 4: Details Of The Machine
18.Botón regulador del largo del punto (800DL) 19.Botón regulador del transporte diferencial (800DL) 20.Volante 21.Tapa posterior 700D 22.Enchufe para la red eléctrica 23.Interruptor principal y de la luz 24.Perilla de ajuste de transport diferencial Details der Maschine Détails de la machine 1. -
Page 5: Accessories
Vue intérieure, surface de travail Stoffauflagedeckel enlevée 1. Wählknopf für Messerstellung 1. Sélecteur pour position du couteau 2. Wählknopf für Stichlänge (700D) 2. Sélecteur pour longueur de point (700D) 3. Wählknopf für Differentialtransport (700D) 3. Sélecteur pour entraînement différentiel (700D) Accessories Accesorios Zubehöre... -
Page 6: Preparing The Machine
Preparing the machine / Preparación de la máquina Maschine bereitstellen / Préparation de la machine Attaching the foot control Plug foot control into the machine socket (A) and then into the main socket (B). The foot control regulates the sewing speed. The sewing speed can be adjusted by increasing or decreasing the pressure on the foot control. -
Page 7: Thread, Cones, Spools
Preparing the machine / Preparación de la máquina Maschine bereitstellen / Préparation de la machine Thread / cones / spools The anti-vibration cone should be used with the wider edge at the bottom on the spool holder pin when sewing with cones. Colocación de las bobinas Para los conos normales colocar los antivibradores en las espigas con la parte ancha hacia abajo. -
Page 8: Using The Machine
Using the machine / Puesta en marchan d Inbetriebnahme / Mise en service machinee Power/light switch The power/light switch is conveniently placed on the handwheel side of the machine in front of the socket. O = Off I = On with light Interruptor principal y de la luz El interruptor principal y de la luz se encuentra en la parte del volante. -
Page 9: Changing The Presser Foot
Using the machine / Puesta en marchan d Inbetriebnahme / Mise en service machinee Changing the presser foot • Switch the machine off (Power switch to “0”). • Raise the presser foot. • Turn the handwheel towards you until needles are fully raised. Press the catch (C) to release the presser foot from the clamp. -
Page 10: Tapa De La Mesa De Trabajo
Using the machine / Puesta en marchan d Inbetriebnahme / Mise en service machinee Cloth plate cover Opening and closing the cloth plate: Opening: Push the cloth plate to the left. Closing: Push the cloth plate to the right. Tapa de la mesa de trabajo Abrir y cerrar la tapa de la mesa de trabajo: Abrir: empujar la tapa de la mesa de trabajo hacia la izquierda. -
Page 11: Colocación De Las Agujas
70 - 90 on your machine. Agujas y máquina La máquina overlock BERNINA está dotada con el sistema de agujas 130/705 H (agujas domésticas de máquina de coser). Cuando Ud. compre agujas nuevas para su máquina asegúrese de comprar agujas del sistema 130/705H. -
Page 12: Enhebrado
Using the machine, Threading / Puesta en marcha, enhebrado Inbetriebnahme, Einfädeln / Mise en service, Enfilage Preparation / Tips Preparación • Switch the machine off (Power switch to “0”). • Desenchufar la máquina ! Interruptor principal a “O”. • Disconnect machine from electricity supply. •... - Page 13 (10) Nähfuss anheben und den Faden unter den Nähfuss legen. Nähfuss senken. Hinweis: Bei Stichen, die mit der Obergreiferabdeckung genäht werden, wird der Obergreifer 700D nicht eingefädelt. 1. Fil de boucleur supérieur, repères bleus Enficher la bobine sur la broche selon illustration.
- Page 14 Einfädeln / Enfilage 2. Lower looper thread, red markings Place the spool on the spool holder pin as illustrated. 700D (1) Bring the thread up from the spool and lay it from back to front into the guide (right one).
- Page 15 Threading / Enhebrado Einfädeln / Enfilage 2. Lower looper thread, red markings Place the spool on the spool holder pin as illustrated. 800DL (1) Bring the thread up from the spool and lay it from the back to the front into the guide (right one).
- Page 16 Threading / Enhebrado Einfädeln / Enfilage 3. Right-hand needle, green markings Place the spool on the spool holder pin as illustrated. (1) Bring the thread up from the spool and lay it from back to front into the guide (second from left) (2) Take the thread with both hands and lay it in the groove.
- Page 17 Threading / Enhebrado Einfädeln / Enfilage 4. Left-hand needle, yellow markings Place the spool on the spool holder pin as illustrated. (1) Bring the thread up from the spool and lay it from back to front into the guide (left one). (2) Take the thread with both hands and lay it in the groove.
-
Page 18: Trial Sewing
Trial sewing, Thread tension / Costura de prueba, Tensión del hilo Nähprobe, Fadenspannung / Essai de couture, tension de fil Sewing test Costura de prueba After threading make a trail run. Always use Después del enhebrado, hacer una costura a double layer of fabric to properly check the de prueba sobre tela doble para poder stitch formation and thread tension. -
Page 19: Thread Tension
Trial sewing, Thread tension / Costura de prueba, Tensión del hilo Nähprobe, Fadenspannung / Essai de couture, tension de fil Thread tension Tensión del hilo Thread tension should be adjusted to suit the La tensión del hilo tiene que adaptarse a los various types of work. -
Page 20: Stitch Length
2.5 mm. Stichlänge von 2.5mm genäht. Stitch length Longitud de puntada 700D Desenchufar la máquina, interruptor principal a “O”. Switch the machine off (power switch “O”). Abra la placa de tela, afloje la perilla y ajuste a la Open the cloth plate, loosen the knob and adjust to longitud deseada. -
Page 21: Differential Feed
El transporte diferencial hace posible la realización de costuras absolutamente planas, sin ningún ondulamiento en tejidos de punto y sin mover ninguna capa de la tela. También evita el fruncimiento de 700D tejidos escurridizos como tricot de nilón o materiales gruesos tejidos (E). -
Page 22: Largo Del Punto
Adjustments and settings / Regulación y manejo Einstellen und Bedienen / Réglage et utilisation Adjusting the differential feed The differential feed can be adjusted by simply turning the differential feed adjustment dial in the direction desired. Always make a trial run. The differential feed is infinitely variable and can be adjusted while sewing. -
Page 23: Dobladillo Enrollado
Adjustments and settings / Regulación y manejo Einstellen und Bedienen / Réglage et utilisation Upper looper converter (800DL) Transportador lanzadera ciega (800DL) Use the upper looper converter to sew stitches with El transportador lanzadera ciega hace posible la one looper thread, such as 2-thread roll hem, 2- costura de puntos con un sólo hilo de lanzadera, thread flatlock and 2-thread overlock. -
Page 24: Presión Del Pie Prensatelas
Adjustments and settings / Regulación y manejo Einstellen und Bedienen / Réglage et utilisation Presser foot pressure Presión del pie prensatelas The presser foot pressure is factory adjusted to a El fabricante ha ajustado la presión del pie medium setting. prensatelas a una regulación media. - Page 25 Differential: N Lower looper (red) 3-5 Upper looper converter 2-Thread roll hem (800DL) Right needle (yellow) 3-5 Stitch length:1-1.8 1.5 mm, right needle Cutting width:1-1.5 Lower looper (red) 3-5 Differential: N-0.7 Stitch lever: roll hem Upper looper converter Optional for 700D...
-
Page 26: Cambio De Las Cuchillas
Klinge doch einmal beschädigt, das Obermesser normalmente non deve essere sostituito. vervangen worden. Als het mes toch ooit au S.A.V de BERNINA qui changera le couteau im BERNINA-Fachgeschäft auswechseln lassen. Se dovesse però rompersi lo stesso, beschadigd is, moet het door uw BERNINA supérieur. -
Page 27: Replacing The Bulb
La potencia eléctrica de la bombilla es and max.10 Watt for 220-240V machines. They de máximo 15 vatios para máquinas de 120 are available from your local BERNINA dealer. voltios, y máximo 10 vatios para máquinas de 220-240 voltios. - Page 28 1 needle, 1 looper: 2 thread overlock, flatlock, roll hem (800DL) 2 needles, 1 looper: 3 thread super stretch (800DL) Needle system 130/705H 800DL 700D 3-5 mm (2/3 thread overlock) 3-5 mm (3 thread overlock) Seam width 5-7 mm (4 thread overlock, 3 thread super stretch)
-
Page 29: Accesorio Especial
Pied pour poser des Paspel – Perl-und élastiques Paillettenfuss Pied passepoils, perles et paillettes Upper looper converter .Optional for 700D. Transformador lanzadera ciega. Accesorio especial 700D. Obergreiferabdeckung. Sonderzubehör 700D. Capot du boucleur supérieur. Accessoire spéciaux pour la 700D. *** tegen extra betaling verkrijgbaar...