Table of Contents
Advertisement
Quick Links
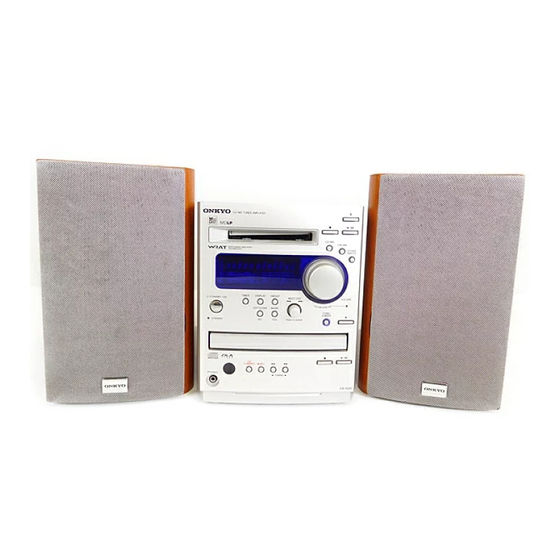
CD/MD TUNER AMPLIFIER
FR-N3X
Instruction Manual
Thank you for purchasing the Onkyo CD/MD TUNER
AMPLIFIER.
Please read this manual thoroughly before making
connections and turning on the power.
Following the instructions in this manual will enable
you to obtain optimum performance and listening
pleasure from your new CD/MD TUNER
AMPLIFIER.
Please retain this manual for future reference.
Contents
Before Using
Connecting
Preparations
Basic Operation
Advanced Operation
Additional Operation
Advertisement
Table of Contents

Related Manuals for Onkyo FR-N3X


Summary of Contents for Onkyo FR-N3X
-
Page 1: Before Using
CD/MD TUNER AMPLIFIER FR-N3X Instruction Manual Thank you for purchasing the Onkyo CD/MD TUNER AMPLIFIER. Please read this manual thoroughly before making connections and turning on the power. Following the instructions in this manual will enable you to obtain optimum performance and listening pleasure from your new CD/MD TUNER AMPLIFIER. -
Page 2: Important Safeguards
WARNING: TO REDUCE THE RISK OF FIRE OR ELECTRIC SHOCK, DO NOT EXPOSE THIS APPLIANCE TO RAIN OR MOISTURE. CAUTION: TO REDUCE THE RISK OF ELECTRIC SHOCK, DO NOT REMOVE COVER (OR BACK). NO USER- SERVICEABLE PARTS INSIDE. REFER SERVICING TO QUALIFIED SERVICE PERSONNEL. - Page 3 Recording of copyrighted material for other than personal use is illegal without permission of the copyright holder. 2. AC Fuse The fuse is located inside the chassis and is not user-service- able. If power does not come on, contact your Onkyo autho- rized service station. 3. Power WARNING BEFORE PLUGGING IN THE UNIT FOR THE FIRST TIME, READ THE FOLLOWING SECTION CAREFULLY.
-
Page 4: Main Features
Main features • DLA Link (Digital Rec Level Adjustment) function automatically adjusts the recording level of CD-to- MD dubbing. • Adjustable digital recording volume level. • Supports MDLP long hour recording mode (2X/4X). • Double-speed CD-to-MD dubbing function • Sampling rate converter equipped •... -
Page 5: Table Of Contents
Recording CD to MD (Various CD Dubbing) ...29 Recording CD to MD (Synchro recording)...31 Recording an FM/AM broadcast program to an MD...32 Recording from another Onkyo System (Synchro Recording) ...33 Recording data from a connected external device to an MD...34 Settings for Recording ...35 Advanced Operation Various ways to play CDs and MDs ...40... -
Page 6: Connecting
Antenna (aerial) and speakers Do not connect the AC power cord (main lead) when you connect the antenna or speakers. You will con- nect the AC power cord on page 11. Speaker connectors Antenna (aerial) connector Subwoofer connector Connecting the supplied indoor FM antenna (aerial) While listening to the radio on page 24, move the antenna (aerial) in various directions until you receive... - Page 7 If you must use a common FM/TV (or VCR) antenna, use a directional linkage type splitter. Directional Iinkage type splitter To FR-N3X To TV (or VCR) Connecting the AM antenna Assembling the AM loop antenna Assemble the loop antenna as shown in the following illustration.
-
Page 8: Connecting A Subwoofer
2). Connecting a subwoofer The FR-N3X has a SUBWOOFER PRE OUT jack. Connect an active subwoofer (a subwoofer that contains an amplifier), or connect an amplifier to the FR-N3X, then connect a non-active subwoofer to the amplifier. Active subwoofer... -
Page 9: Audio/Video Equipment
TAPE (see page 65). (The default source name in the display is CD-R.) • You can operate an Onkyo stereo cassette tape deck using the supplied remote controller. (You also need to connect the audio pin cable.) •... - Page 10 You can connect a CD or DAT recorder that has an optical white digital audio input to the FR-N3X for digital recording. Use a standard optical fiber audio cable for connection. Digital recording is allowed only for the first generation. (See “Guide to the serial copy management system”...
-
Page 11: Connecting The Power Cord
Connecting the power cord To wall outlet STANDBY indicator When the power cord is connected to the AC outlet, the FR-N3X enters stand-by mode. The STANDBY indicator lights up. -
Page 12: Preparations
Precautions for handling Compact Discs (CDs) Important notes on handling CDs 1 Carefully lift the disc from the disc case, mak- ing sure to hold the disc by its edges or the hole in the middle. 2 You can use a soft, dry cloth to wipe dust and fingerprints off the surface of CDs. -
Page 13: Preparing The Remote Controller
Preparing the remote controller Inserting the batteries Detach the battery cover. Insert the two R6 (size AA) batter- ies. Be sure to match the + and – ends of the batteries with the dia- gram inside the bat- tery compartment. Attach the battery cover. -
Page 14: Part Names And Functions
Part names and functions Front panel MULTI JOG dial Enables you to skip tracks forward or backward. When the system is stopped, it enables you to select a track to play. It is also used to select a type of editing and characters to input. Press this dial to confirm the settings. - Page 15 MD operation buttons : Pauses playback or recording. : Stops playback or recording. : Starts playback or resumes recording. Operation buttons for an Onkyo CD recorder : Pauses playback or recording. : Stops playback or recording. : Starts playback or resumes recording.
-
Page 16: Understanding Preparatory And Common Operations
Tip! When you start playing (or turn on the power to) an Onkyo CD recorder or cassette tape deck that is con- nected to the FR-N3X via an cables, the power to the FR-N3X is automatically turned on. -
Page 17: Setting The Day Of The Week And The Time
Setting the day of the week and the time You can select either the 12-hour or 24-hour display. (This section explains how to set the time based on the 12-hour display.) DISPLAY Press TIMER repeatedly until “Clock” appears in the display. Press MULTI JOG. -
Page 18: Programming Fm Stations Automatically - Auto Preset
Programming FM stations automatically — Auto Preset Auto presets store the frequencies of radio stations into memory so you can select your favorite channels without tuning manually. Radio station signals can be automatically located and stored. This function does not apply to AM stations (see the next page). Press STANDBY/ON to turn on the unit. -
Page 19: Programming Am/Fm Stations One By One - Preset Write
Programming AM/FM stations one by one — Preset Write You can store the frequencies of AM stations one by one manually into the preset memory channels. (You can store FM stations manually or by using the auto preset function.) • You can preset up to 30 channels including both FM and AM stations. -
Page 20: Basic Operation
Playing a CD Insert a CD (Compact Disc). 1 Press CD 2 Place the CD in the tray with the label side facing up. If you play a CD single, place it in the center circle of the tray. 3 Press CD Press CD The playback ( ) indicator lights up in the display. -
Page 21: Changing The Display Information
Changing the display information Press DISPLAY on the unit repeatedly to change the display as follows: While the CD is stopped Total number Total playing of tracks time “DISC” Lights up while the disc informa- tion is displayed. CD name or artist name*1 “DISC NAME”... -
Page 22: Playing An Md
Playing an MD Insert an MD (Mini Disc). The MD must be pre-recorded. The arrow on the MD must face up and point to the unit. Push gently to load the MD into the unit. Press MD The playback ( ) indicator lights in the display. Selecting the track to play •... - Page 23 Changing the display information Press DISPLAY on the unit repeatedly to change the display as follows: While the MD is stopped Total number Total playing of tracks time “DISC” is lit while the disc infor- mation is displayed. Total number The remaining of tracks recordable time...
-
Page 24: Listening To An Fm/Am Station
Listening to an FM/AM station First, program the stations into preset channels (see pages 18 and 19). Turn on the power to the FR-N3X. Select FM or AM. Pressing FM/AM toggles between FM and AM. The channel selected most recently will be recalled. - Page 25 Manually tuning a broadcast station You can also tune in radio stations manually. 1 Turn on the power to the FR-N3X. 2 Select FM or AM. 3 Press TUNING repeatedly while observ- ing the display to tune in the desired frequency.
-
Page 26: Adjusting The Tone
Adjusting the tone PHONES Adjusting the tonal quality Press the TONE/S.BASS button to select “Bass±0” (bass adjust- ment), then turn MULTI JOG to adjust the bass. Press MULTI JOG to select “Tre- ble±0” (treble adjustment), then turn MULTI JOG to adjust the tre- ble. -
Page 27: Dubbing Cd To Md (Cd Dubbing)
Press CD DUBBING to start dubbing. “X2 Dubbing?” appears for three seconds. The FR-N3X searches for the peak level in the CD and sets the optimum recording level. (DLA LINK) Then, it starts recording. When CD playback is completed or the recording reaches the end of the MD, the recording stops. -
Page 28: Dubbing Cd To Md At Double Speed
CD until the first 74 minutes of double-speed CD dubbing is completed. If you try to continue the operation, the FR-N3X displays the “Time Protect” message and the waiting time required until the same CD can be used for double-speed CD dubbing (e.g., “Wait 42min”). -
Page 29: Recording Cd To Md (Various Cd Dubbing)
Recording CD to MD (Various CD Dubbing) Recording from the top of a song you are listening to (specified track dubbing) You cannot use double-speed CD dubbing for this operation. 1 Insert a CD and an MD and press the CD to start playback. - Page 30 Recording CD to MD (Various CD Dubbing) (continued) Switching to Fade Out mode (while the input source is MD and the sys- tem is stopped) This mode fades out (gradually lowers the volume level of) the end of a track that cannot be recorded to its conclusion during CD dubbing, specified track dub- bing, or double-speed CD dubbing.
-
Page 31: Recording Cd To Md (Synchro Recording)
Select digital or analog recording. Selecting digital or analog recording from CD to MD See “ page 37. Press REC to set the FR-N3X in recording standby mode. Adjusting the recording level. See the next page. Play the CD. Numbering the desired song(s) Press REC during recording of the desired song. -
Page 32: Recording An Fm/Am Broadcast Program To An Md
Select “FM” or “AM” for input. Turn MULTI JOG to select a preset channel. Press standby mode. If the FR-N3X does not enter record stand-by mode See “Can’t dub?” on page 36. Press MD When the MD is recorded up to its end, recording automati- cally stops. -
Page 33: Recording From Another Onkyo System (Synchro Recording)
For more information on Synchro recording from a CD or MD to a cassette tape, refer to the instruction manual for the cassette tape deck. This section explains how to perform Synchro recording from a cassette tape deck to an MD in the FR-N3X. Set up the recording source (in this example, a cassette tape) and insert an MD in the MD recorder. -
Page 34: Recording Data From A Connected External Device To An Md
(see page 65). Press REC to set the recorder in recording standby mode. If the FR-N3X does not enter record- ing standby mode: See “Can’t dub?” on page 36. Start playing the external device. Adjusting the recording input level on the FR-N3X will change the monitoring volume level. -
Page 35: Settings For Recording
Settings for Recording About the recording indicators Switching the display information during recording • Pressing CD/MD repeatedly toggles between the CD and MD information display. MD information (“MD” lights up.) Track the song number being played on the CD Track the song number being recorded on the MD CD information (“CD”... - Page 36 (Also, refer to the “When the power is down” section on the right.) • When the TOC indicator is lit The information to be written into the TOC is currently stored in memory on the FR-N3X. • When the TOC indicator is flashing The information is being written to the MD.
- Page 37 When you press MODE/YES after the FR-N3X displays “Ana→Dig?,” it starts digital recording. The FR-N3X displays “Complete.” You have now completed all settings. When you eject the CD and press the CD-DUB button, the FR-N3X displays “Dig.” Note If you have recorded a disc in...
- Page 38 Settings for Recording (continued) Adjusting the recording level You can adjust the recording level for better recording quality. This operation is available during Synchro recording and Signal recording. You cannot adjust the recording level during CD dubbing with DLA LINK or during double-speed dubbing. Play the recording source, and perform the steps below during in record standby mode.
- Page 39 Numbering the songs — Level Sync • The Level Sync function of the FR-N3X automatically numbers the song at the beginning of signal input. Turn on this function to automatically number songs during recording. (The songs may not be numbered if the gap (silence) between songs is too short.)
-
Page 40: Advanced Operation
Note If the total playing time of the programmed tracks exceeds the following time length, the FR-N3X does not display the total time. How- ever, this does not affect MEMORY playback. CD: “--:--” appears when the total time meets or exceeds 99 minutes 59 seconds. -
Page 41: Random Playback
1 TR (one track) playback You can play back only a single track using this mode. In addition, using the CD dubbing function along with this mode enables you to create a single track CD easily. While the source is CD or MD, and the unit is in stop mode Press MODE/YES repeatedly until the 1TR indicator lights in the display. - Page 42 Various ways to play CDs and MDs (continued) REPEAT/CHAIN REPEAT playback • The REPEAT mode plays back a CD or MD repeat- edly, and the CHAIN REPEAT mode plays back both the CD and MD in turn. • You can combine either REPEAT or CHAIN REPEAT mode with MEMORY, 1 TR, or RANDOM mode.
-
Page 43: Using The Md Group Function
Using the MD Group Function If 1TR, 1GR, MEM, or RDM is lit, you cannot use the edit functions. Place the unit in normal playback mode. Group The Group function enables you to assign tracks on an MD to groups. This function is convenient when you use MDLP for a disc that contains many tracks. - Page 44 Using the MD Group Function (continued) Group Out (while the source is MD and the unit is stopped) This function enables you to remove a track from the group. Turn MULTI JOG to select a track you wish to remove from the group.
-
Page 45: Editing Groups (Move, Combine And Erase)
Editing Groups (Move, Combine and Erase) You can perform three editing functions: move a group to change the order, combine two groups into one, and erase tracks in a group. Outline of edit function Erasing a group—G.Erase All tracks in the specified group will be erased. Moving a group—G.Move Enables you to move a group. - Page 46 Editing Groups (Move, Combine and Erase) (continued) Moving a group — G.Move • You can execute this function only when the input source is MD and an MD is stopped or paused. • To cancel the operation, press MD . Insert an MD, and select MD as the source.
- Page 47 Combining groups — G.Combine • You can execute this function only when the input source is MD and an MD is playing or paused. • The name of the lower-numbered group is assigned to the combined group. • To cancel the operation, press MD . Insert an MD, and select MD as the source.
-
Page 48: Md Group Functions (Playing Md Groups)
MD Group Functions (Playing MD Groups) Before you use this function, you need to create a group on the disc (see page 43). MD Group playback The selected group and all subsequent groups will be played. Press GROUP. Rotate MULTI JOG to select a group you wish to play. - Page 49 MD Group skip You can specify groups to skip during playback. Press the GROUP button during playback. Rotate MULTI JOG to select the desired group. Playback starts from the first track of the selected group.
-
Page 50: Changing The Fm/Am Preset Channels
Changing the FM/AM preset channels Using the delete and copy functions, you can delete preset stations, copy a preset station to another channel, or change the channel number. Tips for changing the preset channels To change the channel number: Use the copy and delete functions. For example, if you wish to change channel 3 (which has an FM station programmed) to channel 8 (an empty channel):... - Page 51 Copying a preset channel – Preset Copy If you copy a preset channel to another channel, the name of the preset channel (see page 52) is also cop- ied to the other channel. Call the preset channel you wish to copy. Press EDIT/CLEAR/NO and turn MULTI JOG until “PresetCopy?”...
-
Page 52: Naming An Md And Its Tracks, And Preset Channels
Naming an MD and its tracks, and preset channels Naming an MD disc or track • You can enter up to 100 alphabetical characters per name. • Use a recordable MD with the record-protect tab closed. 1 Insert the MD, then select MD as the source. 2 To name the disc, proceed to Step 3. - Page 53 Note If you press and hold EDIT/CLEAR/NO on the unit for more than two seconds, the FR-N3X returs to the previous indica- tion without erasing characters. To continue entering characters, execute Step 3 on the previous page. To complete the operation, execute Step 5 on this page.
- Page 54 Naming an MD and its tracks, and preset channels (continued) Inputting characters from the remote controller Press NAME. Press DISPLAY repeatedly until the character type you wish to enter appears in the display. Each press of the DISPLAY button switches the type of characters. If you press SCROLL button, the type of characters swiches in the reverse order.
-
Page 55: Moving, Dividing, Combining, And Erasing Md Tracks
Moving, dividing, combining, and erasing MD tracks Five basic functions • All Erase This function erases all the tracks and names to ini- tialize the MD. (“Blank Disc” is displayed.) • Erase This function erases the selected track. • Move This function moves the selected track to the desired position. - Page 56 Moving, dividing, combining, and erasing MD tracks (continued) Erasing a selected track – Erase • You can execute this function only when the input source is MD and an MD is stopped or paused. • To cancel the operation, press MD . Insert the MD, then select MD as the source.
- Page 57 Moving the selected track – Move • You can execute this function only when the input source is MD and an MD is stopped or paused. • To cancel the operation, press MD . Insert the MD, then select MD as the source.
- Page 58 Moving, dividing, combining, and erasing MD tracks (continued) Dividing a selected track – Divide • You can execute this function only when the input source is MD and an MD is playing or paused. • If a selected track has a name (see page 52), the first part will retain the name after the track is divided.
- Page 59 Combining selected tracks – Combine • You can execute this function only when the input source is MD and an MD is playing, paused, or stopped. • When the preceding track has a name, this name will be used as the name of the combined track. •...
-
Page 60: Using The Timer Functions
Using the timer functions The FR-N3X provides five timer functions: Sleep, Once, Weekday, Weekend, and Rec timer. Five basic functions Sleep timer This timer places the FR-N3X into standby mode automatically when the sleep timer counts down to zero. This function is convenient, for example, when you wish to fall asleep to music or a radio program. - Page 61 Operating with the unit You can set the Sleep timer for 10 to 90 minutes, in intervals of 10 minutes. It is also possible to set the timer from 1 to 99 in one-minute increments is also possible using MULTI JOG. Press TIMER while you are listen- ing to music or a radio program.
- Page 62 Using the timer functions (continued) Press MULTI JOG, then turn it to select the start time. 24-hour display 12-hour display Press MULTI JOG, then turn it to select the end time. After you press MULTI JOG in this step, the end time is automatically set to one hour after the start time.
- Page 63 *1 If you changed the name, the new name appears (see page 65). *2 If an Onkyo cassette tape deck is connected to the FR- N3X, change the input source indication from CD-R to TAPE. In this case, you can select “TAPE” or “MD&TAPE”...
- Page 64 Using the timer functions (continued) Switching the set timer On/Off You can switch each set timer to Off or On. Check each timer to see whether it is On or Off. The indicator of the timer set to On is lit in the display.
-
Page 65: Customizing The Source Names
Customizing the source names You can change the source name that appears in the display to suit any component you connected per the instructions on pages 9, 10. Press OTHER INPUTS source whose name you wish to change appears in the display. The source names appear in the follow- ing order: LINE... -
Page 66: Miscellaneous
Messages The following table explains the messages that appear in the display. Message Meaning MD Blank Disc A recordable MD without disc or track names is inserted. Cannot Copy You tried to create a second digital copy from a digitally dubbed MD (see “Rules for digital recording” in the right column). -
Page 67: Rules For Digital Recording
Rules for digital recording Guide to the serial copy management system Since your MD unit uses the Serial Copy Management System (SCMS), MDs recorded through the digital input terminal cannot be used to make subsequent copies to other MDs through the digital output termi- nal. -
Page 68: System Limitations
Rules for digital recording (continued) Rule 3 A recordable MD with material recorded from analog sources (analog records or FM programs, etc.) through the line input terminal can be copied to another record- able MD through the digital output terminal. However, you cannot make subsequent copies from the recordable MD to other recordable MDs through the digital output terminal. -
Page 69: Troubleshooting
Troubleshooting Use this troubleshooting guide as an aid to remedy problems. Problems may be caused by any component connected to this unit. Please check the table below, cross-referenc- ing with the instruction manuals for the other components. Symptom Cause The unit does not turn The AC power cord (mains lead) is not fully inserted into the wall outlet (the mains). - Page 70 • Try to operate the remote control from a different angle, or remove the obstruc- tion. • Connect the system correctly, cross-ref- erencing the Onkyo stereo cassette tape deck and CD recorder instruction man- ual. • Connect the unit and stereo cassette...
-
Page 71: Specifications
Specifications General Power supply AC 220-230 V, 50/60 Hz AC 120 V, 60 Hz Power consumption 46 W (220-230 V, 50/60 Hz) 55 W (120 V, 60 Hz) (Standby) 1.5 W Clock precision monthly error: +/–30 seconds (at 25 degrees Celsius) Dimensions (W ×... - Page 72 Sales & Product Planning Div. : 2-1, Nisshin-cho, Neyagawa-shi, OSAKA 572-8540, JAPAN Tel: 072-831-8111 Fax: 072-833-5222 http://www.onkyo-intl.com ONKYO U.S.A. CORPORATION 18 Park Way, Upper Saddle River, N.J. 07458, U.S.A. Tel: 201-785-2600 Fax: 201-785-2650 http://www.onkyousa.com ONKYO EUROPE ELECTRONICS GmbH Liegnitzerstrasse 6, 82194 Groebenzell, GERMANY Tel: +49-8142-4401-0 Fax: +49-8142-4401-555 http://www.onkyo.net...